Disclosure: As an Amazon Associate, umtsmarttool.com earns from qualifying purchases. Links to Amazon on this page are affiliate links; they cost you nothing extra. Listing details such as price and availability change often, so check the current Amazon listing before you buy.
The line of sealant where a bathtub meets the wall is one of the hardest-working strips in a home. It sees hot water, soap, steam, daily flexing as the tub fills and empties, and a constant invitation to mold. When it fails, water slips behind the tile or surround and does damage that you do not see until the wall softens. Choosing the best caulk for tubs and showers is therefore less about brand loyalty and more about matching a sealant type to the joint.
This guide is for homeowners who are re-sealing a tub, finishing a new surround, or tired of black spots along a bead that never looks clean. We compare five widely sold bathroom sealants from GE, DAP, Gorilla and Loctite, explain how silicone differs from acrylic latex, and walk through preparation, curing and the mistakes that make fresh caulk fail early.
All product notes come from manufacturer listings and published data. Always follow the cartridge label, ventilate the room while you work, and read the directions for cure time before the tub is used.
Quick Comparison
| Product | Best for | Main point | Link |
|---|---|---|---|
| GE Silicone 2 Kitchen and Bath Sealant | Wet joints that flex | 100 percent silicone with mold-resistant formula | Check on Amazon |
| DAP Kwik Seal Ultra Kitchen and Bath Adhesive Caulk | Easy cleanup and painting | Siliconized acrylic latex with water cleanup | Check on Amazon |
| Gorilla 100 percent Silicone Sealant Kitchen and Bath | Strong adhesion on slick surfaces | Waterproof silicone for tubs and sinks | Check on Amazon |
| Loctite Polyseamseal Tub and Tile Adhesive Caulk | Do-it-yourself tub surrounds | Acrylic latex designed for tub and tile gaps | Check on Amazon |
| DAP ALEX Plus Acrylic Latex Caulk Plus Silicone | Trim and paintable joints | Acrylic latex enhanced with silicone | Check on Amazon |
In this guide
How These Options Were Chosen
We selected these sealants from manufacturer listings, product data and the way each is positioned for kitchens and baths. We have not used these products ourselves, and we cannot promise how long a bead will last in your bathroom.
The group covers the two big families: pure silicone, which stays flexible and resists water better, and acrylic latex with silicone additives, which is easier to apply, clean up and paint. Including both types is meant to help you decide which family matches your joint. We left out specialty products where we could not confirm exact names or formulas.
The Best Caulk for Tubs and Showers
GE Silicone 2 Kitchen and Bath Sealant
GE Silicone 2 is a staple in hardware aisles. The maker describes it as a 100 percent silicone sealant for kitchens and baths with a formula that includes mildew-resistance, and it is meant to remain flexible after curing. That flexibility is why silicone is the usual first thought for a tub-to-wall joint, where the tub can move slightly as it fills with water and a person.
It suits anyone who plans to remove old caulk, clean the joint properly and lay a new, clear or white bead. It is also a good answer for people looking for the best silicone for tubs because the formula is made for areas that stay wet.
Trade-offs are typical of silicone. Cleanup requires a solvent such as mineral spirits rather than water, the surface cannot be painted, and a bead applied over old residue will not stick well. Silicone also gets messy if you work without masking tape. The label lists cure times, and the joint should stay dry until it is fully ready.
Skip it if you want a bead you can paint to match a wall, or if you dislike working with a product that needs solvent cleanup.
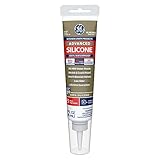
DAP Kwik Seal Ultra Kitchen and Bathroom Adhesive Caulk
Kwik Seal Ultra is a siliconized acrylic latex caulk that DAP markets for kitchens and baths. The reason people choose it is simple: it is much easier to apply and smooth than pure silicone, and a damp finger or cloth cleans it up. It is also marketed with mildew resistance and a quick cure.
It is a good fit for a first-timer who is anxious about mess, and for joints that will see less movement. When shoppers search for the best caulk for bathroom tubs and want something forgiving, this is the type of product they usually find.
The trade-off is flexibility and longevity. Acrylic-based caulks generally do not stretch as far as pure silicone, so a tub that flexes may crack the bead sooner. Plan to inspect it every year. Cure time still matters, so keep the bead dry for as long as the label requires.
Skip it if your tub flexes noticeably, if the joint is a wide gap or if the bead will be under water frequently.
Gorilla 100 Percent Silicone Sealant Kitchen and Bath
Gorilla offers a silicone sealant meant for kitchens and baths, promoted as waterproof and mold and mildew resistant. It belongs in the same family as the GE product, so it is a straightforward alternative if you prefer the brand or find it on the shelf.
This option works well when you need adhesion to slick surfaces such as acrylic, glazed tile and glass, and when you want a bead that stays pliable. For fiberglass and acrylic tub surrounds, a silicone bead gives a pliable seal at the edge.
Keep the usual silicone precautions in mind. Use masking tape for neat lines, tool the bead soon after applying, and check the cure time on the cartridge. Wet silicone sticks to everything, including your fingers and the wrong side of the tape.
Skip it if you plan to paint the caulk line, or if you need a product for a very wide gap that needs backer rod or another filler instead.
Loctite Polyseamseal Tub and Tile Adhesive Caulk
Polyseamseal is a long-standing name for tub and tile work. It is an acrylic latex caulk designed for the gap where a tub meets tile, with an adhesive component that helps it hold, and a water cleanup that appeals to home improvement newcomers.
It suits a typical DIY repair on a tub surround. It is a practical pick for people who need to recaulk quickly and want something easy to smooth. Shoppers who ask for the best caulking for shower tubs with the least effort will often like this style.
The trade-off, as with other acrylic latex products, is flexibility and mold performance over the years. If the bathroom is humid and poorly ventilated, any caulk will darken faster. Plan a regular wipe-down with a mild cleaner and inspect the bead each season.
Skip it if you want the strongest waterproof seal, or if you will be using the tub right away.

DAP ALEX Plus Acrylic Latex Caulk Plus Silicone
ALEX Plus is one of the most familiar trim caulks in hardware stores. It is acrylic latex with silicone added for flexibility and durability, and it can be painted. Although it is not purpose-built for constantly wet tub edges, it earns a place on the list because many bathrooms have joints that are not directly under water, such as the seam between a tub surround and a painted wall.
It suits the upper trim seams around a shower or tub area, the gap between a surround and drywall, and other places where a paintable bead is useful. For the joint right at the tub rim, silicone is the safer pick.
Skip it for the bottom bead of a tub, which sees the heaviest water exposure and movement.

Best for Acrylic Tubs
For acrylic and fiberglass tubs, which flex a little, silicone from GE or Gorilla gives the best match of stretch and adhesion. Read the tub maker’s notes about sealants as well.
Best for First-Time Caulkers
DAP Kwik Seal Ultra and Loctite Polyseamseal clean up with water and tool easily, so they are the gentler choice for someone who has never run a bead.
Best for Painted Trim Near a Tub
DAP ALEX Plus takes paint and is useful on the seams above and beside the tub, where it will not stay wet.
Best for Mold Resistance
A mold-resistant silicone like GE Silicone 2 is the usual answer, but ventilation matters just as much. No caulk can overcome a bathroom that never dries.
Silicone, Acrylic and Primer Questions
Silicone Versus Acrylic Latex
Silicone stays flexible and sheds water, but it is harder to clean up and cannot be painted. Acrylic latex is easier to handle and paintable, yet generally less stretchy. For the joint at the tub rim, many people prefer silicone, while acrylic suits drier seams.
Do You Need a Primer?
Most tub joints do not need one, but certain surfaces may. If you see the phrase silicone primer for bath tubs in a product guide, it usually refers to a surface treatment recommended by a maker for difficult materials. Follow the cartridge instructions.
Adhesive Molding and Caulk Strips
Peel-and-stick molding is another option for a wide gap, and people search for the best adhesive molding for tubs. It can work as a cover, but the surface still must be clean and dry, and the edge needs a seal.
How to Choose a Bathroom Caulk
Start with the joint. Measure the gap. Small, even gaps suit a standard bead. Wide gaps, over roughly a quarter inch, may need a filler or backer material, and the cartridge label will tell you the limit.
Next, decide between silicone and acrylic. The tub rim favors silicone for movement and water. Painted seams and trim favor acrylic. If you are unsure, silicone at the tub and acrylic at the wall is a sensible split.
Look at the color. White caulk is the most common choice for tubs and showers, and clear is useful when you want the joint to disappear against tile. Match as well as you can, but remember that some white caulks yellow with age.
Check mold-resistance claims carefully. Most bathroom caulks include a mildewcide to protect the bead, but this slows growth rather than preventing it. Good ventilation and wiping the joint dry do far more than a label claim.
Finally, collect the tools. A caulk gun, a utility knife, a putty knife or scraper, painter’s tape, a rag and a cleaner are the basic kit. A tooling tool is optional, because a wet fingertip works if you prefer. When shoppers ask about the best caulk for showers and tubs caulking tools, the answer is a quality gun with a smooth trigger and a drip-stop feature.
Installation, Safety and Legal Notes
Follow the cartridge label and ventilate the bathroom while you work and while the bead cures. Many sealants release a vinegar-like odor as they cure, and some products can irritate skin and eyes, so wear gloves and eye protection if the label advises it. Do not mix products, and keep solvents away from flames.
Remove old caulk completely, clean the joint with the cleaner the label recommends, and let it dry fully. Do not caulk over wet surfaces. If you find soft wall material, crumbling grout or damage behind the tub, stop and call a qualified contractor, because sealing over water damage hides the problem. Any change involving plumbing or wiring should be left to licensed professionals, and rental tenants should ask the landlord before major repairs.
Care and Troubleshooting
| Problem | Likely cause | What to try |
|---|---|---|
| Bead peels off | Dirty or damp surface at application | Remove, clean, dry fully and recaulk |
| Black spots return | Moisture and poor ventilation | Wipe dry, run the fan, replace the bead if staining goes deep |
| Bead cracks | Movement or a rigid caulk type | Switch to silicone at the tub rim |
| Uneven line | Too large a nozzle opening | Cut a small tip and use tape |
Wipe the bead with a mild cleaner during regular bathroom cleaning, and look it over every few months for gaps.
Surface Preparation: The Step That Decides How Long Caulk Lasts
Ask any experienced installer what causes caulk to fail and the answer is rarely the product. It is the surface. Caulk bonds only to a clean, dry, sound joint, and a bathroom is full of conditions that undermine that: soap film, body oils, moisture and old residue.
Begin by removing all of the old caulk. A plastic scraper or a dedicated caulk removal tool works without scratching tile or acrylic, and a utility knife helps along the edges. Pick out remaining fragments with a pick or the tip of a blade, taking care not to gouge the tub surface. Softening agents are sold for silicone, and these help with the thin film left behind.
Next, clean the joint. A household cleaner or a diluted bleach solution kills mildew spores that remain in grout lines, and isopropyl alcohol removes oils that interfere with adhesion. Rinse if the cleaner requires it. Then let the area dry completely. Fans, a hair dryer on low or simply waiting a day or more can help, because trapped moisture produces bubbles and weak bonds. If you suspect hidden water behind tile, deal with that first, since caulk will not fix a leak.
Joint Size and Why Backer Rod Sometimes Matters
Caulk is designed for narrow gaps, and the width and depth of the joint affect how it performs. A joint that is too wide or deep takes too much caulk, cures slowly and is more likely to shrink or sag. Many product labels mention a maximum gap size, so check the tube before you buy.
For a wide gap, installers use a foam backer rod pressed into the joint to reduce the depth and give the caulk something to grip on two sides, not three. A good rule of thumb is that the caulk should be about half as deep as it is wide. Without backer rod, a thick bead can crack in the middle as the tub flexes.
That flexing is the real challenge around a tub. When you fill it with water and a person gets in, the tub drops slightly. Caulk must stretch to follow that movement. Silicone is more flexible than most acrylic latex caulks, which is part of why it is the common choice at that joint, while a stiff caulk may split at the corners.
Tooling the Bead for a Clean, Durable Finish
Tooling is the step that smooths the bead and pushes it into the joint, and it affects both looks and performance. Start by cutting the nozzle at a small angle so the opening is slightly narrower than the gap. You can always cut more later, but you cannot undo a nozzle that is too big.
Apply a steady bead while moving at an even pace. Pushing the nozzle ahead of you tends to force caulk into the joint, while pulling it can leave gaps. Choose one method and practice on a piece of cardboard first.
Then smooth. A caulk tool, a plastic spoon or a gloved finger dipped in a smoothing solution presses the bead into the joint and removes excess. Many installers use a mild soapy water mix for acrylic latex products and mineral spirits or a manufacturer-suggested option for silicone. Use whatever your product label recommends, because the wrong liquid can ruin a bead.
If you use painter’s tape for crisp lines, remove it before the caulk forms a skin, usually within a few minutes. Pull slowly at an angle away from the bead.
Planning the Job: Tools, Timing and Ventilation
A smooth caulking job starts with having everything within reach before you open the tube. A basic kit includes a caulk gun, a scraper, a utility knife, cleaning supplies, rags, painter’s tape, a smoothing tool and gloves. A dripless, ratcheting gun gives better control than a cheap one, and it keeps the caulk from oozing after you release the trigger.
Timing matters in two ways. Allow enough time to remove and clean in the same session, so dust and moisture do not return before you apply the new bead. Then plan the cure. Surface skin forms in under an hour for many products, but full cure and water resistance take longer, so read the label before using the shower. Cool, humid rooms slow curing, so a warm room with the exhaust fan running is ideal.
Ventilation is important. Some products give off strong smells while they cure, and others are labeled as low odor. Open a window or run the fan, and wear gloves to keep the product off skin. Dispose of rags and old caulk according to local rules, and store half-used tubes with a nail or screw in the nozzle, though most do not last long once opened.
One more habit pays off: take a photo of the label before you throw the tube away. Cure times, cleaner recommendations and temperature limits are printed there, and you will want them when it is time to redo the joint. Most bathroom beads need replacing every few years, so a quick note of the product and the date saves guessing later. When you inspect the caulk each season, look for gaps at corners, dark spots that scrubbing does not remove, and edges that have pulled away from the tile. Those are signs the bond has failed and moisture is getting behind it, and fixing them early is far cheaper than repairing wet drywall.
Frequently Asked Questions
How long should I wait before using the tub?
The cartridge states the cure time. Wait at least that long before filling the tub or showering.
Can I caulk over old caulk?
It is not recommended. New caulk sticks best to a clean, dry surface after the old bead is removed.
Is white caulk the best choice?
It is the common option because it blends with most tubs. Clear can work on patterned tile, but check the listing.
Why does mold grow on my caulk?
Moisture, soap film and slow drying feed it. Ventilation and regular wiping help the most.
Can I use kitchen caulk in the bathroom?
Choose a product labeled for kitchen and bath, with mildew resistance, and follow its directions.
What is the best way to get a smooth bead?
Use painter’s tape, cut a small opening in the nozzle, apply steady pressure and tool the bead before it skins over.
Should the tub be filled when I caulk?
Many installers fill the tub partly so the joint is at its widest position, but check your tub maker’s advice and the caulk label.
How much caulk do I need for a standard bathtub?
A typical tub perimeter takes one or two standard tubes, depending on the gap size and how many walls it meets. Measure the total linear length and compare it with the coverage noted on the tube. Buying an extra tube is cheap insurance against running out mid-bead.
Should I caulk the tub spout and faucet handles too?
Yes, where water can get behind a plate or around a pipe opening, a small bead of caulk seals the gap. Leave drain holes or weep slots alone if the fixture includes them. Always follow the fixture manufacturer’s directions, and keep caulk off moving parts.
What is the best temperature for applying bathroom caulk?
Most products work best at moderate room temperatures, and labels usually list a minimum, often around 40 degrees Fahrenheit. Cold slows curing and can reduce adhesion, while a hot room speeds skinning and makes tooling harder. Check the tube for the exact range.
How can I remove dried caulk from my hands or from tile?
For wet caulk, wipe quickly with a damp cloth. For cured silicone, a plastic scraper and a manufacturer-approved remover work on tile, and rubbing alcohol can help with residue. Avoid harsh tools on glazed surfaces. Test any solvent on a small hidden spot first.
Bottom Line
For the joint where a tub meets the wall, silicone from GE or Gorilla is the usual choice. DAP Kwik Seal Ultra and Loctite Polyseamseal suit easier jobs, and DAP ALEX Plus fits paintable trim. Prepare the joint, respect the cure time and keep the room ventilated.