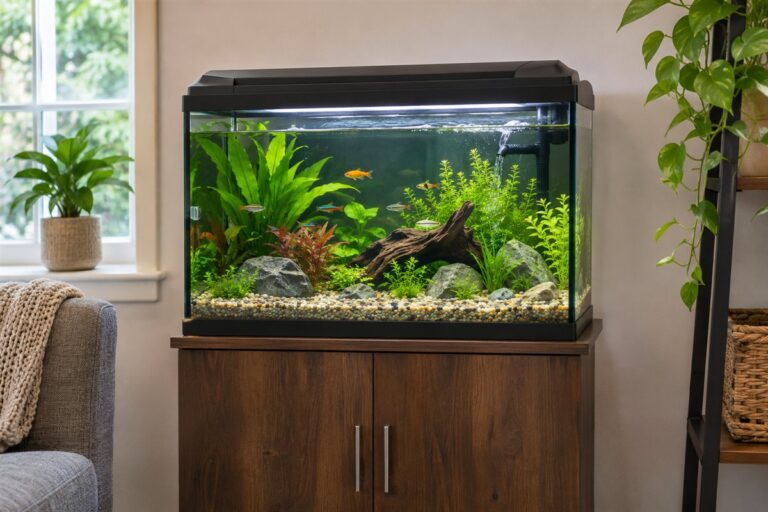
A protein skimmer is a piece of filtration gear for saltwater tanks. It creates fine bubbles in a column so organic waste clings to them and collects in a cup, instead of staying in the water. We have not used these products ourselves, so this guide makes no firsthand claims. Instead it shows how to compare options using the details a maker lists and the setup you have.
Think about the tank volume and where the skimmer will sit. Hang-on units mount on the back of the tank, while in-sump units sit below in a cabinet. Use the checks below to narrow the field before you compare individual models.
As an Amazon Associate we earn from qualifying purchases. Links on this site are affiliate links, and they do not change the information we give.
In this guide
Quick Picks
| Pick | Product | Best For |
|---|---|---|
| Best Overall | Bubble Magus Curve 5 | Mid-size sump systems that want a simple needle-wheel unit |
| Best Space Saver | Reef Octopus Regal 150 SSS | Tight sumps that still want a controllable DC pump |
| Best Hang-On-Back | Reef Octopus BH-1000 | Tanks up to 100 gallons with no sump |
| Best for Nano Tanks | Tunze Comline DOC Skimmer 9004 DC | Nano and all-in-one tanks up to about 79 gallons |
| Best for Larger Tanks | Reef Octopus Classic 200 INT | Bigger sumps and heavier bioloads |
Our Picks

1. Bubble Magus Curve 5 — Best Overall
The Curve 5 is the in-sump starting point many reef keepers land on, because it covers the checks in this guide without extras you may not need. Its curved, wine-glass body is shaped to give bubbles a smooth path upward, and the internal ROCK SP1000 needle-wheel pump is listed at 300 L/H of air intake while drawing only 8W. Bubble Magus rates the skimmer for tanks up to 500 litres (about 140 gallons), so, following the sizing advice above, treat that figure as the light-stocking end and step down for heavy feeding. The footprint is compact at 185 x 180 mm (7.28 x 7.08 in) and the unit stands 470 mm (18.5 in) tall, with a listed working water level of 9.5 to 11 inches, so measure your skimmer chamber before ordering. A bubble plate calms turbulence in the reaction chamber, the collection cup is quick-release for the weekly empty-and-rinse routine, and an air intake silencer is included to keep hiss down in a living-room cabinet. Pick it for a mid-size sumped tank where you want a straightforward AC needle-wheel skimmer that strips down easily for cleaning.

2. Reef Octopus Regal 150 SSS — Best Space Saver
The Regal 150 SSS (Space Saver Skimmer) is built for sumps where footprint is the limiting factor: the pump sits inside the skimmer body outline instead of hanging off the side. CoralVue rates it by filtration demand at up to 210 gallons for light demand, 160 gallons for medium and 100 gallons for high, which maps neatly onto the guide’s advice to size by bioload rather than by the headline number alone. It runs a controllable Reef Octopus VarioS DC 2500S pinwheel pump with its own controller and five speed settings, so air and water flow can be tuned electronically as well as with the precision control valve — useful when you are dialling in wet versus dry skimmate in small steps. The recommended sump water depth is 7 to 8.5 inches. The body is high-quality cast acrylic and is designed to come fully apart, which makes the periodic deep clean described above far less of a chore, and the collection cup includes a waste drain. Choose the Regal 150 SSS if your stand space is tight but you still want DC pump control on a mid-size reef.

3. Reef Octopus BH-1000 — Best Hang-On-Back
For a tank with no sump, the BH-1000 hangs on the back rim instead of occupying cabinet space. Reef Octopus rates it for aquariums up to 100 gallons, and the body is a slim 17 x 3.5 x 17 in, so it needs only a few inches of clearance behind the tank — check that gap before buying, as the guide warns for hang-on units. The design is unusual in that the Aquatrance 1000 pump is mounted externally rather than inside the reaction chamber, which leaves the full body volume for bubble contact and keeps the pump accessible for the impeller cleaning the guide recommends every few months. The body is clear acrylic, so you can see the foam level at a glance when you are adjusting for wetter or drier skimmate during the break-in period. Because all of the equipment stays outside the display, day-to-day cup emptying is straightforward. Pick the BH-1000 if you run a sumpless saltwater tank up to about 100 gallons and want a purpose-built hang-on skimmer from an established skimmer maker rather than an internal nano unit stretched beyond its rating.

4. Tunze Comline DOC Skimmer 9004 DC — Best for Nano Tanks
The Comline DOC Skimmer 9004 DC sits inside the tank or in the rear chamber of an all-in-one aquarium, held by a magnet holder for glass up to 12 mm (1/2 in) thick, so it suits the nano setups the guide says can be fussy to skim. Tunze recommends it, depending on tank load, for 60 to 300 litres (15 to 79 US gal) of seawater, and for 150 to 180 litres in sensitive hard-coral biotopes. It works on Tunze’s flash skimming principle and draws water in at the surface, which also removes the surface film. The electronic Foamer 9004.041 produces fine bubbles of about 0.1 to 0.3 mm, is listed at roughly 200 l/h of air capacity and about 5W of energy use, and the included Turbelle controller lets you adjust performance directly. Immersion depth is approximately 225 to 245 mm (8.9 to 9.7 in) and the whole unit measures only 110 x 90 x 305 mm (4.3 x 3.5 x 12 in). The cup holds 0.2 litres, so expect to empty it often; in exchange you get a silencer-equipped, low-draw skimmer that fits where no sump exists.


5. Reef Octopus Classic 200 INT — Best for Larger Tanks
The Classic 200 INT is the step up in the Classic line for keepers whose bioload has outgrown a mid-size skimmer, following the guide’s advice to oversize deliberately when stocking and feeding are heavy. Its hybrid half-cone body is 8 inches across, and the Aquatrance 3000s pinwheel pump is listed by Reef Octopus at 900 lph of air draw and 800 lph of water draw, a substantial jump over the 110-class units, so confirm your sump chamber can fit the body and still leave height to lift the collection cup clear. The recommended sump water depth is 7.5 to 8.5 inches. Air is introduced through a venturi intake, the body is cast acrylic, and output control comes from a precision valve, which fits the guide’s tuning advice of small changes followed by a day of waiting. Like the rest of the Classic range it is an in-sump-only design, so it needs a cabinet and a stable water level, ideally with an auto top-off. Choose it for a larger, well-stocked system where a bigger reaction chamber and pump headroom matter more than a compact footprint.

What to Look For
| Factor | Why it matters | What to check |
|---|---|---|
| Tank size listed by the maker | An undersized unit struggles to keep up with the waste a tank produces. | Compare the maker’s listed tank volume and leave some margin for a full stocking plan. |
| Mounting style | Hang-on and in-sump units need different space and plumbing. | Measure the back of the tank or the sump and check the required water depth. |
| Pump type | The pump shapes bubble size, noise and how stable the unit runs. | Look at the pump style listed, such as needle wheel, and any controller included. |
| Collection cup | A cup that is hard to reach or too small adds work every week. | Check cup size, the neck diameter and how easily it lifts off for cleaning. |
| Build materials | Salt water is hard on parts, and cracks or leaks ruin a setup. | Look for the plastics and the seals the maker lists, and read about the fittings. |
| Noise and tuning | Gurgling or a loud pump is hard to ignore in a living room. | Read the maker’s notes on silencing, valves and how the water level is adjusted. |
Setup and Care Tips
- Run the new skimmer in a bucket of salt water first to check for leaks and rinse out any dust.
- Set the water level slowly, making small valve changes and waiting before you adjust again.
- Expect a break-in period in which bubbles may behave oddly before the unit settles.
- Empty and rinse the cup on a regular routine, and clean the neck so bubbles can rise freely.
- Soak the pump parts in fresh water or a mild cleaning mix as the maker advises, and replace worn parts when listed.
Mistakes to Avoid
- Buying a unit sized exactly for the tank with no room for growth or extra livestock.
- Ignoring the cabinet or sump dimensions until the unit arrives.
- Leaving the cup until it overflows, which can send waste back into the tank.
- Adjusting the water level in big steps and expecting it to settle at once.
- Choosing by loudness claims alone, instead of the pump style and the way it is mounted.
Matching Skimmer Rating to Your Tank
Manufacturers publish a recommended tank size for each skimmer, and it is the starting point for any purchase. Treat that rating as a guide to the water volume and bioload the skimmer was designed around, not as a guarantee. Ratings are usually based on a lightly to moderately stocked tank, so a heavily stocked system, a large fish such as a tang or a frequent feeding schedule calls for stepping up to a skimmer rated for a larger tank.
Think about total system volume, not just the display tank. A sump, refugium and plumbing add water and also add places for waste to collect. Count what is actually in the system and compare with the listing’s rated volume. Also consider future plans. If you may add fish or corals, buying a skimmer rated above your current needs avoids replacing it later.
- Lightly stocked reef or few fish: a skimmer rated near your tank volume is generally workable.
- Heavy feeding, large fish, many corals: look for a rating well above your system size.
- Nano tanks: small skimmers can be fussy, and some nano keepers rely on water changes and live rock instead. Check what the listing says about minimum water volume.
Oversizing has limits. A very large skimmer in a small tank can strip too much from the water and may be hard to fit. Balance rating, footprint and your feeding habits rather than chasing the biggest number.
Skimmer Types and Where They Fit
Protein skimmers come in several layouts, and each fits a different setup.
- In-sump skimmers: sit in the sump and are the most common design. They hide equipment and keep the display clean. Check the sump’s available water depth, since many skimmers need a specific operating depth.
- Hang-on-back skimmers: attach to the tank rim and suit tanks without a sump. They add visible equipment and need clearance behind the tank.
- External or in-line skimmers: mounted outside the sump, often fed by a separate pump. They suit larger systems or cramped sumps but need plumbing planning.
Within these, the way a skimmer makes bubbles differs. Needle wheel and similar pump designs chop air into fine bubbles. Venturi designs draw air through a pump. Different pump types have different noise, maintenance and tuning needs, so read the listing and manual for how air is introduced.
Consider the body shape as well. A taller reaction chamber gives bubbles more time to contact water, while a wider body trades height for footprint. Measure the sump compartment, including height with the collection cup removed, because you need room to lift the cup for emptying. Check that the power cord and air tubing reach their outlets and air source.
Controlling Wet Versus Dry Skimmate
Skimmate is the foam and waste the skimmer pulls out. How wet or dry it is changes how often you empty the cup and how much water you remove.
Wet skimming pulls out a lot of water along with waste, fills the cup quickly and may export more material, but it demands frequent cup emptying and can also change salinity if you do not top off. Dry skimming produces thicker, darker skimmate, which removes less water and fills the cup slowly. Many keepers aim for something between, adjusting to the tank’s needs.
Adjustment usually comes from the water level in the skimmer body or the air intake. Lowering the water level in the body tends to make skimmate wetter, and raising it tends to make it drier, though the exact controls depend on the model. Check the manual for the adjustment method and expect to make small changes, then wait a day to see the result.
- Change one thing at a time so you know what caused any effect.
- Allow a break-in period: new skimmers often overflow or produce odd foam until they settle, which can take days to weeks. This is a common experience reported by hobbyists, so be patient.
- Watch for overflow: a skimmer that spills into the sump needs adjustment, a lowered level or a check for added oils or soap.
Avoid putting hands with lotion or soap in the tank, as oils can upset skimmer performance.
Noise, Pump Quality and Power Use
A skimmer runs around the clock, so its noise and power draw matter more than they would for a short-use device. Water splashing, air hissing and pump hum can be annoying if the tank sits in a living room or bedroom. Check the listing for the type of pump and any noise comments, and remember that placement affects noise: a sump in a cabinet with a closed door is quieter than an exposed one.
Pump quality affects reliability. Look for pumps with replaceable impellers and available spare parts. A pump that cannot be cleaned or rebuilt turns a minor clog into a replacement. Check whether the manufacturer sells parts and how to access the impeller for cleaning.
Power use is rarely extreme but adds up over months. The manual or listing should state wattage. A more efficient pump can save money over time and also produces less heat in the sump.
- Use a stable surface: vibration against glass or a hard cabinet increases noise. Foam or rubber pads can help.
- Keep the cord out of water paths and use a drip loop.
- Use a GFCI outlet or protected power strip around aquarium water.
If noise changes suddenly, check for a clogged impeller, loose parts or low water level.
Cleaning Schedule and When to Replace
Skimmers need regular cleaning to keep working. Empty the collection cup as it fills, which depends on your skimmate wetness and feeding. Rinse it in freshwater and avoid soap residue. Wipe the neck, where a film builds up and slows bubble flow. Once the film coats the neck, performance usually drops.
Plan a deeper cleaning at an interval suggested in the manual, commonly every few weeks to months depending on the tank. Unplug the skimmer, remove the pump and soak parts in a cleaning solution recommended by the maker, such as vinegar-based solutions for mineral deposits if the manual allows. Brush out the impeller chamber and rinse thoroughly with freshwater before putting it back. Never use harsh chemicals that can crack acrylic or leave residue.
- Check the impeller for wear, and the pump shaft for wobble.
- Inspect seals and tubing for cracks.
- Verify the air intake is not blocked by salt creep.
Signs it is time to replace a skimmer include pumps that no longer prime or spin freely, cracks in the body, steady loss of foam production after thorough cleaning and parts that are no longer available. Replace worn impellers before the whole pump fails, since a seized pump can stress the motor. If the skimmer is simply too small after tank upgrades, move it to a smaller system rather than discarding it.
Sizing by Bioload, Not Just by Tank Volume
Tank volume is the starting point for skimmer sizing, but the load inside the tank is what the skimmer actually works against. Two aquariums of identical size can present completely different workloads. A lightly stocked tank with a few small fish, fed sparingly, produces a modest stream of dissolved organic waste. A heavily stocked tank with large, messy eaters, generous feeding and a growing coral collection produces several times as much, and it produces it continuously. Skimmer ratings assume something in the middle, which is why the same model can feel generous in one system and overwhelmed in another.
Think of your stocking plan over the next year rather than the fish you own today. Tanks tend to gain inhabitants, corals grow, and feeding creeps upward as confidence grows. A skimmer chosen for today’s light load may be the bottleneck on next year’s heavier one. At the same time, gross oversizing brings its own problems: a very large skimmer on a small, clean system may struggle to build a stable foam head at all, because there is too little organic material to sustain it, and it can idle along producing almost nothing while looking impressive in the sump.
A plain-language load assessment
- Count your fish by adult size and appetite, not by how small they are on purchase day.
- Be honest about feeding: how much, how often, and how much uneaten food reaches the rockwork.
- Factor in corals and invertebrates, which add both waste and sensitivity to water quality.
- Consider your other filtration. A refugium, filter media and disciplined water changes share the load the skimmer would otherwise carry alone.
- If you are between sizes, the deciding question is your stocking ambition, not the price difference.
Water Level, Sump Layout and the Physics of a Stable Foam Head
An in-sump skimmer is a creature of its water level. The pump pushes a mixture of water and fine air bubbles into the body, foam rises as organics collect on the bubble surfaces, and the height of water inside the body decides whether that foam spills gently into the cup or never arrives. A water level that drifts up and down with evaporation will make the skimmer behave inconsistently, wet one day and silent the next. This is why experienced keepers pair a skimmer with a baffled sump section that holds a constant level, and why an automatic top-off system, which keeps sump level steady, often improves skimming more than a skimmer upgrade would.
Footprint and height are the other physical limits. Measure the sump chamber the skimmer will occupy, the height available under the stand, and, just as importantly, the clearance needed to lift the collection cup off for emptying. A skimmer that fits only if the cup cannot be removed is a skimmer that will not be cleaned, and an uncleaned skimmer steadily stops skimming. Leave working room around the unit for your hands, the pump cable and future maintenance.
Hang-on and in-tank models: managing their compromises
Hang-on-back skimmers free tanks without sumps from going unskimmed, but they hang their water level sensitivity on the tank itself and put a pump and plumbing where a failure can wet the floor. Check fittings carefully, keep an eye on the area behind the tank, and accept that tuning may need more frequent small adjustments. In-tank and nano skimmers trade capacity for discretion; they suit small systems with light loads and owners who value a clean look, provided expectations about output stay realistic.
The Break-In Period and a Simple Tuning Diary
New skimmers rarely perform at their best immediately. Mould-release residues and fresh plastic surfaces resist stable foam formation, and the biofilm that makes foam behave takes time to establish inside the body. Expect a settling period in which output is erratic, sometimes overflowing, sometimes flat. Run the skimmer, resist constant adjustment, and make one small change at a time, then wait. Foam responds slowly; a keeper who adjusts every hour is chasing a moving target and learning nothing.
A short written diary transforms tuning from guesswork into method. Note the date, the water level, the air and water adjustments as you set them, what you fed, any additives or water changes, and what the cup collected over the following day. Patterns emerge within a week: how the skimmer reacts to feeding, to a water change, to hands in the tank. Those patterns are specific to your system, and they are the real operating manual for your skimmer.
Reading what the cup tells you
Dark, thick skimmate in modest quantity suggests the skimmer is concentrating a real organic load. Pale, watery output in large quantity suggests it is skimming wet, removing more tank water than necessary, which over time can nudge salinity downward as top-off water replaces what the cup removed. A cup that stays empty while the tank shows rising nutrients suggests the foam head is not forming or not reaching the cup, which points back to water level, air supply or a load the skimmer cannot organise into stable foam. Treat the cup as a daily report on the whole system, not just on the skimmer.
Troubleshooting the Common Foam Problems
Overflow and microbubbles
Sudden overflowing often follows something added to the water: certain foods, medications, water conditioners, fresh filter media or even the oils from your hands after handling food. The cure is usually patience, a partially opened drain or lowered water level in the body, and time for the substance to clear. Microbubbles escaping into the display usually settle as the skimmer breaks in and as bubble traps or sponge guards in the sump do their work; persistent clouds of bubbles point to water level or pump issues worth investigating rather than tolerating.
No foam at all
Work through the simple causes first. Is the pump running and the air line clear and connected? Is the water level in the maker’s intended range? Has the tank just been cleaned, dosed or refilled in a way that temporarily suppresses foam? Is the load simply very light right now? A skimmer cannot remove organics that are not there, and a quiet period in a clean, lightly stocked tank is not automatically a fault.
A Maintenance Calendar That Keeps Performance Steady
Skimmer performance decays so gradually that keepers often blame their livestock or their test kits first. A simple calendar prevents that drift. Empty and rinse the collection cup regularly, and clean the neck of the body at the same time, because a slime-coated neck breaks the foam before it can be collected. Periodically clean the pump, checking the impeller and its housing for wear, calcium build-up and trapped debris, and clear the air intake and any silencer, which can slowly clog with salt creep and dust. Inspect tubing and fittings while everything is apart. None of this is difficult; all of it is easy to postpone until the skimmer quietly stops earning its place in the sump.
Keep a small stock of the wear items your model uses, so a worn impeller or a split air line is an evening’s fix rather than a week with no skimming. When you return the skimmer to service after a deep clean, expect a short re-settling period and resist the urge to retune aggressively in the first day.
Choosing by Tank Profile
Nano and small display tanks
Space and discretion rule. A compact in-tank or hang-on unit sized honestly for a light load, with a cup you can actually remove in the available space, beats an oversized unit shoehorned in and never cleaned.
Mid-size mixed reefs
This is the heartland of the in-sump skimmer. Prioritise a constant water level in the skimmer chamber, a pump with a reputation for quiet reliability, and capacity matched to a moderately stocked system with room for growth.
Large or heavily stocked systems
Load rules everything. Favour capacity, a large cup or a drain arrangement for the cup, and build quality that tolerates constant duty. In these systems the skimmer is core life support, and ease of servicing matters because servicing will be frequent.
Decision Checklist
- Assess your bioload by adult fish size, feeding habits and stocking plans, not volume alone.
- Measure sump footprint, operating height and cup-removal clearance before choosing a type.
- Plan a constant water level for the skimmer chamber, with top-off if your sump level wanders.
- Decide how you will handle skimmate: cup size, drain options and how often you will empty it.
- Commit to the break-in period and keep a simple tuning diary for the first weeks.
- Put cup, neck, pump and air-line cleaning on a recurring calendar from day one.
A protein skimmer chosen for your load, installed at a steady water level and maintained on a rhythm quickly becomes invisible infrastructure: the cup fills, the water stays clearer, and the tank’s inhabitants get the stable conditions that every other part of reef keeping depends on.
A Worked Example: Choosing for a Tank That Will Grow
Imagine a mid-size reef tank, newly cycled, holding a few small fish and its first corals, with an owner who fully intends to add more fish and watch the corals grow over the coming year. The naive purchase matches the skimmer to today’s whisper of a bioload. The wiser purchase matches it to the tank this will be in eighteen months: more mouths, larger fish, heavier feeding and a greater consequence if nutrient control slips. That means choosing from the middle of the size range rather than the bottom, confirming the sump chamber can hold the chosen footprint with room to work, and planning the constant water level from the start rather than retrofitting baffles around a skimmer that never settles.
Now imagine the opposite case: a mature, lightly stocked tank whose owner values quiet and simplicity, with excellent water parameters maintained for years. Here a modest, well-made skimmer, or even a smaller unit run consistently, may serve better than a large one that idles without a stable foam head. The lesson generalises: skimmer sizing is a forecast about your husbandry, and the honest forecaster is not the one who buys biggest, but the one who knows how the tank will actually be stocked and fed.
Planning the sump around the skimmer
Because the skimmer is usually the largest single object in the sump, plan the sump layout with it in place rather than hoping it fits the space left by everything else. Reserve its chamber first, set the baffle height to the maker’s intended water level, leave clearance to lift the cup clear, and route its cable and air line so they cannot be trapped or kinked by other equipment. Future you, cleaning the pump at arm’s length under a stand, will be grateful for every centimetre of that planning.
Running Costs, Spares and the Long View
A skimmer’s running cost is mostly its pump’s electricity and its wear parts. Pumps run continuously, so efficiency and reliability matter more over years than small differences in purchase price, and a pump with readily available impellers and spares is a better long-term proposition than an exotic unit that must be replaced whole. Keep the model’s key spares in mind when choosing: if the impeller, air silencer or cup for your candidate would be hard to obtain, that is a genuine mark against it, because a skimmer out of service for weeks is a nutrient problem in slow motion.
Think about noise in the same long view. A skimmer that hums in a living room will be resented daily, and resentment leads to switches being turned off at night, which is the worst skimming schedule of all. Quiet design, a sound silencer in good condition, vibration-isolating feet or a mat under the unit, and a sump cabinet that does not amplify hum are all part of the real specification for a tank that shares your living space.
Integrating the Skimmer With the Rest of Your Filtration
No skimmer works alone, and choosing one sensibly means placing it in your system. Mechanical filtration that catches particles before they dissolve reduces the dissolved load the skimmer must handle. Biological filtration processes what skimming cannot remove. Water changes dilute everything, including the compounds no filter touches. The skimmer’s particular gift is removing dissolved organics before they break down, which lightens the load on everything downstream of it. Judge a candidate by how it complements your habits: a keeper who loves regular water changes can run a smaller skimmer happily, while a keeper who travels and maintains less often should let the skimmer carry more of the load and size it accordingly.
Questions to Ask Before You Order
- Is the rating based on a heavily or lightly stocked tank, and which matches my plan?
- What water level does it need, and can my sump hold that level constant?
- Does the cup lift clear in the height my stand actually offers?
- Are pump spares, especially the impeller, available for this model?
- How is skimmate handled: cup only, or a drain fitting for a separate container?
- What do owners in similar living spaces say about its running noise?
Answer those against your stocking forecast and your sump measurements, and the skimmer you choose will still be the right one when the tank has grown into the system you planned.
What a Skimmer Cannot Do: Setting Honest Expectations
A skimmer is powerful within its borders, and choosing well means knowing where those borders lie. It removes a portion of dissolved organic waste before that waste breaks down; it does not remove nitrate or phosphate directly in meaningful quantity, does not substitute for water changes, and does not rescue a tank from chronic overfeeding or neglected maintenance. It will not clarify water clouded by a bacterial bloom overnight, cure an algae problem rooted in lighting and nutrients, or compensate for a stocking level the tank’s volume cannot support. Owners who understand this buy a skimmer as one instrument in an orchestra and are pleased with it for years. Owners who expect a solo performance blame the instrument.
It is equally worth knowing what consistent skimming quietly contributes over months. By exporting organics early, it reduces the rate at which nutrients accumulate, which lengthens the comfortable interval between water changes and steadies the conditions corals respond to. It oxygenates as a side effect of its enormous air-water contact. And its collection cup gives the keeper a daily, visible measure of the tank’s organic traffic, which often provides the first clue that something, a dying animal, an overfeeding guest, a failing filter, has changed in the system. That diagnostic value is rarely listed in specifications and frequently cited by experienced keepers as a reason they would not run a stocked reef without one.
Special Situations: New Tanks, Treatments and Power Cuts
During a tank’s earliest weeks, skimming strategy is a judgement call. Many keepers run the skimmer from the start to remove the organic surge of curing rock and early die-off; others delay while the biological filter establishes. Either approach can succeed, and consistency matters more than the choice itself. During medication or certain treatments, skimmers are commonly switched off or run without collection, because skimming can remove the treatment or erupt in overflow; follow the treatment maker’s guidance rather than habit, and expect a period of enthusiastic foaming when normal skimming resumes.
Power cuts deserve a plan too. A skimmer that restarts into a sump whose level has risen during the outage can overflow its cup on restoration. After any outage, check the sump level and the cup before leaving the system unattended, and empty the cup if the restart has pushed skimmate into it. Keepers in outage-prone areas sometimes put the skimmer on the same protected circuit as the return pump so both behave predictably together. Small preparations like these are the difference between a power cut being a story and being a flood.
The Second-Hand Market and Knowing When to Replace
Skimmers are durable and appear second-hand often, and the inspection is straightforward. Check the pump first, since it is both the heart and the most common failure: it should start reliably, run quietly and show an impeller free of swelling, cracks and excessive wear. Inspect the body for crazing or cracks around fittings, confirm the cup and lid are present and undamaged, and check that adjustment valves turn smoothly. A skimmer missing its silencer or with a perished air line is a small negotiation point; one with a dying pump is a purchase of a body only, and should be priced as such.
Replace a skimmer when its pump becomes unreliable, when its capacity is honestly outgrown by the system, or when its servicing has become a struggle against worn threads and brittle parts. Move the old unit on, keep it as a spare if storage allows, or retire it to a quarantine or frag system where its remaining life is still useful. In a hobby where equipment outlives several generations of livestock, that kind of planned succession is simply good husbandry.
Seasonal Rhythms and the Skimmer’s Year
A reef tank is not a constant system, and a skimmer’s behaviour through the year teaches attentive keepers a great deal. Feeding often increases when new livestock arrives in spring, holidays bring house-sitters whose generous hands can send a skimmer into days of overflow, and warm rooms in summer change evaporation, top-off rates and sump levels, all of which the skimmer notices before you do. Build the responses into your routine. Brief anyone who feeds your tank in your absence on exactly how much to feed and what an overflowing cup looks like and what to do about it. Recheck the skimmer’s water level whenever the season changes your evaporation pattern. After holidays, expect the cup to tell the story of the feeding it received, and let a water test, not alarm, decide your response.
Keep a simple annual rhythm alongside the weekly one: a deep clean and inspection of pump, impeller and air path, a check of tubing and fittings, and a review of whether the tank’s stocking has outgrown the skimmer’s comfortable range. Tanks evolve gradually, and equipment should be re-matched to them deliberately rather than discovered inadequate during a nutrient problem. That annual honest review, cup diary in hand, is what separates systems that run stably for years from systems that lurch between crises, and the skimmer, faithfully maintained and correctly sized, is usually the least dramatic part of the stable ones.
A Final Word on Patience as a Skimming Skill
Almost every skimmer mistake in this guide reduces to impatience: adjusting too often, sizing for today instead of next year, expecting a new unit to perform before it has broken in, or condemning a quiet skimmer in a clean tank for failing to produce waste that is not there. The keepers whose systems run calmly for years treat the skimmer as they treat the tank itself, as a living system that responds over days rather than minutes. Set the water level, make one adjustment at a time, read the cup like a diary, clean on a rhythm, and let the machine do the slow, unglamorous work it was built for. A skimmer rewarded with that patience returns it as the rarest commodity in reef keeping: a system you do not have to think about.
FAQ
Do all saltwater tanks need a skimmer?
Not always. Some keepers use other filtration methods and frequent water changes. A skimmer is a common choice because it removes waste early, but read about your livestock and your setup before you decide.
Is a bigger skimmer always better?
Not necessarily. A larger unit may need more depth, space and power than your tank offers. Compare the maker’s listed tank size with your own and think about the space available in your cabinet.
How long does a new skimmer take to work properly?
Many new skimmers need a break-in period before foam production stabilizes. Expect several days to a few weeks, and check the manual for tuning tips.
Why is my skimmer making no foam?
Possible causes include a low water level, a clogged air intake, a dirty neck or a worn impeller. Clean the parts and check the water level against the manual.
How often should I empty the collection cup?
It depends on how wet the skimmate is and how much you feed. Many keepers empty it every few days to weekly, adjusting by observation.
Can I run a skimmer on a new tank?
Many keepers wait until the tank is established and has some bioload, since a new tank may produce little skimmate. Follow your livestock plan and the maker's advice.
Does a skimmer replace water changes?
No. It removes organic waste but does not replace trace elements or fix all water issues. Regular water changes remain a standard part of tank care.
Should the skimmer run all the time?
Most are run continuously. Some keepers turn them off briefly during treatments or feeding, but follow instructions for any medication or additive you use.
The Short Version
Choose a protein skimmer for a sensible fit to your tank size, a mounting style that suits your space, a stable pump and a cup you can reach easily. Use maker claims as a first guide and judge the rest in your own tank. Before you buy, list the tank volume, the space for the unit and how often you want to maintain it, then compare each option against that list.