A stud finder helps you locate the framing behind a wall so shelves and mounts have something solid to fix into. Magnetic models look for fasteners, while electronic ones sense changes in density. Choose by wall type, depth and how clear the indicator is, and always confirm the result before you drill.
Two Main Approaches
- Magnetic finder: a simple magnet that responds to nails or screws in the framing. No batteries, but it only finds metal fixings.
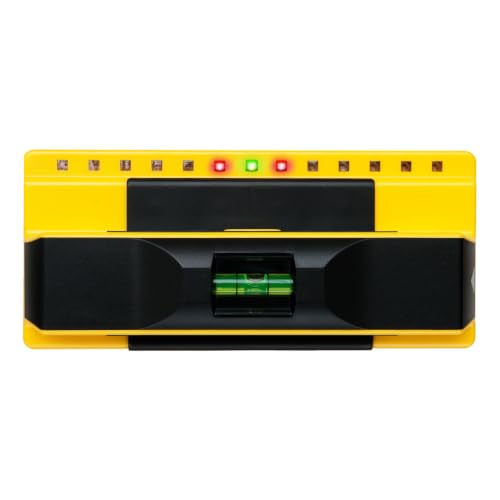
- Electronic finder: senses density changes through the wall surface and signals with lights or sounds. It needs batteries and a few seconds of setup on each wall.
Some electronic models add extra sensing modes, such as detecting live wiring. These are aids only. Never treat any indicator as a promise that a wall is clear, and follow the maker’s manual.
In this guide
What to Compare
| Factor | Why it matters | What to check |
|---|---|---|
| Wall type | Plaster, drywall and textured surfaces behave differently | Read what wall types the maker lists |
| Scan depth | Thicker walls need deeper sensing | Compare the depth to your wall thickness |
| Indicator | Clear signals reduce guesswork | Check the display and any sound alerts |
| Edge marking | Showing both edges helps you find the center | See whether the tool marks edges or the middle only |
| Power | Batteries can run down at a bad moment | Check which type it uses |
Finding a Stud Step by Step
- Clear the wall area and read the maker’s instructions for setting up the tool on your surface.
- Place the finder flat on the wall away from any suspected stud and switch it on.
- Slide it slowly sideways and mark where it signals the first edge.
- Repeat from the other direction and mark the second edge.
- The center between your marks is the likely middle of the stud. Confirm with a second scan above and below.
Before You Drill
Studs usually sit in a regular pattern, so a few marks on the same line add confidence. Pipes and wires can run through or near framing, and no scanner replaces careful checking. Where you have doubts, use a small test hole as the maker and local rules allow, or ask a qualified person. Fixings should suit the load, so check the maker’s guidance for the screws and anchors you use.
Reading the Wall Before You Scan
A little detective work saves time. Look at where the skirting, door frames and window frames sit, because framing usually lines up with them. Look for rows of tiny dimples or slight ridges on the wall surface, which often mark fixings in framing. Light from a lamp held at a low angle across the wall can show them.
Know what the wall is made of. Plasterboard on timber studs, lath and plaster, masonry and metal studs all behave differently under a scanner. A finder that works well on one may give odd readings on another, and a magnetic finder will not help on masonry at all. The maker’s guide lists the surfaces each mode suits.
Think too about what sits behind the wall. Kitchens, bathrooms and exterior walls often hold pipes, ducts and insulation, and cables commonly run vertically from sockets and switches. Treat the area directly above and below a socket or switch with extra caution.
Common Scenarios
Hanging a heavy shelf
Find at least two studs, mark both edges of each and use fixings that the shelf and fixing makers say suit the load. If the studs do not line up with the bracket spacing, use the method the maker advises, such as a rail along the wall.
Mounting a television bracket
Check the bracket maker’s instructions for stud spacing and fixings. Confirm the stud centers with two scans before drilling, and ask for help lifting the screen.
Hanging a mirror or picture frame
Light items may not need a stud, but wall anchors still depend on the wall type. Follow the anchor maker’s guidance.
Working on an older plaster wall
Thick or uneven plaster can confuse sensors. Try scanning in several spots, and consider a small pilot hole in a place that will be hidden.
Mistakes to Avoid
- Scanning with the tool already over a stud when switched on: the reset point is then wrong and the readings reverse.
- Scanning too fast: sensors need time to read. Move slowly and steadily.
- Trusting a single reading: repeat from each side and in a second row.
- Drilling near sockets and switches: cables often run close to these.
- Assuming a stud is directly behind a fixing: framing can be off-center or doubled. Mark and confirm.
Quick Troubleshooting
| Symptom | Likely cause | What to try |
|---|---|---|
| Signals everywhere | Reset over a stud or uneven surface | Lift, switch off and reset on a clear area |
| No signal at all | Low battery, thick wall or wrong mode | Fit fresh batteries and check the mode for your wall |
| Edges do not match on repeat scans | Moving too quickly or tilting the tool | Hold it flat and slide slowly |
| Magnet finds nothing | No fixings where you slide it | Try nearer baseboards or electrical boxes |
| Marks do not line up in a row | Nogging, doubled studs or cabling | Check a wider area and stop if unsure |
Glossary
- Stud: a vertical framing member inside a wall.
- Joist: a horizontal member that supports a floor or ceiling.
- Density change: the difference in material that an electronic finder senses.
- Anchor: a fixing that grips a hollow or soft wall where there is no stud.
- Nogging: short horizontal pieces between studs.
- Pilot hole: a small guide hole drilled before a screw goes in goes in.
Checklist before you commit
- Note the wall types in your home: plasterboard, lath and plaster, masonry or metal studs.
- Check that the finder lists those surfaces in the maker’s guide, and which mode applies to each.
- Compare the scan depth with the thickest wall you plan to scan, including any added boards or layers.
- Look for a clear display or lights that you can read at arm’s length and in poor light.
- Check the battery type and whether a spare is easy to keep with the tool.
Keep the manual with the tool, because the reset step differs between models. Carry a pencil and low-tack tape so you can mark edges lightly without marking the wall, and wipe or lift the marks when the job is done.
If you plan to fix something heavy, such as a wall-mounted cabinet or a screen, treat the finder as only the first step. Read the fixing maker’s load guidance, think about what is behind the wall, and ask a qualified person where the load or the wall structure is a concern.
How Electronic Finders Sense the Wall
Most electronic models measure a change in the wall’s density as you slide across it. After you press the button, the device sets a baseline reading for that spot. When you move over a stud, the denser material changes the reading and the unit signals. Because the baseline is set where you start, starting directly over a stud gives backward results, with the finder treating the stud as normal and the empty cavity as the unusual part.
This explains many false readings. Calibrating on a thick patch, over a joint or beside a corner can throw the measurement off. If readings look random, lift the unit, move a few inches to a plain section of wall and recalibrate. Many models also work better when you keep them flat and move at a steady pace, so sweeping too fast can miss the edge of a stud.
Edge finding versus center finding
Basic models mark only one edge at a time. You scan from the left, mark where it signals, scan from the right, mark the second edge and find the middle yourself. Models with center finding try to display the middle directly. Either way, the two-edge method is a useful check. If both edges sit roughly an inch and a half apart, which matches the face of a common stud, you can trust the result more.
What Is Typically Inside a Wall
Knowing the usual layout makes scanning faster. In many homes, studs are spaced at a regular interval, commonly sixteen inches apart from center to center, though some builds use twenty-four inches or other spacing. Older or custom houses may not follow any pattern. Studs often appear beside windows and doors, with extra framing around openings. Outlets and switch boxes are usually fixed to the side of a stud, so the one next to a box is a reasonable place to begin searching.
- Plumbing walls may have wider or doubled framing.
- Corners usually hold several pieces of framing close together.
- Horizontal blocking can appear partway up a wall, which is helpful for heavy mounts but confusing during a scan.
- Fire blocking, ducts and chases can leave unexpected gaps or extra wood.
Treat the common spacing as a guide, not a guarantee. Confirm each stud rather than assuming the next one is a set distance away.
Features Worth Paying For
Price differences between finders come mainly from sensing depth, display quality and extra modes. Without testing the models ourselves, we can only describe what the features are meant to do, so compare the manufacturer’s stated limits and read user reviews critically.
Depth rating
Standard drywall is a half inch or five eighths thick, so most models handle it. A higher depth rating matters for thicker boards, plaster with lath, or walls with a double layer. Check what depth the maker lists and which wall types it names.
Live wire detection
This is a warning aid, not a safety guarantee. It can flag live alternating current near the surface, but it may miss cable that is not energized, cable deeper in the wall or shielded wiring. Never treat it as proof that a spot is clear. Use it with other caution, and for any doubt turn off power at the breaker or consult a qualified electrician.
Display and sound
A clear indicator that you can see while holding the unit against the wall helps a lot. Some people prefer a beep, others prefer lights. Check that the display is readable in a dim room, where you will often be working near a ceiling or a corner.
Extras that are nice but optional
- Built-in lasers or levels for quick alignment.
- Marking tools or a pencil notch on the housing.
- Metal detection for locating nails and screws.
- A carrying case or lanyard.
Backup Methods That Confirm the Result
Even a good finder benefits from a second opinion. Tapping lightly along the wall can reveal changes in sound, since a hollow knock becomes a duller one over wood. A small magnet dragged along the surface may catch on drywall screws, which line up in a vertical row on a stud. Look for faint dimples or seams, as well as the line where the board edges meet.
When you need certainty before hanging something heavy, drill a very small test hole in a spot that will be hidden by the mount. A thin bit meets resistance and brings out wood dust if you have hit framing, but passes freely into a hollow gap. You can also insert a bent wire or straightened paper clip through the hole to feel for the depth and sides of the cavity. Patch the hole afterward if it is not covered.
Budget and Value Thinking
A simple magnetic finder is low in cost and may suit someone who hangs the occasional shelf. A mid-range electronic unit adds convenience and better readings across wall types. Premium models offer greater depth and extra modes, but many households will not use those functions often. Ask how often you will use it, in which walls, and whether you would pay more for fewer failed attempts. Prices shift, so compare current offers rather than relying on a general range.
Safety When You Start Drilling
Finding a stud is only half the job. Before you drill or drive long screws, think about what else could be behind the surface. Electrical cable, water pipes and gas lines can run through or beside framing. Avoid drilling near outlets, switches, over plumbing fixtures and along straight lines above or below them. Wear safety glasses, use the right bit and keep your hands clear of the drill path. Follow local building codes and the instructions of any mount you use. If you suspect wiring or pipes in the way, stop and call a qualified professional.
Also respect weight limits. A stud supports more than an anchor, but a mount still has a rated capacity, and so do its screws. Check the packaging and use the fasteners it specifies. For items that could injure someone if they fall, such as a heavy television, a large mirror over a bed or a cabinet, consider a professional installation.
Ready to Buy? Start Here
If this guide helped you decide what to look for, these products are a place to start.
As an Amazon Associate we earn from qualifying purchases. Prices and availability are shown on Amazon.
A Pre-Purchase Checklist for Stud Finders
Stud finders look similar on the shelf, yet they suit different walls and different jobs. Before you compare models, write down the details of the walls you plan to scan and what you intend to hang. These points will keep the choice practical.
- Note what your walls are made of: plasterboard, lath and plaster, masonry or something else.
- Decide whether you need to find only studs or also joists, pipes and cables.
- Think about the heaviest item you will hang, and whether the finder is only a first step before a closer check.
- Check how the display works, and whether it uses sound, lights or numbers to show a result.
- Look at how the tool is calibrated, since some need a clear patch of wall to set themselves.
- Check the battery type and whether a spare is easy to find.
- Read the maker description of maximum scan depth and the wall types it supports.
Treat the answers as a brief for yourself. A tool that handles thin plasterboard well may struggle with thick plaster, and a detailed brief stops you buying the wrong one.
Magnetic Finders Compared With Electronic Finders
Most people choose between these two families. Each has strengths, and many careful users own one of each as a way to cross-check results.
| Point | Magnetic finder | Electronic finder |
|---|---|---|
| How it works | Responds to fasteners in the wall | Senses changes in density behind the surface |
| Power | None needed | Battery |
| Strength | Simple and consistent | Can show edges or centres of framing |
| Limit | Finds fasteners, not the frame itself | Needs correct calibration and a steady hand |
| Best use | Quick confirmation of a position | Mapping a wall before marking it |
If a result from one type does not match the other, take that as a signal to slow down and check again before making any hole.
When to Follow the Maker Guidance or Call a Professional
A stud finder gives a hint, not a certainty about what lies behind a wall. Walls may contain cables, pipes or other services, and a tool may not detect all of them. Follow the maker instructions for scanning, and use any live-wire warning only as an extra, never as a replacement for good practice. Before drilling in an area that could hide electrical, gas or water services, consult the plans for the building if you have them, or ask a qualified electrician or plumber. For heavy or high-risk mounting, such as large shelving or equipment that could cause injury if it fell, follow the fixing instructions supplied with the product or ask a professional installer.
Choosing a Stud Finder by the Walls You Actually Have
A stud finder is only as good as its match to your walls, so begin with the building rather than the gadget. Note the wall coverings in the rooms where you hang heavy things: painted drywall is the easy case, while thick plaster, tile, textured finishes, and double layers of board all ask more of a sensor. Note also what you hang. A finder that locates a stud well enough for a picture hook may not give you the confidence you want for a television bracket or a loaded shelf, where finding the centre of the stud, not merely its neighbourhood, decides whether fixings bite into solid timber. Finally, note how often you will use it. An occasional user needs clarity and forgiveness; a frequent renovator benefits from extra sensing modes and a display that explains itself under time pressure.
Hanging pictures and light items
For light work, the job is mostly about avoiding the embarrassment and repair of a hole in the wrong place. You need a finder that behaves predictably on ordinary painted walls, marks an edge cleanly with a pencil, and does not overwhelm you with modes you will never select. Simplicity is a genuine feature here: a tool you understand completely will be used carefully, while a complex tool used on the wrong setting produces confident nonsense. Even for light items, build the habit of scanning in both directions and marking both edges of a stud, because the centre you calculate from two edges is far more trustworthy than a single beep acted on in hope.
Mounting heavy items on drywall
Shelves, brackets, cabinets, and screens raise the stakes. The stud must carry real load, the fixing must land near the centre of the timber, and hidden services become a safety question rather than a curiosity. For this work, value a finder that indicates the centre directly or makes edge-finding precise, that warns about live wiring where that feature is fitted, and that holds its calibration across a wide wall rather than drifting as you move. Your technique matters as much as the tool: slow passes, a level reference line, and confirmation from a second method such as measuring from a corner or checking a neighbouring fixing all protect the result. Choose the finder that supports that careful routine instead of one that promises instant answers.
Older homes, plaster, and difficult walls
Plaster over lath, thick skim coats, foil-backed boards, and walls with uneven density can confuse sensors that assume uniform drywall. If your home is older, prioritise a finder whose maker speaks honestly about performance on plaster and deeper scanning, and expect to lean more on backup methods: gentle tapping, looking for fixing patterns, and measuring typical stud spacing from a known point such as a corner or a doorway. In difficult walls, a magnetic finder can play a useful supporting role by locating the fixings that already hold the board or lath, which reveals the stud line indirectly. The wise purchase for an old house is often the tool that gives you several ways to agree with yourself before you drill, rather than the tool with the longest feature list.
Reading Sensor Technology and Scan Depth in Plain Terms
Electronic finders sense changes in density behind the surface. As the tool slides across board and then across the timber behind it, the material it is looking through becomes denser, and the finder reports that change with lights, tones, or a display. Understanding that one idea explains most real-world behaviour: anything that changes density, including a pipe, a cable bundle, a patch of filler, or a second layer of board, can influence a reading, which is why careful users scan slowly, repeat passes, and treat surprises as information rather than errors. Calibration is the finder settling its sense of the plain wall before it hunts for contrast, so where you place the tool when you switch it on or trigger it matters. Begin on a stretch of wall you believe is empty, hold the tool flat, and keep it flat as you move.
Edge finding, centre finding, and scan depth
An edge finder reports when it arrives at the side of a stud, so you mark one edge, approach from the other side, mark the second edge, and take the middle as your fixing line. A centre finder does more of that reasoning for you and indicates the middle directly, which is convenient and reduces arithmetic mistakes when you are working on a ladder or in poor light. Scan depth describes how far behind the surface the finder can sense, and deeper is not automatically better for everyday work: a very sensitive deep mode may report framing, services, and layers you do not need, while a standard mode gives a cleaner picture on ordinary board. What matters is that the modes match your wall build-up. Thin board over studs needs little depth; thick plaster or doubled board needs more, and the honest specification to compare is the depth the maker states for each mode on materials like yours.
Wire warnings, displays, and handling details
Live-wire warning, where fitted, senses electrical fields from energised cables and should be treated as a helpful alert, never as a guarantee that a wall is safe to drill. It can miss cables that are not live, shielded, or deeper than its sensing range, so it supplements careful planning rather than replacing it. Displays range from a row of lights to a screen showing proximity and centre; choose the clarity you can read at arm length, in your lighting, possibly wearing work gloves. Handling details decide daily satisfaction: a body that slides smoothly without rocking, a marking notch or line you can pencil against accurately, and a grip that keeps the sensing face flat all matter more than novelty features. A finder that tilts as you slide it reads a changing wall and invents studs that are not there.
A Decision Matrix You Can Walk Through
If your walls are standard drywall and your jobs are pictures, mirrors, and the occasional shelf, choose a straightforward electronic finder with clear edge or centre indication, and invest your effort in technique. If your jobs are heavy brackets and cabinets on drywall, choose a finder with a trustworthy centre indication, a deeper mode for doubled board if your home has it, and a wire warning as a secondary alert, then confirm every critical fixing with spacing measurements. If your walls are plaster or otherwise difficult, choose a finder whose guidance covers those materials, add a strong magnetic finder as a cross-check, and accept a slower routine as the price of certainty. If you renovate often across varied buildings, choose a multi-mode tool whose display explains what it senses, because you will meet walls that punish a single-mode habit.
Whatever you choose, decide in advance how you will verify a result before drilling. A practical rule is two agreeing signals: two passes from opposite directions giving the same edges, or a sensor result that matches expected spacing measured from a corner, an outlet fixing, or another known stud. When the two signals disagree, the correct move is to slow down, rescan from a fresh calibration point, and check for pipes or cables that might explain the confusion. A finder is a guide to a decision, and the decision to drill deserves that small ceremony every time, especially where the item is heavy or the wall hides services you cannot see.
A Worked Example With the Numbers Checked Twice
Suppose you mark the left edge of a stud at twelve inches from a corner and the right edge at thirteen and a half inches from the same corner. The stud width implied by your marks is one and a half inches, which matches the familiar face width of common framing timber, so the marks are plausible. The centre is halfway between them: twelve plus thirteen and a half equals twenty-five and a half, and half of that is twelve and three-quarter inches from the corner. Check by measuring from the centre back to each edge: twelve and three-quarter minus twelve is three quarters of an inch, and thirteen and a half minus twelve and three-quarter is also three quarters, so the centre divides the stud evenly. If instead your two edge marks implied a width of three inches, the arithmetic itself would warn you that one mark is wrong, because a single stud face is not that wide; rescan rather than drill. This is the quiet value of marking both edges: the numbers audit your technique before the drill can audit it permanently.
Spacing gives a second audit. If you find one stud centre at twelve and three-quarter inches and the construction follows a regular sixteen-inch spacing, the next centre should appear near twenty-eight and three-quarter inches. When your finder suggests a centre at twenty-two inches instead, treat the mismatch as a question: there may be a pipe, a nogging, or a scanning error, and each possibility deserves a slower pass and a second method before any hole is made. Simple addition, done on the wall in pencil, turns a beeping gadget into a reasoning process.
Mistakes, Accessories, and Upkeep
Choosing and using mistakes that show up again and again
The commonest mistake is calibrating over a stud, which teaches the finder that dense material is normal wall and makes the rest of the scan unreliable. The second is moving too fast, which smears edges and shifts apparent centres. The third is trusting a single pass for a heavy fixing, when a repeat pass costs twenty seconds. The fourth is ignoring the wall covering: tile, thick texture, and metallic finishes all change sensing, and a finder chosen for bare drywall may struggle honestly rather than fail mysteriously. Finally, many buyers expect wire detection to certify safety. It cannot. Plan fixing positions to avoid the vertical and horizontal runs where services are likely, and treat every warning, and every absence of warning, with the same caution.
Accessories and supporting tools worth planning for
Keep a sharp pencil and low-tack tape for marking without damaging paint, a tape measure for spacing checks, and a small level so bracket fixings share a line. A strong magnetic finder is an inexpensive partner that confirms stud lines by finding existing fixings. Spare batteries matter because a fading battery can make readings vague at exactly the wrong moment. For heavy items, the real accessories are the correct fixings themselves, chosen for stud mounting as your bracket maker directs, and a drill bit matched to a pilot hole in timber. None of this is costly; together it turns a finder from a novelty into a small, reliable system for hanging things once, correctly.
Maintenance and storage habits
Wipe the sensing face clean, since dust and grit hold the tool slightly off the wall and tilt it. Store the finder in a drawer or case where it is not crushed under heavier tools, and remove batteries during long storage if the maker advises it, to avoid leakage damage. Test the finder occasionally on a wall where you already know the stud positions, such as beside a fixed cabinet you installed, so you learn its behaviour when the answer is known. Replace batteries at the first sign of inconsistent behaviour rather than coaxing a tired tool through an important job. A finder has no cutting edges to maintain, so its upkeep is mostly about honesty: when readings stop making sense, believe the wall, slow down, and verify by another route.
Checks to Run During the Return Window
Test the finder on a wall where you can verify the truth, for example by measuring from a corner in a room with regular framing or by comparing with fixings you already know. Scan slowly from both directions and confirm the edges repeat within a small tolerance and the implied stud width is sensible. Try it on each wall type in your home, including the thickest or most textured, and judge whether the readings stay interpretable there. Practise the marking routine until you can place a pencil line at the indicated centre without the tool rocking. Check the wire warning behaviour near a known live outlet run while remembering it is an alert, not a clearance. If the finder cries wolf constantly on your walls or cannot repeat its own results, exchange it while that is simple; a tool you distrust will be left in the drawer on the day you need it most.
More questions buyers ask
Why does the finder react in different places on repeat scans? Usually technique: a different calibration point, a tilted tool, or a faster pass. Slow down, recalibrate on plain wall, keep the face flat, and scan the same line again; consistent edges should emerge, and if they do not, suspect a pipe, patch, or layered construction and verify by measuring spacing.
Is the centre indication enough for a heavy bracket? It is a strong guide, but for heavy items confirm with a second signal such as edge marks that give a sensible stud width, or spacing that matches neighbouring studs. The fixing deserves two agreeing pieces of evidence.
Can a finder replace careful planning around services? No. It helps you locate framing and may warn about some live cables, but safe drilling also means choosing positions away from likely service runs and stopping if resistance or material feels wrong.
Building a Reliable Scanning Routine
Professionals who hang heavy things daily share a routine more than a favourite tool, and it is worth copying whole. They begin by reading the room: where are the outlets, switches, and existing fixings, since services and framing both leave clues in those positions, and where does the construction suggest framing should be? They mark a light horizontal reference line at the height of the intended fixings so every mark can be compared along one level. Then they scan slowly in both directions, marking edges in pencil, and they convert edges to centres with the small arithmetic of halving the distance, checking that the implied stud width is plausible. Only then do they measure along the wall to where the neighbouring studs should be and confirm that the pattern repeats, because a wall that agrees with itself in three places can be trusted in a way that one beep never can.
The routine ends with a decision recorded on the wall itself: centre lines drawn clearly, doubtful marks crossed out rather than left to confuse the drilling stage, and fixing positions chosen to avoid the runs where pipes and cables are likely to travel. If a drill is used to confirm with a tiny pilot hole in an inconspicuous spot within the fixing’s footprint, that too is part of the routine’s honesty: evidence over optimism. Adopting this sequence takes an extra two minutes per item and transforms the finder from a gadget you interrogate into an instrument inside a method. When you shop, you are really shopping for a tool that supports this method gracefully, with clear marking, repeatable edges, and behaviour you can learn, and that is why two finders with similar specifications can feel so different in a careful hand: one cooperates with the routine, and the other keeps interrupting it.
What to do when the wall will not agree with itself
Some walls genuinely resist clean answers: a repair patch with different density, a chimney breast, a section of doubled board, or framing at an irregular spacing where a doorway or opening interrupts the pattern. When repeated careful scans disagree, widen the evidence rather than pressing the tool harder. Measure from both corners, look at the room from the other side of the wall if you can, check the floor above or below for clues about joist and stud direction, and consider whether the item could be fixed at a different position where the wall reads clearly. For genuinely heavy items on genuinely doubtful walls, the honest options are fixings and methods designed for the wall construction itself, chosen by their makers’ guidance, or help from a professional who can open, inspect, and make good. A finder that leaves you uncertain has still done useful work: it has told you not to drill in hope.
A note on keeping a simple record of your walls
Every careful scan produces knowledge that is valuable long after the picture is hung, and a few pencil notes preserve it. On a plan of the room, or simply in a notebook kept with the finder, record where studs were confirmed, where a pipe or cable run was suspected, and which walls read strangely. The next project in that room then begins from evidence instead of from memory, and memory, months later, is generous with false confidence. Note the date and the item you mounted as well, because a future removal or a heavier replacement will want to know what the wall already holds and where. This small archive is the difference between a household that rediscovers its walls painfully, one hole at a time, and a household that gradually builds a reliable map of its own structure, project by project, until hanging even a heavy item becomes a calm exercise in reading notes and confirming them with two quick passes of a tool you already trust.
One last habit ties the whole method together: photograph the marked wall before you drill, with the tape measure visible in the frame. If a later project needs a fixing nearby, or a repair ever opens the question of what was done and why, that photograph is evidence rather than recollection, and it costs five seconds on the one day when all the information is literally written on the wall in front of you, in pencil, at its clearest.
FAQ
Why does my finder give odd readings?
Uneven surfaces, moisture, and metal fixings can confuse sensors. Reset the tool on a clear area and scan again.
Do I need an electronic finder?
For occasional light jobs a magnetic model may do. Electronic ones suit frequent work or thick walls.
Can a stud finder detect pipes and wires?
Some models offer extra modes, but these are not guarantees. Switch off power or ask a qualified person before drilling where cables or pipes might run.
How wide is a stud and how far apart are they?
That varies by country, building age and construction method, so do not rely on a fixed figure. Find the edges with the tool and measure.
What if my wall has no studs?
Masonry and some other walls use different fixings. Read the fixing maker’s guidance for the wall type, or ask a qualified person.
Which stud finder is best for plaster walls?
Plaster over lath is dense and uneven, so many standard finders struggle. Look for a model that lists plaster or deep scanning in its specifications, and expect to scan slowly. A magnetic finder that locates nails in the lath can also help, or use a test hole to confirm.
Why does my stud finder beep everywhere?
This often means it was calibrated over a stud or on an uneven surface, or the batteries are low. Lift it off the wall, move to a plain section, press the button again and scan slowly. Textured walls and metal behind the surface can also cause constant signals.
How do I find studs without a stud finder?
Tap along the wall and listen for a duller sound, look for nail or screw dimples, and check beside outlets and switches, which are commonly attached to a stud. A small magnet can catch screw heads. Confirm with a thin test nail or drill bit in a hidden spot.
Can a stud finder see through tile or thick walls?
Usually not well. Tile, concrete, brick and thick plaster can block or confuse density sensing. Check the manufacturer limits for your finder. For masonry walls, different fasteners and tools are used, and a stud finder is not the right approach.
Do magnetic stud finders work as well as electronic ones?
They can be reliable for finding drywall screws or nails, and they need no batteries. They do not sense wood itself, so they miss framing that has few fasteners nearby. Many people use a magnetic finder as a backup check alongside an electronic one.
The Short Version
Choose between magnetic and electronic by wall type and how often you work. Scan from both sides, confirm with a second pass and never rely on a single reading. Follow the maker’s manual and local rules.