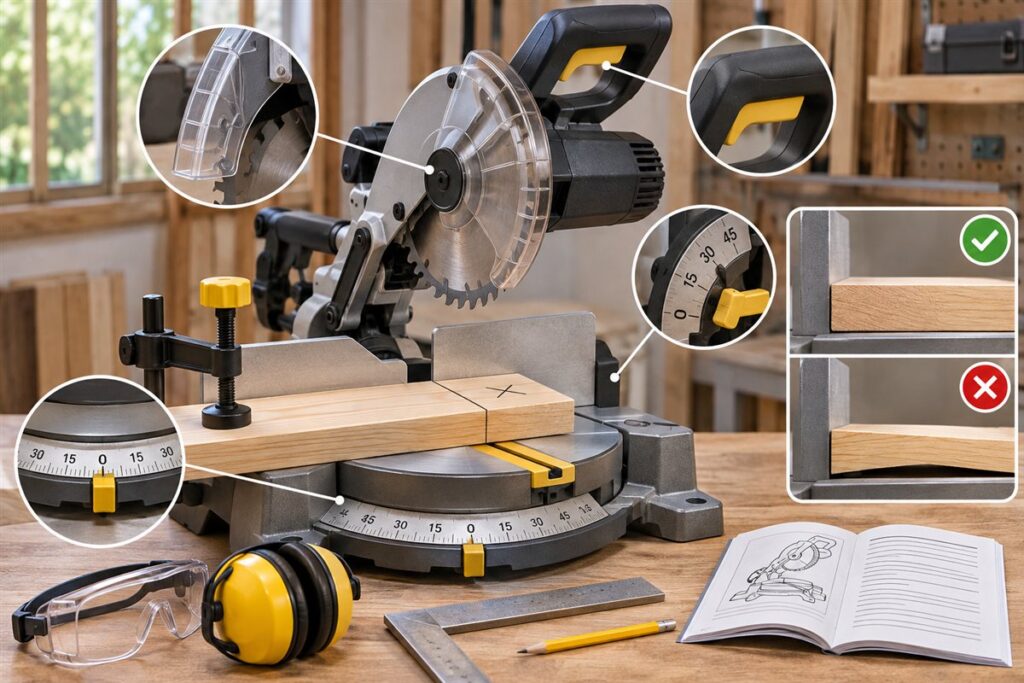
A miter saw makes crosscuts and angled cuts by swinging a spinning blade down through a board held against a fence. Hold the work flat and firmly, let the blade reach full speed before cutting, and lower it slowly. This is general beginner guidance; always read the maker’s manual and follow its safety instructions.
Know the Parts
- Fence: the back wall the board rests against.
- Miter scale: sets the angle left or right of square.
- Bevel adjustment: tilts the blade for angled edges on saws that offer it.
- Blade guard: a cover that moves as you lower the blade. Never block or remove it.
- Trigger and brake: the switch to run the blade, and a brake on many saws that stops it after release.
Prepare Before Cutting
- Put on eye protection and hearing protection, and tie back loose clothing and hair.
- Make sure the saw sits on a stable bench and the cord will not drag across the cut.
- Check the blade is the right size and type for the saw and material, following the maker’s manual, and that it is fitted properly.
- Set the angle and lock it. Check with a square if accuracy matters.
- Mark the board with a clear line and a small X on the waste side.
Making a Cut
- Hold the board flat on the table and tight against the fence. Use a clamp when the saw has one, especially on short or small pieces.
- Line up the blade edge on the waste side of your mark. Blades remove a strip of wood, known as the kerf.
- Keep your hands well clear of the blade path. The saw’s manual or the table markings usually show a no-hands zone.
- Switch on and wait for the blade to reach full speed.
- Lower the blade steadily through the board without forcing it.
- Release the trigger and keep the blade down until it stops fully, then lift it.
Habits for Better Results
| Goal | Habit |
|---|---|
| Clean edges | Use a sharp blade and slow, even downward motion |
| Square corners | Check the 90 degree setting with a square |
| Matching miters | Cut a spare piece and test the fit before the real board |
| Long boards | Support both ends at table height |
Avoid cutting very small pieces by hand, and do not cut warped boards that rock on the table. Unplug the saw before changing the blade or making adjustments.
FAQ
Why is my cut slightly off square?
The scale or fence may have shifted, or the board lifted away from the fence. Re-check with a square.
Can I cut metal or masonry on a miter saw?
Only if the maker’s manual says the saw and a matching blade are suited. Otherwise, use a tool made for that job.
The Short Version
Guard in place, board tight to the fence, hands clear, blade at full speed and lowered slowly. Read the manual, wear eye and ear protection and unplug before adjusting.