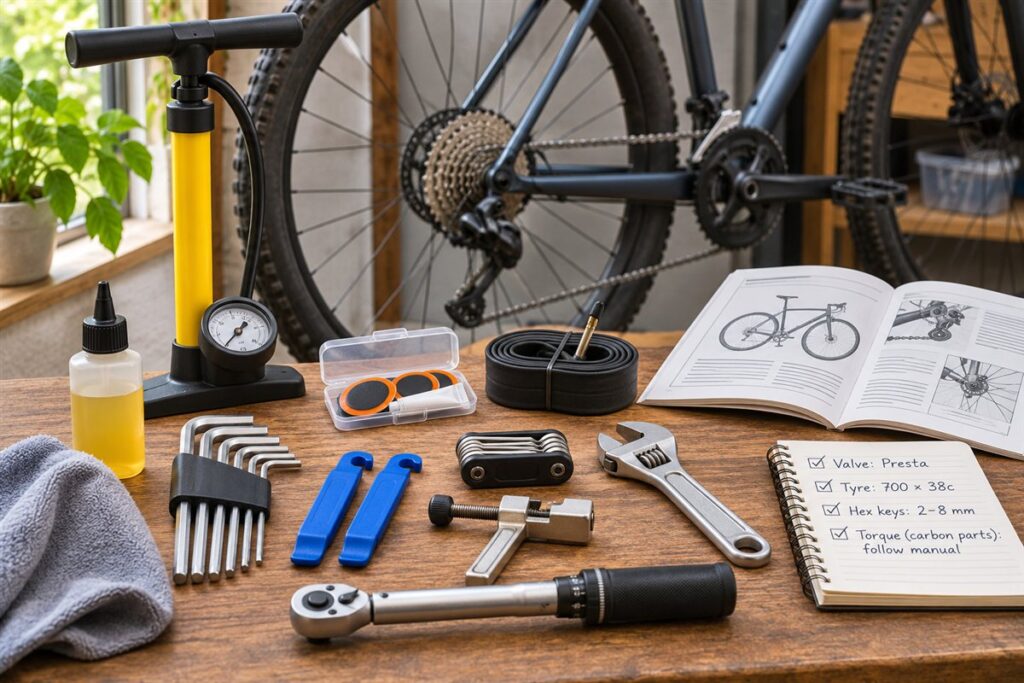
A small set of hex keys, a pump, tyre levers and a chain tool handles most basic bicycle upkeep at home. Learn what each tool does, work through the maker’s manual for your bike, and take anything involving brakes, frames or carbon parts you are unsure about to a qualified bike mechanic. This guide covers the kit, the everyday jobs, and the habits that keep a bike dependable.
The Core Home Kit
- A hex key set, since most bikes use hex bolts in 2 to 8 mm sizes.
- A floor pump with a gauge that matches your valve type.
- Tyre levers and a patch kit or spare inner tube.
- A chain lubricant made for bicycles and a clean rag.
- A multi-tool for rides.
- An adjustable wrench for axle nuts on some bikes.
Add a torque wrench if your bike has carbon or lightweight parts, and follow the component maker’s torque figures. Check the maker’s guide rather than guessing.
Everyday Jobs Step by Step
Fixing a Flat Tyre
- Release the brake if needed and remove the wheel.
- Let out remaining air and use tyre levers to lift one side of the tyre off the rim.
- Remove the tube and check the tyre inside for sharp objects.
- Fit the new or patched tube, with a little air to hold its shape.
- Seat the tyre, inflate to the range printed on the sidewall, and refit the wheel.
Cleaning and Lubing the Chain
Wipe the chain, apply lubricant sparingly, spin the pedals, then wipe off the excess. Keep lubricant away from rims and brake pads. Dispose of used rags and cleaners following local rules.
Know Your Limits
Brakes, steering parts and wheels affect control. If you are not confident with a repair, ask a qualified mechanic. No home guide can promise a repair is right, so check your work, ride gently at first, and follow the manual.
Which Tool for Which Job
| Job | Tool |
|---|---|
| Seat height | Hex key |
| Flat tyre | Levers, pump, tube |
| Chain care | Lubricant, rag |
| Wheel removal | Hex key or wrench, per bike |
Worked Walkthrough: A Pre-Ride Check
A two-minute check before a ride catches most small problems. Many riders remember it as a simple order from front to back.
- Look at the tyres. Squeeze each one and check the pressure against the range printed on the sidewall, using the pump gauge. Look for cuts, bulges or embedded glass.
- Check the wheels are seated in the frame. Quick-release levers or thru-axles should be closed as the maker describes, and the wheel should spin without rubbing.
- Squeeze each brake lever. It should engage firmly well before it touches the handlebar, and the pads should meet the rim or disc as the manual shows. If anything feels spongy or odd, do not ride until it is checked.
- Hold the front brake and rock the bike forward and back. A knock from the headset area means a part may be loose.
- Check the saddle and handlebar. Try to twist each by hand. They should not move.
- Look at the chain for dryness or rust, and turn the pedals to see that the gears change smoothly.
- Carry the spare tube, levers and multi-tool, and ride gently for the first minutes.
Common Scenarios
- A flat on the road: a spare tube is usually quicker than patching at the roadside. Patch the old tube at home when you have good light.
- A squeaky chain after rain: wipe off grit, then apply a little lubricant made for bicycles. Excess lubricant attracts dirt.
- A saddle that has dropped: tighten the seat clamp with the right hex key, following the maker’s marked limits for the seatpost.
- A rattle from the bottle cage or mudguard: check the small bolts with the matching hex key. Add a drop of thread-locking product only if the part maker allows it.
- A bent wheel or a clicking crank: these are good reasons to visit a qualified mechanic rather than try to fix it with household tools.
Mistakes to Avoid
- Overtightening bolts. Aluminium and carbon parts can be damaged by excess force, and some have torque figures marked on them.
- Getting lubricant on rims or brake pads. It reduces braking grip. Keep it on the chain and wipe off any splash.
- Pumping beyond the sidewall range. Tyres and rims have limits printed on them for a reason.
- Using the wrong tool on small bolts. A hex key that is slightly too small rounds the socket, which makes the bolt hard to remove later.
- Skipping the manual. Different brake and axle designs need different steps, so read what applies to your bike.
Quick Troubleshooting
| Symptom | Likely cause | What to try |
|---|---|---|
| Tyre goes flat again quickly | Object still in the tyre, or a pinched tube | Run a gloved finger inside the tyre and check the tube is not caught under the bead |
| Gears skip or jump | Dry or dirty chain, or cable out of adjustment | Clean and lubricate the chain, then ask a mechanic if it persists |
| Brakes squeal | Dirt or contamination on pads or rim | Clean as the manual describes and check pad wear |
| Wheel wobbles | Loose axle or bent rim | Reseat the wheel; if it still wobbles, see a mechanic |
Keeping Records and Spares
Write down the sizes and types your bike uses, such as the valve style, tyre size and the hex key sizes, so you can buy the right spares without guessing. Keep a spare tube, a patch kit and a small multi-tool in a saddle bag. After a few repairs you will know which tools you reach for most, and you can add to the kit as your confidence grows. Check bolts and quick-release levers regularly, as the maker describes in the manual. Wipe the bike down after wet rides and store it dry so metal parts do not corrode.
Glossary
- Presta and Schrader
- Two common valve types; a pump head must suit the one on your tyre.
- Bead
- The edge of the tyre that sits inside the rim.
- Quick release
- A lever that clamps a wheel or seatpost without tools.
- Thru-axle
- A threaded axle that passes through the fork or frame to hold a wheel.
- Torque
- The tightening force on a bolt, often marked by the part maker.
- Headset
- The bearings that let the fork and handlebar turn in the frame.
FAQ
Do I need a workstand?
It is not essential, but it makes adjustments easier. You can also turn the bike upside down on a soft surface for quick jobs, following any advice in the manual.
How often should I clean the chain?
It depends on conditions. A dusty or wet ride calls for more frequent care. Check the chain maker’s guidance.
What tyre pressure should I use?
Use the range printed on the tyre sidewall and check the rim maker’s limits too. Within that range, rider weight and conditions affect what feels best, so adjust gradually.
Can I fix hydraulic brakes myself?
Pad changes may be within reach if the maker describes them, but bleeding or opening the hydraulic system is better left to a qualified mechanic.
How do I know when a part is worn out?
Look for cracks, deep rust, chain stretch, thin brake pads and bald tyre patches. If you cannot tell, a mechanic can measure wear quickly.
The Short Version
Hex keys, a pump, levers and lubricant cover most basic work. Use the maker’s manual, do a short check before each ride, and have a qualified mechanic look at brakes, frames and anything you doubt.