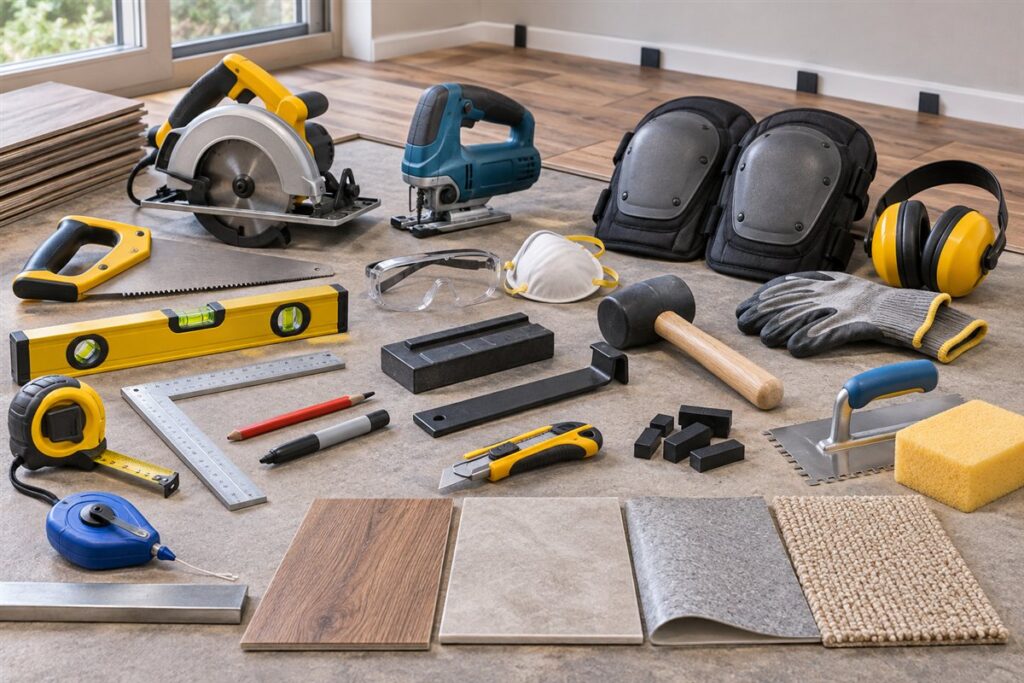
Most flooring projects need measuring tools, a way to cut cleanly, spacers, a mallet and knee protection. The exact list depends on the material you choose, so read the flooring maker’s installation guide before buying anything. This checklist covers planning, tools, a worked sequence for a click-together floor, and the points where a professional is the better call.
Measuring and Marking
- A long tape measure and a framing square.
- A straight edge or chalk line for guide lines.
- A pencil and a moisture-resistant marker.
- A level or straight board to check the subfloor.
A flat, clean, dry subfloor matters for most floor types. Check the flooring maker’s requirements for flatness and moisture, and consult a qualified professional if you find damp or damage.
Cutting and Fitting Tools
- A hand saw, jigsaw or circular saw for planks, following the saw maker’s manual.
- A utility knife with fresh blades for vinyl and underlay.
- A tapping block and pull bar to close gaps without damaging edges.
- Spacers to leave the expansion gap the maker specifies.
- A rubber mallet for gentle persuasion.
Wear eye protection and a dust mask when cutting, and keep your hands clear of blades. A guard on a saw should never be removed. Tile and stone need different cutters and tools, so match tools to the material.
Comfort and Protection
Knee pads make a big difference on long jobs. Work gloves protect against splinters, and ear protection is wise around saws. Ventilate the room when using adhesives, and follow the label directions. Used adhesive containers and offcuts should be disposed of following local rules.
Floor Types and Their Tools
| Floor type | Key tools |
|---|---|
| Click-together planks | Saw, tapping block, spacers |
| Tile | Tile cutter, trowel, spacers, sponge |
| Sheet vinyl | Knife, straight edge, roller |
| Carpet | Knife, stretcher, gripper rod tools |
Plan the Job
Measure the room, add an allowance for waste as the maker advises, and work out the layout from the centre or the longest wall. Remove old flooring carefully, checking for hazardous material in older homes; if you suspect any, stop and ask a qualified professional. Structural issues in joists or subfloors should be assessed by a professional.
Walk through the layout before you buy. Note doorways, cupboards, stair edges and any fixed items the floor must run around. Check how the new floor will meet the surfaces next to it, because height differences may call for transition strips. Finally, move furniture out of the room and plan where the stored boxes will sit while they settle.
Worked Walkthrough: Laying a Click-Together Floor
This outline suits a typical floating plank floor. Your flooring maker’s guide is the authority, so adapt it to match.
- Let the boxes sit flat in the room for the period the maker recommends so the planks adjust to the conditions.
- Clear the room, remove old trim as needed, and check the subfloor with a straight edge. Fill dips or sand high spots only as the maker allows. Vacuum thoroughly.
- Lay the underlay if the system calls for it, butting the edges together without overlapping unless the maker says otherwise.
- Measure the room width. If the last row would be a very thin sliver, adjust the first row width so both sides finish more evenly.
- Place spacers against the wall to leave the expansion gap, then lay the first row with the grooved edge toward the wall or as the guide shows.
- Click each following row into place using the tapping block, staggering end joints as the maker specifies so they do not line up.
- Cut the final row to fit, using the pull bar to draw it into position, then remove the spacers and fit trim over the gap.
Common Scenarios
- A door frame in the way: undercut the bottom of the frame with a flush-cut saw so the plank slides underneath and the edge stays hidden.
- Pipes through the floor: measure carefully, drill a hole slightly larger than the pipe to allow movement, and cover the gap with a pipe cover.
- A slightly uneven subfloor: check what the flooring maker says about acceptable variation. Leveling products exist, but their use depends on the subfloor, so follow the product maker’s directions.
- Tiling a small bathroom: plan the layout from the centre so that cut tiles at both walls are similar, and use spacers throughout.
- Replacing flooring in an older home: if the old material may contain hazardous substances, do not sand, scrape or break it up yourself. Ask a qualified professional.
Mistakes to Avoid
- Skipping the expansion gap. Floors move with temperature and humidity, and tight edges can lead to buckling.
- Ignoring subfloor moisture. Damp can ruin many materials, so deal with the source first.
- Lining up end joints. Staggered joints make a stronger and better-looking floor.
- Using the wrong blade or cutter. A blade made for the wrong material can chip edges and increase the chance of injury.
- Buying the exact floor area. Cuts and mistakes create waste, so follow the maker’s allowance.
Quick Troubleshooting
| Symptom | Likely cause | What to try |
|---|---|---|
| Planks will not click together | Debris in the joint or wrong angle | Clean the edges and follow the maker’s angle for locking |
| Gaps between planks | Joint not fully seated | Use the tapping block and pull bar along the row |
| Floor squeaks | Movement on an uneven subfloor | Check flatness and underlay as the maker advises |
| Chipped edges on cuts | Dull blade or wrong cutting direction | Fit a fresh blade and cut with the finished face as the saw maker advises |
Care and Finishing Touches
Once the main area is laid, trim details make the difference. You may need a pull bar for the last row, threshold strips where the floor meets another surface, and skirting or trim to hide the expansion gap. A hand-held detail saw or a multi-tool with a flush-cut blade can trim door frames so the planks slide neatly underneath. Check the flooring maker guide for allowed methods, and clean up dust and offcuts as you go so they do not scratch the surface. Afterwards, follow the maker’s cleaning advice, add felt pads under furniture, and keep a few spare planks stored flat in case of damage later.
Glossary
- Subfloor
- The structural surface beneath the finished floor.
- Underlay
- A layer under the floor that adds cushioning or moisture protection, depending on type.
- Expansion gap
- A small space left at the walls so the floor can move.
- Floating floor
- A floor held by its own joints and weight instead of being fixed to the subfloor.
- Threshold strip
- A trim piece that covers the join between two floor surfaces.
- Acclimatisation
- Letting material adjust to room conditions before installation.
FAQ
Can a beginner lay a floor?
Click-together systems are generally approachable. Large or complex rooms may be easier with help. Tiling and sheet materials take more practice, so consider a small room first.
How long should materials sit in the room first?
Many makers recommend an acclimatisation period. Check the installation guide for yours, because the time and conditions differ between materials.
Do I need to remove the old floor?
That depends on the old material and the new product. Some systems can go over a flat existing floor, while others need a bare subfloor. Read the maker’s guide and ask a professional if you are unsure.
How much extra material should I buy?
Follow the maker’s waste allowance, which can vary with layout and room shape. Keep a few spare pieces from the same batch for future repairs.
Which saw is best for planks?
That depends on the plank type and the cuts. Hand saws, jigsaws and circular saws can all work, but follow the saw maker’s manual and the flooring guide.
The Short Version
Measure carefully, prepare the subfloor, and use the right cutter and fitting tools for your material. Leave the expansion gap and stagger the joints. Follow the maker’s guide and call a professional for structural or hazardous issues.