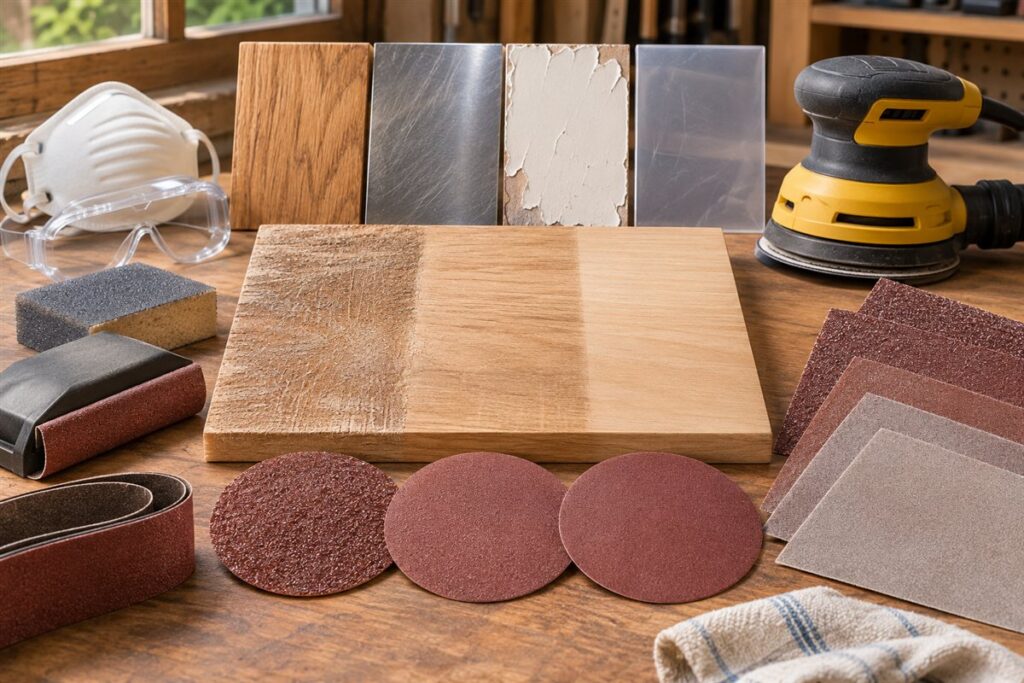
Choose sandpaper by grit number and by the job: low numbers remove material quickly, high numbers smooth the surface. Most projects use two or three grits in order, moving from coarse to fine.
What the Grit Number Tells You
Grit is the size of the abrasive particles. A low number means large, aggressive particles. A high number means small ones that leave a finer scratch pattern. Grit labels differ slightly between systems, so check the maker’s guide if a package shows an unfamiliar scale.
- Coarse grits shape wood and remove old finish or rough spots.
- Medium grits level the surface and remove the scratches left by coarse paper.
- Fine grits prepare a surface for a finish.
- Very fine grits smooth between coats of a finish.
Abrasive Types in Plain Terms
The mineral on the paper changes how it behaves. Aluminum oxide is a common general choice for wood and metal. Silicon carbide is often used for sanding between finish coats and for some hard materials. Garnet is a natural abrasive that many people use by hand on bare wood. Ceramic grains are used on tough, demanding jobs.
The backing matters too. Paper backing is stiff and suits flat work. Cloth backing is more flexible and tears less easily. Foam-backed pads follow curves. Sheets for sanders should match the sander’s size and attachment style.
Working Through the Grits
- Look at the surface and decide the coarsest grit you really need.
- Sand until the surface looks even, with no deep marks left.
- Move to the next finer grit and sand until the previous scratches are gone.
- Skip no more than one step in the sequence, because large jumps leave scratches that are hard to remove.
- Wipe away dust before each change of grit.
Match the Paper to the Job
| Job | General grit range | Note |
|---|---|---|
| Removing old finish | Coarse | Check for hazardous coatings in older homes first |
| Smoothing bare wood | Medium then fine | Sand with the grain |
| Between finish coats | Very fine | Use a light touch |
| Metal cleanup | Medium to fine | Use paper made for metal |
Sanding makes fine dust, so wear a dust mask and eye protection and work with ventilation. Older coatings may contain hazardous materials; ask a qualified professional and follow local rules before sanding them.
Sheets, Discs, Sponges and Belts
Abrasive comes in several formats, and the right format can matter as much as the grit. Plain sheets are the most flexible choice, as you can cut, fold and wrap them around a block or your hand. They suit hand sanding on flat surfaces, edges and profiles. Discs fit random orbital and other power sanders, and they rely on a hook-and-loop or adhesive backing, so check that the size and hole pattern match your tool. Belts are used on belt sanders and are made in specific lengths and widths, so check your machine’s manual before buying. Strips and detail shapes fit detail sanders and tight corners.
Sanding sponges and foam-backed blocks bend around curves and moldings, and they are useful for reaching into contours without flattening edges. They often come in a graded system labelled by coarse, medium and fine rather than by number, so check the pack for the equivalent grit. Sanding screens and mesh sheets are designed to resist clogging and are often used with drywall, as dust passes through the openings. Abrasive pads, which look like scouring pads, are used for light surface preparation and cleaning between coats.
- Flat surfaces: a sanding block with sheets keeps the surface even.
- Curves and moldings: a foam block or sponge conforms to the shape.
- Large areas: a power sander with discs saves time.
Choose the format first, then the grit and abrasive type that suit your material.
Wood Types, Grain and Raising the Grain
Different woods respond differently to sanding. Softwoods such as pine are easy to cut, but they can clog paper with resin and scratch deeply under coarse grits. Hardwoods such as oak and maple are denser, take longer to sand and often finish with a finer final grit. Open-grained woods can hold dust in their pores, so wipe or vacuum dust off thoroughly. Plywood and veneer have a very thin face layer, and aggressive sanding can go through to the layer below, so use finer grits and light pressure.
Always sand with the grain on the final passes. Cross-grain scratches show clearly under stain or clear finish, even if they look minor on bare wood. If you have to level across the grain with a coarse grit, follow with finer grits along the grain until the cross marks disappear. Check your work in raking light, which highlights scratches that a flat view hides.
Water-based finishes and stains can raise the grain, which means the wood fibers swell and stand up, leaving a rough feel. To deal with this, lightly dampen the surface with water before the final sanding, let it dry and then sand lightly with a fine grit. This knocks down the raised fibers so they do not appear after finishing. The same technique can reduce roughness after the first coat of a water-based finish.
- Do not over-sand: too fine a grit can burnish the surface and prevent stain from absorbing evenly.
- Check the finish label for the maker’s suggested final grit.
Sanding Metal, Paint and Plastic
Abrasive work on materials other than wood calls for different choices. For metal, use paper or cloth made for metal, often with silicon carbide or aluminum oxide abrasive, and consider wet-or-dry types that you can use with water or oil to reduce clogging and heat. Start with a grit that removes rust, burrs or scale and work to finer grits for a smooth finish. Wear gloves, as metal edges and dust can cut. Keep sparks and flammable materials apart, particularly with power tools.
For painted surfaces, the aim is usually to scuff the gloss so new paint will grip, remove loose or flaking material and smooth patched areas. A medium to fine grit often suffices for scuffing. Wipe away the dust with a damp cloth. If the existing paint is old, check for hazardous coatings before sanding, as dust from some older coatings can be harmful. Follow local guidance for testing and containment, or consult a qualified professional.
For plastics, use fine grits and light pressure, since heat from friction can melt or smear plastic. Wet sanding helps with cooling. Test a hidden spot first. Fiberglass and composites make irritating dust, so wear a respirator, gloves and long sleeves. Automotive paint preparation uses many fine grits and special techniques that go beyond a general guide, so follow the paint maker’s instructions.
- Use wet-or-dry paper only for wet use if the pack says it is made for it.
- Rinse and wipe surfaces between grits to avoid carrying coarse particles forward.
Dust Control and Personal Safety
Sanding creates fine dust that irritates the eyes and lungs and, in some materials, can be hazardous. Wear a dust mask or respirator suited to fine particles, and make sure it fits snugly. Safety glasses protect the eyes, and hearing protection is useful with power sanders. Work in a ventilated space, and consider a fan that blows air outward through a window rather than around the room.
Dust collection makes a real difference. Power sanders with a dust port connected to a suitable vacuum capture much of the fine dust at the source. Use sanding sheets with holes that match the tool’s dust ports. For hand sanding, a damp cloth and a vacuum with a brush attachment help keep the area tidy. Avoid dry sweeping, which throws dust back into the air.
Some woods, such as certain exotic species, and treated lumber can cause stronger reactions in some people. Check the material’s information and take extra care. Sanding old paint or finishes can release hazardous substances, so get guidance before you start. Keep dust away from pilot flames, heaters and sparks, since fine dust can be combustible in high concentrations. Clean up regularly, and dispose of dust as local rules direct.
- Change your mask or filters as the maker advises.
- Wash hands and face after sanding before eating or drinking.
- Keep children and pets out of the work area.
Storage and Getting More From Each Sheet
Abrasive paper lasts longer when it is kept flat, dry and clean. Store sheets in a drawer or folder in a stable environment, since damp can weaken the bond and make paper curl, and heat can degrade glue. Sort by grit, and label the back of loose sheets with the grit number, because the printing often wears off. A simple folder with dividers, or an envelope for each grit, saves time and prevents mixups, which is especially useful when sanding between coats.
You can extend paper life by cleaning it. A crepe rubber block or abrasive cleaning stick removes clogged dust from the surface of paper and discs, restoring some cutting action. Tapping a sheet on a bench or brushing it also helps. Folding sheets over a block gives a fresh edge, and tearing a sheet into sections lets you use all of it. Avoid folding sheets in ways that crack the backing.
Use the right amount of pressure. Pressing too hard wears out the abrasive and can leave deeper scratches. Letting the paper cut at its own pace is more efficient. If the paper stops cutting, replace it rather than pushing harder. Using worn paper takes more time overall and risks heat damage to the work.
Keep used paper out of the trash if it is loaded with hazardous dust, and follow local disposal guidance. Buying a few fresh sheets of each grit before starting a project avoids stopping midway with nothing suitable.
FAQ
Does a higher grit always give a better result?
No. A very fine grit used too soon will not remove the marks you need to remove, and it will clog quickly. Use the grit that suits the stage of work.
When should I replace the paper?
Replace it when it stops cutting, looks glazed or clogs with dust that will not clear. Pushing harder on worn paper only makes heat and poor results.
What grit should I use before staining wood?
Many people finish with a fine grit in the medium-to-fine range before staining, but the best choice depends on the wood and the stain label. Too fine a grit can limit stain absorption. Test on a scrap piece.
Is wet sanding better than dry sanding?
Wet sanding reduces dust and heat and can give a smoother surface with wet-or-dry paper. It suits some finishes, metal and plastics. Not every material tolerates water, so check first.
Can I reuse sandpaper?
You can reuse it while it still cuts well. Clean clogged paper with a rubber block or brush, and switch to a fresh sheet when it glazes or tears. Reusing worn paper wastes time and may damage the work.
Why does my sandpaper clog so quickly?
Soft resinous woods, paint, filler and gum-like finishes clog paper. Use open-coat paper made to resist clogging, clean it often and avoid pressing too hard. Make sure the surface is fully dry.
How do I sand curved or detailed surfaces?
Use a foam block, sanding sponge or folded paper that follows the curve. Keep pressure light to avoid flattening edges. Go through the grits in order, as you would on a flat surface.
Do I need to sand between coats of finish?
Many finishes benefit from a light scuff sanding with a fine grit between coats to remove dust nibs and help the next coat bond. Follow the finish label, and wipe off dust before applying the next coat.
What does open coat mean?
Open coat paper has abrasive grains spaced apart, leaving gaps where dust can escape. It clogs less than closed coat paper, so it is often used on resinous wood and paint. Check the pack for the description.
The Short Version
Choose the coarsest grit the job needs, then work up through finer grits without skipping too far. Match the abrasive and backing to the material and the sander, and protect your lungs and eyes.