Adhesive hooks work best on clean, dry, smooth surfaces and when you give the bond time to settle before hanging anything. Wipe the spot, press the hook firmly for the time the maker states, and keep to the weight limit on the packaging. Rushing is the usual cause of falls. This guide adds surface checks, a worked example, scenarios, mistakes to avoid and a troubleshooting table.
Check the Surface First
Not every surface suits an adhesive hook. Smooth tile, glass, sealed wood and metal often work well. Rough, dusty, crumbly or textured surfaces tend to give a poor bond. Wallpaper and some wall coatings can peel away when the hook is removed, so test a hidden area first or choose another method.
- Good candidates: smooth, flat, clean and dry
- Poor candidates: textured plaster, flaking coatings, damp or steamy spots
- Think about heat and humidity near showers, ovens and sunny windows
Read the maker’s instructions for temperature limits and approved surfaces before you buy or fit anything.
In this guide
Fitting Routine
- Choose the spot and mark it lightly with a pencil, using a small level if the hook has to be straight.
- Clean the area with a lint-free cloth and rubbing alcohol if the label allows it, then let it dry fully.
- Check that your hands are clean and dry. Skin oils weaken the adhesive.
- Peel the backing from the strip without touching the sticky side.
- Press the hook to the surface and hold firm pressure for the time on the packaging, often about half a minute.
- Wait before loading. Many makers suggest an hour or more, so check the instructions.
- Hang a light item first, then add more only up to the stated limit.
Weight and Placement Guide
| Factor | Why it matters | What to check |
|---|---|---|
| Weight | Overloading is the top cause of failure | Limit printed on the pack |
| Items that swing | Movement adds pull on the strip | Choose lighter loads for doors |
| Hook count | Heavier items may need a larger strip size | Follow the maker’s chart |
| Location | Heat and damp weaken some adhesives | The stated conditions |
Do not use adhesive hooks for anything whose fall could cause harm, such as heavy mirrors above beds or items over stairs. Use proper fixings instead, and ask a qualified professional if the wall type is unclear.
Plan the layout before you press anything down. Hold the hook in place, step back and check the height from where you will stand, then decide how many you need. Spacing hooks a few inches apart helps coats and bags hang without touching one another and pulling on the strips.
How the Load Really Acts on a Strip
Adhesive strips are strongest when the pull runs along the wall, parallel to the surface, because the adhesive is then loaded in shear. A hook that holds an item hanging well away from the wall adds a leverage effect, which tries to peel the top edge of the strip. This is why the maker’s weight limit applies to items hung close to the wall, and why a bulky bag on a hook can fail even when it weighs less than the limit. Choose hooks whose hanging point sits close to the wall, and avoid items that swing or are pulled out sideways each time they are used.
A Worked Example With Invented Numbers
Figures below are invented to show how to plan; always use the limit on your own pack. Suppose a pack lists a limit of 2 units per hook, and you want to hang a tote that weighs an invented 1.5 units plus its contents.
- Weigh the tote with its usual contents on kitchen scales, in the same units as the pack.
- If the total is, say, 1.8 units, it is under the limit but close. Because a bag swings and is pulled each day, choose a pack with a higher listed limit or use two hooks.
- Clean and dry the spot, press for the stated time and wait for the stated waiting period before loading.
- Load the hook with a lighter item first, and look at it after a few hours and again the next day.
- If the strip edge begins to lift, take the item off and replace the strip following the maker’s removal steps.
Common Scenarios
A hook on a bathroom tile
Smooth tile suits many strips, but steam and splashes matter. Choose a hook the maker approves for damp areas, and keep it away from direct shower spray.
A hook on the back of a door
Doors move, so loads swing and slam. Use light items such as a dressing gown or a lightweight bag, and press the strip thoroughly.
A hook on a coated wall in a rental
Some wall coatings come away with the strip. Try a hidden spot first, and remove the strip slowly as directed.
A hook near a kitchen cooker
Heat and grease weaken adhesive. Avoid placing hooks close to the cooker or on greasy tiles that cannot be fully cleaned.
Mistakes to Avoid
- Skipping the cleaning step. Dust and oil sit between the strip and the surface, so the bond never forms properly.
- Loading too soon. The adhesive needs time to flow into the surface, and an early load can break the bond.
- Pulling the strip outward to remove it. This can tear the wall coating or paper from the wall; stretch it along the wall as the maker instructs.
- Reusing a used strip. It has lost tack and collected dust.
- Treating the limit as a target. Staying well below it leaves room for movement and age.
Quick Troubleshooting
| Symptom | Likely cause | What to try |
|---|---|---|
| Hook drops after a day | Surface dirty, damp or textured | Clean again, or choose screws or anchors |
| Strip edge lifts | Peeling force from an item hung away from the wall | Lighten the load or use two hooks |
| Coating comes away | Weak surface layer | Use another method for that wall |
| Hook slides down | Pressed too briefly or loaded too soon | Replace the strip and allow full waiting time |
Care and Upkeep Over Time
Check hooks now and then, especially after humid spells or temperature swings. If the strip edge lifts, take the load off and replace the strip. Wipe the hook face with a damp cloth, and avoid cleaners the maker warns about. Keep spare strips in a cool dry drawer, sealed in their pack.
If a hook has to come down for good, remove it slowly as the pack describes and wipe any residue with a cloth and a gentle cleaner suited to the surface. Check the spot in daylight afterward. If the surface looks marked, ask the maker for advice before using stronger products, since some can harm coatings.
Types of Adhesive Hooks and What Each Is Suited For
Adhesive hooks are not all alike, and choosing a type that fits your use matters more than most people expect. The main differences lie in the adhesive, the hook shape and the intended surface.
Strip-based hooks attach with a removable strip, often with a pull tab that lets you detach the hook cleanly. They suit smooth, painted or sealed surfaces and light to moderate loads, as set out on the pack. Foam-backed or tape-backed hooks stick with a double-sided pad that is meant to stay in place longer. They can bond strongly, but removal may leave residue or mark the surface. Peel-and-stick hooks have a simple adhesive layer for light items. Suction hooks hold by vacuum on glass, tile and other very smooth surfaces, and can lose grip over time. Hooks for outdoor or bathroom use may be designed to resist moisture, though their limits are described by the maker, so check the packaging.
Hook shape matters too. A hook that holds items close to the wall puts less leverage on the adhesive than one that projects out. Wide bases spread load, and hooks with a pivot or swing can add movement forces.
- Light items such as keys, small decorations and lightweight towels suit most light-duty hooks.
- Coats, bags and items that are pulled on every day need hooks rated for more, or a screw-in option.
- Items that swing, such as hanging bags on doors, put changing forces on the adhesive.
Read the product listing for the surfaces it is made for, the stated weight and the removal method. Do not assume that a hook that works on tile will work on textured paint. When a listing is unclear about your surface, test a single hook in a hidden spot or choose a different method.
Preparing Different Surfaces Before You Stick
The routine in the post covers the basic clean-and-dry step. Surface differences go deeper, and a few specifics can save you from failed hooks and damaged walls.
Painted walls: the hook holds only as well as the paint holds the wall. Fresh paint needs time to cure before it will take an adhesive, so check the paint maker’s guidance. Cheap or flaking paint can peel when the hook comes off. Matte and textured finishes give less contact area than satin or gloss ones.
Tile and glass: these are good candidates, but soap film, mineral deposits and polish residue reduce grip. Clean with a product the hook maker allows and dry fully. Avoid hanging near hot water pipes or in direct steam if the maker advises against it.
Wood and metal: sealed or varnished surfaces suit adhesives better than raw wood, which can be porous. Metal should be clean and free of grease and rust.
Wallpaper and fabric-textured walls: adhesives may tear the surface on removal, so many makers advise against use. Test or choose another way.
Plastic and laminate: some plastics have a low surface energy that adhesives struggle to grip, so check the packaging for compatibility.
- Clean with the solution the maker names, and let it dry.
- Do not touch the area after cleaning, since oils can return.
- Work in the temperature range the packaging states, because cold surfaces reduce stickiness.
- If the surface is rough, uneven or dusty, choose another fixing.
When in doubt, go for a hidden test before covering a wall with hooks.
Load Limits and How Real Use Differs From the Label
The weight written on a pack is a starting point, and real life changes the picture. Understanding how loads actually act on a hook helps you stay inside safe limits.
Stated limits usually assume ideal conditions: a clean, suitable surface, correct installation, full cure time and a static, evenly hanging load. Anything that departs from that, such as a pull at an angle, a swinging bag or a damp surface, reduces the margin. Treat the label as a maximum, not a target, and leave room beneath it.
Think about how a load is applied. A coat hung on a hook pulls down and outward at the top of the strip, which is where peeling begins. Items that are yanked off the hook each day add repeated stress. Wet items weigh more, so a damp towel is heavier than a dry one. A bag with contents may weigh more than you think.
- Do not hang items that you pull off with force.
- Use more than one hook to share a load, but only if the item can be hung evenly.
- Avoid hanging fragile, valuable or hazardous items, such as glass, hot items or anything that could hurt someone if it fell.
- Do not use hooks over beds, stairs, cots or seating.
- Inspect hooks regularly, and take them down if the strip stretches, lifts or loses grip.
Doors deserve a note. Opening and closing sends a jolt through the hook, so doors are among the less forgiving places. Check the maker’s listing for door use and keep loads light.
If you need to hang something heavy, choose screws or anchors. The post on wall anchors covers the basics.
Removing Hooks Without Damaging the Surface
Taking a hook off cleanly is part of using one well. Rushing the removal is the most common way to pull paint or plaster off a wall. Plan removal as carefully as installation.
For strip-based hooks, follow the maker’s method, which commonly involves pulling the tab slowly in a direction parallel to the wall, so that the strip stretches and lets go. Pulling outward, away from the wall, tends to peel the surface. Take your time, and support the wall with your other hand if it feels delicate. If the tab breaks or is hidden, a thin tool, such as dental floss or fishing line, may help to cut behind a foam pad, but follow the maker’s guidance.
Warm air can soften an adhesive. Some makers suggest gentle warmth from a hairdryer on a low setting to ease removal, though that is not suitable for every surface, so check first. Keep the heat moving and do not overheat plastic or paint.
Once the hook is off, deal with any residue. Remove it with a method suited to the surface, such as rubbing gently with a cloth and a product recommended by the maker. Test any cleaner in a hidden spot first, since solvents may damage paint or finishes.
- Go slowly and keep the angle low.
- Do not scrape with sharp tools on painted or delicate surfaces.
- If the paint lifts, stop, and touch it up after the surface has dried.
- Dispose of used strips as the maker suggests.
When a wall is old, freshly painted or fragile, a hidden test is wise, and a different fixing may be the better answer.
Troubleshooting a Hook That Keeps Falling
If a hook lets go repeatedly, there is nearly always a reason. Instead of pressing harder or adding more strips, work through the likely causes in order.
- Surface: is it suited to adhesives? Textured, dusty, damp or flaking surfaces rarely hold. Clean properly or choose another method.
- Preparation: was it cleaned and dried with an approved product? Did you let it dry before sticking? Skin oils on the strip can reduce grip.
- Pressure and time: did you press for the full time listed? Did you wait before loading? Rushing is a common cause.
- Load: is the item heavier than you think, or does it swing or get pulled? Reduce the load.
- Temperature and humidity: hot, steamy or very cold places weaken adhesives. Move the hook or choose a different type.
- Product: is the strip old or has it been stored in heat? Adhesives can age, so use fresh ones.
Fix one factor at a time so you can learn which one mattered. When a spot keeps failing, consider the location itself. A door that is slammed, a wall near a shower or a surface that moves may simply be a bad match for adhesives.
If the hook falls with damage to the wall, pause before trying again. Repair the surface and let it dry or cure, then choose a method that suits it. Sometimes the best answer is to switch to a screw-in hook with the right anchor.
Keep notes on which hooks and surfaces worked well. Over time you will learn what suits your home, and you will avoid repeating the failures.
Which adhesive hook should you buy for your wall?
Choose the hook type by the surface and the load. The types described above suit different jobs, so match them to where you will hang things.
- Smooth painted wall, light items: a strip-based hook with a pull tab, which is meant to come off cleanly.
- Tile or glass in a dry area: a strip hook, or a suction hook for very light items.
- Bathroom or damp area: a hook the maker describes for moisture, used within its stated conditions.
- Something you want to stay put for long: a foam-backed or tape-backed hook, accepting that removal may leave residue.
- Coats, bags or daily-use items: a screw-in hook with the right anchor, since adhesives are a weaker match.
If a fall would hurt someone or break something valuable, do not use adhesive at all. For a rental, a strip hook with a pull tab is usually the kindest option to the wall, though a hidden test spot is still wise.
Look at your surface and your heaviest item first, then read the listing to confirm the hook is made for both.
What to check before you buy adhesive hooks, and who should skip them
Before buying, check the approved surfaces, the weight limit and the removal method on the listing. Most failures come from a mismatch in one of these three.
- Which surfaces the hook is made for, and whether your paint or wallpaper is listed.
- The weight limit per hook, compared with your item when it is full or wet.
- The temperature and humidity conditions the maker states.
- How many strips and hooks come in the pack, and whether spare strips are sold.
- The waiting time before loading, and the removal steps.
- Return and warranty terms on the listing.
Now the honest objections. Adhesive hooks are easy and avoid holes, but they are not made for heavy, swinging or high-risk loads, and a wall coating in poor shape may peel on removal. Cheaper packs are not always weaker, but check the listing for limits instead of assuming.
You should skip adhesive hooks if your walls are textured, damp or flaking, if the item is heavy, or if it hangs over a bed, stairs or a cot. Screws and anchors are the better answer there.
Compare the types above, check the current listing for surface, limit and pack contents, then choose the hook that suits your wall and your load.
Ready to Buy? Start Here
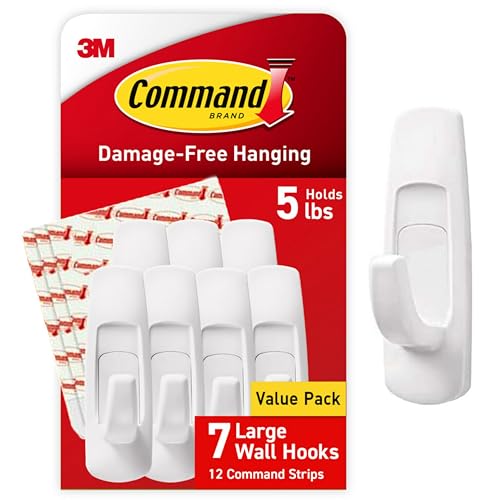
If this guide helped you decide what to look for, these products are a place to start.

As an Amazon Associate we earn from qualifying purchases. Prices and availability are shown on Amazon.
Why Adhesive Hooks Really Fail: A Failure Detective’s Guide
Almost every adhesive hook failure has a biography, and learning to read it turns a frustrating product category into a reliable one. When a hook comes down, rescue the evidence before you tidy it away. Look first at the strip’s back. If the adhesive surface is clean, glossy and largely free of dust or paint, the bond never formed properly in the first place: the wall was greasy, dusty, damp or too cold, or the strip was not pressed long and evenly enough for the adhesive to flow into the surface’s microscopic texture. Adhesive strips bond by wetting out, flowing under sustained pressure into intimate contact, and a quick thumb press gives them neither the time nor the evenness they need. If the strip comes away carrying a skin of paint, the adhesive did its job perfectly and the paint did not: the weak layer was the wall’s coating, which is why hooks on fresh, chalky or flaking paint fail with the paint attached, and why the hook gets blamed for the wall’s confession.
If the strip carries a grey felt of dust and fibres, the surface preparation was the story: the wall looked clean and was not, at the microscopic level where bonding happens. If the hook held for weeks and released on a humid day or after a hot shower, the story is environment: moisture and heat soften many adhesives and expand the wall’s surface, and a hook loaded near its limit in a dry week becomes an overloaded hook in a steamy one. And if the hook held for months and then let go in the night with a crash, look at the load’s shape rather than its weight: something may have shifted so its weight hung further from the wall, multiplying the peeling force at the strip’s top edge, because adhesive strips are strong in shear, loaded parallel to the wall, and weak in peel, loaded away from it. Every one of these biographies prescribes its own remedy, which is why the detective work matters more than buying a stronger hook.
The Preparation Ritual, Step by Step and Why Each Step Exists
Preparation is not fussiness; it is the installation, of which sticking is merely the last act. Clean the patch of wall, and clean a margin around it, with the method the strip maker specifies, commonly a wipe with rubbing alcohol on a clean cloth, because alcohol lifts grease and evaporates without leaving a residue film of its own. Soap-and-water washing feels virtuous and can leave exactly the film that defeats the bond, unless the maker directs it. Let the cleaned patch dry fully; adhesive applied to a wall still cool and damp from its wipe is adhesive applied to water. Warmth helps modestly: a cold wall in an unheated room in winter is a legitimate reason to wait for a milder day or warm the room, because adhesives flow and grip reluctantly when cold.
Then commit properly. Position the hook with a pencil mark and a level if it is one of a row, peel without touching the adhesive with your fingers, since skin oils are a release agent you carry everywhere, and press the whole strip firmly for the full time the maker states, working pressure evenly across its whole area rather than favouring the middle. That press is when the bond actually happens. Afterwards, respect the cure wait before loading, and understand what it is: the adhesive continues to wet out and gain strength for hours after the press, so a hook loaded at minute ten is being tested at a fraction of the strength it would have had tomorrow. The first load should also be gentle and progressive: hang the item, let it sit, and check the strip’s edges for any lifting before you trust the hook with the good coat or the full utensil crock.
Load, Leverage and the Honest Arithmetic of Sharing
Do the sum the way the wall experiences it. Start with the item’s real weight, wet and full if it is ever wet or full: a dripping bathrobe, a wash bag packed for travel, a wreath after rain. Compare that with the maker’s stated limit for one hook on your surface type, because the same strip is rated differently on tile, painted wood and bare plaster, and the headline number on the packet usually describes the kindest surface. Keep a genuine margin; a hook working at the top of its rating in a steamy room is a hook scheduling its departure. Then consider leverage. A slim picture hanging flat loads a strip kindly, mostly in shear. A bulky item whose weight sits out from the wall, a full handbag on a hook by the door, loads the same strip in peel at its top edge, and should be treated as if it weighed considerably more than the scale says.
Sharing a load across two hooks only works when the sharing is real. Two hooks carrying a bar, a rail or a rigid object between them genuinely divide the weight, because the object forces them to. Two hooks each holding one handle of a soft bag divide nothing reliably, because the bag shifts and either hook may take the whole load at any moment. The self-check is simple: if one hook of the pair let go, would the other instantly be overloaded and follow it? If yes, you do not have a doubled capacity; you have a single point of failure with a spare. Rate each hook for the whole load, or choose a rigid carrier that makes the sharing honest, or step up to a screwed fixing and stop asking chemistry to do a carpenter’s job.
Surface by Surface: Where Strips Thrive and Where They Should Not Go
Smooth, sealed, stable surfaces are the strip’s home ground: glazed tile, glass, metal, sealed wood and sound, fully cured paint with a slight sheen. Each offers the continuous contact the adhesive needs. The doubtful list deserves equal clarity. Textured and stippled paints break the contact into islands. Wallpaper adds a paper layer whose own bond to the wall becomes the weak link, and removal can tear it. Bare plaster and matte, chalky paints shed the very particles the strip tries to grip. Brick, stone and concrete are porous and dusty at the surface however clean they look. Fresh paint is a special trap: it can feel dry in a day and still be curing for weeks, and a strip applied during curing can bond to a skin that later releases, or tear that skin away on removal. On any doubtful surface, the professional habit is a test hook in an inconspicuous place, loaded with a modest weight for a few days, before the arrangement that matters depends on it.
Removal as a Skill, and Planning the Hook’s Whole Life
Removal is where adhesive hooks keep or break their promise, and it is a technique, not a tug. The strip is designed to release when stretched slowly along the wall, elongating until the adhesive lets go progressively; pulled outward, away from the wall, the same strip holds on and takes paint with it in protest. Work slowly, keep the stretching tab parallel to the wall, and give the adhesive time to release along its length, supporting the hook with your other hand so the sudden release does not drop it onto a toe or a basin. If a strip snaps mid-stretch, the remaining fragment can usually be worked off by gripping its edge and continuing the slow stretch at a low angle, or softened with gentle warmth. Residue, when it occurs, rolls off under a fingertip or lifts with the maker’s recommended cleaner tested in a hidden spot first.
Plan a hook’s life backwards from that removal. Do not place strips where a future stretch is impossible, hard against a ceiling or inside a corner where the tab cannot be drawn out. Do not commit the irreplaceable, the breakable or the dangerous to any adhesive hook, however confident you feel, because the failure mode of even a perfect installation is eventual and unscheduled. And keep a note, literal or mental, of where your hooks are and roughly when they went up, because a hook asked to hold through years of bathroom steam is being asked for more than its maker promised, and a planned replacement on a calm afternoon beats an unplanned one at midnight, every time.
A Room-by-Room Field Guide to Where Hooks Earn Their Keep
The entrance hall is the adhesive hook’s finest stage and its hardest test. Keys, light bags and dog leads are ideal loads, small, dry and hung flat, while the hall’s temptation is the winter coat, heavy, damp and hung by a loop that concentrates its weight at one peeling point. Give the hall a hierarchy: hooks for the light daily traffic, and one mechanically fixed rail or hook for the coats, so the adhesive hooks are never promoted beyond their competence by a wet November evening. In the kitchen, heat and grease rewrite the rules: a hook near the cooker lives in rising grease vapour that coats both wall and strip, and oven gloves hung beside the hob are a fire consideration before they are a storage one, so kitchen hooks belong on cooler walls away from the cooking line, holding utensils and aprons that are light, dry and used daily, which is the profile adhesive bonding handles best.
Bedrooms and wardrobes reward hooks used as organisers rather than as structure: belts, scarves, jewellery and tomorrow’s outfit all hang light and flat, and a hook inside a wardrobe door, on clean, sealed wood, will serve for years. Children’s rooms demand the safety lens first: hooks at child height must hold only soft, light things, must be checked as part of the room’s routine, and must never carry anything whose fall, or whose hook’s fall, could hurt, because children load hooks experimentally and tug them in peel as a matter of scientific interest. In utility spaces and garages, dust is the governing fact: surfaces there are rarely clean enough at the microscopic level for a lasting bond, temperatures swing wider, and the loads people imagine hanging, tools, ladders, bikes, are mechanical-fixing loads by any honest arithmetic, so let hooks there be the exception, small and light, and let screws do the heavy work.
Renting With Hooks: The Deposit-Safe Doctrine
For renters, adhesive hooks are close to a perfect technology, provided the doctrine is followed whole: sound paint only, tested first in a hidden place, loads kept modest, and removal always by the slow stretch, never by the impatient pull that converts a deposit-safe hook into a paint claim. Keep the evidence of care: the strip packets with their instructions, a photograph of the wall before and after, and a note of where hooks were placed, because the conversation with a landlord goes better with dates and pictures than with assurances. Know also the doctrine’s limits in a rental: hooks do not make heavy storage possible, and a renter who needs to hang a bicycle, a large mirror or a loaded shelf should be asking the landlord about a screwed fixing with a promise to make good, a request many landlords prefer to the alternative of a failed adhesive experiment conducted at height with a heavy object.
When you leave, walk the home with a removal kit and unhurried time: stretch each strip slowly, support each hook, roll away any residue with a fingertip, and inspect each site in good light. A wall that hosted a dozen hooks can be returned truly unmarked, and that clean exit is the whole point of the technology. The renter who treats preparation, loading and removal as one continuous craft gets the storage and the deposit; the one who treats hooks as stickers gets the stories. Everything in this guide, the cleaning, the pressing, the waiting, the honest arithmetic, exists to put you in the first group, in a home you own or one you are borrowing.
Keeping a Small Hook Log in a Busy House
In a house with many hooks, a tiny amount of record-keeping pays for itself the first time one fails. A note on your phone, or a card in the drawer where the spare strips live, listing where each hook is, what it carries and roughly when it went up, turns a midnight fall from a mystery into a datum: you can see at a glance whether the failure was the oldest hook in the steamiest room, which is a hook that served its term, or a new hook on a problem wall, which is a surface asking to be investigated. The log also disciplines replacement: when a hook in a hard-working spot reaches a good age, you can renew its strip on a calm afternoon of your choosing rather than on the hook’s. This is admittedly more administration than a sticker with ambitions usually receives, but that is rather the point of this whole guide: adhesive hooks reward people who treat them as a small system, prepared, loaded, inspected and renewed on purpose, and they punish, gently but reliably, everyone who treats them as magic.
FAQ
How do I remove an adhesive hook cleanly?
Most strips have a pull tab. Stretch it slowly along the wall, not outward, as the maker describes.
Can I reuse a strip?
Typically not. Use a fresh strip each time.
Why did my hook fall overnight?
Common reasons are a dusty or damp surface, loading before the waiting time, or hanging something heavier than the limit. Clean the surface and reread the pack.
Do adhesive hooks work on textured walls?
Often poorly, because the strip touches only the high points. Look for a smooth patch or choose another fixing.
Can I use more than one hook for a heavy item?
Only if the maker says the load can be shared and the item hangs evenly. For heavy or risky loads, use screws and anchors.
Can adhesive hooks go on painted walls?
Often yes, once the paint is fully cured and sound. Fresh, flaking or low-quality paint can peel when the hook is removed, so check the paint maker's guidance and test a hidden spot first.
How long should I wait before hanging something?
Follow the time on the packaging, which is often an hour or more. Rushing is a common cause of falls, so load the hook only after the stated wait.
Why do hooks fail in bathrooms?
Steam, splashes and temperature changes weaken many adhesives. Choose products that the maker describes for damp areas, and keep to their conditions and limits.
Can I use two hooks to hold something heavier?
Two hooks can share a load only if the item hangs evenly and each hook stays within its own limit. Do not rely on this for anything that would cause harm if it fell.
Is rubbing alcohol safe for cleaning the surface?
Many hook makers suggest it, but it can harm some finishes. Check the instructions for your product, and test a hidden spot first.
What if the strip leaves residue on the wall?
Rub gently with a cloth and a product suited to the surface, testing a hidden area first. Avoid scraping, which can damage paint.
Are adhesive hooks suitable for rented homes?
They can be, because they usually avoid holes. Check the lease, test a hidden spot, and remove hooks slowly using the maker's method to reduce the risk of marks.
Which adhesive hooks are strongest?
Strength depends on the type, the surface and the stated limit, not the brand alone. Read the listing for the weight limit and approved surfaces, and stay well under that limit.
Can adhesive hooks hold a coat?
Sometimes, if the coat is light and the hook is rated for it. Coats pull outward at the top of the strip, so a screw-in hook is the more dependable choice for daily use.
Will adhesive hooks damage paint?
They can, especially on fresh, cheap or flaking paint. Test a hidden spot, and remove the strip slowly along the wall as the maker describes.
How long do adhesive hooks last?
It varies with the surface, load and conditions, and makers do not all state a lifespan. Check hooks now and then, and replace the strip if its edge lifts.
Can I put adhesive hooks on a fridge or appliance?
Only if the maker lists that surface as suitable. Heat, vibration and textured finishes can weaken the bond, so test with a light item first.
Do adhesive hooks work in cold weather?
Cold surfaces reduce stickiness, so apply them within the temperature range on the packaging. Warm the room first if the wall is cold.
Can I put a hook up the same day I paint the wall?
No, and this is one of the most common causes of both hook failure and paint damage. Paint that is dry to the touch is still curing beneath the surface, and its bond to the wall is at its weakest exactly when the strip’s bond to it is forming. Wait the full curing period the paint maker states, which is measured in weeks, not days, and then treat the new paint as a surface worth testing with one hook and a modest load before you commit a row of them.
Why do my hooks hold all winter and fall in summer?
Heat and humidity are the usual authors. Warmth softens many strip adhesives, humid air works at the bond’s edges, and a hook loaded near its limit has no reserve for either. Summer also changes the loads themselves: wet towels, swimsuits and garden gear are heavier than they look. The fixes are to rate summer loads honestly with a bigger margin, to move marginal hooks to cooler, drier walls, and to step up to mechanical fixings for the hooks that must work hardest in the warm months.
Is it safe to hang a mirror or a picture with glass on adhesive hooks?
For a small, light piece, on a proven surface, with hooks rated well above its weight and hung so the load sits flat against the wall, many people do so successfully. For anything large, heavy or valuable, the honest answer is that a mechanical fixing is the right tool, because the cost of the one-in-a-hundred failure is broken glass where people walk barefoot. Adhesive hooks shine for light, forgiving loads; asking them to guard breakables above a floor is outside their gift.
How do I hang a row of hooks perfectly evenly?
Mark the row before any strip is peeled. Stretch a length of painter’s tape along the wall at the hooks’ top line, check it with a level, and mark each hook’s centre on the tape with your spacing measured from one end, not from hook to hook, so small errors do not accumulate. Apply each hook to its mark, pressing fully, then remove the tape once all are placed. If one hook of a row sits on a doubtful patch of paint or texture, move the whole row a fraction rather than letting one hook live on a worse surface than its neighbours.
What should I do with a hook that has started to lift at one corner?
Unload it now, while the decision is still yours. A lifting corner is the bond unzipping, and it does not heal under continued load; it progresses. Remove the hook by the proper stretch method before it chooses its own moment, clean the surface, and diagnose from the strip’s back, as the failure guide above describes, before deciding whether a fresh strip on a better-prepared surface, a different position, or a screwed fixing is the right successor.
The Short Version
Clean and dry the surface, press for the full time, wait before loading and stay under the stated weight limit. Choose screws or anchors for heavy or risky loads.