A tidy shed comes from three habits: empty it out, sort tools into groups by use, and give every item a fixed home on a wall, shelf or hook. You do not need elaborate fittings. A weekend and a few basic hooks are usually enough to turn a jumble into a space you can walk into.
Empty It and Look Honestly
Take everything outside on a dry day. Sweep the floor and check for leaks, damp patches and pests. Sort the pile into keep, repair, give away and dispose. Broken items with no plan for repair are best removed so they stop taking up space.
In this guide
Plan Zones
- Digging zone: spades, forks, shovels
- Cutting zone: shears, loppers, saws, kept high or in a closed box
- Soil and potting zone: trowels, pots, trays
- Watering zone: hoses, cans, nozzles
- Seasonal zone: items used only for a few weeks a year, placed at the back
Putting Things Back, Step by Step
- Fit hooks or a rail on the wall studs for long-handled tools, heads up and spaced so they do not tangle.
- Set shelves at a height you can reach without a ladder for everyday items.
- Store sharp tools above child height or in a lockable box.
- Use jars, tubs or buckets for small items like twine and plant labels.
- Place pots and trays in stacks on the lowest shelves.
- Label shelves and bins so everyone in the household can follow the system.
Keeping It That Way
| Habit | How often |
|---|---|
| Return tools to their hooks after use | Every time |
| Wipe soil off before hanging | Every time |
| Quick sweep and check for damp | Monthly |
| Full sort and clear-out | Once a year |
Leave a clear walkway and good light. Keep fuel, chemicals and fertiliser in their original containers, away from heat, and follow the labels.
Think about safety and access as you plan. Keep heavier items low, light ones higher, and nothing sharp at head height near the door. Good lighting makes a big difference, and a small battery lantern or window can help. If the shed doubles as a storage place for bikes or camping gear, give those items their own corner so they do not tangle with long-handled tools. A tidy shed also makes it much easier to notice damage, damp or missing items.
Look again at the layout after a few weeks of real use. If you keep reaching for the same tool and it sits at the back, move it forward. Small changes like this make the shed fit your habits rather than a plan on paper.
A Worked Walkthrough With Invented Details
This example is invented, to show the sequence of decisions. Imagine a small shed with one door, one window, a bare floor and a pile of mixed tools.
- Empty the shed and lay the tools on a sheet or the lawn in their zone groups, so you can see how much of each kind you own.
- Look at the walls. Find the framing members behind the lining, using the knocking method or a suitable detector, and mark them with chalk.
- Decide where the door swings and keep that area clear. Put the long-handled rack on the wall opposite the door, so you see it as you enter.
- Fix the rail into the framing using fixings suited to the wall and to the rail maker’s weight guidance.
- Put the shelving under the window for light, with everyday items at the middle shelf height and heavy bags of compost on the floor or the lowest shelf.
- Hang tools heads up, wipe each one, and check that nothing blocks the door.
- Stand in the doorway and ask: can I see and reach what I use most?
Your shed will differ, but the sequence of zones, framing, rail, shelf and final check will serve in any layout.
Common Scenarios
A damp shed
Raise everything off the floor and leave a gap behind stored items for air. Wipe metal parts dry before putting them away, and look for the source of the damp, such as a leaking roof or a ground-level gap.
A shed shared by a household
Agree where things live and label each hook with the tool’s name or a simple outline. Children and visitors can then return tools to the right place.
A very narrow shed
Mount tools on the door and one long wall, and keep the floor completely clear. Slim racks and wall-mounted holders do more than boxes on the floor.
A shed with power tools and chargers
Keep batteries and chargers in a cool, dry spot as the maker advises, and avoid leaving charging gear unattended. Any wiring in the shed is a job for a qualified electrician under local rules.
Mistakes to Avoid
- Hanging tools blades-out at head height. Anyone walking in can catch a cutting edge, so point edges toward the wall and keep sharp tools high or enclosed.
- Storing damp tools. Soil and moisture speed up rust and rot, so wipe each tool before it goes on its hook.
- Stacking heavy items high. A bag or tool that falls is a hazard, so keep heavy things low.
- Mixing chemicals and food-related items. Keep products in original labeled containers and apart from other things.
- Using weak fixings. A rail with several heavy tools needs fixing into framing or suitable masonry anchors per the maker’s instructions.
Quick Troubleshooting
| Symptom | Likely cause | What to try |
|---|---|---|
| Tools tangle on the rail | Hooks too close together | Space them wider or alternate heights |
| Rust on blades | Damp air or soil left on | Clean, dry and lightly oil metal parts, and improve ventilation |
| Rail pulls from the wall | Fixings in thin lining only | Remove and refit into framing or proper anchors |
| Shed smells musty | Poor airflow or stored damp items | Dry items outside, open vents and clear mouldy material |
Glossary
- Stud or framing: the wooden uprights behind a wall lining that give solid fixing points.
- Rail: a long strip with hooks or slots for hanging tools.
- Loppers: long-handled cutters for branches.
- Zone: an area of the shed set aside for one kind of use.
- Ventilation: the movement of air that keeps a shed dry.
- Heads up: hanging a tool with its working end at the top, away from your hands.
Choosing Hooks, Racks and Shelves That Suit Your Tools
You do not need a lot of fittings, but the right kind in the right place makes a large difference. Match the fitting to the shape of the tool. Long-handled tools such as spades, rakes and brooms hang well from a rail with spaced hooks or from simple slots that hold the handle. Smaller hand tools sit better in a tray, a tub or a pocketed organiser hung on the wall.
Think about what each fitting is made of and where it will live. Metal fittings may rust in a damp shed, while plastic ones can become brittle in the cold or in strong sun. Wooden rails are easy to cut and fit but need to be kept dry. Check the maker’s guidance on weight for any rail, hook or shelf bracket, and allow a margin, because a loaded spade or a full pot of tools weighs more than it looks.
- Budget-friendly: a length of timber with screwed-in hooks, reused buckets and tubs, and old crates turned into open shelves.
- Middle range: ready-made rails or slotted boards, plastic stacking bins and a few sturdy brackets.
- Higher spend: purpose-built shed shelving, lockable cabinets and modular wall systems.
Before buying anything, measure the wall space and the longest tool, and check that the door can still open fully once everything is in place. Reusing what you own and adding fittings gradually spreads the cost and lets you see what you really need.
Protecting Tools From Rust, Rot and Pests
Storage is only half the job; the other half is stopping the shed from damaging what is in it. Moisture is the main enemy, so deal with it first. Look for drips from the roof, gaps at the base of the walls and condensation on cold surfaces. If air cannot move, damp builds up even without a leak, so check whether the shed has vents and keep them clear.
Clean tools before they go away. Knock off dried soil, rinse or brush the blades, and dry them completely. A light wipe of oil on bare metal, using a product the tool maker or oil label approves for the purpose, helps keep rust at bay. Wooden handles benefit from an occasional rub with a suitable oil or wax, which resists cracking and splinters.
Keep items off the bare floor wherever you can, since floors collect moisture and are where mice and insects shelter. Cardboard boxes, old sacks and piles of cloth attract pests and hold damp, so favour plastic tubs with lids. If you find droppings, chewed material or nests, clear them using gloves and follow local advice on pest control rather than leaving the problem to grow.
Seeds, bulbs and bagged feed need particular care. Store them in sealed containers, high enough to be out of reach of rodents and away from heat and frost.
Lighting, Access and Floor Space
A shed that is tidy but dark or cramped still frustrates. Start with the doorway. Stand there and look in: you should see the tools you use most and be able to reach them without stepping over anything. Keep a clear path from the door to the main storage wall, and avoid putting low obstacles where you are likely to walk with your arms full.
Light comes first from the door and any window, so keep the window clean and unblocked. For the dim corners, consider a battery or rechargeable lantern, a clip-on light or a headtorch kept on a hook by the door. Any fixed electric lighting or sockets in a shed are a matter for a qualified electrician working to local rules, so do not attempt wiring yourself.
Use floor space deliberately. Heavy and bulky items, such as compost bags, a wheelbarrow or a mower, belong on the floor near the door where they can be wheeled out. Keep the middle clear. If you store a bicycle, ladder or camping gear, give each a defined corner and a hook or bracket so they do not lean against the tool wall.
- Leave enough room to turn around with a long-handled tool.
- Do not block the door’s swing or any exit.
- Keep the most used tools between waist and shoulder height.
Rotating Tools With the Gardening Year
Few gardeners use every tool all year, so a fixed arrangement will not always suit the season. Treat the front of the shed as prime space and let the contents change as the year turns.
In spring and early summer, bring the planting and watering tools forward: trowels, dibbers, seed trays, cans, hoses and nozzles. In late summer and autumn, move the cutting and clearing tools to the front, such as shears, rakes, loppers and leaf collectors. Over winter, the digging tools and any frost-sensitive items need attention. Drain hoses and watering gear according to the maker’s guidance so water does not freeze inside them, and store them coiled loosely in a dry place.
The end of a season is also a good moment for care. Clean, dry and sharpen or service blades as the tool maker advises, tighten loose handles and replace anything that is cracked. Write a short list of repairs and replacements while the problems are fresh in your mind.
- Move seasonal items to the back or to a high shelf once they are finished for the year.
- Keep a labelled box for items that only come out for one job, such as plant supports or netting.
- Check fuel-powered equipment against the maker’s storage advice before winter.
A rotation only takes a few minutes each season and keeps the things you need within easy reach.
Deciding What to Keep, Repair or Replace
Many sheds are crowded because nothing ever leaves. A few honest questions make the decision easier. Have I used this in the last year or two? Does it still work safely? Do I have another that does the same job better? Is it worth the space it takes?
Look for signs that a tool is at the end of its life. A cracked or splintered handle, a blade bent out of shape, a loose head that will not stay tight, heavy rust that has eaten into the metal, or a frayed cord or damaged plug on an electric tool are all reasons to repair or retire the item. Electrical equipment with damaged cables should be repaired by a qualified person or disposed of properly, not used as it is.
A tool that can be fixed cheaply, such as one with a replaceable handle, is often worth keeping. One that needs repair beyond your skills or budget may be better passed on if it still works, or recycled where local rules allow. Old chemicals, paint and fuel need particular care: take them to a suitable disposal point rather than pouring them away or putting them in household waste.
- Keep: used regularly, safe and in good order.
- Repair: useful but with a fixable fault, with a date to do the job.
- Pass on: working but unused, or duplicated.
- Dispose: unsafe, broken beyond repair, or out of date.
Clearing the shed in this way leaves room for the tools you actually use.
Which Garden Tool Shed Setup Should You Choose?
The best way to organize garden tools in a shed is the one that matches your shed size, your tools and how often you garden. Use the options already described above as building blocks and match them to your situation.
- If your shed is small and narrow, use wall rails, slim holders and the back of the door, and keep the floor clear.
- If you own many long-handled tools, a rail with spaced hooks on the wall opposite the door is the core of the plan.
- If children or visitors use the shed, add a lockable box for sharp tools and chemicals, and label each hook.
- If the shed is damp, choose plastic tubs with lids, raise items off the floor and treat airflow as the first job.
- If you want to spend as little as possible, reuse buckets, crates and spare timber, and buy fittings only after you see what is missing.
- If you garden heavily all year, consider sturdier shelving and modular wall fittings, since they cope better with daily use.
Most people end up with a mix: a rail for long tools, a shelf for everyday items and a closed box for anything sharp or hazardous. Begin with the cheapest version, live with it for a few weeks, then upgrade the part that annoys you most.
What to Check Before You Buy Shed Storage, and Who Can Skip It
Before buying any shed storage, measure first and check the details on each listing. A few minutes of checking prevents returns and awkward fits.
- Measure the wall length, shelf depth and the longest tool, and check the door can still open fully.
- Check the maker’s weight guidance for rails, hooks and brackets, and allow a margin.
- Look at the material: metal may rust in damp, plastic can turn brittle in cold or sun, and wood needs to stay dry.
- Check what is included, such as screws and wall fixings, and whether they suit your wall type.
- Confirm how the item is fixed: into framing, masonry or only thin lining.
- Read the warranty and returns terms on the current listing.
There are fair objections. Wall fittings need drilling and some effort, and a bad installation can fail under weight. Ready-made systems can cost more than reused items, and they may not fit an odd-shaped shed. Some buyers also find that tidy storage does not stay tidy without habits, so fittings alone do not fix clutter.
You can skip buying anything if you own few tools, if a few hooks and tubs already cover them, or if your main problem is old rubbish that needs clearing out. Otherwise, compare the setups above, check the current listing for size and what is included, and choose the one that fits how you will use your shed.
Ready to Buy? Start Here
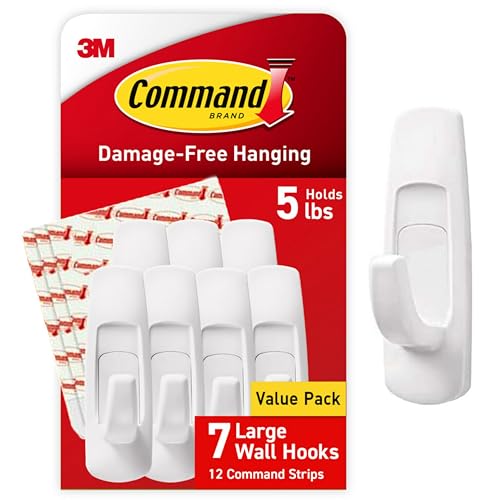
If this guide helped you decide what to look for, these products are a place to start.

As an Amazon Associate we earn from qualifying purchases. Prices and availability are shown on Amazon.
Measuring the Shed and Drawing a Plan That Fits on One Page
Before anything moves, measure the shed as it actually is: inside length, inside width, the height at the walls and at the ridge, and the width of the door opening. Then subtract the things that are not storage. The door needs a swing or slide zone that stays empty. You need a standing and turning space — roughly a square of floor where you can pivot with a fork or a watering can in your hands. Anything stored inside those two zones will be moved every visit and resented within a month. The arithmetic is simple but worth doing on paper: usable wall length equals the wall’s full length minus the door zone and minus any corner where two walls’ stored tools would collide. A run of wall that measures eight feet may offer only six feet of honest hanging space, and planning for six rather than eight is the difference between a system that fits and a pile leaning in the corner by autumn.
Draw the result as a rough rectangle on one sheet of paper, marking the door, any window, and the zones you intend: long-handled tools, hand tools, watering, pots and supplies, and the machines. Keep the drawing — pin it inside the door when you finish. It becomes the map that tells everyone in the household where things live, and it is the reference you will use at the seasonal reset to spot which zone has quietly overflowed. Measure your biggest items too: the mower’s folded footprint, the wheelbarrow’s length, the ladder if it lives here. Big items claim their floor or wall space first in the plan, because small tools can fill any gap, but a wheelbarrow fits only where it fits.
A Worked Example: One Weekend Reorganisation, Sequenced Hour by Hour
This invented schedule shows the order of work for a typical single shed, assuming the emptying and sorting described earlier in this guide. Saturday morning, first hour: everything out onto the lawn or a tarp, grouped roughly as it comes — do not sort yet, just empty, then sweep the shed, check the floor and walls for damp, leaks and nests, and let the space air while you work outside it. Second hour: sort the piles into keep, repair, and go, and be honest about duplicates; the third spade with the cracked handle is not a spare, it is clutter wearing a costume. Measure and mark your zones inside the empty shed with chalk or tape on the walls and floor, following your paper plan, because marking an empty shed takes minutes and moving fixed racks later takes hours.
Saturday afternoon: fix the storage for the biggest and heaviest things first — the mower and wheelbarrow positions, then the long-handled tool rack on its wall — and load those zones. Then shelving and the hand-tool area, then the small stuff: twine, labels, ties, gloves, in boxes or jars where you can see them. Sunday morning: labels and finishing touches, a hook by the door for the tools you grab daily, the inventory list pinned up, and a photograph of each wall on your phone. That photograph is your baseline; when the shed drifts, as all sheds do, you compare it with the photo rather than with your memory. Leave Sunday afternoon empty in the plan. Every reorganisation takes longer than expected, and a buffer hour is what turns a half-finished shed — the worst of all states — into a finished one.
Grouping by Task Instead of by Tool Type
Most sheds are organised by what things are — all the cutting tools together, all the digging tools together — but gardeners work by task, and task grouping can serve you better. A pruning kit keeps secateurs, loppers, a folding saw and gloves within one reach, because a pruning session uses exactly those and nothing else. A sowing and planting kit gathers the hand trowel, fork, dibber, line and labels in one box you can carry to the bed and bring back whole. A watering kit groups cans, hose fittings, nozzles and the watering spike near the door or the tap side of the shed. A care corner holds the oil, cloth, file and brush used to maintain everything else, so maintenance happens where the tools already are.
Task grouping has a second benefit: it exposes duplicates and gaps honestly. When the kits are assembled, whatever remains unclaimed on the bench is either a rarely used specialist tool, which earns a high shelf, or a duplicate you do not need. Keep one small empty box or crate as the landing zone for new acquisitions and things awaiting repair; a defined landing zone stops new items from colonising the floor while they wait for a decision. Review the kits at the start of each season, because tasks change — a new vegetable bed creates a watering routine that did not exist last year, and the kit should change with it.
Safety and Access: Sharps, Chemicals and Shared Use
A shed stores some of the sharpest and least forgiving objects in a household, and organisation is partly a safety system. Blades and points should hang or rest so that reaching for one tool never means brushing past another’s edge: saws and shears on their own hooks with edges facing the wall, forks and rakes with tines against the wall rather than facing the doorway, and nothing sharp stored above head height where it must be lifted down blind. Fuel and garden chemicals belong in their original labelled containers, upright, in one defined area away from the door swing and off the floor if there is any flood risk, following the storage directions on each product’s label. In a shared shed, agree the rule that chemicals and sharp tools live in their zones and nowhere else, and that anything borrowed returns the same day.
If children visit the garden, treat the shed as you would a kitchen: the door closed and latched as the default, the sharpest tools hung high or in a closed box, and chemicals out of reach and sight. None of this needs locks and cabinets to start with — height, closed containers and a latched door do most of the work — but a lockable box for chemicals is a sensible upgrade where young children are regular visitors. Finally, keep the floor route from door to the far end clear enough to walk without stepping over anything; most shed injuries are trips and knocked-over tools, not dramatic accidents, and a clear path prevents the everyday kind.
Troubleshooting by Symptom: When the System Starts to Slip
The floor slowly fills up again
Floor creep means the landing zone is missing or full. Items land on the floor because putting them away takes longer than the moment allows. Add one crate by the door for arrivals and repairs, empty it at a fixed moment each week or month, and check whether one category — usually pots, bags of compost or saved containers — has outgrown its shelf and needs a bigger zone or a cull.
One zone overflows while others have space
Zones sized for last year’s garden rarely fit this year’s. Move the boundary rather than stacking higher: give the growing category part of a shrinking neighbour’s space, and re-draw the plan on the door so the new layout is the official one. Overflow that is stacked upward becomes unstable and hides what is underneath, which is how tools get bought twice.
Tools migrate and labels stop matching reality
Migration means the home position is in the wrong place for how the tool is actually used — the secateurs live in the greenhouse because that is where the work is. Believe the evidence: either move the tool’s official home to where it is used, or accept a two-location system with the shed as the winter store. A label that describes a fiction helps nobody.
A damp patch or musty smell returns
Treat this as a building problem, not an organising problem. Find where the water enters or where condensation forms, clear anything stored against that wall so air can move, and re-check after the next rain. Storing absorbent things — paper packets, fabric gloves, cardboard — away from that wall protects them while you fix the cause, and tools on that wall need their rust protection checked more often until it is fixed.
The Seasonal Reset and a Simple Inventory
Twice a year, at the change of the gardening seasons, give the shed a reset that takes an hour rather than a weekend: walk the zones with your door plan in hand, return migrants, cull what broke or duplicated itself during the season, oil and sharpen the tools that are about to work hardest, and check the care corner still has its oil, cloth and file. The inventory itself can be one handwritten list or a phone note naming the significant tools and where they live. Its purpose is not bureaucracy; it is so that when something is missing you know whether it is lost, lent or simply hiding, and so that insurance or replacement decisions after a theft or a fire start from a list rather than from memory. Update the wall photographs at the same visit. A shed kept by two small resets a year almost never needs another full emptying, which is the real payoff of the system this guide builds: the big reorganisation happens once, and maintenance stays small.
The Door Zone: Designing the First Metre of the Shed
The most valuable storage in any shed is the metre inside the door, because that is the space you can use without fully entering, in the rain, in the dark, with your hands full. Design it deliberately. The tools you reach for weekly — for most gardeners the secateurs, a hand fork and trowel, gloves, twine and a watering can — should live in that zone at grab height, on hooks or in one open box, visible the moment the door opens. Everything in the door zone should be returnable one-handed, because a tool that needs two hands and a step inside to put away will be left on the bench, the path or the lawn, and the system’s slow decay always starts with the tools used most.
The door zone should also change with the year, in step with the seasonal rotation described earlier in this guide. In spring it holds sowing and planting tools; in summer, watering fittings and pruning tools; in autumn, the leaf and clearing tools; in winter, it can hold the care kit and the few tools used for winter pruning and repairs, while the summer equipment rests deeper in the shed. Rotating the door zone takes ten minutes at each change of season and pays for itself every single visit, because the tool you want is always the one by the door. Mark the zone’s boundary — a painted line, a change of hook colour, a single shelf — so that its contents stay a chosen few rather than everything that has recently been used.
Guard the door zone against its two natural enemies. The first is the door swing itself: nothing stored where the door sweeps, nothing on the floor where the door opens inward, and hooks on the back of the door only for light, flat items that cannot swing, rattle or fall when the door moves — a point worth repeating because door storage is so tempting. The second enemy is mission creep: the door zone attracts every new purchase and every homeless object, because it is where hands naturally unload. The landing crate described earlier belongs just outside this zone, catching arrivals before they colonise it. Review the door zone at each seasonal reset with a single question for every item: did I grab this, from here, this season? If not, it moves deeper, and something that earned the place takes its hook.
A small light makes the door zone work in the months when gardening happens at the edges of the day: even a simple battery light by the door, switched on without a search, turns a dark shed from a place you reach into blindly — past edges and points — into a place you can use safely. Combined with the rule that sharp tools hang with edges to the wall, a lit, ordered entrance is the difference between a shed you use daily with pleasure and one you avoid until a big tidy forces the issue.
Borrowing and Lending Without Losing Tools
A shed system survives contact with other people only if lending has a ritual. Keep a simple loans note — a card inside the door or a note on your phone — recording what went out, to whom, and when; it takes ten seconds and removes the slow uncertainty about whether a missing tool was lent, lost or left in the garden. Agree that borrowed tools return to their hooks, not to the bench, and that anything returned damaged or dirty is mentioned, not hidden, so it can be repaired before its next job rather than discovered mid-task. In a shared household shed, the same note settles the commonest friction of all — two people each sure the other has the secateurs — with evidence instead of archaeology among the shelves.
FAQ
What if my shed is very small?
Use the walls and the back of the door. Narrow racks and slim hooks free the floor.
How do I stop tools rusting in there?
Keep air moving, raise items off the floor, and wipe metal with a little oil before storing.
Where should I keep fuel and chemicals?
Follow the label and local rules. Keep products in their original containers, closed, away from heat and out of reach of children.
Should I use a lock?
A lockable box or cupboard is sensible for sharp tools and chemicals, especially where children or visitors may enter. Keep the key somewhere adults can find it easily.
How often should I clear out the shed?
A full sort once a year is usually enough, with small monthly checks. Do it at the end of the main gardening season, when you know what you used.
What is the cheapest way to start organising a shed?
Begin by clearing and sorting what you already own, then reuse tubs, buckets and spare timber for storage. Add a rail with hooks for long-handled tools, and buy more only once you see what is missing.
How can I tell where the wall framing is?
Knock lightly along the wall and listen for a more solid sound, or use a suitable detector. Mark the positions with chalk and check them before fixing a rail, so heavy tools are held by the framing rather than thin lining.
Is it safe to store power tools in a shed?
It can be, if the shed stays dry and the maker's storage advice allows it. Batteries and chargers often prefer a cool, dry spot, so check the manual and consider keeping them indoors if the shed gets damp or very cold.
How do I keep small items like twine and labels from getting lost?
Put each kind in its own jar, tub or labelled drawer, and keep them on a shelf at eye level. A clear container lets you see what is inside without opening it.
What should I do about spiders and insects?
Most are harmless and a clear, dry, tidy shed discourages them. Shake out gloves and boots before use, and if you suspect a nest or a harmful species, get advice before disturbing it.
Can I hang tools on the shed door?
Yes, if the door is solid enough to take the weight and the fittings do not stop it closing. Keep sharp edges turned toward the door and check that nothing swings into your path as you open it.
How do I stop the floor from getting muddy and dirty?
Leave muddy boots outside or on a mat by the door and brush tools before they go in. A washable mat or a layer of suitable flooring makes sweeping easier, but check it does not trap damp.
How many hooks do I need for a shed wall?
Count your long-handled tools and add a few spare spaces. Space hooks wide enough that handles do not tangle, and check that the rail's weight guidance covers the total load.
Is a shed organizer system worth buying or should I build my own?
Both work. Building from timber and reused containers costs less, while ready-made systems save time and suit awkward spaces, so choose based on your skills and how much time you have.
Should I store tools on the floor or on the wall?
Walls are better for most hand and long-handled tools because they keep items dry and free the floor. Keep heavy bulky items such as compost bags low and near the door.
How do I organize a shed with no shelves?
Start with a wall rail or a few sturdy hooks, then use tubs and buckets on the floor for small items. Add shelves later if you find you need them.
What is the best way to store a wheelbarrow and mower in a small shed?
Place them near the door so they can be wheeled out without moving other things. Hang tools on the walls above and leave the middle floor clear.
Can I use pegboard in a garden shed?
You can if it is firmly fixed into the framing and kept dry, since damp can swell or warp some boards. Check the board maker's weight guidance, and use hooks that match the tools you hang.
How should I store the tools I use every day compared with ones I rarely touch?
Daily tools earn the prime positions: within reach of the door, at waist to shoulder height, on hooks you can use one-handed. Rarely used tools go high, deep or low — the top shelf, the back of a cupboard, under the bench — where their inconvenience costs you nothing most of the year. The mistake is giving prime space to a tool used twice a year while the secateurs you use weekly sit behind it; arrange by frequency, not by size or by what looks tidy.
Where is the safest place to hang sharp tools?
On their own hooks with the edge or points facing the wall, at a height where you take them down by the handle with your eyes on them — never above head height, and never loose on a shelf where a hand searching by feel will find the edge first. Saws, shears, forks and rakes each get a defined spot, and in households with children they go high or into a closed box, with the shed door latched as a habit.
How do I keep hoses and extension cables from becoming a tangled pile?
Give each one a large hook, a reel or a figure-of-eight wrap over two pegs, hung on the wall rather than coiled on the floor where it traps damp and trips feet. Coil in big, relaxed loops — tight coils kink hoses and stress cable — and hang the connector ends at the top so they stay clean and visible. One hook per hose or cable, labelled if several look alike, ends the tangle permanently.
What should I do with broken tools I keep meaning to repair?
Put them in one defined repair box or corner with a note of what each needs, and give the box a deadline at your next seasonal reset: repaired by then, or recycled, given away or thrown out. A broken tool stored among working tools is clutter that also risks being grabbed in a hurry and failing mid-job. If the same tool sits through two resets unrepaired, that is your answer about whether the repair will ever happen.
Can I store seeds and bulbs in the shed?
Often yes, if the spot is dry, cool, dark and safe from mice: a sealed tin or jar on a high shelf away from any damp wall works well. Avoid anywhere that gets hot in summer sun or damp in winter, because both shorten the life of seed quickly, and never store seed near chemicals. Check stored bulbs occasionally for mould or softness and remove any that are going bad before they spoil their neighbours.
How can I label zones without buying anything?
Use what you already have: chalk directly on a wooden wall, pencil on masking tape stuck to shelves and boxes, or luggage-style tags tied to hooks with string. The label that matters most is the outline — drawing or taping the silhouette of each long-handled tool on the wall behind its hook shows at a glance what is missing and where a returned tool belongs, and it costs nothing but a few minutes.
How do I organise a shed that also stores bikes and household overflow?
Divide the shed into territories with fixed borders and defend them: garden tools on their walls and shelves, bikes in their floor zone or on their own hooks, household overflow in sealed boxes stacked in the least accessible corner, because it is handled least. The failure mode to prevent is intermixing — garden tools buried behind boxes, boxes colonising tool shelves. If space forces a choice, the things used weekly win the accessible space, whatever they are, and the things used yearly go highest, deepest or, honestly assessed, elsewhere.
The Short Version
Clear it out, group by use, hang what you can, and give each item a home. A short tidy at the end of each job keeps it working, and a yearly sort keeps it honest.


