If you have never sharpened a knife before, a guided sharpener takes the hardest part out of the job. Electric units and pull-through tools hold the angle for you, while a rolling sharpener and a simple honing rod ease you in gently. The goal is a result you can repeat, so choose the one you will actually reach for each time a knife feels dull.
The six sharpeners below are all friendly to first-timers. We have not used them ourselves, so confirm the compatible knife types and how the sharpener handles serrated blades on the current listing before buying. Compare how much space each one takes and how easily you can store it. Ease-of-use claims are the makers’ own.
As an Amazon Associate we earn from qualifying purchases. Links below are affiliate links, and they do not change the product information we give.
What to Look For
| Feature | Why it matters |
|---|---|
| Guided angle | A guide or slot sets the angle so you do not have to |
| Learning curve | Pull-through tools are easiest, while stones take time |
| Safety | A guard and a stable base keep your hands away from the edge |
| Knife types | Check whether the sharpener fits kitchen or pocket knives |
In this guide
Specs at a Glance
| Sharpener | Style | Learning curve | Notes |
|---|---|---|---|
| Chef’sChoice EdgeSelect 120 | Electric three-stage | Very easy | Guided slots |
| Presto EverSharp | Electric two-stage | Very easy | Compact body |
| Tumbler Rolling Knife Sharpener | Rolling magnetic | Easy | Magnetic angle holder |
| KitchenIQ Angle Adjust | Pull-through | Easy | Adjustable angle |
| Smith’s Jiffy-Pro | Pull-through | Easy | Pocket-size |
| Zwilling Twin Sharp Pull-Through | Pull-through | Easy | Two-stage |
The 6 Best Knife Sharpeners for Beginners
Top pickBest for new users who want results
1. Chef’sChoice EdgeSelect 120 Electric Knife Sharpener
A three-stage electric sharpener with guided slots, popular with first-time buyers. Insert the blade, pull it through, and the angle takes care of itself.
Suits: new users who want results. Strengths: guided slots and quick results. Weaknesses: counter space and electricity needed. Skip it if you want a travel tool.
View Chef’sChoice EdgeSelect 120 Electric Knife Sharpener on Amazon
Best for simple electric use
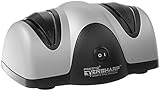
2. Presto EverSharp Electric Knife Sharpener
A compact electric sharpener with a guided design, simple to operate and easy to store. It is a straightforward step up from guessing with a pull-through.
Suits: simple electric use. Strengths: a small footprint and an easy design. Weaknesses: fewer stages than larger units. Skip it if you want fine control.
Best for people who like a hands-on tool
3. Tumbler Rolling Knife Sharpener
A rolling sharpener where the knife sits in a magnetic holder and you roll the base along. The system sets the angle, so it feels more like a gentle craft project than a chore.
Suits: people who like a hands-on tool. Strengths: a magnetic angle guide and a gentle process. Weaknesses: it takes more time than an electric unit. Skip it if you want a quick pull-through.

Best for beginners with mixed knives
4. KitchenIQ Angle Adjust Two-Stage Knife Sharpener
A pull-through sharpener with an adjustable angle selector and two stages. The adjustable setting suits different knife types, from kitchen blades to some pocket knives.
Suits: beginners with mixed knives. Strengths: an adjustable angle and a simple stroke. Weaknesses: less control than stones. Skip it if you want a premium edge.
View KitchenIQ Angle Adjust Two-Stage Knife Sharpener on Amazon
Best for quick fixes and a pack
5. Smith’s Jiffy-Pro Handheld Knife Sharpener
A small hand-held sharpener with a carbide and ceramic stage, easy to use in a kitchen or a pack. It restores a working edge quickly.
Suits: quick fixes and a pack. Strengths: a small size and a fast action. Weaknesses: a rough edge compared with stones. Skip it if you want a refined finish.
View Smith’s Jiffy-Pro Handheld Knife Sharpener on Amazon
Best for everyday home use
6. Zwilling Twin Sharp Pull-Through Knife Sharpener
A two-stage pull-through sharpener from a German knife maker, designed to give an easy tune-up. It suits home cooks who want a straightforward tool.
Suits: everyday home use. Strengths: a brand name and an easy stroke. Weaknesses: gentle touch-up rather than a repair. Skip it if you need a precision finish.
View Zwilling Twin Sharp Pull-Through Knife Sharpener on Amazon
Care and Setup
- Read the manual before the first use.
- Pull knives through with steady, light strokes.
- Wipe off metal dust after sharpening.
- Keep your fingers clear of the blade path, and set the sharpener on a steady non-slip surface before you begin.
Mistakes to Avoid
- Pressing hard through a pull-through slot.
- Using a coarse stage on a lightly dull knife.
- Sharpening a serrated knife in a flat slot.
- Skipping a wipe-down of the blade.
What Beginners Should Prioritize
When you are new to sharpening, the best tool is the one that gives acceptable results with the fewest chances to go wrong. Priorities include a built-in angle guide, clear instructions, easy setup and a design that makes it hard to damage the knife. Fine control and refined edges matter less at the start than getting a reliably sharp, safe edge.
Think about how much effort you are willing to spend. Electric and pull-through tools take away much of the skill, while stones and guided systems ask you to learn technique. Some beginners start with an easy tool and move to a stone later, and that is a perfectly sensible path. Others enjoy learning from the start and pick a stone straight away.
Also consider the knives you have. A basic set of everyday kitchen knives is forgiving, whereas expensive or hard, thin-edged knives call for more care. If your knives are very dull, you may need a tool with a coarse stage first. If they are only slightly dull, a gentle one will do. Read the listing to see which knives the tool is intended for.
Angle Guides and How They Help
The biggest hurdle for a newcomer is holding a steady angle. Angle guides remove that difficulty. Pull-through sharpeners fix the angle with slots, rolling sharpeners hold the knife against a magnetic guide, and some stone holders clip the blade at a set angle. Each approach trades flexibility for ease.
Fixed guides are only helpful if their angle suits your knife. Many Western knives use a slightly wider angle and many Japanese knives a narrower one, so check the listing and your knife’s documentation. A tool with several angle settings gives you more choices, but it also adds steps. If you do not know your knife’s angle, a common kitchen angle is a reasonable starting point, but confirm with the maker when you can.
Practice helps regardless of the guide. Use light, even strokes and keep the knife steady. A permanent marker drawn along the edge shows where the abrasive touches. If the marker disappears only near the tip or the heel, adjust your position. Good habits formed early make any later move to freehand sharpening easier.
Common First-Timer Mistakes
The most common mistake is pressing too hard. Heavy pressure does not make the edge sharper, and it can wear the knife quickly or create a ragged edge. Let the abrasive do the work, and use consistent, light strokes. Another frequent error is changing the angle during a stroke, which rounds the edge and makes the knife feel dull.
Skipping the burr check is another trap. When you sharpen one side, a thin burr forms on the other, and you need to remove it. Alternate sides or use a finer abrasive at the end to clean it up. Without that step, the knife may feel sharp for a moment and then fold over.
Beginners also tend to overuse coarse stages. Use the coarse surface only when the knife is dull or damaged, and finish on a fine one. Do not sharpen serrated blades on a flat tool, and do not use a sharpener designed for kitchen knives on a thick axe or tool unless the maker says it is safe. Finally, avoid rushing, since fingers and edges do not mix well when you are hurried.
Practice, Test Knives and the Learning Curve
Practice on an inexpensive knife before working on a favorite. Make a few sessions with a plain kitchen knife, and check results by slicing paper or a tomato. You will quickly feel the difference between a sharp edge and a dull one. Keep notes about how many strokes you used and the result, so you can repeat what works.
If you choose a whetstone eventually, start with a medium grit and a steady base. Hold the knife at the angle you can maintain, use short strokes and keep the stone wet if it needs water. Expect the first few attempts to be imperfect, since muscle memory takes time. A sharpening guide that clips onto the spine can bridge the gap.
Keep realistic expectations. A beginner can achieve a very serviceable kitchen edge within a few sessions. Perfect, razor-like edges require more practice. Learning also includes recognizing when a knife is beyond easy repair, such as a chipped or broken edge, and taking it to a professional. Safety comes first, so cut away from yourself and keep your fingers clear.
Upkeep, Safety and Moving Up Later
Keep your sharpener clean. Remove metal dust and residue after each use, and let wet tools dry before storage. Follow the instructions about water or oil. Replace worn abrasives, since a glazed surface does not cut. Store the tool in a place where children cannot reach it, and keep knives in a block, strip or guard.
Build a simple routine. Hone lightly now and then, and sharpen when the knife starts slipping on soft foods. Wash knives by hand, use wood or plastic boards and avoid cutting bone or frozen food. These habits make your sharpener last longer and keep knives in good shape.
When you are ready to move up, consider what you wish to improve. If you want finer edges, try a combination stone. If you want speed with more control, look at guided systems with replaceable abrasives. If you own many knives, a more capable machine may make sense. Replace your beginner tool when it no longer gives a good edge, its guide loosens or the abrasive is spent. There is no need to move up until your needs change.
Knife Sharpeners for Beginners FAQ
Which type is easiest?
Electric and pull-through sharpeners are simplest, since they set the angle for you.
Will a pull-through hurt my knives?
It can wear an edge faster than a stone, so use it only when the knife needs it.
Can I learn to use a whetstone later?
Yes. Start with a guided tool and move to stones when you want finer control.
How do I know my knife is sharp?
It should slice a tomato skin or paper with little pressure.
How do I know which angle my knife needs?
Check the maker's care guide or website, since many Western and Japanese styles differ. If you cannot find it, use the angle a tool recommends for general kitchen knives and avoid aggressive changes.
How many passes should I make with a pull-through sharpener?
Follow the instructions, which usually suggest a few passes per stage. Extra passes remove more metal without improving the edge much.
Is it okay to sharpen a knife that is only a little dull?
Yes, but honing or a light touch-up on a fine stage may be enough. Save coarse stages for knives that really need them.
Why does my knife feel sharp and then dull quickly?
A leftover burr can fold over after a few cuts. Finish with a fine stage or light alternating strokes to remove it.
Do I need to wear gloves when sharpening?
Not always, but cut-resistant gloves can add confidence while you learn. Keep fingers clear of the edge either way.
Should I learn on my best knife?
It is better to practice on an inexpensive knife first. Once you can get consistent results, move on to your better knives.
The Short Version
For electric ease, the Chef’sChoice EdgeSelect 120. For a compact electric, the Presto EverSharp. For a rolling method, the Tumbler. For adjustable angles, the KitchenIQ. For a pocket tool, the Smith’s Jiffy-Pro. For a brand name, the Zwilling Twin Sharp. Whichever you pick, keep strokes light and let the tool do the work, and test the edge on paper or a tomato skin before you start cooking.
Related Guides
- 6 Best Manual Knife Sharpeners for Beginners
- 6 Best Pull-Through Knife Sharpeners for Beginners (2026)
- 6 Best Knife Sharpeners for Victorinox Knives (2026)
- 6 Best Knife Sharpeners for Wusthof Knives (2026)
- 6 Best Knife Sharpeners: Electric, Stones and Rods (2026)
How Each Sharpener Style Actually Works
The six sharpeners in this guide use different mechanics, and knowing the difference helps you predict what each will do to a knife. Electric models such as the Chef’sChoice EdgeSelect 120 and the Presto EverSharp spin abrasive wheels or belts at a set angle. They are fast and forgiving, but they remove metal quickly, so a few passes go a long way. Manual pull-through tools like the Smith’s Jiffy-Pro and the Zwilling Twin Sharp use fixed abrasive slots, and you supply the motion by drawing the knife through. The KitchenIQ adds an angle adjustment, which lets you match different blades.
The Tumbler rolling sharpener is a different approach. The knife is held in a magnetic cradle at a fixed angle while you roll a disc along it, so the angle stays consistent without freehand skill. It tends to be slower, but the process is easy to follow and the results depend less on your hand steadiness.
- Electric: speed and low effort, but more metal removal and a bigger footprint.
- Pull-through: compact, cheap and quick, though fixed angles can be a poor match for some knives.
- Rolling or guided: slower, more controlled, and generally more forgiving of mistakes.
None of these is automatically better. The right style is the one you will use regularly and that suits your knives, so match it to your habits rather than the longest feature list.
Knives You Should Not Run Through a Beginner Sharpener
A beginner tool is built for common stamped or forged stainless kitchen knives with a standard bevel. Some knives need more care, and putting them in the wrong sharpener can leave scratches, chips or an uneven edge. Before you start, check the maker’s list of compatible blades.
- Serrated knives usually require a special tapered rod or a sharpener that supports them. A standard slot can flatten the teeth.
- Ceramic knives are very hard and brittle, and most home sharpeners are not designed for them.
- Thin, hard Japanese-style knives often have a narrower angle than a fixed Western slot, which can alter their geometry.
- Knives with very expensive or sentimental value are best left alone until you have practiced on cheaper ones.
If you own a mix, begin with ordinary stainless chef’s, utility and paring knives. They are the most forgiving and the most common, which makes them ideal for learning. Hold off on specialty blades until you know how your sharpener behaves and what the finished edge looks like.
Setting Up a Safe, Tidy Sharpening Spot
Sharpening is not complicated, but a small bit of preparation makes it safer and cleaner. Work on a stable, dry counter with good light, and keep the area clear of clutter. An electric sharpener should sit on a non-slip surface, and a manual one should be gripped firmly or placed on a damp cloth so it does not slide. Keep your fingers behind the spine of the knife and away from the path of the edge.
Sharpening produces metal dust, and some abrasive tools throw fine particles. Wipe the knife and the sharpener when you finish, and wash the blade with warm water and soap before using it on food. Check whether your tool has a removable tray or a way to clear debris, because built-up dust can reduce performance. Store the sharpener where it stays dry and away from small children.
Budgeting and Moving Up Over Time
A beginner sharpener does not need to be an expensive purchase. The cheaper pull-through and handheld models cost little and will teach you the basics of keeping a knife keen. Electric and angle-adjustable models cost more but save time or add flexibility. Think about how many knives you own and how often you cook before deciding how much to spend.
As your confidence grows, you may find that the tool you started with is limiting. That is a normal sign you are ready to try a whetstone or a guided system, which give more control over angle and finish. It does not mean your first purchase was wasted, since a simple sharpener remains handy for quick touch-ups, travel kitchens or a second home.
Questions to Ask Before You Order
Check which knives the sharpener supports and which it excludes, including serrated or ceramic blades. Look at whether the angle is fixed or adjustable, how many stages it uses, and whether the abrasive can be replaced when worn. For electric models, check the footprint, noise and cord length. For manual tools, check whether the base grips the counter. Consider the learning curve described in the instructions and whether the maker provides a clear guide for the first use. Finally, find out about warranty and return terms, since a sharpener that does not suit your knives is easier to swap if you act quickly.
Frequently Asked Questions
Can I sharpen a ceramic knife with a beginner sharpener?
Generally no. Ceramic is very hard and brittle, and most home sharpeners are made for steel. Using the wrong tool can chip the blade. Check the sharpener’s description for ceramic support, or use a service that specializes in ceramic knives.
Are electric knife sharpeners bad for knives?
Not inherently, but they remove metal faster than manual tools. Used sparingly and with the maker’s stage instructions, they can keep a standard stainless knife in good shape. Overuse can wear a blade down sooner, so sharpen only when honing no longer helps.
How do I clean a knife sharpener?
Unplug electric models, then brush or wipe out metal dust with a dry cloth or soft brush. Follow the maker’s cleaning advice for abrasives, since some should not get wet. Clear residue regularly so the abrasive surfaces cut cleanly.
How often should a beginner sharpen versus hone?
Hone lightly when the edge feels slightly off, and sharpen when honing no longer restores a clean cut. For many home cooks that means sharpening a few times a year. Frequent heavy use or a hard cutting board can shorten that interval.