A pin vise is a small hand held chuck on a handle. You grip it and twist to turn tiny drill bits, hold wire, files, taps or reamers, and work on models, jewelry and electronics where a power tool is too coarse. The main choices are the clamping range, the body material, whether one end or both ends open, and whether bits come in the box.
The six pin vises below range from a lightweight Tamiya for model work to a robust adjustable General Tools unit and a kit with 18 micro bits. Sizes and materials come from each listing page and are the makers’ own claims. We have not used these tools ourselves. Where a page leaves out a size range, we say so.
As an Amazon Associate we earn from qualifying purchases. Links below are affiliate links, and they do not change the product information we give.
What to Look For
| Feature | Why it matters |
|---|---|
| Clamping range | Tiny bits need a fine collet; larger shanks need a bigger chuck |
| Body | Brass, steel and plastic differ in weight and grip |
| Hollow bore | A hollow body lets long wire or rod pass through |
| Extras | Bits in the box save buying them separately |
In this guide
Specs at a Glance
| Pin vise | Range | Material | Notes |
|---|---|---|---|
| Tamiya 74112 | 0.1 to 3.2 mm | Nickel plated brass | Ball bearing rotating end; elastomer grip; 1.44 oz |
| General Tools 93 | Keyless three jaw chuck | Steel and plastic | 5.75 in; 6.4 oz; the largest in the maker’s line |
| General Tools 90 | Not stated | Tool steel, nickel | Double end; reversible collets; hollow body |
| General Tools S94 | 0 to 0.187 in | Alloy steel | Set of four single end vises; hollow bodies |
| SE 840SH | Not stated | Brass | Swivel head; two reversible collets; 3.6 in |
| Craft911 kit | Bits 0.8 to 2.5 mm | High speed steel bits | 18 bits; 4 in long; 1.44 oz |
The 6 Best Pin Vises

Top pickBest for plastic model kits and tiny holes
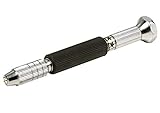
1. Tamiya 74112 Fine Pin Vise D-R (0.1 to 3.2 mm)
A model maker’s pin vise made from nickel plated brass with an elastomer grip. The rotating end has built-in ball bearings so the handle turns smoothly under the palm. The clamping range is listed as 0.1 to 3.2 mm and the tool weighs 1.44 ounces.
Suits: plastic model kits and tiny holes. Strengths: a wide fine range and a bearing end. Weaknesses: small and light for heavy work. Skip it if you want a bench style handle.

Best for a bench or toolbox pin vise with a hand filling handle
2. General Tools 93 Adjustable Pin Vise
A pin vise with a three jaw hardened steel keyless chuck and a plastic handle. The maker calls it the largest and most sturdy pin vise in its line, meant for electronics, tool making, model making and hobbies. It holds small drills, deburrers, wire, files and reamers. It measures 5.75 inches and weighs 6.4 ounces.
Suits: a bench or toolbox pin vise with a hand filling handle. Strengths: a keyless adjustable chuck. Weaknesses: the page gives no exact range. Skip it if you want a slim jeweler’s tool.

Best for flipping between two small tools
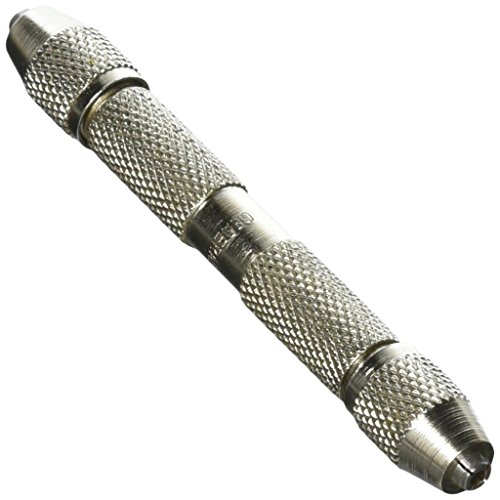
3. General Tools 90 Pin Vise, Double End
A small tool steel pin vise with a collet at each end. One end can drill while the other holds a deburring tool or reamer. The body is knurled for grip and hollow, so long wire or rod can pass through. It measures 3.63 inches and weighs 1.76 ounces. The listing does not give the collet range.
Suits: flipping between two small tools. Strengths: two collets and a hollow body. Weaknesses: no stated size range. Skip it if you need the range confirmed before buying.


Best for a shop that wants several sizes at hand
4. General Tools S94 Single End Pin Vise Set
A four piece set that the maker says covers its whole selection of single end pin vises, with collet sizes from 0 to 0.187 inch. The alloy steel bodies are hollow so they can be used with long rods or wire. The listing weight is 4.48 ounces. The page does not say how each of the four is sized.
Suits: a shop that wants several sizes at hand. Strengths: four vises in one purchase. Weaknesses: no breakdown by piece. Skip it if one vise is enough.

View General Tools S94 Single End Pin Vise Set,Silver on Amazon

Best for light fine drilling
5. SE 840SH Swivel Head Pin Vise
A brass pin vise with a swivel head, two reversible collets and an anti-slip body, aimed at hobby, professional and precision work. It is 3.6 inches long and weighs 0.32 ounce. The page does not state the clamping range, so confirm the collet sizes with the maker.
Suits: light fine drilling. Strengths: a swivel head and reversible collets. Weaknesses: no size range on the page. Skip it if you want bits in the box.


Best for resin and craft drilling
6. Craft911 Pin Vise Hand Drill with Micro Drill Bits
A pin vise sold with 18 high speed steel micro bits from 0.8 mm and 1 mm up to 2.5 mm. It is 4 inches long, weighs 1.44 ounces and has a soft shaft cover for grip. The maker names jewelry, resin, beads and shells as typical uses.
Suits: resin and craft drilling. Strengths: a full bit assortment. Weaknesses: small bits only. Skip it if you want a metal bodied vise.

View Pin Vise Hand Drill Manual with Micro Drill Bits, Jewelry Drill for Resin on Amazon
Care and Setup
- Insert the bit fully and tighten the chuck by hand.
- Drill slowly with light pressure, as tiny bits snap easily.
- Back the bit out often to clear chips.
- Store the vise with the collet closed and free of dust.
Mistakes to Avoid
- Forcing a bit larger than the listed range.
- Leaning on the tool and bending the bit.
- Buying without checking the collet range on the page.
- Using fine bits on hard material.
Collets, Chucks and the Size Range They Grip
The business end of a pin vise is the part that holds the bit, and it determines which tools you can use. Most designs use a collet, a split sleeve that squeezes the shank as a collar is tightened, and several vises include a few collets so that one tool can hold a range of shank sizes. Others use a multi-jaw chuck that opens and closes to grip a range of sizes in one piece. Both can work well, but they behave differently.
Collet designs tend to center the bit well and hold small sizes firmly, provided you use the right collet for each shank. If the collet is too large for the bit, the bit slips or wobbles. Chuck designs are convenient because there are no loose parts to track, but they rely on well-made jaws for accurate centering. A poorly centered bit wobbles, which breaks small bits quickly and produces oversized holes.
- Check the stated range of shank sizes and compare it with the bits you plan to use.
- Check whether collets are included, and in which sizes.
- Look for a double-ended model if you want to keep two sizes ready.
- Be aware that a vise labeled for fine work may not grip larger shanks safely.
If your bits have a larger shank than the chuck allows, you need a different tool. Do not force a bit that does not fit. Match the vise to the range you actually use most.
Hand Drilling Technique for Clean Small Holes
A pin vise drills by hand, which gives control and feel that a power tool cannot. The technique is simple but benefits from patience. Mark the spot with a small center punch or a tiny dimple so the bit does not wander. Hold the work firmly or clamp it. Place the tip of the bit on the mark, hold the vise upright, and rotate it between your thumb and fingers while applying light, steady pressure.
Keep the bit aligned with the hole. Tilting the vise as you turn it bends small bits and makes them snap. Let the bit cut instead of pushing hard, and back out often to clear chips. For deeper holes in plastic, resin or metal, repeat this cycle so the chips do not jam the flutes. A drop of suitable lubricant helps in metal; check what is appropriate for your material.
- Use a light touch; if you need to force it, the bit is dull or too small for the material.
- Drill from one side, then check from the other to keep the hole straight.
- For thin sheets, place a scrap of wood behind the work to avoid burrs and tear-out.
- Wear eye protection, as small fragments can fly.
Holes in brittle materials such as thin plastic can crack if you press too hard, so go slowly. With practice, you can drill neat holes for rigging in models, for pins in jewelry, or for wires in electronics.
Choosing and Protecting Small Drill Bits
The vise is only half the story, and tiny bits are fragile. Bits for this kind of work come in high-speed steel, carbide and other materials, and each has strengths. High-speed steel is common and forgiving for plastics, wood and soft metals. Carbide is hard and holds an edge but is brittle and can snap under side loads, which makes it a poor match for a beginner’s hand-drilling. The material listed in a set is usually a claim from the seller, so check the description for details.
Bit size is given in millimeters, inches, or number and letter gauges. Make sure the unit is clear when you choose a set. For model work, many people use a range of tiny sizes; for jewelry, you may need a few sizes for wire and findings.
- Keep bits in an indexed case so you can find the right size and avoid damaging the tips.
- Replace bits that are dull, bent or chipped instead of pushing harder.
- Use a bit with a shank that matches your collet, not one that is slightly smaller.
- Take extra care with the smallest sizes, which can break at the slightest twist.
A bent bit gives uneven holes and may bend further in the chuck. Never try to straighten a bent micro bit; replace it. Buy spares of the sizes you use most.
Handle Shape, Weight and Swivel Heads
Because you spin a pin vise with your fingers, the body shape affects how comfortable and controlled it feels. Slim, round handles roll easily between fingertips and suit very fine work. Thicker or knurled handles give more grip and are easier on the hand for longer sessions. Knurling is a pattern of fine ridges that stops the vise from slipping in your fingers, but heavy knurling can be rough on skin.
Some pin vises have a swivel head on the end. This lets you press down with the palm or a finger while the body spins freely, so you can apply steady downward pressure without bracing the whole vise against your hand. It is helpful for deeper holes and for work where you need to keep the bit vertical. It adds a small part that can wear or loosen, so check that the head turns smoothly and does not wobble.
- A metal body feels solid and tends to last, while plastic bodies are lighter.
- Weight is noticeable over long sessions; a lighter vise is gentler on the hand.
- Check that the vise has a flat or a mark that stops it from rolling off the bench.
- Consider an extra-long handle for reach into tight spots.
If you have arthritis or limited grip strength, look for a larger handle or a design that is easy to turn and tighten. Try to compare the vise with tools you already like.
Single Tools, Sets and Ongoing Upkeep
Pin vises are sold as single tools, double-ended tools and sets with bits. A single vise is the least expensive way to start, and it suits someone with bits already on hand. A set offers a vise, several collets and a range of bits in one purchase, which is handy for beginners but can include bits you will rarely use. Quality can vary between bits in a set, so be ready to replace any that perform poorly.
Think about the type of work. Model builders, jewelers, electronics hobbyists, dollhouse makers and woodworkers each use different sizes and materials. If you do a mix of tasks, a vise with a range of collets and a few spare bits gives flexibility, while someone who does one task repeatedly may prefer a dedicated vise for it.
Upkeep is brief. Wipe the vise after use, blow dust out of the collet, and keep the threads clean. A drop of light oil on the threads now and then keeps them turning smoothly, though keep oil away from the gripping surfaces. Store the vise and bits in a case.
Signs it is time to replace the vise include a collet that no longer holds bits, a bent or wobbly body, damaged threads, a chuck that does not close evenly and a swivel head that binds. Because the bit runs true only if the vise does, a worn tool produces poor results even with new bits.
Which pin vise should you buy?
The best pin vise is the one whose clamping range matches the bits you already own and whose handle suits the work you do most. Here is how the six picks map to common needs.
- Plastic model kits and tiny holes: the Tamiya 74112 lists a fine clamping range and a bearing end, so it suits delicate hobby drilling.
- A sturdy bench or toolbox tool: the General Tools 93 has a keyless adjustable chuck and a larger handle that fills the hand.
- Two tools ready at once: the General Tools 90 has a collet at each end, so you can keep a drill bit on one side and a reamer or deburring tool on the other.
- Several sizes in one purchase: the General Tools S94 set gives you four single end vises, which saves swapping collets mid-job.
- Straight, steady holes with palm pressure: the SE 840SH has a swivel head, which lets you push down while the body spins.
- Starting from zero with no bits: the Craft911 kit includes a full assortment of micro bits, which suits resin, beads and craft drilling.
If you are unsure, think about what you will hold most often. A pin vise for jewelry or rigging wire is a different purchase from one for deburring metal parts, and the right pin vise for a beginner is often the one that comes with bits.
What to check before you buy, and who should skip it
Before you buy a pin vise, confirm the clamping range, the body material and what is in the box. Several listings in this guide do not state a collet range, so do not assume it will fit your bits.
- Measure or look up the shank size of the smallest and largest bits you plan to use.
- Check the listing for the collet or chuck range, and ask the seller if it is missing.
- See whether collets, bits or a case are included, or sold separately.
- Look at the length and weight, since a very light tool and a heavy one feel quite different in the fingers.
- Confirm the return and warranty terms on the listing page.
- Decide whether you need a hollow body for long wire or rod.
There are honest trade-offs. A hand pin vise is slow, so it is a poor choice if you need to drill many holes quickly or work in thick, hard metal. A kit with many micro bits is convenient, but bits of that size break easily and you may find yourself replacing the ones you use most. A larger, heavier vise is more comfortable to grip but can feel clumsy for very fine work. A set of four is handy in a busy shop but is wasted if one size covers everything you do.
You can reasonably skip this tool if you already own a small rotary tool with a precision chuck and are happy with its control, or if your work needs bits larger than any of these chucks can hold. If a pin vise still fits your plans, compare the picks above, check the current listing for size and what is included, then choose the one that fits how you will use it.
Putting the Picks to Work: Small-Hole Scenarios by Craft
A pin vise holds tiny bits and small workpieces so your fingers become the motor. Its whole value is control at a scale where a power tool destroys in a second what took an hour to build. The six picks split into precision single tools, versatile double-ended designs and bit-inclusive kits, and each craft below leans on a different one of those strengths.
Scale modelling and miniature work
Drilling grab-handle holes, vent holes and pilot holes in plastic kits demands a vise that centres very small bits and turns without wobble. The Tamiya 74112 Fine Pin Vise, with its stated fine gripping range, is the specialist here: it was designed by a model company for exactly this work. Technique is patience: mark the spot, start the hole with the bit’s point under light finger pressure, and turn slowly while clearing dust from the flutes every few turns. Plastic melts and grabs if you spin fast or push hard, so let the bit’s sharpness work and back it out often.
Jewellery, wire work and beading
Jewellers and beaders use pin vises as much for holding as for drilling: gripping wire for twisting, holding a bead steady for reaming its hole, and drilling soft materials and shell. A swivel-head design such as the SE 840SH lets the tool rotate in the palm while pressure stays constant, which suits repetitive small holes. The General Tools adjustable and double-ended vises, the 93, the 90 and the S94 set, cover the general bench version of this work, where the same tool must grip a bit in the morning and a needle file or wire in the afternoon.
Electronics, repair and general bench tasks
Clearing a clogged nozzle, drilling a circuit board by hand for a prototype fix, or holding a tiny screw while it is cleaned: these odd jobs are why a general pin vise lives in a repair drawer. The Craft911 kit, which bundles the vise with micro drill bits, suits this grab-and-go pattern and the beginner who does not yet know which bit sizes their hobby will demand. The kit’s bits are a starting set; the sizes you use constantly deserve eventual replacement with quality individual bits, while the odd sizes serve happily for years.
Head-to-Head: Holding Systems and Formats Compared
Collet versus three-jaw chuck
Collet vises grip a narrow size range very truly, which is why the precision picks use them: a bit held in a matched collet spins without the tip orbiting. Three-jaw mini chucks grip a wider range with a small sacrifice in concentricity. For drilling holes where position matters more than diameter, collet trueness wins. For a bench tool that must hold bits, wire, files and whatever else the day brings, the chuck’s range wins. The double-ended General Tools 90 splits the difference by offering different gripping capacity at each end.
Single tool versus set versus kit with bits
The S94 set format spreads gripping capacity across several vises, which suits a bench that wants a dedicated holder left set up for a repeated task. A single quality vise suits a focused craft. A kit with bits suits a beginner or a new hobby, where the first month is about discovering sizes. None is a hierarchy; they are answers to how settled your work already is. The unsettled should buy range, the settled should buy precision.
Swivel head versus fixed head
A swivel head lets the handle rotate against your palm while your fingers turn the barrel, giving smooth continuous rotation under steady pressure. It shines in repetitive drilling and in holding work while the other hand operates. A fixed head gives a more direct, rigid feel that some users prefer for starting holes precisely. If your work is mostly starting holes, fixed is fine; if it is mostly completing many holes, the swivel earns its place.
First Use: Setup and Checks in Order
Fit the smallest bit you own first and check how truly it spins: hold the vise still, rotate it slowly, and watch the bit tip against a fixed background. A tip that draws a circle instead of a point means the bit is bent, the collet is mismatched, or debris is in the jaws. Clean, reseat and retest before blaming the tool. Then drill a test hole in scrap of your working material, noting how many turns it takes and how much pressure feels right. Practise backing the bit out to clear flutes; that single habit prevents most snapped micro bits. Finally, test the vise as a holder: grip a piece of wire or a small part and confirm it holds without marring, since half of a pin vise’s working life is holding, not drilling.
Troubleshooting in Diagnostic Order
Micro bits keep snapping
Snapping is almost never a bit-quality problem alone. First, check pressure: micro bits cut with fingertip force, and palm force bends them past recovery. Second, check alignment: a hole started at an angle loads the bit sideways with every turn. Third, clear the flutes; a packed flute turns a drill into a wedge. Fourth, confirm the bit spins true, because a wobbling bit fatigues at the same point each revolution until it parts.
The bit slips and spins in the vise
Clean the bit shank and the gripping surfaces first; oil and dust are the usual culprits. Then confirm the bit size is inside the collet or chuck’s real range rather than at its ragged edge. Tighten firmly by hand, and if a particular bit keeps slipping, its shank may be undersized or polished smooth from previous slips, in which case replacing the bit fixes what tightening cannot.
Holes come out oversized or off position
Oversized holes mean the bit is orbiting: a bent bit, a mismatched collet or a loose grip. Off-position holes mean the start wandered: dimple the spot first with a needle point, start with two or three slow turns while sighting from above, and only then settle into a drilling rhythm. In hard materials, a tiny starter divot from a harder point tool makes the difference between a placed hole and a skated scratch.
The vise feels rough or the head will not swivel
Grit is the usual cause. Unscrew the assembly over a clean surface, brush out debris, and reassemble without forcing threads. A swivel head that binds usually has dust packed into the joint; clean it and avoid heavy oil, which attracts more dust and migrates onto tiny workpieces.
Storage, Bit Care and Who Should Buy What
Store micro bits in a labelled case or block, never loose, because a loose micro bit is both invisible and fragile. Keep the vise with its collets together in one pouch or drawer slot so the set stays a set. Wipe bits before storage; the smallest tools rust fastest because there is so little metal to spare.
Decide by craft. The scale modeller should buy the precision collet vise and quality bits in their two or three working sizes. The jeweller and beader should buy the swivel head or a double-ended vise for holding versatility. The repair bench should buy the general adjustable vise. The beginner in any small-scale hobby should buy the kit with bits, learn which sizes matter, and upgrade those specific bits later. A pin vise is a small purchase that punches far above its size, provided its grip is true and its bits are treated as the delicate instruments they are.
Small-Hole Method: From Mark to Finished Hole
Marking and starting at miniature scale
At pin-vise scale, the mark is the hole: an error invisible on a door hinge is the whole tolerance on a model part. Mark with a needle point or the tip of a blade under magnification if you use it, making a dimple just deep enough to seat the bit. Start the bit in the dimple with two or three slow turns while sighting straight down the tool’s axis; a hole started true usually finishes true, because the tiny bit follows its own beginning faithfully.
Peck drilling and chip clearing
Drill in short advances: a few turns in, a partial withdrawal to clear the flutes, then back to depth. This pecking rhythm prevents the packed-flute wedging that snaps micro bits and melts plastic. In resin and soft plastic, withdraw fully and let the bit cool by touch standards; heat at this scale builds fast and softens the material, which then grabs the bit on the next advance.
Finishing: reaming and test fitting
A drilled micro hole is often a starting size, not a finished one. Open it gradually with the next bit sizes, or with a reaming pass using the same bit turned slowly with minimal pressure, testing the fit of the wire, pin or part after each step. Removing a whisker at a time is the entire craft at this scale; there is no technique for putting material back.
More Questions Buyers Ask After the First Month
Why does my bit wander on hard plastic and metal?
Hard, smooth surfaces give a tiny point nothing to bite. Deepen the starting dimple with a harder point tool, begin with your smallest bit to establish a true pilot, and keep the first turns slow and perfectly vertical. A wandering start cannot be corrected by the hole that follows it, so the extra minute at the dimple stage is the whole solution.
How do I hold a tiny workpiece safely while drilling it?
Never pinch a small part between the fingers that sit behind the drilling point. Rest the part on a cork, a piece of soft wood or a dedicated holding jig, or grip it in a second vise or pliers with padded jaws. The pin vise’s control tempts users into hand-holding parts that should be fixtured; resist whenever the bit could break through into a fingertip.
What is the difference between the bits in a kit and separate quality bits?
Kit bits cover many sizes adequately and are ideal for discovering your working sizes. Separate quality bits, in the sizes you use constantly, typically run truer, stay sharp longer and snap less often because their flutes are ground more consistently. The economical pattern is kit first, then quality replacements only for your proven sizes.
Can I use a pin vise to tap or clean small threads?
A pin vise makes an excellent handle for small taps and thread-cleaning tools, because its sensitive grip lets you feel the moment a tap begins to bind, which is the moment to reverse and clear it. Work with the same pecking rhythm as drilling: a partial turn forward, a fraction back, and never force a small tap that has stopped cutting willingly.
Decision Scenarios and a Simple Buying Checklist
Before choosing, answer three questions honestly. What do you hold most: bits for drilling, or parts, wire and small tools for working on? What size range covers your week: the finest model sizes, or a general bench spread? And how settled is your hobby: still exploring, or committed for years? The scale modeller with committed habits should buy the Tamiya fine vise and quality bits in proven sizes. The jeweller who holds as much as drills should buy a General Tools double-ended or adjustable model, or the S94 set if several holders would each stay set up for a task. The electronics and repair bench should buy the SE swivel head for its continuous rotation during repetitive small holes, or a general General Tools model for maximum odd-job tolerance. The newcomer to any miniature hobby should buy the Craft911 kit, spend a month learning which sizes matter, and then upgrade exactly those bits. One more consideration is magnification: if you work under a lamp or loupe, a vise with a stable, non-reflective finish and a head that stays where you set it earns its place quickly, because at miniature scale the tool’s behaviour under your actual working conditions matters more than any specification. A pin vise costs little, lives in a drawer, and is reached for constantly once its habits are learned; buy the one whose grip matches your work and it will quietly become indispensable.
Organising Bits and Collets So the System Survives
Pin vise ownership fails in the drawer, not at the bench: collets separate from their vise, micro bits migrate into general clutter, and the tool that should take ten seconds to set up takes ten minutes to assemble. Give the whole system one home: a small case or pouch holding the vise, its collets in a labelled tube or compartment, and bits in a slotted block or their original indexed case. When a bit is borrowed for another tool, return it the same day; micro bits are too small to survive as loose citizens of a general toolbox. Label bit sizes on the case rather than trusting eyesight, because at these diameters adjacent sizes are indistinguishable until they are chucked and measured against the work. This modest organisation is what turns a pin vise from an occasional frustration into the reach-for-it-first tool its owners describe, and it costs nothing but the decision to keep the family together.
Beyond Drilling: The Pin Vise as a Holder
Half the value of a pin vise never involves a drill bit. It holds wire while you form a loop or a coil, grips a tiny screw while you clean its threads, presents a small part at a workable angle for filing, and steadies a needle, a burr or a small tap for tasks across jewellery, electronics and model work. When judging the picks, weigh this holding life seriously: a vise whose jaws close parallel and grip without marring will serve in a dozen crafts, while one bought purely as a drill handle may disappoint the first time it is asked to hold a polished part. Protect delicate work by wrapping a turn of tape around the part or choosing smooth-jawed collets for finished surfaces. The benches that love their pin vises most are rarely drilling with them all day; they are holding the small world steady, one tiny part at a time, while the other hand does the delicate work.
Working Under Magnification: Setup Tips
Many pin vise tasks happen under a lamp or loupe, and the setup deserves a minute of thought. Position the light so it rakes across the work rather than shining straight down it; raking light reveals the dimple, the bit’s point and the hole’s progress that flat light hides. Rest your wrists or forearms on the bench edge so the tool is steadied by furniture rather than by muscle alone, and keep the workpiece low, close to the bench surface, where your hands naturally stabilise. Take breaks on a schedule rather than when your eyes demand them; miniature work concentrates vision and grip together, and both degrade quietly before they complain. The vise itself should disappear into this setup, turning smoothly, holding truly, asking for no attention, which is precisely what the better picks here are designed to do.
A Word on Patience at Small Scale
Every failure mode in pin vise work, snapped bits, wandered starts, oversized holes, traces back to hurry. The tool operates at a scale where a second of patience is worth minutes of correction, and where correction is sometimes impossible because the part cannot be un-drilled. Build the pause into your rhythm: dimple, sight, turn slowly, clear, test. The fastest miniature workers are not the ones who turn quickest; they are the ones who never have to start a part over.
Labelling and Lending: Small Tools Wander
Pin vises and their bits are the most borrowable and most losable items on any bench. Mark the vise discreetly as yours, keep its kit in one case so a loan is a case rather than a handful of parts, and note what left the bench when a fellow crafter borrows it. When it returns, check the bits before they rejoin the block; a bit bent during someone else’s project will otherwise announce itself during yours. None of this is mistrust; it is simply how small, shared, precision tools survive in busy workshops, clubs and classrooms where many hands reach for the same helpful little instrument.
Keeping a Record of Sizes That Worked
Miniature hobbies repeat themselves: the same kit brands, the same wire gauges, the same hole sizes project after project. Keep a card in the vise case noting the bit and collet combination that worked for each recurring job. The note takes seconds to write and saves the trial-and-error fitting that otherwise repeats every few months, because human memory for which tiny bit suited which tiny task is reliably optimistic and reliably wrong. Your future self, mid-project with parts spread across the bench, will be grateful for the card.
Final Thought: Small Tool, Long Career
Few tools this inexpensive stay useful for an entire crafting lifetime. A pin vise bought for one hobby migrates happily to the next, because small holes and small parts exist in all of them. Buy one whose grip runs true, keep its family of collets and bits together, and it will still be earning its drawer space decades from now.
Pin Vise FAQ
What is a pin vise used for?
It holds small drill bits, wire, files and reamers by hand so you can drill tiny holes or do fine work with good control.
Which pin vise has a stated fine range?
The Tamiya lists 0.1 to 3.2 mm. The General Tools S94 lists collets from 0 to 0.187 inch.
Can a pin vise drill metal?
It can drill soft metals and thin sheet with suitable bits and patience. Use light pressure and a lubricant if appropriate, and consider a power tool for hard or thick metal.
Why do my small bits keep snapping?
Common causes are tilting the vise, pushing too hard and using dull bits. Keep the bit straight, let it cut and back out often to clear chips.
What is the difference between a collet and a chuck?
A collet is a split sleeve sized for a specific shank, while a chuck has adjustable jaws that grip a range of sizes. Collets center well, and chucks are more convenient.
Can I use a pin vise with a rotary tool?
No. A pin vise is a hand tool. Do not mount it in a power tool unless the maker says it is designed for that.
What is a swivel head for?
It lets you push on the end with your palm while the body spins freely, giving steady downward pressure for straight holes.
How do I stop a bit from slipping in the vise?
Make sure you use the correct collet for the shank, tighten firmly and check that the bit is clean and not bent. Replace worn collets.
What size bits should I buy?
It depends on your work. Choose sizes that match your needs, such as wire or rigging, and buy spares of the smallest ones, which break most often.
What size pin vise do I need for model making?
Choose one whose clamping range covers the smallest bits you use, since model work often needs very fine sizes. Check the collet range on the listing before buying. A vise that only opens to larger sizes will not hold tiny bits securely.
Is a pin vise better than a rotary tool for small holes?
It depends on the job. A pin vise gives more feel and control and is less likely to break tiny bits or crack brittle plastic. A rotary tool is faster, so it suits harder materials or many holes.
Should I buy a pin vise with bits included?
A kit is a good start if you own no small bits, because it saves buying them one at a time. If you already have bits you like, a vise alone may be enough. Check the sizes in the kit match the holes you plan to drill.
How tight should I make the chuck on a pin vise?
Tighten it firmly by hand until the bit cannot turn or slip, but do not use pliers or force it. Over-tightening can damage the collet or bend a thin shank. If the bit still slips, check that the collet matches the shank size.
Can a pin vise hold wire or small files?
Yes, many pin vises hold wire, small files, reamers and similar tools within their stated range. Hollow bodies also let long wire or rod pass through. Check the range on the listing before relying on it.
Is a double-ended pin vise worth it?
It is worth it if you often switch between two tools, such as a drill bit and a reamer. You keep both ready without changing collets. If you only ever use one size, a single end vise is simpler.
The Short Version
For model work, the Tamiya. For an adjustable chuck, the General Tools 93. For two ends, the General Tools 90. For a four piece set, the General Tools S94. For a swivel head, the SE 840SH. For a kit with bits, the Craft911.