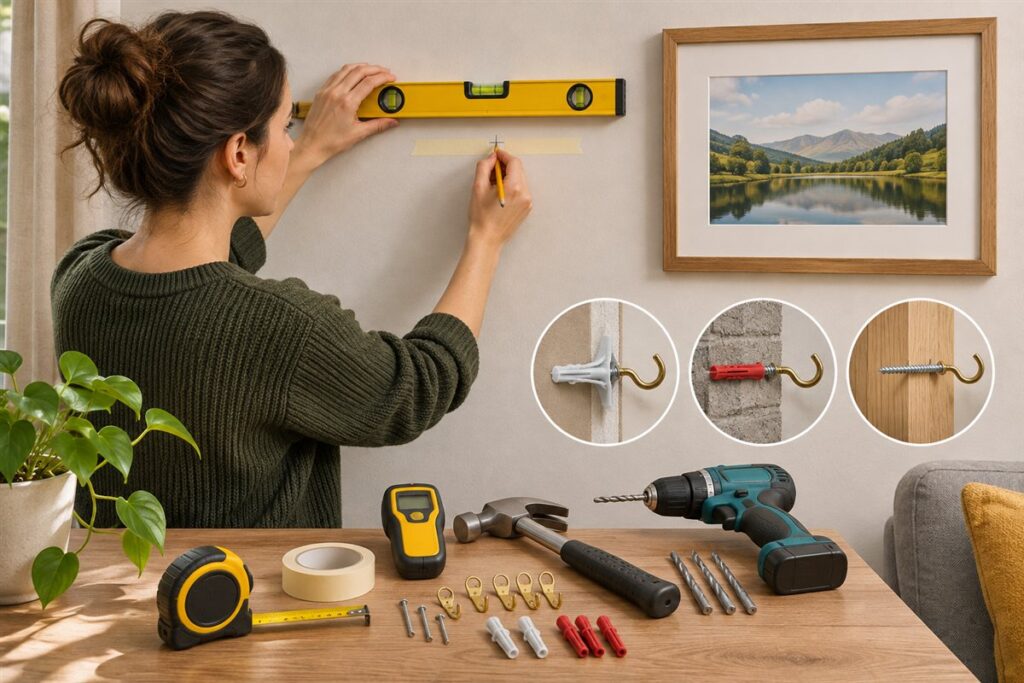
Hanging a frame neatly takes a tape measure, a pencil, a level and the right wall fixing for your wall type. Add a hammer or drill depending on the hanger, and always check what is inside the wall before making a hole. This guide covers the tools, a step-by-step method, how to arrange groups, and how to avoid the usual mistakes.
The Short Tool List
- A tape measure and a sharp pencil.
- A spirit level, ideally one long enough to span the frame.
- A hammer for nail-type hangers.
- A drill and bits for masonry or plasterboard fixings, if needed.
- A stud finder, treated as a guide and not a guarantee.
- A selection of picture hooks, wall plugs and anchors specified by the maker for the weight you plan to hang.
- Low-tack masking tape for marking positions.
Note that the maker’s weight guidance depends on the wall type, so read the packaging.
Step by Step Method
- Decide on the height. A common habit is to centre the artwork roughly at eye level, but adjust for furniture and room use.
- Measure the distance from the top of the frame to the hanging wire when pulled taut.
- Mark the wall at the chosen height, then subtract the wire measure to find the hook position.
- Check for hidden wiring and pipes. Use a detector as one guide, and avoid drilling above switches, sockets and along likely cable routes. If you are not sure, ask a qualified electrician or professional.
- Fit the hook or anchor following the maker’s instructions.
- Hang the frame and check with the level, adjusting as needed.
Choosing a Fixing
| Wall type | Common approach | Check |
|---|---|---|
| Plasterboard | Light hooks or suitable anchors | Maker’s weight guidance |
| Masonry | Plug and screw with masonry bit | Drill instructions |
| Timber stud | Screw into stud | Hidden services nearby |
Worked Walkthrough: Hanging One Frame With a Wire
This example uses an invented frame to show the arithmetic. Suppose the frame is 40 cm tall, and when you pull the wire taut with a finger, the wire peaks 8 cm below the top edge. You want the middle of the picture at 145 cm from the floor (an invented height; choose your own).
- The centre of the frame is 20 cm below its top edge, so the top edge needs to be at 165 cm.
- The wire peak is 8 cm below the top, so the hook goes at 157 cm from the floor.
- Mark that point lightly in pencil. Put a short strip of masking tape over the mark and make the mark on the tape, so the wall surface is not marked.
- Look at where the mark sits in relation to switches, sockets and likely cable runs. Use a detector as a guide, and ask a qualified professional if in doubt.
- Fit the hook the way the maker describes. For a nail-type hook, angle and tap gently so the plaster does not crumble.
- Hang the frame, place the level on top, and nudge until the bubble sits between the lines.
- Step back, view it from where you normally sit, and adjust if needed.
The same arithmetic works for any frame: centre height minus half the frame height gives the top edge, and subtracting the wire drop gives the hook position.
Tips for Groups of Frames
Cut paper templates of each frame, tape them to the wall, and move them around until you like the layout. Mark nail positions through the paper, then tear it away. This avoids extra holes.
For heavy mirrors or items hung above a bed or doorway, follow the maker’s fixing instructions and consider a qualified professional.
Common Scenarios
- A light print on a plasterboard wall: a small hook, used as the maker describes, may be enough. Check the weight limit on the packaging.
- A heavy mirror: use fixings the maker specifies for the weight and wall type, and consider a qualified professional. A fall could hurt someone.
- A gallery wall in a rented flat: check your lease on holes first. Low-damage hanging strips may work for light frames, following the product maker’s wall and weight guidance.
- A masonry or brick wall: this needs the correct drill type and bit and a matching plug. Read the drill manual and wear eye protection and a dust mask.
- A frame above a staircase: use a stable ladder or platform, and consider asking a second person to steady it.
Mistakes to Avoid
- Trusting a stud finder completely. Detectors can miss or misread things, so treat them as a guide.
- Ignoring the weight of the frame. Glass and wide frames add weight. Check the packaging and, if unsure, choose a stronger fixing.
- Measuring from the wrong point. Measure to the wire peak when it is pulled taut, not to the hanging ring.
- Drilling near switches and sockets. Cables often run in straight lines from them, so avoid the area directly above and below.
- Making holes before planning the layout. Templates on the wall prevent unnecessary holes.
Quick Troubleshooting
| Symptom | Likely cause | What to try |
|---|---|---|
| Frame hangs crooked | Wire has slipped or hook is off level | Check with the level and adjust the wire or add a second hook |
| Plaster crumbles around the nail | Brittle wall or wrong angle | Try an anchor made for the wall type, following the maker’s guidance |
| Anchor spins in the hole | Hole too large or wall too soft | Use a larger anchor made for the wall as the maker directs |
| Frame tilts at the bottom | No spacer on the lower corners | Add small adhesive bumpers |
Care and Upkeep Over Time
Think about the room as well as the wall. Keep frames away from direct heat sources and damp areas where possible, and consider how the picture will look from the usual seating position. Leave enough space between frames so each can be seen, and use small adhesive bumpers on the bottom corners to stop frames tilting. Recheck heavy items from time to time to make sure the fixing has not loosened, and replace any hook that bends or shows rust.
Glossary
- Stud
- A vertical timber or metal member inside a framed wall.
- Wall plug
- A sleeve placed in a drilled hole to give a screw something to grip.
- Anchor
- A fixing designed to hold in hollow or soft wall materials.
- Plasterboard
- A common interior wall board made from plaster between paper layers.
- Masonry
- Brick, block or concrete walls.
- Hanging wire
- The wire across the back of a frame that rests on the hook.
FAQ
Do I always need a drill?
No. Light frames can go on small hooks hammered in gently. Heavier ones and harder walls generally need drilling.
What if I make a wrong hole?
Small holes can usually be filled with a suitable filler. Check the filler maker’s instructions and your lease if you rent.
How high should I hang a picture?
Many people centre the artwork at roughly eye level, but furniture and room use matter. Over a sofa, leave a gap above the furniture so the picture relates to it and not to the ceiling.
How do I hang a picture without a wire?
Some frames have sawtooth hangers or two D-rings. Measure both fixing points, mark them level on the wall and fit two hooks, following the frame maker’s guidance.
Can I hang pictures on a tiled wall?
Tile needs a special bit and technique, and drilling can crack it. Follow the drill and bit makers’ instructions, or ask a qualified professional.
The Short Version
Measure, mark, level, and match the fixing to the wall and the weight. Check for hidden services first, plan groups with paper templates, and ask a professional when in doubt.