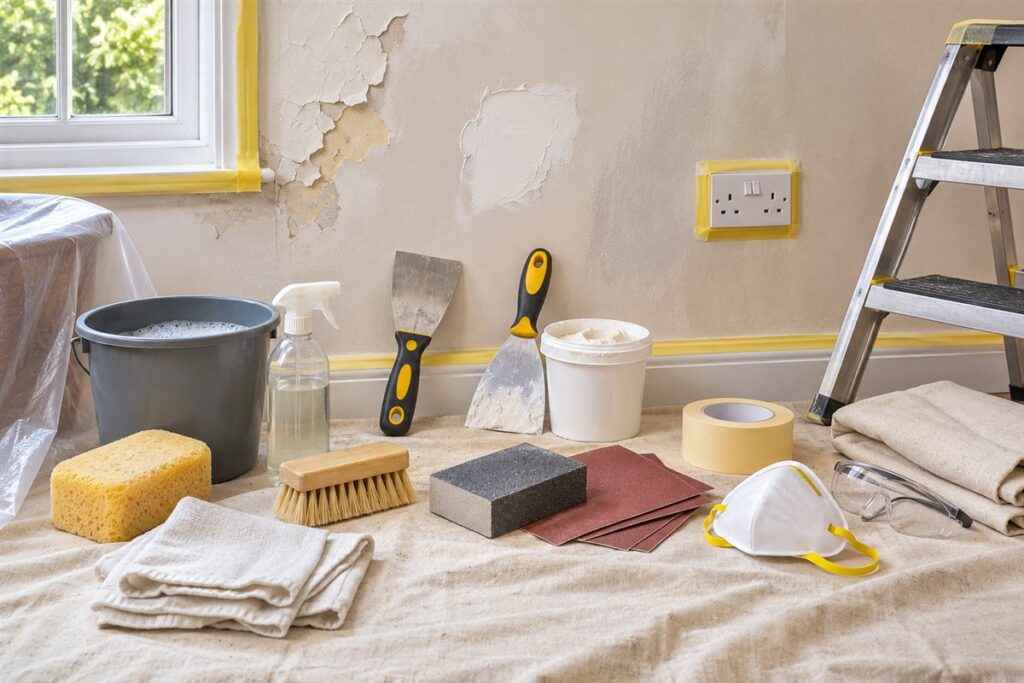
Good wall preparation depends on a scraper, filler knife, sanding supplies, masking tape and cleaning materials. Spending time on these steps usually makes the final coat look better, and a few precautions around dust and older finishes are worth following. This guide covers the tools, a worked sequence from bare wall to ready surface, and the mistakes that most often spoil the result.
Cleaning and Scraping
- A bucket, sponge and mild cleaning solution for dirt and grease.
- A flexible scraper for loose flaking material.
- A stiff brush for crumbling surfaces.
- Rags and dust sheets to cover floors and furniture.
Older finishes in some homes may contain hazardous materials. If a building is old and you suspect this, do not sand or scrape it dry; check local guidance and ask a qualified professional about testing and removal. Hazardous waste must be handled following local rules.
Filling and Smoothing
- Fill holes and cracks with a suitable filler using a flexible filling knife.
- Let the filler dry fully, following the maker’s instructions.
- Sand the area flat with a sanding block and fine paper.
- Wipe away dust with a slightly damp cloth.
- Spot-seal repaired patches with the primer the maker recommends.
A sanding block gives a flatter result than sanding by hand with a folded sheet. If you use a power sander, connect dust extraction if the model allows, and wear a dust mask recommended by the maker.
Masking and Protection
Use low-tack masking tape on trim, window frames and sockets. Press the edge down firmly and remove it at a shallow angle when the coating is touch dry, or as the product maker advises. Switch off power to sockets you need to remove covers from, and do not remove covers or touch wiring unless you are qualified. Ask a licensed electrician for any electrical work.
Ventilation and Reaching High Spots
Open windows while sanding or using solvents, and take breaks. For ceilings and high walls, use a stable step platform or ladder and follow the maker’s instructions. Working at height carries risk, so for tall or awkward areas, hire a qualified professional.
Prep Toolkit at a Glance
| Stage | Tool |
|---|---|
| Clean | Sponge, bucket, rags |
| Repair | Filler knife, filler |
| Smooth | Sanding block, fine paper |
| Protect | Masking tape, dust sheets |
Worked Walkthrough: One Wall From Marked to Ready
This order keeps dust and mess under control. Adapt it to your wall and to the filler and coating makers’ directions.
- Move furniture out or to the centre of the room and cover it with dust sheets. Cover the floor along the wall, and tape the edges of sheets down so they do not slide.
- Switch off power to nearby outlets if you need to remove cover plates, and only do this if you are qualified. Otherwise leave plates in place and mask around them.
- Look along the wall in bright side light. Mark dents, cracks, nail holes and flaking areas lightly with a pencil.
- Scrape off loose material with the scraper, holding it at a shallow angle. Brush away debris.
- Wash greasy areas, such as those near kitchens, with the mild cleaning solution, rinse with a clean damp sponge and let the wall dry fully.
- Press filler into each marked defect, pulling the knife across in one direction. Leave it slightly proud, because filler may shrink as it dries. Let it dry as the label says.
- Sand the dried filler flush with the sanding block, working in light, even strokes. Wipe the dust with a damp cloth, then spot-prime the patches with the recommended primer.
- Mask the edges of trim and fittings, press the tape down, and run a final check in side light before you apply a coating.
Common Scenarios
- Nail holes after removing pictures: a small amount of filler on a flexible knife, left to dry and sanded lightly, is usually enough.
- A glossy surface: a light sanding gives the new coating something to grip. Follow the coating maker’s guidance on preparation.
- A stain from water: find and fix the cause of any leak first. Ask a qualified professional if the source is unclear. Then follow the primer maker’s guidance for stain sealing.
- A ceiling: use a stable platform, wear eye protection, and expect dust to fall. Cover floors and consider asking for help on large areas.
- An older home: if you suspect old finishes contain hazardous substances, stop before sanding or scraping and seek advice from a qualified professional.
Mistakes to Avoid
- Skipping the cleaning step. Grease and dust stop coatings from sticking well.
- Applying filler in one thick layer. Deep holes may need layers and longer drying, as the filler maker describes.
- Sanding dry hazardous finishes. This creates dust that is harmful to breathe, so seek advice instead.
- Leaving masking tape on too long. Some tapes leave residue or lift the surface. Remove them as the tape maker advises.
- Rushing the drying time. Filler and primer that are still damp can bubble or flake later.
Quick Troubleshooting
| Symptom | Likely cause | What to try |
|---|---|---|
| Filled patch shows as a bump | Filler left too proud or sanding uneven | Sand with a block, wipe clean and re-prime the spot |
| Filler cracks as it dries | Applied too thickly | Dig out, refill in thin layers and allow each to dry |
| Tape pulls up surface material | Tape left too long or wall not fully dry | Remove slowly at a low angle next time and use a lower-tack tape |
| Ridges visible in side light | Scraping marks or old coating edges | Sand the edges level with a block and fine paper |
Care and Cleanup
Take your time with the last wipe-down. Dust left on a sanded surface shows up clearly once the new coat goes on, so finish with a damp cloth and let the wall dry. Check your work in a bright light shone along the wall at a low angle, since that reveals ridges and dents that are hard to see otherwise. Keep a small kit of rags, tape and filler ready for last-minute touch-ups. Close filler tubs tightly, wash knives before the filler hardens, and dispose of dust and waste following local rules. Let used sandpaper and rags go into the right waste stream, and vacuum floors rather than sweeping, which raises dust.
Glossary
- Filler
- A paste used to fill holes and cracks before sanding.
- Primer
- A preparatory coating that helps the final coat stick and look even.
- Sanding block
- A flat holder for sanding paper that keeps the surface even.
- Dust sheet
- A cover to protect floors and furniture.
- Side light
- Light shone at a low angle along a wall to reveal flaws.
- Spot-priming
- Applying primer only to repaired patches.
FAQ
Do I need to sand every wall?
Not always. Glossy or repaired areas generally benefit from light sanding, while clean, dull surfaces may need less. Check the coating maker’s instructions.
How do I dispose of leftover materials?
Follow local collection rules for liquids and used materials rather than pouring them down drains.
Can I fill and sand in the same day?
Only if the filler maker says the product dries that fast for the depth you are filling. Deep patches can take much longer, so follow the label.
What dust protection should I use?
Wear a dust mask recommended by the maker of your sanding product, along with eye protection. Keep the room ventilated, and consider a vacuum or dust extraction where the tool allows.
Should I wash walls before filling them?
Wash greasy or dirty areas first and let them dry. Filler sticks best to clean, dry surfaces.
The Short Version
Clean, fill, sand, wipe and mask, in that order. Take care with dust and old finishes, check the result in side light, and leave high or electrical work to qualified people.