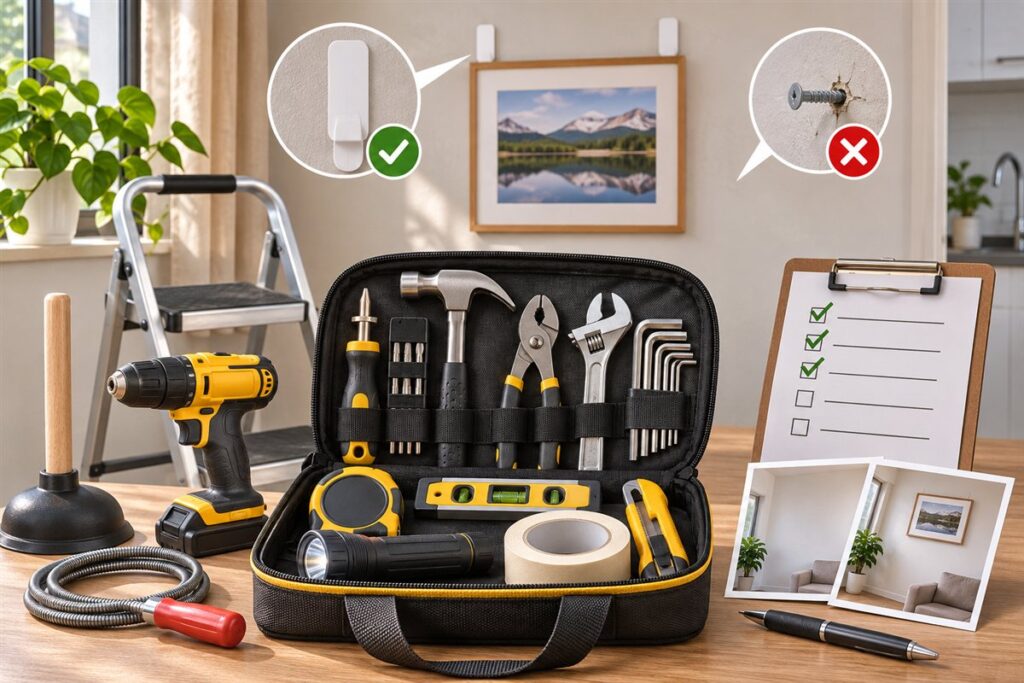
Renters need a small, tidy tool kit that handles minor fixes without harming the walls, floors or fittings that belong to the landlord. A handful of hand tools, a few low-damage hanging supplies and a clear understanding of what you are allowed to change will cover most situations. This guide covers the kit, the rules to check, and a sensible routine for the day you move in and the day you leave.
The Core Kit
You can keep this in a shoebox or a small tool bag.
- A multi-bit screwdriver with slotted and cross-head tips.
- A small hammer for light jobs.
- A tape measure and a short spirit level.
- Slip-joint pliers and an adjustable wrench.
- A set of hex keys for furniture.
- A utility knife and a roll of masking tape.
- A flashlight or headlamp.
Buy for the jobs you actually do. If you move often, choose items that pack flat and do not need a dedicated storage spot.
Know the Rules Before You Touch Anything
Your lease or tenancy agreement sets the limits. Before drilling, hanging heavy items or changing fixtures, read the agreement and ask the landlord or property manager. Many places permit small nail holes but not larger fixings, and some expect you to restore the wall before moving out. Anything involving electrical wiring, gas, plumbing behind walls or ceiling work should be left to the landlord or a qualified professional, and local rules may require a licensed person.
Renter-Friendly Fixes
- Tighten loose cabinet handles, hinges and door knobs with the right driver size.
- Replace worn furniture feet or add felt pads to protect floors.
- Use removable hanging strips for light frames, following the maker’s weight guidance.
- Seal drafty gaps with temporary, removable materials where allowed.
- Report leaks and faults promptly rather than patching them yourself.
Always follow the maker’s instructions on any removable adhesive product, since results depend on the wall surface.
Nice-to-Have Additions
| Item | Why renters like it |
|---|---|
| Cordless drill and driver | Speeds up assembly if drilling is allowed |
| Stud finder | Helps choose fixing points when permitted |
| Plunger and drain snake | Handles minor blockages |
| Small step stool | Reaches shelves without climbing on furniture |
Worked Walkthrough: Move-In to Move-Out
A simple sequence protects your position as a tenant and keeps your kit useful.
- On the day you move in, walk through each room with a phone or camera. Photograph existing marks, scratches, holes and worn fittings, and note the date. Share the photos with the landlord or agent if your agreement or local practice allows.
- Read the tenancy agreement for the sections on alterations, repairs and decoration. Ask in writing about anything unclear, such as whether small nail holes are acceptable.
- Unpack the tool kit first, so that you can assemble beds and shelves and tighten anything loose from transport.
- Before hanging anything, choose a method the agreement permits. Use the measuring tools to plan positions so you make as few marks as possible.
- Report faults, such as leaks, flickering lights or failed heating, to the landlord or agent in writing, with photographs. Do not attempt repairs on building systems.
- Before moving out, take down hanging items following the product maker’s removal directions, tighten any fittings you loosened, clean the surfaces and compare the room with your move-in photos.
- Photograph the finished rooms and keep the images with your tenancy paperwork.
Common Scenarios
- A loose cabinet door: tighten the hinge screws with the correct driver. If the screw hole is stripped, tell the landlord, because fixing that may need a repair product or a different fixing.
- A dripping tap: report it. A drip wastes water and the cause may be a worn part that the landlord should fix.
- A bed that needs assembling: hex keys and a driver handle most frames. Work on a soft surface to protect the floor.
- A draft under a door: temporary draught strips or a door snake are removable options. Ask before fixing anything permanent.
- A shelf you really want: read the lease, ask about fixings and consider free-standing furniture as an alternative.
Mistakes to Avoid
- Assuming small holes are always fine. Agreements differ, and you may be responsible for repairs.
- Using the wrong removable hanger on the wrong surface. Some wall coatings peel with adhesive strips, so read the maker’s directions for surfaces and weights.
- Attempting wiring, gas or plumbing work. It creates danger for you and others and can breach your agreement.
- Not documenting the condition. Without photographs, disputes about marks and wear are harder to settle.
- Throwing away spare parts. Keep screws, shelf pins and fittings from furniture and fixtures you remove.
Quick Troubleshooting
| Symptom | Likely cause | What to try |
|---|---|---|
| Adhesive strip will not hold | Dusty, textured or unsuitable surface | Clean the surface, check the maker’s directions and lower the load |
| Screw spins and will not tighten | Stripped hole in soft material | Tell the landlord for fixtures, or ask the furniture maker for guidance |
| Door or drawer sticks | Loose hinge or swollen wood | Tighten hinge screws and check for obvious damage |
| Wall coating peels off with a strip | Product not suited to the surface | Stop, use only products the maker allows for that surface and tell the landlord |
Care and Storage for a Moving Life
Keep a simple record of anything you change or repair, with dated photographs of the room before and after. This helps if questions come up when you move out, and it shows you took care of the place. Store small spare parts, such as the screws from furniture you have taken apart, in labelled bags so they travel with you to the next home. Wipe tools dry, keep blades covered and pack the kit where you can reach it first. Check the kit once a year and replace worn bits and blades.
Glossary
- Tenancy agreement
- The written contract that sets out your rights and duties as a renter.
- Landlord or agent
- The owner or the person who manages the property for the owner.
- Removable hanging strip
- An adhesive hanger designed to come off the wall with little damage when removed as directed.
- Fixture
- A fitting that is part of the property, such as a light or a tap.
- Inventory
- A list or record of the property’s condition when a tenancy begins.
FAQ
Should renters buy a power drill?
It is useful for furniture and shelves, but only if your agreement allows fixing into walls. A simple driver set covers many tasks without one.
Who handles repairs, me or the landlord?
That depends on your agreement and local rules. When unsure, ask in writing before you attempt anything beyond cosmetic fixes.
Can I fill nail holes before I leave?
Often that is a sensible idea, but check your agreement and local practice. Use a filler suited to the wall and follow the filler maker’s directions.
What should I do if something breaks that is not my fault?
Report it promptly in writing, with photographs, and keep a copy. Do not try to fix building systems yourself.
What is the best way to store the kit if I move often?
Use a small lidded box or bag that you carry yourself, and keep spare parts labelled. Having the tools within reach on arrival makes first-night assembly easier.
The Short Version
Keep a compact hand tool kit, follow your lease, and use low-damage options for hanging and protection. Photograph the property at move-in and move-out, and leave wiring, gas, plumbing and structural work to the landlord or a qualified professional.