Turning part of a garage into a workshop works best when you walk through the space with a list in hand. The checklist below covers the main areas people tend to overlook. Tick off what applies to you and note what needs attention. After the checklist, this guide adds a worked walk-through, common situations, a troubleshooting table and a plan for keeping the space in order.
Floor and Layout
- Clear a path from the door to the bench
- Keep walkways free of cords and offcuts
- Leave room around the bench to move a long board
- Check that the floor is level enough for a bench to sit firmly
- Consider an anti-fatigue mat where you stand for long periods
In this guide
Light and Air
- Bright, even light over the bench, with no deep shadows
- A way to open doors or windows when sanding or using glues
- A dust control plan, such as a vacuum or a sweep routine
- Follow product labels for ventilation advice
Storage
- Heavy items low, light items high
- Small parts sorted in labeled containers
- Sharp tools kept where they cannot fall or be grabbed by accident
- Chemicals and batteries stored as the label directs, away from heat
- Cordless tool chargers on a hard surface, not buried in clutter
Power, Fire and First Aid
Power and Cords
- Enough outlets so that long chains of adapters are unnecessary
- Cords in good shape, with no cuts or exposed wire
- Questions about circuits or new outlets referred to a qualified electrician
Fire and First Aid
- A fire extinguisher suited to workshop use, mounted where you can reach it
- A working smoke alarm
- Oily rags handled according to the product label and local rules
- A first aid kit within easy reach
No checklist can promise a particular outcome. Treat it as a prompt for careful thinking and follow local rules and each maker’s manual.
Worked Walkthrough: Your First Walk-Through
A list is only useful if you act on it. Here is a way to move from tick-boxes to a better space in one afternoon.
- Empty a bench or table and clear a single route from the garage door to it. Move vehicles out if possible so you can see the full floor.
- Stand in the doorway and look at the room as a visitor would. Note anything that blocks the path, hangs low or could fall.
- Walk each section of the checklist above and mark each line as done, quick fix, weekend job, or needs help.
- Take photographs of the room, especially the outlets, the storage walls and any chemical shelves. They give you a baseline record to compare against later.
- Do the quick fixes first. Coil cords, remove trip hazards, relocate heavy items to low shelves, and label containers.
- Put dates next to the weekend jobs so they do not drift, such as lighting, shelving or a dust routine.
- List the items that need outside help, such as electrical changes, and contact a qualified professional for each.
Common Scenarios
- A shared garage with a car: use a folding or wheeled bench and keep fuels and chemicals stored according to their labels, away from heat.
- A dark, windowless corner: add task lighting over the bench and consider brighter, evenly spread lighting overhead.
- A cold garage in winter: follow product labels on glues and finishes for temperature limits, and plan indoor tasks for difficult weeks. Do not use fuel heaters without following the heater maker’s ventilation guidance and local rules.
- A garage with children nearby: keep sharp tools, chemicals and batteries locked or out of reach, and keep chargers off the floor.
- A very small space: use wall-mounted storage, vertical racks and a fold-down work surface, subject to the wall structure and the maker’s fixing guidance.
Mistakes to Avoid
- Daisy-chaining adapters and extension leads. Overloaded cords can overheat, so ask a qualified electrician about additional outlets.
- Storing chemicals near heat. Labels give storage guidance for a reason, including temperature limits.
- Leaving oily rags in a pile. Some can heat up as they dry. Follow the product label and local rules on handling and disposal.
- Putting heavy items on high shelves. A fall can injure you, so keep heavy things low.
- Skipping dust control. Fine dust gets into lungs and equipment, so plan a routine and wear a mask recommended for the job.
Quick Troubleshooting
| Symptom | Likely cause | What to try |
|---|---|---|
| Bench rocks on the floor | Uneven concrete | Adjust the feet or add shims suited to the load, and recheck |
| Shadows on the work surface | Light source behind you or too few lights | Add light from the side and above, and check bulb output |
| Breaker trips during use | Too many devices on one circuit | Stop and ask a qualified electrician to assess the circuit |
| Tools rusting | Damp air | Store them dry and wipe metal parts, as the tool maker advises |
| Dust spread through the house | No dust control plan | Vacuum, wipe surfaces and change clothes before going indoors |
Keeping the Space in Order Through the Year
After your first walk-through, sort the findings into three groups: quick fixes you can do today, jobs that need a weekend, and items that need outside help. Take photos of the space before and after, which makes progress easy to see and helps you spot problems you had stopped noticing. If you share the garage with others, go through the list together so everyone knows where things belong.
Finally, think about how the space will change with the seasons. A garage that feels pleasant in spring can be cold, damp, or hot at other times of year, which affects glue, finishes, batteries, and your own comfort. Note which weeks are difficult and plan indoor tasks for those periods. Repeat the walk-through each season and whenever you add a major tool.
Glossary
- Task lighting
- A focused light placed to illuminate the work surface.
- Circuit
- The wiring path that supplies a group of outlets or lights, protected by a breaker or fuse.
- Anti-fatigue mat
- A cushioned floor mat for standing comfort.
- Offcut
- A leftover piece of material from cutting.
- Ventilation
- Moving fresh air through a space to carry away dust and fumes.
Zoning the Garage by Task
Instead of treating the garage as one open room, divide it into zones based on what you actually do there. A cutting zone, an assembly zone, a finishing zone and a storage zone each have different needs. Cutting makes dust and noise and needs long clear runs for boards. Assembly needs a flat, solid surface and good light. Finishing needs ventilation and a place where wet work can dry without being bumped. Storage should sit near the zone that uses it most, so you are not carrying heavy items across the room.
Start by listing your three most common jobs and walk through each one in your head, step by step. Where do you pick up the material, where do you cut it, where do you join it, and where does it end up? If the route crosses itself or doubles back, move something. Keep the messy zone near the door or window, since that is where air moves most easily. Keep the zone with chargers and batteries away from the finishing area, because solvents and sparks do not mix. Place the tools you use daily within arm’s reach of the bench, and push rarely used items to the edges. If you share the garage with a car or bikes, mark zone edges with tape on the floor so everyone knows where the working space ends. Revisit the layout after a few weeks of real use, since your habits will show you what the plan got wrong.
Bench Height and Workholding
A bench that suits you reduces strain more than almost any other change. A common initial point is a surface that lands near the height of your wrist when your arms hang at your sides, but your own comfort matters more than a rule. Stand at the bench and mimic the motions you will use. For planing or sawing, many people prefer a slightly lower surface so they can use body weight. For detailed assembly or electronics, a higher surface keeps the work closer to your eyes. If you do both, consider a bench with adjustable legs or a second, smaller table.
Workholding matters as much as height. A vise, clamps and a non-slip mat let you use both hands on the tool instead of one hand steadying the piece. Check how a vise is fixed to the bench, and confirm the bench top and frame can take the loads you expect. A wobbling bench is a safety issue, not only an annoyance. Think about what the bench must resist: downward pressure, sideways push and pull. Heavy benches resist movement, while light folding ones may need to be weighted or fixed to a wall if the maker allows it.
- Check that clamps open wide enough for the work you plan to do.
- Keep a few offcuts handy to act as protective pads under clamp jaws.
- Leave the space under the bench for storage only if it does not block your feet.
Lighting Options Compared
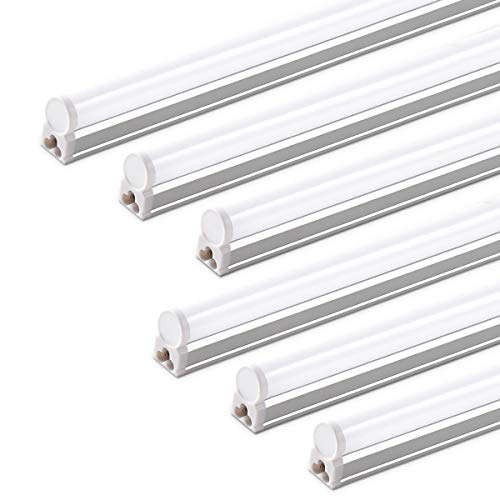
Good light helps you see what you are cutting and reduces mistakes. Overhead lighting spreads light across the whole room, while task lighting puts it exactly where you need it. Most workshops benefit from both. Overhead fixtures give general visibility and help you spot trip hazards and spills. Task lights, such as a clamp-on lamp or a fixed bar over the bench, fill in the shadows that your own body and tools cast.
When comparing lights, look at the brightness and the colour of the light on the product listing, since both vary. Cooler, whiter light tends to make fine detail easier to see, while warmer light can feel gentler but may hide small marks. Check whether a fixture is rated for a garage, where temperature swings and damp can occur, and read the maker’s notes on suitable locations. Position matters as much as strength. A single bright light behind you throws your shadow over the work, so place lights to the side and slightly in front.
Consider glare too. A bare bulb in your line of sight tires the eyes, so use diffusers or angled fixtures. If you use power tools with moving blades, steady light helps you judge speed and position. Flickering light can make rotating parts appear to stand still, which is a real hazard, so avoid lights that flicker visibly. Ask a qualified electrician about any permanent wiring, and keep cords from plug-in lights out of the walking path.
Noise, Dust and Neighbours
A garage workshop affects the people around you, and planning for that avoids conflict. Noise is the most obvious issue. Power tools can be loud enough to need hearing protection, so keep ear defenders where you can reach them and make wearing them a habit. Check local rules or building agreements for permitted working hours, and plan loud jobs for times that are polite for neighbours and household members.
Dust is quieter but just as important. Fine dust travels, settles on everything and can irritate lungs and eyes. Use tools with dust ports where possible and connect them to a vacuum or extractor suited to the job. Read the maker’s notes before using a household vacuum on fine dust, since some are not designed for it and filters can clog. Wipe surfaces with a damp cloth rather than sweeping, which throws dust back into the air. Wear a mask recommended for the material you are working with, and replace it as the maker advises.
- Close the door between the garage and the house while working.
- Change clothes or brush them off outside before going indoors.
- Keep pets and children out of the space during cutting and sanding.
- Empty vacuum bins outdoors and follow local guidance on disposal.
Budget Tiers and Order of Spending
You do not need to equip everything at once. Spend first on safety and basic function, then on comfort, then on capability. At a modest level, focus on a stable surface, decent light, a fire extinguisher, a first aid kit, eye and ear protection and a way to sort small parts. These improve the space more than any single power tool.
At a middle level, add better storage such as wall rails, shelves and labelled bins, then a vise, an extractor or vacuum with a dust connection, and extra outlets installed by a qualified electrician. At a higher level, consider dedicated benches for different tasks, a ventilation fan fitted properly, a more complete lighting plan and purpose-made cabinets for chemicals and batteries. Quality in a few key items usually serves better than many cheap ones.
Before buying anything, ask yourself what problem it solves and whether you already have a way to solve it. Check whether an item suits your floor and wall type, whether it needs a power supply you do not have, and whether the maker lists any limits on use in a garage. Buy used tools only if you can inspect them and the maker’s guidance is still available. Signs it is time to replace something include cracked housings, damaged cords, loose joints that cannot be tightened and safety guards that no longer work. Retire those items rather than patching them.
Which garage workshop setup fits you?
The best garage workshop setup is the one that matches how much space you share and what you build most often. Use your situation to decide where to put effort first in the checklist.
- You share the garage with a car: prioritise a wheeled or folding bench, wall storage and tape marks for the working area. The goal is a space you can set up and clear away quickly.
- You mostly cut wood: focus on clear runs for long boards, dust control and hearing protection. Place the cutting zone near the door for airflow.
- You do small assembly, electronics or hobby work: put money into task lighting, a firm bench at a comfortable height and sorted small-parts storage.
- You do finishing, painting or gluing: ventilation and a safe place for products to dry come first, plus careful storage of anything flammable.
- Children or pets use the garage: lockable storage and a rule that blades and chemicals are always put away matter more than any extra tool.
- You are just beginning: do the basic walk-through, handle safety items, then add one improvement at a time.
If you cannot decide, start with the issue that could hurt someone. Fire readiness, cord condition and heavy items on high shelves outrank neat labels. Comfort and convenience come second, and appearance comes last.
Whichever setup you choose, test it with a real project. A layout that looks tidy but forces you to carry timber around a car will not last. Adjust after a few weeks, when your habits have shown you what the plan missed.
What to check before you buy garage workshop gear, and who should skip it
Before you buy shelving, benches, lights or storage for the garage, check that each item suits the space, the wall and your actual jobs. Most regrets come from buying before measuring.
- Measure the wall, floor and ceiling space, and note where doors, vehicles and outlets sit.
- Check the maker’s load limits on shelves, racks and benches, and what wall type the fixings are intended for.
- Look at the listing for what is included, such as fixings, shelves, casters or tools needed for assembly.
- Confirm that electrical items suit a garage and that you have a suitable outlet, with a qualified electrician for any new wiring.
- Read the warranty and returns terms on the current listing.
- Ask whether you already own something that does the same job.
There are honest trade-offs. Wall storage frees floor space but needs a sound wall and correct fixings. Wheeled benches are flexible but can be less steady than a fixed one. A better dust system costs more and takes room, and cheap lighting may flicker or glare.
Who should skip a full workshop fit-out? Anyone who works in the garage a few times a year may do better with a simple folding bench and a labelled box. Renters should check what they may fix to walls.
When you are ready, compare your options, check the current listing for size and what is included, then choose the one that fits how you will use the space.
Ready to Buy? Start Here
If this guide helped you decide what to look for, these products are a place to start.
As an Amazon Associate we earn from qualifying purchases. Prices and availability are shown on Amazon.
Using the Checklist Zone by Zone: A Deeper Walk
A checklist becomes powerful when it is walked in a deliberate order, and for a garage workshop the natural order is the order of risk and movement. Begin at the door and the floor, because everything else in the space depends on being able to enter, move and stop safely. Check the path from door to bench as if you were carrying a long board in poor light, because one day you will be. Trip points, stored items creeping into the walkway, and the sweep of the door itself belong to this first zone, and fixing them costs little while protecting every later activity in the space.
Move next to the bench zone, the workshop’s centre of gravity. Beyond the bench itself, audit what lives within arm’s reach and what has migrated there without permission. Benches attract clutter the way harbours attract silt, and the checklist’s value lies in naming a home for each category that tries to settle: tools in use today, materials for the current project, and nothing else. Everything else is storage pretending to be readiness. Check workholding from the user’s side: stand where you stand to work, reach for what you reach for, and notice the small contortions that have become normal. Those contortions are the checklist items nobody writes down until someone suggests looking for them.
The storage zone deserves a slower pass than it usually gets, because its failures are quiet. Heavy items stored high, chemicals stored near heat, sharp tools stored where a hand searches blindly, and inherited containers with faded labels all pass a casual glance and fail a deliberate one. Open the cabinets. Read the labels. Lift the box you assume is light. The checklist’s storage items are written from incidents, and the incidents share a pattern: the hazard was stored correctly once, then moved temporarily, and the temporary place became permanent by forgetting. Your walk is how forgetting gets reversed.
Finish with the perimeter: walls, corners, the space behind the largest machine, the gap beside the door where things are leaned. Perimeters collect the items that belong nowhere, including the most dangerous category in any garage, the thing leaned for a moment against a wall it can slide from. Check the perimeter last because it is where the walk’s earlier decisions land: everything displaced from floor, bench and storage needs a genuine home or an exit, and the perimeter is where unresolved items announce themselves. A garage whose perimeter is clear is a garage whose system is working.
Using the Checklist by Season: The Repeating Cycle
A garage workshop lives four different lives a year, and the checklist repays being run in a seasonal rhythm rather than as a one-off purge. In spring, the emphasis falls on moisture and air: check for the winter’s condensation damage, rust blooming on tool surfaces, damp in stored timber and cardboard that has wicked water from the floor. Ventilation that was sealed against the cold gets reopened and its filters or screens cleaned. Spring is also the honest moment to review what winter projects left behind, since half-finished work stored in hope tends to become permanent scenery by summer if it is not consciously resumed or released.
Summer shifts the emphasis to heat, dust and project volume. Check shade and airflow for the hours you actually work, the state of dust control when doors stand open, and the storage of finishes and adhesives whose labels carry temperature limits. Batteries for cordless tools deserve a summer glance as well, since garages can reach temperatures their makers did not intend for storage. The summer pass is also the natural audit for outdoor-project overflow: the garden tools, sports gear and bicycles that migrate inward during busy months and quietly annex the workshop’s floor. The checklist’s layout items, applied firmly in summer, defend the working space at its most besieged season.
Autumn is the preparation pass, and its theme is readiness for the indoor season. Lighting gets checked while the evenings are still forgiving, because a failed fitting discovered in autumn is an errand, while the same failure in midwinter is a project done badly by torchlight. Heating arrangements, if any, are inspected before they are needed, clearances around them re-established after summer’s storage drift, and the fire readiness items on the main checklist get their most serious reading of the year. Autumn is also when to restock consumables that winter weather makes tedious to fetch, and to service the tools the indoor projects will lean on.
Winter’s pass is the shortest and the most safety-weighted. Paths stay clear despite the season’s extra arrivals, exits stay unblocked, and the first aid and fire items are verified rather than assumed. Check that water, whether from plumbing, stored containers or melting snow from a vehicle, is not reaching electrics, stored finishes or tool steel. Winter is also when the checklist’s lighting and air items reveal their truth: a workshop that is dim and stale in January will not be fixed by enthusiasm, only by the fittings and ventilation the autumn pass was meant to secure. The cycle, repeated, turns the checklist from an event into the workshop’s immune system.
Using the Checklist by Stage: Before, During and After Projects
Beyond zones and seasons, the checklist has a third rhythm keyed to projects themselves. Before a project, run a short readiness pass: the work area clear, the tools the project needs present and serviceable, the materials staged without blocking movement, and the safety items the project’s processes demand verified in place. Dust control for a sanding project, ventilation for a finishing project, and a clear floor for a project involving long stock are stage-specific items the general checklist implies but the moment makes concrete. Five minutes of readiness prevents the mid-task improvisation that causes both accidents and ugly work.
During a long project, the checklist’s role changes from inspection to maintenance. Workshops decay during projects by a predictable mechanism: offcuts accumulate near the saw, tools rest where they were last used, and the walkway narrows by degrees no single step of which seems worth correcting. A ten-minute reset at the end of each work session, restoring floor, bench and tool homes to their checked state, keeps the space at the standard the checklist set. The reset is not tidiness for its own sake. It is how the next session begins with finding rather than searching, and how hazards are evicted while they are still small.
After a project, run the closing pass the main list describes, extended by one question the seasons cannot ask: what did this project teach the workshop? Every project reveals a storage gap, a lighting shadow, a tool that needs service or a consumable that ran out at the worst moment. Record those revelations on the checklist itself or in the project notes, and convert the durable ones into changes before the next project begins. A checklist that learns is recognisably different after a year: annotated, reordered toward your real risks, and increasingly written in your own hand rather than the author’s.
Treat abandoned and paused projects as a stage of their own, with a checklist moment attached. A paused project should be left in a defined state: parts labelled, fixings bagged with the parts they belong to, sharp and fragile elements protected, and a note recording where work stopped and what comes next. That discipline, applied at the moment energy fades, is what makes resumption possible months later without an archaeological dig. The checklist’s keeping-order section supplies the principles; the pause note is where they meet the reality that not everything finishes on schedule.
Scoring What You Find: Fix Now, Schedule, or Monitor
A thorough walk produces more findings than one session can fix, and the checklist becomes far more useful when each finding is immediately sorted. The first category is fix now: anything affecting safe movement, fire readiness, first aid, electrical safety or the security of stored hazards. These items share a property that justifies their priority: the cost of the fix is small and the cost of delay is potentially large and irreversible. The walk does not end until the fix-now list is empty or the workshop is closed to work until it can be emptied. That strictness is the difference between a checklist and a wish list.
The second category is schedule: improvements and repairs that matter but do not endanger, such as a storage rebuild, a lighting upgrade, a bench modification or a tool service. Give each scheduled item two things at the moment you record it: a rough scope, so future you knows what was meant, and a place in time, whether a date, a season or a trigger such as before the next large project. Items without a when drift into the third category by default, and the drift is invisible until a later walk rediscovers them with a sense of déjà vu that erodes faith in the whole system.
The third category is monitor: findings that are acceptable today but trending the wrong way. A tool handle developing play, a cable sheath ageing, a wall stain that may be damp, a battery that holds less charge than it did. Monitoring is an active state, not a dismissal: each monitored item gets a simple test or observation you can repeat, and a threshold at which it graduates to the schedule. Recording the current state in a line, with a date, is what makes the next observation meaningful, because change over time is the information and memory alone will not preserve it.
Keep the three lists visible in the workshop for a while after each walk. Visibility does quiet work: the fix-now list empties faster when it is seen daily, scheduled items get absorbed into shopping and planning naturally, and monitored items get their repeat observations almost without effort. When a list is complete, file it with its date rather than discarding it. A run of filed checklists is the workshop’s medical record, and patterns across them, the storage zone that always fails first, the season that always brings damp, are the deepest guidance the checklist method can offer.
A Second Walk-Through: The Garage That Also Stores a Car
Consider the commonest difficult case the checklist must serve: a single garage that houses a car nightly and a workshop daily. The walk begins with the honest measurement the scenarios elsewhere encourage: with the car in its true parked position, mark the floor, mentally or with tape, at the boundaries of the space that remains. Every later decision in this walk is governed by those marks. Storage planned outside them is fantasy, and benches imagined beyond them will be dismantled in frustration within a season. The checklist’s layout items, applied to the marked reality, produce a smaller but genuinely workable shop.
In this constrained space, the zone audit concentrates on the walls and the vertical dimension, because the floor has an owner. Wall storage must be checked with the car present and its doors opening, a detail missed in many empty-garage plans: a cabinet that clears the car’s body may still meet its open door. The bench zone typically becomes a folding or narrow fixed bench along one wall, and the checklist items for workholding and lighting adapt accordingly, with particular attention to light that reaches the bench when the car shadows the main fitting. None of this is second-best thinking; it is the checklist doing its proper work of matching standards to the actual room.
Movement checks dominate the shared garage’s safety pass. The route from house door to car door, the route from car to street, and the route from bench to exit must all survive the workshop’s fullest state, including a project mid-assembly. Hot, sharp, wet and heavy processes need a rule the household agrees in advance: some happen only with the car out, and the checklist walk is where that rule gets written down rather than negotiated mid-project with a saw already set up. Fire and first aid items sit where they can be reached with the car in, since emergencies do not schedule themselves around parking.
The seasonal cycle adapts too. The shared garage’s spring pass includes the car’s own winter residue, salt and grit tracked across the workshop floor, and its autumn pass plans where winter tyres, bikes or garden furniture will go without consuming the marked workshop territory. The deeper lesson of the example generalises to every constrained space, from a shed corner to a balcony store: the checklist is not a demand for an ideal workshop but a method for making the real one safe, legible and ready, and its questions scale down as gracefully as they scale up.
More Questions Readers Ask About the Checklist
How long should a full checklist walk take? For a typical garage, a deliberate first walk takes the better part of an hour, because it involves opening, lifting and testing rather than glancing. Later walks shorten considerably as the space approaches the standard and your eye learns its own workshop’s hiding places. If a walk consistently takes only a few minutes, it has probably become a glance, and the remedy is to change the route or the order, which forces fresh attention onto familiar zones. Speed is a reward of a well-kept space, never a target in itself.
Should I work through the checklist alone or with someone? A second pair of eyes earns its keep on the storage and perimeter zones especially, because familiarity blindness is the main enemy and a newcomer sees the leaned board and the blocked vent that you have stopped registering. Households benefit from walking together at least once a year, since the findings often involve other people’s storage habits, and agreeing the fix-now list together prevents the checklist from becoming one person’s grievance document. Solo walks remain fine for the seasonal rhythm; the annual joint walk keeps the system honest.
What do I do when a checklist item does not apply to my space? Mark it as considered and not applicable, with a word about why, rather than deleting it. The record matters because spaces change: the item about a heater clearance is irrelevant until the winter a heater arrives, and a checklist that silently dropped it will not remind you. Reviewing the not-applicable items once a year takes minutes and catches exactly those changes of circumstance that turn a safe workshop into an outdated one.
Can the checklist substitute for professional checks of wiring and similar systems? No, and its electrical items are written to detect the visible and the obvious: damage, overloading, improvised arrangements and blocked access. Anything beyond observation, and anything you are unsure you have understood, belongs to a qualified professional, and the walk’s correct output in those cases is a scheduled professional visit recorded on the list. A checklist that knows its boundary is more trustworthy within it, which is the bargain this one tries to keep throughout.
Five Quick Wins the Walk Usually Reveals
Most first walks through a neglected garage surface the same handful of inexpensive victories, and naming them here helps a new reader recognise them on their own pass. The first is light at the point of work: repositioning or adding a single fitting so the bench stops shadowing itself transforms every task done there, and usually costs less than the tools it serves. The second is the walkway: reclaiming one clear route from door to bench to exit, defended against storage creep, changes how the whole space feels and how safely it can be left in a hurry. Neither requires building anything. Both require only the decision the checklist prompts.
The third quick win is labelling, applied to the storage that already exists. A dozen honest labels end the era of opening five boxes to find one item, and they expose the duplicates and the dead stock that invisible storage protects. The fourth is the vertical rescue of the floor: hooks, rails or a single shelf that lifts the most-leaned items, boards, handles and long tools, into a defined home, removing the perimeter’s population of things waiting to slide. The fifth is the consumables station: one defined place where blades, abrasives, adhesives and fixings live and are restocked from a list, ending the mid-project expedition for a single blade.
Notice what these wins share. None is a purchase of capability; all are purchases of order, and each pays out on every subsequent visit to the space rather than on one project. That is the checklist’s underlying economics: it directs the first effort toward the conditions of work rather than the tools of work, because conditions multiply. A workshop made legible by a single weekend’s walk will teach its owner, over the following months, exactly which genuine capability it lacks, and by then the owner will have the clear floor and the clear bench needed to use it.
FAQ
How often should I run through this list?
Many people do it when they first set up and again each season, or whenever they add a new tool or rearrange the space.
What if my garage is shared with a car?
Use folding or wheeled benches so the space can switch roles, and keep fuels and chemicals stored according to their labels.
What kind of fire extinguisher do I need?
Types differ by fire class, so check the label against the materials in your space and consult local fire guidance or your fire service. Read the instructions before you ever need to use it.
Can I add outlets myself?
Wiring changes should be done by a qualified electrician and may need to follow local rules or permits. Ask before attempting any change to circuits.
How do I handle dust from sanding?
Open doors or windows as the product label advises, use a vacuum or dust extraction where the tool allows, and wear a dust mask recommended by the tool or material maker.
Should I insulate the garage before setting up a workshop?
Insulation can make the space more comfortable and help keep glues and finishes within their temperature limits. It also affects ventilation, so check local rules and product labels before sealing the space. A qualified contractor can advise on what suits your building.
What flooring works best for a garage workshop?
Bare concrete is common and durable but hard on the feet and tools that get dropped. Sealed concrete, interlocking tiles and mats each have trade-offs in grip, cleaning and comfort, so check the product notes for garage and vehicle use.
How do I keep tools from rusting?
Keep the space as dry as you can, wipe metal parts after use and store tools in a closed box or on a rack away from damp walls. Follow the tool maker's advice on protective coatings or oils.
Is it safe to charge cordless tool batteries in the garage?
Follow the battery and charger maker's instructions on temperature and location. Charge on a hard surface, keep the area clear of clutter and never leave damaged batteries charging.
How much clear space should I leave around a table saw or similar tool?
The right amount depends on the tool and the length of material you cut. Check the maker's manual and allow room to feed and support long boards without stepping into a cramped spot.
Do I need a separate fire plan for a workshop?
It helps. Know where the extinguisher is, keep exits clear and make sure everyone who uses the space knows what to do. Ask your local fire service for guidance suited to your building.
Can I run a dehumidifier in the garage?
Many people do, especially in damp climates. Check that the unit is rated for the temperatures in your garage, that it drains safely and that the cord is not a trip hazard.
How much space do you need for a garage workshop?
There is no single answer, because it depends on the tools and the length of material you handle. Allow room to move a long board around the bench without bumping walls or a vehicle. Mark out the area with tape and try a real task before buying anything large.
Should a garage workshop have its own electrical circuit?
It can help, especially if you run several power tools or a dust extractor, since a shared circuit may trip. Ask a qualified electrician to assess the existing wiring and advise. Do not attempt circuit changes yourself.
What is the best lighting for a garage workshop?
Use bright, even overhead light plus task lighting over the bench. Place lights to the side and slightly in front so your shadow does not fall on the work. Check that fixtures are suitable for garage temperatures and damp.
How do you store flammable products in a garage workshop?
Follow the product label and local rules, and keep containers closed and away from heat, sparks and chargers. A suitable cabinet may be required in some areas. Ask your local fire service if you are unsure.
How can you reduce dust in a garage workshop?
Connect tools with dust ports to a suitable vacuum or extractor, wipe surfaces with a damp cloth and keep the door to the house closed. Wear a mask recommended for the material. Empty collection bins outdoors.
What should you buy first for a new garage workshop?
Start with safety and function: a stable bench, good light, a fire extinguisher, a first aid kit and eye and ear protection. Add storage next, then specialist tools. These basics improve the space more than a single power tool.
The Short Version
Check floor space, light, air, storage, power, and fire readiness. Fix the easy items yourself, schedule the bigger ones, and ask a qualified professional about wiring. Repeat the walk-through each season so the space stays safe and usable.


