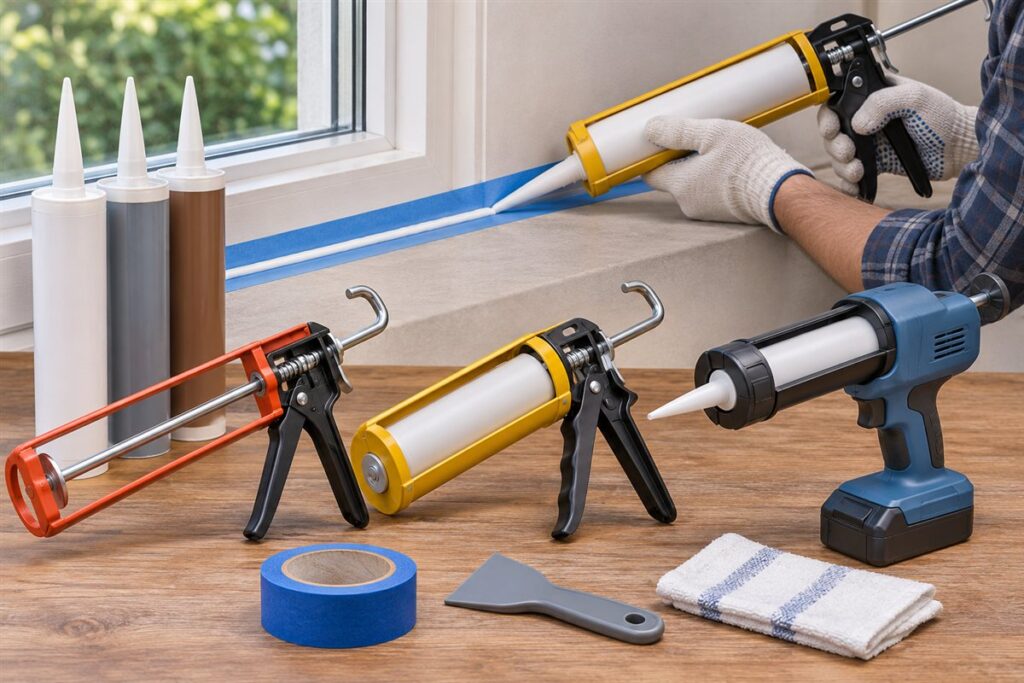
A caulk gun pushes sealant out of a tube in a steady bead, and the right one is comfortable in your hand, fits your tube size and gives you control over the flow. Frame style, the push ratio and a drip-control feature are the main points to look at.
Frame Styles
Most guns follow one of two frame designs. A skeleton frame is an open metal shape that is light and simple. A barrel (or cradle) frame wraps around the tube, which supports it and suits heavier sealants. Powered versions exist too, and they follow the same ideas with a motor doing the pushing.
- Skeleton: light, easy to clean, good for occasional jobs.
- Barrel: more support for the tube, steadier on long runs.
- Powered: less hand effort, though they add weight and need charging or a cord, so read the manual.
What to Look For
| Factor | Why it matters | What to check |
|---|---|---|
| Tube size | Guns are built for set tube sizes | Size marking in the maker’s guide |
| Push ratio | A higher ratio means less hand force per squeeze | Ratio stated by the maker |
| Drip control | Stops flow when you release the trigger | A release lever or rod design |
| Handle shape | Affects comfort and control | How it feels in your grip |
| Cut tool and poker | Used to open the tube and puncture the seal | Built-in tools on the frame |
Thick sealants need more force, so a gun with a higher push ratio can feel easier on the hand. Thin sealants flow readily, so a drip-control feature becomes more useful.
Laying a Neat Bead
- Clean out old sealant and dust from the joint, and let it dry.
- Cut the tip at a slight angle, a little smaller than the gap, then puncture the inner seal.
- Load the tube and squeeze until sealant begins to move.
- Move at a steady pace along the joint, keeping the angle the same.
- Release pressure at the end of the run and wipe the tip.
- Smooth the bead with a tool or a gloved finger within the working time on the label.
Some sealants release fumes, so work with ventilation and follow the product label for gloves and eye protection. Dispose of empty tubes and leftovers by local rules.
Sealant Types and What They Demand From the Gun
Different sealants behave very differently in a gun, and knowing the family you will use helps you choose the right frame. Acrylic latex products are water-based, flow fairly easily and clean up with water, so they suit paintable trim gaps and interior joints. Silicone sealants stay flexible and resist water, which is why they are common around baths, sinks and outdoor joints, but they are sticky and cannot usually be painted. Polyurethane and hybrid sealants bond strongly and are often thick, so they ask more of both the gun and your hand.
Read the label for the tube size and the working conditions. Thick construction-type products and adhesive tubes can need real force to push out, and a light skeleton gun with a thin rod may flex or bend under the load. Thin products flow with little effort, and a light gun is fine for them. Some sealants come in a sausage-style pack instead of a rigid tube, and these need a gun made for that format, so check the maker’s guide before you buy.
- Light, thin products: almost any frame will do.
- Thick sealants and adhesives: favor a sturdy frame with a good push ratio.
- Mixed use: choose the frame that handles your thickest product, since it will also handle the others.
If you only seal a bathroom once a year, a simple gun is enough. If you seal windows and siding regularly, spend more time on the frame and the grip.
Plunger Rod, Drive Teeth and Release Mechanism
Look closely at the parts that actually move the tube. The plunger rod pushes the base of the tube forward, and its design matters. Round rods are simple and common. Flat rods with notches or teeth can give a more positive grip, but dirt and hardened sealant in the teeth can cause slipping. Some guns have a ratcheting drive in which each squeeze advances the rod a fixed amount, and others use a smooth drive that gives more continuous feel.
The release mechanism controls how the gun stops. A thumb-operated release lever relieves the pressure so the sealant stops flowing the moment you stop pressing. A rod you must turn and pull back does the same, but is slower. Test the release action in the store if you can, since stiff or fiddly releases are a common annoyance on long runs.
Check the trigger and handle at the pivot. Wobble at the pivot point makes the drive skip and wastes effort. Look at the thickness of the frame metal and see whether the pressure plate, which pushes on the tube, is firmly attached and flat. A pressure plate that tilts will bind the rod and leave you with uneven flow. Finally, see whether the rod can be pulled fully back so a fresh tube fits easily without forcing.
Surface Prep and Taped-Edge Method
A tidy bead depends as much on the preparation as on the gun. Remove all of the old sealant, since new product does not bond reliably to old material or to loose paint. A scraper or a dedicated removal tool takes off the bulk, and a cloth with the cleaner named on the sealant label removes residue. The joint must be dry, clean and free of dust, soap film and oil. Allow time for any damp to dry out, particularly in bathrooms and outdoors after rain.
For crisp lines, use painter’s masking tape along both sides of the joint, leaving the gap itself exposed. Press the tape edges down firmly so sealant cannot creep underneath. Run the bead, then smooth it with a tool or gloved finger, and pull the tape off while the sealant is still wet, drawing it away from the joint at a low angle. Doing this after the sealant skins over can tear the bead.
- Match the bead size to the gap: a bead that is too thin may crack, one too thick sags.
- For deep gaps, ask whether the label recommends a backing material to fill the depth before sealing.
- Keep a damp rag or paper towels and a bin nearby for the inevitable mess.
Check the label for cure times before exposing the joint to water, and follow the product directions for ventilation and gloves.
Troubleshooting Flow, Gaps and Messy Beads
Most problems with a caulk gun come down to a short list of causes. If the sealant will not come out at all, check that the inner seal is punctured and that the tip is cut open enough. A tip cut too small makes you push hard and strains the gun. If sealant surges out unevenly, the tube may have air bubbles, or the rod may be skipping on its teeth. Pull the rod back, reseat the tube and press the trigger slowly until the flow is steady.
If a bead looks lumpy, you probably moved too fast or changed the angle during the run. Slow down, keep the nozzle at a consistent angle and push the bead ahead of the tip or pull it behind the tip, whichever gives you a neater result. Practicing on a piece of cardboard first helps you find the pace.
- Gaps along the edges often mean the surface was dirty or damp.
- Cracking after curing can mean the joint moves more than the sealant allows, so ask about a more flexible product.
- Mold in a bathroom joint points to ongoing damp, which may need better ventilation.
Hold the gun with the tube tip up when you stop so sealant does not drain, and wipe the tip before you start again. If you will pause for a long time, plug the nozzle with the cap or a screw as the maker suggests.
Storage, Care and Signs to Replace
Clean the gun after each job. Wipe the rod, the pressure plate and the frame while any leftover sealant is still soft. Hardened silicone and polyurethane are difficult to remove from the teeth of the rod, and dried residue makes the drive slip or the rod bind. Use the cleaning method named on the sealant label, and keep solvents away from heat and flame. If the gun is used with water-based products, a damp cloth is usually enough.
Store the gun with the rod released so the spring or drive is not left under tension. Hang it up or keep it in a drawer where the rod will not bend. A rod that has been bent will not slide smoothly and is a common reason a gun stops working well. Do not leave a loaded tube sitting in the gun for weeks, as the sealant can cure in the nozzle and the pressure can leak through.
Signs it is time to replace the gun include a bent rod, a cracked frame, a worn drive that slips under load, a release lever that no longer stops the flow and a pressure plate that has come loose. Repairing a basic gun is rarely worthwhile, since a replacement is inexpensive compared with the cost of ruined joints. If you have a powered model, follow the manual for battery care, charging and cleaning, and replace parts only with those the maker lists.
FAQ
Why does my gun keep oozing?
Pressure stays in the tube after you let go. Press the release lever if your gun has one, or pull back the rod, and clean the tip.
Can I use the same gun for adhesive tubes?
Many standard guns fit common tube sizes, but thick products can strain a light frame. Check the maker’s guide for the tube type.
What angle should I cut the nozzle tip?
A slight angle of about 45 degrees is common for a bead that sits neatly in a joint. Cut a little smaller than the gap and widen it only if needed, because you cannot make a cut tip smaller again.
How do I stop a tube from drying out between jobs?
Wipe the nozzle, then seal it with the cap or a screw that fits the opening. Store the tube somewhere cool and away from direct sun. Check the label for shelf life, as old sealant may not cure properly.
Is a powered caulk gun worth it?
It can be worthwhile for large amounts of sealing or for thick products because it reduces hand effort. For occasional small jobs a manual gun is usually enough. Consider weight and charging needs before choosing one.
Should I push or pull the bead?
Both are used, and the best choice depends on the sealant and the joint. Many people pull the nozzle so the bead is pressed into the gap, but trying both on scrap will show which one gives you a cleaner result.
Why is there sealant left in the tube after I stop pushing?
Pressure stays in the tube after you release the trigger. Use the release lever or pull the rod back to relieve it, then wipe the tip. A gun with a good release stops the flow cleanly.
Can I use a caulk gun for foam or other products?
Some products are made for special guns, such as expanding foam or two-part cartridges. Check the product label and use the gun the maker specifies. A standard gun is not suited to those formats.
What is the best way to remove cured sealant from my hands or tools?
Remove uncured sealant with a dry cloth first, then follow the cleaning advice on the label. Cured silicone is difficult to remove and is usually peeled or cut away. Wearing gloves from the start avoids the problem.
The Short Version
Choose a barrel frame for steadiness and thick sealants, a skeleton frame for light occasional use, and look for drip control. Match the gun to the tube size and practice a steady pace.