Wall anchors let a screw hold in material that would not grip it alone. The right anchor depends on what is behind the surface and how much weight will hang from it. Check the anchor’s packaging for the load figures, and remember that stated limits are guides, not promises. This guide walks through identifying the wall, matching the anchor, fitting it, and sorting out the usual problems.
Know Your Wall First
Tap the wall and look at how it is built. Hollow sheets of drywall sound empty, while brick, block and concrete sound solid. Plaster over lath or masonry may behave differently from modern board. If you are unsure, drill a small test hole in a hidden spot and look at the dust and depth. Before you drill, check for pipes and cables, using a detector and local guidance, since hidden services can be dangerous.
Light-colored powder that crumbles suggests plasterboard or plaster. Red or brown dust suggests brick, grey dust suggests concrete or block, and sudden loss of resistance after a few millimetres suggests a hollow cavity behind a thin skin. Write down what you find, because the same room can contain several wall types, especially where an extension or partition was added.
In this guide
Anchor Choices by Wall Type
| Wall type | Common anchors | What to check |
|---|---|---|
| Hollow drywall | Toggle, expanding sleeve, self-drilling threaded, plastic expansion | Load figures and board thickness |
| Wood stud behind the board | Wood screws directly into the stud | Stud location; no anchor needed |
| Brick and block | Plastic plugs, sleeve anchors | Hole diameter and depth, mortar joints |
| Solid concrete | Masonry screws, wedge or sleeve anchors | Hammer drill and masonry bit |
| Hollow block | Toggle or special hollow-wall anchors | Web thickness inside the block |
Match the Anchor to the Load
- Light items, such as small frames: simple plastic anchors in solid material, or light drywall anchors.
- Medium items, such as shelves and mirrors: toggle type or screws into studs.
- Heavy or high-risk items, such as TV mounts or cabinets: use fixings the maker lists for the load and fix into studs or masonry.
- Anything that could injure someone if it falls, such as items over beds or doors: add margin and seek advice from a qualified person.
Remember that the load on an anchor is not only the weight of the item. A shelf with books pulls outward at the top screws, and a mirror hung from a single point puts all its weight on one fixing. Count the number of fixing points, think about where the weight sits, and allow for things being added later. People tend to fill shelves and lean on mounts, so the real load is often higher than the first plan.
Fitting an Anchor
- Mark the position and make sure the item is level.
- Choose the drill bit size printed on the anchor packaging, and use the correct type of bit for the wall.
- Drill to the depth required, plus a little extra for dust in masonry, and clear dust from the hole.
- Insert the anchor flush with the wall surface, tapping if needed.
- Drive the screw to the stated depth. Stop when it is snug, not crushed.
- Wear eye protection and a dust mask when drilling masonry, and follow your drill’s manual.
Worked Example: A Shelf on a Drywall Partition
Suppose you want to hang a small shelf for light ornaments. This is an invented example to show the thinking, not a rule. First, locate studs with a detector and mark them lightly. If a bracket lines up with a stud, use a wood screw of the length the shelf maker suggests and skip the anchor. If a bracket falls between studs, choose a hollow-wall anchor whose packaging lists a load comfortably above what the shelf will carry. Drill the size printed on the pack, insert the anchor as its instructions show, then offer the bracket up and fit the screw. Check the bracket for movement before loading the shelf, and add items gradually.
Common Scenarios
Hanging a heavy mirror over a sofa
Use two fixing points where possible, ideally into studs or masonry, and follow the mirror maker’s hardware guidance. Because a fall could hurt someone, consider asking a qualified person to check the plan.
Fixing a curtain rail into plaster over brick
The plaster layer may be soft, so drill through it into the brick and use plugs sized for masonry. Match the screw to the plug as the packaging directs.
Attaching a hook to a concrete lintel
Concrete often contains steel reinforcement, and drilling in the wrong place can be an issue. Use a masonry bit, slow progress, and local advice if the drill stops abruptly.
Mounting a small clock on a hollow door-frame wall
A light plastic expansion anchor may do, but check the packaging for the board thickness it suits.
Mistakes to Avoid
- Using the wrong bit for the wall. A wood bit in masonry overheats and makes an oversize hole, which reduces grip.
- Skipping the dust clean-out. Dust at the bottom of a hole stops the anchor seating fully.
- Over-driving the screw. In drywall this crushes the board around the anchor and loosens the hold.
- Mixing parts. A screw that is not the type the anchor was made for may not expand it correctly.
- Ignoring edges. Fixings close to a corner or an edge can crack the material. Keep to the minimum distances listed by the maker.
Quick Troubleshooting
| Symptom | Likely cause | What to try |
|---|---|---|
| Anchor spins while driving the screw | Hole too wide or crumbly material | Use a larger anchor made for that material, or move to a new spot |
| Anchor pulls out with the screw | Too little depth or wrong type for the load | Choose a type listed for a higher load and the right wall |
| Drill stops dead | Metal, reinforcement or very hard aggregate | Stop and move the position; seek advice if services may be nearby |
| Item sits crooked after fitting | Marks not leveled before drilling | Fill the holes as the filler maker directs and redo the marks |
| Wall surface cracks around the hole | Too close to an edge or drilled with too much force | Repair, then relocate and drill gently |
Glossary
- Toggle: an anchor with wings that open behind a hollow wall and spread the load.
- Stud: a vertical frame member, usually timber or metal, behind the board.
- Masonry: brick, block, stone or concrete.
- Pilot hole: the hole drilled before the anchor goes in.
- Shear load: force acting down along the wall, as with a hanging picture.
- Pull-out load: force acting outward from the wall, as with a heavily loaded shelf top.
Reading Load Ratings Without Fooling Yourself
Anchor packaging often prints a single large number, and it is easy to treat that number as a promise. In practice, a printed rating describes what the anchor held under a particular set of conditions: a specific wall material, a specific thickness, a straight pull or a sideways pull, and a test setup that rarely matches your living room. Your wall may be older, thinner, or softer than the test panel. Treat the rating as a ceiling you should stay well below, never as a target.
A sensible habit is to apply a generous safety margin. For items that could hurt someone or something valuable if they fall, such as a heavy mirror, a television bracket, or a shelf above a bed, plan for the anchors to carry only a fraction of the stated rating. Many careful installers aim for a small share of the printed figure, and manufacturers often publish their own recommended working loads that are lower than the ultimate failure figure. Read the instructions inside the box, because they are the authority for that product.
Shear Versus Pull-Out
Two different forces act on an anchor. Shear is the downward slide of the load along the wall surface, which is what a hanging picture or shelf mostly produces. Pull-out, or tension, is the force trying to drag the anchor straight out of the wall, which a shelf bracket creates at its top screw because the shelf wants to rotate away from the wall. Some anchors are rated separately for each direction, and the two numbers can differ a lot. A shelf with deep brackets puts far more pull-out load on the upper fasteners than its weight alone would suggest.
Why Wall Condition Changes the Number
Drywall that is damp, crumbling at the paper face, or cracked around a past repair holds less than clean, dry board. Old plaster may be sound in one spot and hollow a few inches away. Brick can have soft mortar joints or hollow cores, and concrete block is often hollow with thin outer shells. If a wall looks or sounds questionable, step down in load or move to a better location.
Tools and Materials Worth Having Ready
Most anchor failures start with the wrong tool or the wrong hole, not with a bad anchor. A short kit covers nearly every household job.
- A drill with a clutch or adjustable torque setting for drywall work, so you do not strip or crush the board.
- A hammer drill, or a rotary hammer, for brick and solid concrete, along with carbide-tipped masonry bits.
- A set of twist bits in common sizes, since most anchors call for a hole in the range of roughly 3/16 inch up to 3/8 inch or larger for heavy-duty types. Always use the size printed on the anchor package.
- A screwdriver or driver bit that fits the screw head exactly. A loose fit rounds out heads and ruins the grip.
- A level and a pencil, plus painter’s tape to mark depth on the bit.
- A stud finder or a strong magnet to locate framing screws, and a small pin or thin nail to confirm what lies behind the surface.
- A vacuum or a squeeze bulb to clear dust from masonry holes, which matters because dust weakens grip in many anchor types.
- Safety glasses and a dust mask, especially when drilling masonry.
Drilling the Hole: Size, Depth, and Clean-Out
A hole that is too large is the quiet reason many anchors spin. A hole that is too small makes the anchor hard to seat and can split plastic bodies. Follow the package, and test with a scrap if you are unsure. For plastic expansion anchors, the hole should be a snug fit so the anchor needs light taps to seat. For toggle bolts, the hole is bigger, because the wings must pass through, so check the size on the box.
Depth matters as much as width. In solid masonry, drill slightly deeper than the anchor length so dust and debris have somewhere to settle and the anchor sits fully flush. Wrap a strip of painter’s tape around the bit at the target depth as a guide. In hollow block or hollow brick, avoid letting the bit blast through the thin face and then keep spinning; use steady pressure and watch for the sudden give that tells you the cavity has been reached.
Clearing the hole is a step people skip. Blow out or vacuum the dust, particularly for sleeve and wedge types in concrete. A clean hole lets the anchor expand against solid material rather than loose powder.
Aligning Before You Commit
Hold the item against the wall, level it, and mark through the mounting holes with a pencil. Drill straight and perpendicular to the wall. A bit that wanders at an angle can pull the anchor sideways and weaken the grip. If you are mounting something with two or more points, drill one hole, set that anchor, hang the item loosely on it, and then re-mark the second position. That small habit absorbs measurement errors that would otherwise strain the fasteners.
Warning Signs That an Anchor Is Not Holding
You can catch problems at installation if you pay attention. These are the usual signals.
- The screw keeps turning without tightening, which means the anchor is spinning in the hole or the wall material has crumbled.
- The anchor seats but wobbles when you pull gently on the screw.
- Fine cracks radiate from the hole in plaster or drywall.
- The screw tightens, then suddenly goes loose, a sign the anchor body has split or the wall face has crushed.
- The item tilts slowly over days after hanging, which points to slow creep in a soft wall.
If any of these appear, stop and fix the problem before loading the mount. Remove the anchor, patch or move the hole, and choose a stronger type. Hanging something on a doubtful anchor and hoping rarely ends well.
Planning a Multi-Point Mount
Heavier objects almost always belong on several anchors spread out over a wider area. Spreading the points lowers the load on each one and also resists twisting. Keep anchors a reasonable distance apart and away from edges, corners, and door openings, because wall material near an edge breaks away more easily. Check the manufacturer guidance for minimum spacing and minimum edge distance, which tend to be larger in concrete and brick than in drywall.
When the item has a rail or cleat, such as a French cleat shelf or a curtain track, consider anchoring into framing wherever you can and using wall anchors for the points between studs. Mixing a stud screw with anchors in the gaps gives a stronger result than anchors alone. If you cannot find framing, use more anchors rather than relying on one big one.

A Simple Planning Table
| Situation | Better approach |
|---|---|
| Light picture frame on drywall | Small plastic or self-drilling anchor, or a picture hook rated for the weight |
| Medium shelf between studs | Several toggle or strap-style anchors, spaced apart |
| Heavy cabinet or TV mount | Screw into framing; use anchors only as a supplement if allowed |
| Brick or block outdoors | Sleeve or masonry screw anchors sized for the material, with corrosion-resistant hardware |
| Solid concrete | Sleeve, wedge, or concrete screw anchors, hole cleaned of dust |
When to Call a Professional
Some jobs are best left to someone with the right gear and training. Consider help if you are hanging something very heavy or something that sits above people, if you suspect hidden wiring or pipes in the drilling zone, if the wall is old plaster that crumbles at the surface, or if you are anchoring into structural concrete where drilling could cut reinforcing bar. Before you drill into any wall, think about where electrical cables and water lines run, since these often follow straight paths up from outlets and switches. Use a detector designed for this purpose if you are unsure, and turn off power to the circuit when there is real doubt. Follow local building codes and the manufacturer’s instructions.
Cost and Time in General Terms
Anchors themselves are inexpensive compared with the value of what they hold, so there is little reason to economize on the fastener for a heavy item. A packet of basic plastic anchors costs little, while toggle and masonry types cost more per piece. Plan on a few minutes per hole for drywall and noticeably longer for masonry, since you need to pause to clear dust and let the bit cool. Doing a mount carefully at a relaxed pace beats rushing through and patching later.
Ready to Buy? Start Here
If this guide helped you decide what to look for, these products are a place to start.
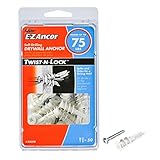
As an Amazon Associate we earn from qualifying purchases. Prices and availability are shown on Amazon.
Begin With the Wall and the Load Together
Wall anchors fail in the imagination before they fail in the wall, because buyers usually think about only one half of the pairing. An anchor is a relationship between a wall material, a fixing design and a load, and changing any one of the three changes the answer. Start by sorting your walls honestly. Solid walls of brick, block or concrete hold fixings directly and generously, provided the material is sound. Cavity walls, most commonly plasterboard over a frame or a void, hold fixings only as well as the board and the anchor design allow, unless you can reach the frame itself. Lath and plaster, tiled surfaces over unknown backing, and old walls of uncertain construction form a third, cautious family where testing and gentleness matter more than any product choice. Then sort your loads the same way. Light loads hang still and pull mostly downward. Medium loads add leverage, because a shelf or bracket holds weight away from the wall and converts some of that downward pull into an outward pull at the top fixings. Heavy or dynamic loads, anything that moves, vibrates or can be grabbed, deserve the most conservative thinking of all, and sometimes deserve a professional rather than a product.
Write the pairing down for each job, wall plus load, before shopping. That one habit prevents the two classic errors: using a light cavity fixing for a leveraged load because the item itself did not feel heavy in the hand, and drilling hopefully into an unknown wall because the anchor box promised strength the wall was never going to provide.
Load Ratings, Shear and Pull-Out in Plain Terms
Published load figures for anchors describe tests in specific materials under specific conditions, and they are best read as comparisons between products rather than as promises about your wall. Two kinds of force act on a hanging fixing, and distinguishing them explains most real-world behaviour. Shear is the downward slide, the force of the load trying to slip straight down the face of the wall. Pull-out is the outward force, the load trying to lever the fixing out of the wall toward the room. Many fixings resist shear comfortably and pull-out poorly, which is why the depth of a shelf or the length of a bracket arm matters so much: the further the load sits from the wall, the more of its weight is converted into pull-out at the upper fixings. A shallow picture hook and a deep shelf can hold the same object with completely different demands on the anchor, a fact that surprises people until they picture the leverage involved.
Why your wall lowers every number
Test figures assume sound material, a correctly sized hole, correct installation and a static load. Real walls offer crumbly plaster, a hole drilled slightly oversize on a tired afternoon, a fixing near an edge or another hole, and a load that gets bumped, loaded unevenly or climbed on by a determined child. Each departure from test conditions spends some of the safety margin the figure appeared to offer. The practical response is to work well inside any published figure, to spread loads across several fixings whenever the design allows, and to treat the weakest element, often the wall surface itself, as the true rating. An anchor is only ever as strong as the material immediately around it, and no expansion mechanism can create strength in plaster that is no longer attached to anything behind it.
Anchor families matched to walls
In solid masonry, expansion and sleeve designs grip by pressing outward in a drilled hole, and their performance depends on hole accuracy and material soundness. In cavity board, the successful designs either spread load behind the board with wings, toggles or a flange, or thread into the board with a coarse self-drilling form for lighter duties; the board thickness and condition set the ceiling for all of them. Fixing into the frame or stud behind a cavity wall, when its position coincides with your layout, outperforms any board fixing and is worth planning layouts around. Universal anchors attempt to serve several materials and can be genuinely handy for light work in mixed walls, but versatility is bought with compromise, and a leveraged or heavy load deserves the specialist design for the wall you actually have. Choosing the family for the wall first, and the specific product second, is the order that keeps people out of trouble.
A Decision Path for Common Buyer Situations
Consider four recognisable jobs. The first is hanging pictures, mirrors of modest size and light shelves on plasterboard between studs. Board fixings matched to the load, placed with attention to level and spacing, handle this work well, and the main skill is locating the fixings thoughtfully rather than forcefully. The second job is a bookcase or a run of kitchen shelving on a solid wall. Masonry fixings with correct hole depth and diameter do the work, and the planning effort goes into layout, level and hitting sound material rather than mortar joints or edges. The third job is a television bracket or a heavy mirror, where leverage and consequence both rise. That job deserves fixings into studs or sound masonry wherever the layout permits, a bracket mounted exactly as its maker directs, and a willingness to adjust the position to meet the structure rather than forcing the structure to meet the position. The fourth job is in an old house with lath, plaster and surprises. Test drilling in an inconspicuous spot, conservative loads, spreading fixings widely and knowing when to stop and seek advice are the skills that matter there, more than any anchor in any box.
Across all four, the pattern is consistent: the wall proposes, the load disposes, and the anchor merely negotiates between them. Buyers who accept that order of authority rarely have anything fall down.
A Small Worked Example With Numbers You Can Check
Suppose a shelf will carry books along its length, and you estimate the loaded shelf, board plus contents, as a medium load for your wall. The bracket design offers two fixing points per bracket and you plan two brackets. Two brackets multiplied by two fixings equals four fixings sharing the load. Now compare the alternative of one central bracket with two fixings: the same load shared by half as many points, each point carrying roughly double, and the shelf far less stable against twisting. The arithmetic is simple but the lesson is structural: adding fixing points is often a more reliable way to strengthen a mounting than choosing a nominally stronger anchor, because sharing reduces both shear and pull-out at every point simultaneously. Apply the same counting to a curtain rail, a cabinet or a row of hooks. Count the fixings, picture the load divided among them, and then ask whether the topmost fixings, which carry the leverage, are the ones your wall and anchor choice serve best. If they are not, add a point, shorten the bracket depth, or move the fixing into structure. Those three moves solve more real problems than any premium anchor.
Mistakes, Drilling and Warning Signs
The familiar mistakes begin before the anchor is chosen. Drilling without checking for pipes and cables in the wall is the most serious, and a detector, combined with thinking about where services logically run, is a non-negotiable part of the job rather than an optional refinement. Guessing the wall construction is the second mistake; a small test hole in a hidden area tells you more than any amount of tapping and hoping. Drilling the wrong hole size is the third: an oversize hole leaves an expansion anchor nothing to grip, while an undersize hole can crack brittle material or prevent a cavity fixing from opening properly. Reusing an old hole because it is conveniently placed is the fourth, since the material around a worked hole has already been stressed and enlarged. Finally, hanging the load immediately at full weight, without a progressive test, wastes the one free safety check the job offers.
Warning signs after installation deserve respect rather than optimism. An anchor that rotates in its hole, a screw that never quite tightens, a fine crack radiating from a fixing, dust or crumbling around the hole, or a fitting that has developed a slight tilt it did not have last month are all the wall reporting that something is wrong. The correct response is to unload the fixing, investigate, and re-fix in fresh material or with a design suited to what you found. Loads almost never fall without first whispering, and the whisper is always cheaper to answer than the fall.
Tools and materials worth having ready
A reliable drill with the correct bits for your wall materials, a detector for services, a level, a vacuum or brush for clearing dust from holes, and a small selection of fixings matched to your walls turn anchor work from improvisation into routine. Dust left in a masonry hole genuinely reduces grip, so clearing it is part of the fixing, not tidiness. Keep the fixings you use in labelled containers with their required drill size noted on the label; the pairing of anchor and bit is the detail most often forgotten between projects and most often responsible for a spoiled hole. A stud finder, where your walls have studs, earns its storage space the first time it lets you place a heavy fixing into timber instead of board.
The Return-Window Check and Final Questions
Test new anchors in your real wall during the return window, in a place that will be hidden or can be made good: behind where a cabinet will stand, inside a cupboard, low behind furniture. Drill, install and load the fixing progressively, beginning with a fraction of the intended weight, checking for movement, rotation or cracking at each stage, and only then approaching the full load. Tug outward as well as downward, because pull-out is the force most likely to surprise you. If the fixing creeps, spins or cracks the surface under a partial load, change the design or the position now, while the lesson costs one small hole. A fixing that passes a progressive test in your actual wall is worth more than any figure printed on any box, because it is evidence about the only wall that matters.
Before paying, three questions clarify most listings. Which wall materials is this anchor genuinely designed for, stated specifically rather than universally? What drill size and hole depth does it require, and do I own that bit? And how does it carry load, by expansion in solid material, by spreading behind a board, or by threading into the board itself, and does that mechanism match my wall and my leverage? A seller who answers those questions precisely is helping you form the pairing this whole guide is about. A seller who answers only with a maximum weight is offering you the least useful number in the subject, detached from the wall that decides everything.
Planning a Whole Room of Fixings at Once
Individual fixings get most of the attention in this subject, but many real projects are rooms, not items: a set of kitchen cabinets, a wall of shelving, a nursery being made ready, a gallery of pictures along a hall. Planning at room scale changes several decisions for the better. First, it lets you map the wall structure once, finding studs, solid areas and suspect patches across the whole surface, and then design the layout around that map rather than discovering the structure one hopeful hole at a time. Second, it lets you standardise: a room hung on two or three anchor types, each matched to a zone of the wall, is easier to install consistently, easier to check, and easier to repair years later than a room hung on nine improvisations. Third, it lets you sequence the work intelligently, drilling all the holes in one dusty session, clearing and checking them together, and only then bringing in the items to hang, which keeps heavy objects from being held aloft while decisions are made. A room planned this way also produces a natural record: a simple sketch or note of what fixing went where, kept with household papers, which future you, or a future owner, will bless the first time something needs to come down or go back up.
Fixings that must come down again
Some mountings are temporary by design, seasonal decorations, rented-home shelving, a child gate that will serve for a season, and they deserve a different calculus from permanent work. For temporary fixings, favour positions that can be made good easily, anchors that remove cleanly or leave a small, fillable hole, and loads kept modest, because the cost of a temporary fixing is paid twice, once in the hanging and once in the restoration. In rented homes, the honest conversation with the terms of the tenancy comes before the drill, and the lightest solutions, existing picture hooks, furniture that leans rather than hangs, fixings into woodwork where permitted, often serve better than any anchor. Where a temporary fixing must carry real weight, such as a gate at the top of stairs, permanence rules apply regardless of the calendar: safety-critical mountings are installed as if forever, into structure, and the making-good afterwards is accepted as the price of the safety. Sorting fixings into truly temporary, long-term and safety-critical, before choosing products, prevents the common muddle in which a seasonal approach is applied to a critical job.
Checking old fixings you inherited
Homes arrive with other people fixings already in the walls, holding curtains, cabinets and sometimes surprisingly heavy items on unknown anchors installed to unknown standards. A short audit of inherited fixings is worthwhile in any new home and after any long tenancy change. Look for the warning signs this guide has described, tilt, cracking, dust, movement, and test each fixing that carries weight with a firm hand before trusting it with your own possessions. Replace doubtful fixings in fresh material rather than reusing their holes, and take the opportunity to move safety-relevant mountings, anything above a bed, a cot or a seating area, onto fixings you have installed and tested yourself. The audit usually takes an hour and a small bag of anchors, and it converts an unknown inheritance into a known quantity. That conversion, from hoping the previous work was sound to knowing your own work is, is the real subject of this entire guide, expressed in one afternoon of checking.
When the wall itself needs attention first
Occasionally the correct anchor decision is to fix the wall before fixing anything to it. Plaster that sounds hollow over a wide area, board that flexes under a palm, masonry that sheds sand when brushed: these are surfaces reporting that they cannot currently hold what you intend to hang, and no anchor design negotiates with that report. The remedies range from modest to substantial. A local weak patch can sometimes be cut out and patched with material that will hold fixings properly once cured. A wider weakness may mean moving the mounting to a sounder area, spreading fixings across a batten that bridges good material, or, for anything heavy, accepting that the wall needs professional assessment before it carries loads again. Battens deserve a word of their own, because they solve several problems at once: a timber batten fixed through into structure at multiple sound points creates a new, known surface into which shelves, rails and cabinets can be fixed confidently and rearranged later. Many apparently difficult walls become straightforward once a batten carries the argument with the wall on behalf of everything hung afterwards. The judgement to cultivate is sequencing: wall first, anchor second, load last, and never the reverse merely because the item is ready and the afternoon is free. A mounting delayed by a week of wall repair is a small story; a mounting that fails is a longer one, told at the scene, usually with breakages.
Records, photographs and the kindness of leaving a map
Before leaving this subject, consider the small administrative habit that separates confident households from hopeful ones: record your fixings. When you install anything substantial, take a photograph of the wall before the item covers it, showing the fixing positions against a recognisable feature, and keep the photograph with the household records rather than in the general flood of a phone gallery. Note the anchor type and the drill size on the back of the item itself, in pencil on a hidden face, where the next person to take it down will find it at the exact moment of need. If you move a fixing because the first position failed, mark the failed hole honestly rather than disguising it, because a disguised failed hole invites the next installer to drill into weakened material in perfect innocence. These habits cost minutes across a whole project and repay them for decades, to you when memory fades, to a tradesperson pricing a job, and to whoever owns the walls after you. Walls accumulate history whether it is recorded or not; the recorded version is simply the one that does not have to be rediscovered with a drill.
A closing word on confidence and patience
Confidence in this subject is not a personality trait; it is the residue of tested fixings, recorded decisions and warnings answered early. Every section of this guide has pointed at the same small set of behaviours: identify the wall before choosing, respect leverage more than headline weight, test progressively in real material, spread loads where you can, and listen when a fixing reports trouble. A reader who adopts only those behaviours, and buys nothing fancier than the anchors already in the garage, will hang things more safely than a reader who buys premium fixings and skips every test. That is the encouraging truth at the centre of the subject. The wall, the load and a little patience decide the outcome, and all three are available to any careful household, starting with the very next picture, shelf or rail that needs to go up.
FAQ
Can I reuse an anchor hole?
Usually not. A stretched hole loses grip, so fill it or move to a new position with a fresh anchor. If the position must stay the same, a larger anchor suited to the material may work, following the packaging.
Why did my anchor spin in the hole?
The hole may be too large, or the wall material may be soft or crumbly. Try a larger anchor made for that material, or choose another fixing type.
Do I need a stud finder?
It helps. Fixing into a stud is often a stronger option than any hollow-wall anchor. A detector may also warn of cables or pipes, but treat its readings as a guide and follow local advice.
Are plastic anchors strong enough?
In solid masonry they suit light to medium items when the right size is used. In hollow walls they suit only light loads listed on the pack.
What if the wall is old plaster?
Old plaster can be brittle. Drill gently, avoid hammer mode unless the wall behind is masonry, and consider fixing into the structure behind rather than the plaster alone.
How much weight can a drywall anchor hold?
There is no single answer. Capacity depends on the anchor type, the thickness and condition of the board, and whether the pull is straight out or downward. Use the manufacturer rating for that exact product, apply a generous safety margin, and move to framing or a heavier anchor for anything valuable or risky.
What size drill bit do I need for wall anchors?
Use the size printed on the anchor packaging, because it varies by type and brand. Plastic expansion anchors usually need a snug hole, while toggle bolts need a larger one for the wings. If you are unsure, test on a scrap piece of the same material before drilling the wall.
Can I use anchors in hollow brick or block?
Yes, but you need types designed for hollow material, such as sleeve or toggle styles. Solid masonry anchors can fail in a cavity. Drill gently so you do not blow out the thin outer wall, and check the product instructions for hollow-wall use and its load limits.
How far apart should wall anchors be?
Spacing guidance comes from the manufacturer and gets larger in concrete and brick. As a general idea, keep anchors apart from each other and away from edges and corners so the wall material cannot break out. Always check the package for minimum spacing and edge distance.
Is it safe to drill into a wall without checking for wires?
It is risky. Cables and pipes often run vertically from outlets and switches, and they may also run in other paths. Use a detector made for this and avoid drilling near outlets. Turn off power to the circuit when in doubt, and call an electrician if you are unsure.
The Short Version
Identify the wall, match the anchor to it and to the load, and follow the packaging for bit size and depth. Check for hidden services first and follow the maker’s instructions. For anything heavy or risky, seek advice from a qualified person.