Drywall is soft, so a curtain rod mounted straight into it with plain screws can pull loose. Wall anchors spread the load and give the screw something to grip. Below is an anchor-focused method for walls with no wood behind the brackets, followed by scenarios, mistakes to avoid and a troubleshooting table for when something does not sit right.
Why Anchors Matter
A screw in bare drywall bites into crumbly gypsum. Each time the curtain moves, the hole widens. An anchor expands or locks behind the board, which helps the bracket hold. Different anchors suit different loads, so check the packaging and the rod maker’s instructions.
In this guide
Collect These
- Rod and brackets
- Wall anchors in the size the maker lists
- Drill and a bit of the size the anchor packaging asks for
- Screwdriver
- Level, pencil, tape measure
- Small hammer for tapping plastic anchors
Anchor Installation, One Bracket at a Time
- Mark the bracket spots, keeping the marks level across the window.
- Check the area for a stud. If one lines up, you can screw into it directly and skip the anchor.
- Drill a pilot hole at each mark, going straight into the wall rather than at an angle.
- Tap the anchor into the hole until its rim is flush with the wall.
- Line the bracket over the anchor and drive the screw slowly.
- Stop turning when the bracket is firm. Further turning can strip the anchor.
- Repeat for each bracket, including any center support.
- Hang the rod and gently pull down to test the hold before adding curtains.
Anchor Types in Plain Terms
| Anchor | How it grips | Typical use |
|---|---|---|
| Plastic expansion | Spreads inside the hole | Light curtains |
| Self-drilling threaded | Threads cut into the board | Light to moderate loads |
| Toggle or butterfly | Opens behind the board | Heavier drapes |
What Is Behind the Board
Drywall is a thin layer over an empty cavity, and the cavity may hold framing, insulation, cables or pipes. Before drilling, look at where switches, sockets and fittings sit, because services often run in straight lines above and below them. A detector made for the purpose can help, but it does not guarantee a clear path. If you are unsure, move the bracket or ask a qualified professional. Toggle-style anchors need room behind the board to open, so confirm there is nothing blocking that space.
A Worked Example With Invented Numbers
The numbers here are invented to show the order of thinking. Suppose your curtain and rod together weigh an invented 6 units, and the rod has two end brackets and one center bracket. The load is shared, but not always evenly, so plan as though each end bracket could carry more than a third.
- Check the maker’s limit on the anchor packaging for the board thickness you have. If a single anchor lists a limit comfortably above your guess for one bracket, it is a reasonable candidate; if it is close, move up a type.
- Mark the three bracket positions on a level line.
- Run a detector over each. If the center mark meets a stud, use a screw there and anchors at the ends.
- Drill each hole to the size on the pack, matching the drill bit width to the anchor body.
- Fit and tighten in small turns, checking the line again after the second bracket.
Treat these as steps, not figures to copy. Your curtain, board and anchors will differ, and the packaging is the source for real limits.
Common Scenarios
Light sheer curtains on a short rod
Two plastic expansion anchors are often enough if the maker lists them for the load. Keep the bracket close to the board and avoid hanging heavy tie-backs on the same rod.
Heavy lined drapes
Look for studs first, then choose toggle-style anchors for any bracket that cannot reach wood. Add a center bracket so the rod does not bow.
A bracket falls between a stud and nothing
Slide the bracket along the line to reach the stud, or use two anchors on a bracket with several holes. A little change in position can add a lot of grip.
A damaged or patched wall
Old holes and patches are weaker than sound board. Keep new holes away from them, or ask a qualified professional about repairing the area first.
Mistakes to Avoid
- Over-tightening. Anchors hold by gripping the board, and too much torque crushes it, leaving a hole that spins.
- Drilling at an angle. A tilted hole makes the anchor sit crooked and the bracket lean.
- Mixing anchors and screws from different packs. Each anchor is made for its own screw size, so keep sets together.
- Ignoring the board thickness. Some anchors need a certain thickness to work, so read the pack.
- Hanging the curtain straight away. Wait and check the empty rod first.
Troubleshooting
| Symptom | Likely cause | What to try |
|---|---|---|
| Anchor spins in the hole | Hole too big or board crushed | Move the bracket slightly or use the next anchor size |
| Bracket leans down | Too much weight on one point | Reduce curtain weight or add a center support |
| Screw will not go in | Anchor not flush or wrong screw | Check the pack and tap the anchor fully in |
| Crack around the hole | Over-tightening or old board | Stop, fill the area and re-site the bracket |
| Dust everywhere | Normal drilling mess | Hold a vacuum nozzle near the drill, or tape a folded paper cup under the hole |
If you are fitting a long rod, it can help to use a center bracket with its own anchor, since the weight sags in the middle. Check that every bracket lines up with the rod before you drive the last screw. Keep a spare anchor handy in case one fails when you tighten it.
Leave the rod empty for a day and look again. Any bracket that has dropped or leaned shows up quickly, and fixing it before the fabric goes on is much easier than doing so afterward.
Care and Upkeep Over Time
Every few months, give each bracket a gentle tug and look for small cracks or dust lines in the paper face of the board around it. Tighten screws only until they are snug. If a bracket has loosened, take the curtain down before you work on it, since pulling against the weight makes the hole worse. A hole that has widened is better filled and left, with the bracket re-sited a short distance along the line.
Glossary
- Drywall: board made of a gypsum core between paper faces.
- Stud: upright framing member behind the board.
- Toggle anchor: an anchor with wings or a bar that opens behind the board.
- Flush: level with the wall surface.
- Strip out: to damage a hole or thread so a fixing spins instead of gripping.
Planning the Layout Before You Touch the Wall
Most curtain problems start with a poor layout, not a poor anchor. Spend a few minutes on measurements and the rest of the job goes quickly.
Rod height and width
A common approach is to mount the rod several inches above the window frame, or closer to the ceiling if you want the room to feel taller. Many people also let the rod extend a few inches past each side of the frame so the open curtains stack on the wall rather than covering the glass. These are style choices, not rules, so adjust them to your room. What matters for strength is that each bracket lands in a spot you have checked, not just a spot that looks right.
Bracket spacing
Rod kits usually include two end brackets and, for longer rods, a center support. Follow the maker’s instructions on when a center bracket is required. As a general idea, a long rod carrying lined curtains sags in the middle without support, and that sag pulls the end brackets inward and downward. A center bracket shares the load, so each anchor works less hard.
Marking with a level
Hold the first bracket at your chosen height and mark its screw holes with a pencil. Use a level to carry the line across to the second bracket position, then mark again. Measure the distance from the ceiling or the top of the frame at both ends as a second check. A bracket that is a quarter inch off is easy to spot on a long rod, so it is worth confirming before you drill.
- Mark one bracket, then level across to the other.
- Measure down from the same reference at both ends.
- Mark the center bracket after the ends are set, using the rod itself as a guide.
- Write small labels on painter’s tape if you have several brackets, so they go back in the right place.
Detailed Steps for Each Anchor Style
Anchor packaging lists a drill bit size and a screw size. Treat those numbers as the authority, since anchors from different makers are not identical. The notes below describe the general sequence for the types most people meet.
Plastic expansion anchors
These are the simplest and suit light curtains. Drill the hole at the size printed on the package, using a bit that matches exactly. Tap the anchor in until its flange is flush with the wall. Set the bracket over it and drive the screw slowly. The anchor spreads as the screw enters. Stop when the bracket is snug. Over-tightening can crush the plastic or strip the hole, which leaves a loose bracket that you then have to redo.
Self-drilling threaded anchors
These have a coarse thread that cuts into the drywall. Many are driven with a screwdriver rather than a drill, which gives better control. Press the tip on your mark and turn steadily, keeping it square to the wall. Stop when the head sits flush. A drill on high speed can spin the anchor through the board and strip the opening, so use a low clutch setting if you use a power driver.
Toggle or butterfly anchors
These pass through a larger hole and open behind the board. They are chosen for heavier loads. Drill the hole at the stated size, fold the wings, push the anchor through and let it spring open. Pull the screw gently outward while turning so the wings seat against the back of the board. Do not remove the screw completely once the bracket is placed, because the wings can drop into the wall cavity. If the anchor spins without gripping, the hole is probably too large.
Snap toggles and heavy-duty options
Snap-style toggles use a metal channel that you slide into place, then lock by snapping the strap. They suit larger drapes, but read the instructions carefully and check the stated capacity for the thickness of your drywall. Drywall is commonly half an inch or five eighths of an inch thick, though older or specialty boards differ.
Matching Anchors to Curtain Weight
There is no single number that fits every window, because capacity depends on the anchor, the drywall condition and the direction of the pull. Curtains hang down, but they also pull outward when you draw them, and that sideways tug is often harder on the wall than the weight alone. The table gives a general planning guide only. Always check the capacity on your anchor package and the instructions from the rod maker.
| Curtain type | Typical situation | General anchor approach |
|---|---|---|
| Sheer panels | Short rod, light fabric | Plastic expansion or self-drilling anchors |
| Standard cotton or polyester | Medium window, single layer | Self-drilling anchors, or toggles if the rod is long |
| Lined or blackout drapes | Wide window, two layers | Toggle anchors, plus a center bracket |
| Heavy velvet or double rods | Large span, frequent use | Heavy-duty toggles, or fix into framing where possible |
When in doubt, step up one level. A heavier anchor costs little and reduces the chance of repainting and patching later.
Tools and Materials by Experience Level
If you are new to this
You can do the whole job with a pencil, a tape measure, a small level, a screwdriver and the kit supplied with the rod. Choose self-drilling anchors, because they need no pilot hole and fewer separate steps. Work on a step stool you trust, and keep the stool on a flat floor. If the window is above a bed or a sofa, move the furniture or cover it first, so dust and dropped screws do not become a problem.
If you have done a few installs
A cordless drill with an adjustable clutch speeds things up. A set of drill bits that match common anchor sizes saves trips to the store. A stud finder, or a magnet that picks up screw heads, helps you decide whether a bracket can go into framing instead of an anchor. Where framing lines up with a bracket position, a screw into wood is usually stronger than any drywall anchor.

If you are mounting something unusual
Ceiling-mounted tracks, corner rods and extra-wide spans each have their own rules. Read the maker’s instructions and follow their fastener recommendations. If the instructions require fixing into framing and your layout does not allow it, change the layout or ask a professional rather than trusting anchors to carry loads they were not designed for.
Fixing a Hole That Will Not Hold
Sooner or later an anchor spins, a hole grows or a screw strips. Do not push a larger screw into a wrecked opening, because it rarely holds. Use one of these fixes in order of effort.
- Move over: if the bracket design allows, shift a short distance and use a fresh spot, then fill the old hole later.
- Step up the anchor: remove the failed one and fit a larger toggle that grips a wider area behind the board.
- Fill and redo: for a stripped or oversized hole, press in joint compound or a patch, let it dry fully, then drill again at the same spot.
- Use a backer: for a badly damaged area, a small repair patch with a wood or metal backing gives the anchor fresh material to grip.
Allow the compound to cure as the product label directs before drilling. Rushing this step is a common reason a repaired spot fails again.
Before You Drill: Safety and Final Checks
Walls hide things. Electrical cable, plumbing and ducts can run near windows, particularly above them. Use a detector designed to sense live wiring if you own one, and avoid drilling directly above or below outlets and switches, since cable commonly runs in straight lines between them. If you are unsure, hold off and consult a qualified electrician. Wear eye protection when drilling overhead, because dust and debris fall into your face.
Once the brackets are in, hang the rod without the curtains first. Give it a gentle pull in each direction and watch for any movement at the brackets. Add the curtains and test again by sliding them open and closed a few times. If a bracket lifts or rocks at this stage, fix it now, while the curtains are still easy to take down.
Ready to Buy? Start Here
If this guide helped you decide what to look for, these products are a place to start.
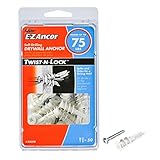
As an Amazon Associate we earn from qualifying purchases. Prices and availability are shown on Amazon.
How Each Anchor Actually Works, and Why the Difference Matters
Anchors fail in predictable ways because each type holds by a different trick, and matching the trick to the job is the whole skill. An expansion anchor works by wedging: the screw draws a plug tight until it presses outward against the sides of its hole. It holds by friction, which makes it neat and adequate for light, steady loads in sound board, and vulnerable to exactly two things: a hole drilled even slightly oversize, which leaves nothing to press against, and repeated tugging, which works the plug like a loose tooth. A self-drilling threaded anchor works by cutting its own wide thread into the board, spreading the load over a larger circle of material. It installs fast and holds respectable loads, but its thread is only as strong as the board it bites, so crumbly or previously damaged board defeats it. A toggle works by geometry: a wing or bar passes through the hole and opens behind the board, so the load is carried by a patch of board surface rather than by friction in the hole. That is why toggles are the honest choice for the heaviest bracket loads in hollow board, and why they demand a bigger hole and a wall cavity that is actually empty where the wing needs to open.
Reading a failure tells you which trick was defeated. An anchor that pulls straight out with a neat plug of board dust around it was in an oversize or crumbling hole. An anchor that stays in the wall while its screw strips has been overtightened past the point where the board could resist. An anchor that holds for weeks and then leans, the bracket tilting away from the wall at the top, has been creeping under a load that pulls outward as much as downward, which is exactly what a loaded curtain bracket does: the rod sits out from the wall, so the curtains’ weight tries to rotate the bracket, prising the top fixings out while pressing the bottom ones in. That rotation is why the top screw of a curtain bracket deserves your best anchor, your most careful hole, and your most honest load judgement, even when the bracket has several screws that look identical.
Drilling the Hole the Anchor Deserves
Most anchor failures are born at the drilling stage, in holes that are slightly wrong in ways the eye forgives and the anchor does not. The hole must match the anchor maker’s stated bit size, not the nearest bit in the box, because expansion and threaded anchors are both sized around a specific grip. Drill at a steady speed, square to the wall, without wobbling the bit to hurry the hole wider; a hole made by a wandering bit is a cone, and cones hold nothing well. Drill to the depth the anchor needs and no further argument is required, but clear the dust from the hole, because a hole packed with its own dust makes an anchor feel seated when it is actually floating on debris. In board over studs, stop and think the moment the bit’s behaviour changes: easy progress that suddenly meets resistance means you have found the stud, and the correct response is to celebrate and use a screw into wood, not to force an anchor designed for hollow board into a space that no longer exists.
Do the pilot-hole self-check on a scrap or an inconspicuous spot if the wall is unfamiliar: drill, fit the anchor by hand, and feel whether it seats with the firm resistance the maker describes. An anchor that spins in its hole before the screw is even offered has already failed, quietly, and no screw will rescue it. An anchor that needs a light tap from the handle of a screwdriver to sit flush is behaving as designed. Learning that feel on a test hole, rather than behind the bracket where you cannot see, is a two-minute investment that experienced installers make on every new wall type they meet.
Load Arithmetic for a Curtain Bracket, Done Properly
Work the numbers with your own curtains, using the method rather than any borrowed figure. Weigh the curtains, or weigh yourself holding them and subtract, and add the rod’s weight. Divide by the number of brackets that will carry the span. That gives the steady downward load per bracket, but a bracket’s life is not steady: add a mental allowance for the draw, because every opening and closing tugs the rod, and for the day a child or a pet pulls a curtain, which no arithmetic can fully insure against and which is a reason to keep a sensible margin rather than to aim exactly at a limit. Compare your per-bracket figure with the anchor maker’s stated capacity for a single fixing in board, then divide by the number of screws in the bracket only if the bracket is rigid enough to share the load evenly, which most pressed-steel brackets approximately are once all screws are snug.
An example with invented numbers shows the shape of the thinking. Imagine curtains and rod together weighing about as much as a packed carry-on bag, carried on two end brackets. Each bracket then holds half a bag, through, say, two screws, so each anchor carries roughly a quarter of a bag in steady load, plus tugs. If the anchor you are holding is described by its maker as a light-duty fixing for small pictures, the comparison tells you to step up a class, to a threaded anchor used carefully or a toggle, before a hole is drilled. If the same window had a centre bracket, the per-bracket load falls by a third and the lighter anchor might pass the same test honestly. The arithmetic is simple; the discipline is doing it while the anchors are still in their packets and the wall is still unmarked.
When the Wall Fights Back: Patches, Crumbly Board and Second Attempts
Every installer eventually drills a hole that crumbles, lands on a hidden obstruction, or opens into a cavity full of debris. The wrong response is to push the anchor in anyway and lean on hope. The right response starts with information: shine a light into the hole, probe gently with a screwdriver to feel whether the cavity is clear and how thick the board is, and look at what came out on the bit. Clean, pale dust is sound board. Grey, gritty or layered debris suggests old repairs, and a hole that keeps growing as you look at it is board that has lost its integrity in that spot. A failed hole should be retired, filled properly once the new position is established, and the bracket moved by at least a few centimetres into fresh material, because an anchor placed at the edge of a weak patch inherits the weakness.
If the bracket cannot move because the rod’s layout is fixed, change the anchor’s trick rather than its address. A toggle that bridges behind the board can succeed in a spot where friction anchors cannot, because it bears on the board’s back face over a wider area. Where even the back face is doubtful, a small plywood or timber pattress fixed across to sound material, or a bracket position moved up into the band where a fixing rail or header exists above the window in some constructions, are the honest escalations. What never works is the folklore remedy of packing a loose hole with matchsticks or filler and reusing it for a loaded bracket; that trick has its place for a hinge screw in wood, and a curtain bracket pulling out of a packed hole above someone’s head is not that place.
A Proving Routine After the Rod Goes Up
Do not let the curtains be the first test. With the brackets fitted and the rod in place, load each bracket progressively with your hands: a firm downward pull, then a downward-and-outward pull that imitates the bracket’s real working direction, watching the fixing line for any movement and listening for the faint crunch that means board is giving way. A sound installation is silent and still. Then hang the curtains, draw them through their full travel a dozen times, and re-inspect the top screws of each bracket. Finally, put a date in your diary, a few weeks out, to look again: anchors that creep announce themselves early as a bracket sitting a fraction off the wall or a screw head no longer snug, and catching creep at that stage is a ten-minute re-fix rather than a falling rod. That little routine, weigh, divide, compare, prove, recheck, is the difference between installing a curtain rod and merely attaching one.
Reading the Existing Wall: A Forensic Survey Before New Holes
Most curtain rods are not hung on virgin walls; they are hung on walls with a history, and reading that history first will save your anchors. Look along the wall above the window in raking light, from a low angle with the room’s light behind you, and the wall will confess: filled holes appear as faint discs, old bracket positions as rectangles of slightly different paint, and hairline cracks around forgotten fixings as tiny dark stars. Each confession is a no-drill zone for your new anchors, because filled and cracked board has already spent its strength. Map the confessions in pencil alongside your stud marks, and let the combined map, structure, history and hazards, dictate the final bracket positions. It is common for this survey to move a bracket by several centimetres from its geometrically ideal spot, and equally common for nobody, ever, to notice the move, while a bracket anchored into an old filled hole announces itself to the whole room within the month.
The survey should include the window’s own structure. Above many windows sits a lintel or header, of timber, steel or concrete depending on the house’s age and construction, and a drill that meets it behaves entirely differently from one in board: sudden hard resistance, a bit that skates or stalls, and dust of a new colour. Meeting structure is not automatically bad news; a fixing into sound timber above a window can be the strongest on the whole rod, but a fixing attempted blindly into concrete or steel with the wrong bit and the wrong anchor is how holes become craters. If your bracket line crosses the lintel zone, which on many windows is the band immediately above the frame, plan for it: know which positions will be board and which will be structure, and carry the anchors and bits for both, chosen in advance, rather than improvising at the top of a ladder with a hot drill in your hand.
Two Brackets, Two Worlds: A Worked Comparison
Consider a single long window whose left bracket lands on a stud and whose right bracket lands in open board, a situation so common it might as well be the default. The left fixing is a screw into wood: drill a slim pilot, drive the screw, feel it bite and seat the bracket like furniture. The right fixing must achieve a comparable honesty by completely different means, and the discipline is to refuse the temptation to use the same screw-and-plug routine on both ends for the sake of symmetry in your toolbox. On the right, the anchor choice follows the load arithmetic: the stack of curtain gathers at that end when open, so the right bracket may actually carry more than the stud-fixed left one, a fine irony that the packet of small plugs supplied free with the rod will not survive. Choose the threaded anchor or the toggle the arithmetic demands, drill its exact hole, prove it with the pull test, and only then hang the rod.
Six months later, the difference between the two ends will be measured in silence: both brackets still, both screws snug at the quarterly glance. That outcome was decided entirely at the fitting stage, by treating each position as its own engineering problem. The general principle travels well beyond curtain rods: in any installation, the fixings are only as uniform as the wall allows, and craftsmanship consists of giving each position what its material requires while keeping the visible result uniform. Nobody admires a rod for having identical screws. Everybody admires, without knowing why, a rod that is still level and silent in its fifth year.
The Installer’s Kit for Drywall Days
Assemble the kit before the ladder comes out, because drywall work punishes mid-job improvisation. You want the anchors in at least two families, so a position that defeats one can be answered by the other without a trip to the shop in dusty clothes; the exact bits those anchors specify, checked against the packets rather than your memory; a stud finder and a strong small magnet, which finds the screws in the studs and so maps the studs by the wall’s own confession; a level long enough to span between brackets; painter’s tape for marking without pencil on delicate paint and for the dust envelopes under each hole; and a vacuum or a helper with one, because board dust worked into a carpet is a permanent souvenir. Add a torch for inspecting holes, since half the diagnoses in this guide are made by looking into a dark hole and understanding what you see, and a notebook habit: record, on the rod’s instruction sheet or your phone, which anchor went in which position and what the wall turned out to be. The next installer of anything on that wall, very likely you, inherits your notes or your mysteries; choose the notes.
Label the Wall’s Secrets for the Next Job
Finish a drywall curtain installation by leaving the wall’s secrets written down, because you have just paid for that knowledge with investigation and it should not be charged twice. On the back of the rod’s instruction sheet, or in a note on your phone, record the stud positions you found measured from a fixed corner, which bracket positions are in wood and which are on anchors, which anchor family each hollow position received, and anything odd you met, a lintel, a patch, a cavity full of debris. Tape the sheet inside a nearby cupboard or keep it with the house documents. The next job on that wall, a picture, a shelf, a replacement rod in five years, then starts from your map instead of from a fresh round of tapping and guessing, and the wall accumulates fewer exploratory holes over its life. Installers who work in the same buildings for years are recognisable by exactly this habit: they treat every wall as a document they are annotating for the next reader, who is usually themselves, older, and grateful.
That note-keeping habit pairs with one last physical check before the ladder goes away: sight along the fitted rod from each end of the room, because a rod can pass a level test at its middle and still show a bracket sitting a fraction proud at one end, visible only from an angle. Correct anything the sighting finds now, while the anchors are fresh in your mind and the positions are still marked, and the installation closes with nothing left to memory or luck.
FAQ
Can I reuse an old anchor hole?
Only if it is still tight. A loose hole is better filled and left, with the bracket moved a short way.
What about wiring behind the wall?
Treat wall areas near switches and outlets with caution. Electrical work belongs to a qualified professional.
Do I need a pilot hole for every anchor?
Some self-drilling types do not, but many need one. The packaging says which, so follow it.
Can I use anchors if the wall has a thick finish or texture?
Often yes, but the surface can chip when drilled. Mask the mark with tape and drill slowly.
How many anchors should each bracket have?
Use every screw hole the bracket provides, each with its own anchor, unless the maker says otherwise.
How high above the window should I mount a curtain rod?
Many people place the rod somewhere between a few inches above the window frame and near the ceiling, depending on the look they want. Higher placement can make a room feel taller. Choose your height first, then check what is behind the wall at that spot before you commit to drilling.
Can drywall anchors hold heavy curtains?
Some can, if you choose the right type and follow the package capacity. Toggle-style anchors spread load behind the board and are usually better for heavy drapes than basic plastic ones. For very heavy curtains, fixing into framing is stronger. Always check the rated load and the rod maker instructions.
Why does my curtain rod bracket keep pulling out of the wall?
Common causes are an anchor that is too small for the load, a hole drilled oversize, or over-tightening that crushes the drywall. Pulling the curtains sideways also stresses the bracket. Try a larger toggle anchor, add a center bracket, or move the bracket to a spot with framing behind it.
Do I need a center bracket on a curtain rod?
It depends on the rod length and curtain weight. Longer rods carrying lined or heavy curtains usually sag without one. The rod maker will state when a center support is required. Adding one shares the load across more anchors, which helps reduce strain on the end brackets.
How do I patch the holes if I move a curtain rod?
Remove the anchor if you can, or push it flush. Fill the hole with joint compound or a small patch, let it dry fully, sand lightly and touch up the paint. For larger holes from toggle anchors, use a patch kit sized to the opening and follow its directions.
How do I know if I have drilled into a stud or just hit something hard?
The evidence is on the bit and in the feel. A stud gives pale wood shavings and steady, grippy resistance that continues as the bit advances, and a screw driven there bites and tightens with a firm, rising resistance. An obstruction gives gritty or metallic dust, resistance that suddenly stops the bit dead, or a hollow ring when you tap around the spot. If the evidence is ambiguous, stop, withdraw, and probe the hole gently with a thin screwdriver; certainty matters more than the minute lost, because the right fixing for wood and the right fixing for a hollow cavity are opposites.
Can I put the centre bracket on anchors if the ends are in studs?
Yes, provided the anchors are honestly chosen for their share. With end brackets in studs, the centre bracket’s job is mainly to stop the span sagging and to share the middle load, so a good threaded anchor or a toggle in sound board is a reasonable match. Fit it with the same care as the ends, prove it with the same pull test, and remember that rings cannot pass it, so the centre bracket decision is still also a curtain-travel decision.
What size hole is too big to save with a larger anchor?
A hole is too big for its spot when the board around it is cracked, soft or missing, whatever its diameter, because anchors hold in board, not in holes. A clean, sound hole that is simply oversize for one anchor can often accept the next type up, particularly a toggle whose bearing is behind the board. Test any rescue by fitting the anchor and giving it the pull test before the bracket goes on; an anchor that moves under a hand pull has answered the question, whatever its packet promised.
Why did my anchor hold the bracket but fail when the curtains were drawn?
Because drawing curtains adds the load anchors dislike most: repeated outward tugs at the top of the bracket, cycling hundreds of times. A friction anchor at the edge of its capacity survives the static hang, then works loose a fraction with every draw until one day it lets go. The lesson is to size anchors for the working load with margin, to put your strongest fixing at the top screw position, and to treat any bracket that needs retightening more than once as a fixing asking to be upgraded, not tightened again.
Should I fill old holes before or after fitting the new rod?
Fit the new rod first, prove it, and live with it briefly, then fill. Old holes near new ones should be left strictly alone during drilling, because filler that has not fully cured crumbles into a new hole that strays too close. Once the installation is settled and you are sure no bracket needs to move, fill the retired holes, let the filler cure completely, sand and touch up. Filling last also means you only fill the holes that are truly retired, not the ones you end up reusing.
The Short Version
Use anchors when no stud is behind the bracket, drill neat pilot holes, and stop tightening when firm. Test the rod before hanging fabric. Follow the maker’s guidance, and results depend on your wall.