Redoing a small patch of grout means scraping out the damaged material, cleaning the joint, and pressing in fresh grout mixed to the maker’s directions. It is a patient job rather than a hard one. The best results come from not rushing the drying times. This guide adds a worked walkthrough, realistic cases, a troubleshooting table and the upkeep that keeps a repair looking good.
Before Any Scraping
Look closely at the problem. Hairline cracks in one corner may just need new grout, but a wide crack that follows the same line across a floor, or tiles that sound hollow, can signal movement underneath. Do not hide that kind of problem with new grout; ask a qualified professional to assess it.
Tools list
- Grout removal tool or a small rigid scraper
- Safety glasses and a dust mask
- Vacuum with a brush nozzle
- Powder or ready-mixed grout in a matching shade
- Small rubber float, sponge and two buckets
- Masking tape for nearby surfaces
In this guide
Sanded or Unsanded, and Which Joint
Grout comes in more than one type, and the choice usually follows joint width. Sanded grout contains fine grit and is typically used for wider joints because the grit resists shrinking. Unsanded grout is smoother and is commonly used for narrow joints. The maker’s label states the joint widths it suits, so follow that. Matching the existing grout type matters, because mixing types in one line can look and behave differently.
Corners and edges where a wall meets a floor, a tub or a countertop are usually filled with flexible sealant instead of grout, because those joints move. If your damaged strip is at such a meeting point, you likely need to replace sealant, not grout. Check how the original was done before you begin.
The Job in Order
- Put on glasses and a mask. Old grout produces fine dust.
- Pull the scraper along the joint with moderate pressure, taking out about half the depth of the grout. Keep it centered so tile edges stay unchipped.
- Vacuum out dust and wipe the joint with a barely damp sponge. Let it dry.
- Mix the new grout exactly as the maker describes, aiming for a thick, spreadable texture.
- Hold the float at an angle and press grout firmly into the joint, working across it, then along it.
- Scrape off excess at a diagonal so you do not drag grout back out.
- After the time the maker lists, wipe the surface with a damp, well-wrung sponge in light sweeps, rinsing often.
- Buff off the haze with a dry cloth once it has dried on the surface.
- Keep the area dry and unused for as long as the instructions say.
A Worked Walkthrough
Picture a 30 cm strip of cracked grout beside a bathtub wall, with six tiles affected. The numbers are invented to illustrate the pacing.
- Tape the tile faces on both sides of the strip to protect them, and lay a cloth over the tub edge.
- Work the scraper along the line in short pulls. After the first pass, check the depth with a flat tool, and stop once most of the old material is out.
- Vacuum, then wipe with a barely damp sponge. Leave the joint to dry fully, which may take an hour or more.
- Mix a small batch, about what you can place in ten minutes, so it does not harden in the bucket.
- Press it in with the float held at roughly 45 degrees. Make a second pass in the other direction to fill voids.
- Wait the time on the label, then do the first wipe with a nearly dry sponge. A second wipe after more time clears the haze.
- Remove the tape while the grout is still soft enough not to tear, and tidy the edge with a fingertip or a shaping tool.
Common Scenarios
A single cracked corner in a shower
Check for water behind the tile. If the wall feels soft or the crack returns, stop and ask a qualified professional about the cause.
Grout that is stained rather than cracked
If the joint is solid, cleaning may be enough. Replace it only when it crumbles, gaps or lets water through.
A kitchen backsplash joint
Small gaps near the countertop usually need flexible sealant, while the joints between tiles take grout. Use the right product in each place.
A floor joint near a doorway
Floors flex more under foot traffic. If cracks keep returning, the base may be moving, which is a job for a qualified professional rather than more grout.
Common Slip-Ups
- Mixing too wet, which leaves shrinkage cracks
- Wiping too early and pulling grout out of the joints
- Choosing a shade that does not match, since fresh grout often looks different from aged grout
- Using grout made for another purpose; check the label
- Leaving the old joint dusty, which stops fresh grout from bonding
If water has been leaking behind the tile, or the area is near a supply line, stop and call a qualified plumber.
Quick Troubleshooting
| Symptom | Likely cause | What to try |
|---|---|---|
| Fine cracks soon after drying | Mix was too wet or dried too fast | Remove and redo with a stiffer mix; keep the area from drying in drafts if the maker advises |
| Pinholes in the surface | Joint not pressed in firmly | Press a little more grout into the holes within the working time |
| Cloudy haze on tile | Residue left on the surface | Buff with a dry cloth; use a haze remover only if the maker allows it |
| Patch is a different shade | New grout against aged grout, or too much water in the mix | Wait for it to harden fully before judging, and mix with consistent water |
| Grout pulls out when wiping | Wiped too early | Press it back in and wait longer before the next wipe |
Care and Upkeep Over Time
Keep a bright lamp nearby so you can see how deep the joint is. Aim to leave the joint slightly below the tile surface, which looks neat and sheds water, and wipe off any grout that lands on the tile faces before it dries.
After the repair, clean with a mild cleaner and avoid harsh scrubbing. Dry wet areas such as shower corners with a squeegee or cloth where practical, and ventilate the room. Check the patch now and then for new hairlines. If the maker recommends a sealer, apply it after the grout has fully hardened and according to the label.
Choosing Materials and Matching the Existing Joint
A small repair looks best when the new grout resembles the old in color, texture and width. That means doing some detective work before you buy anything. Spend ten minutes studying the joint, because a mismatch is much harder to hide than a slightly untidy edge.
Measuring the joint
Slide a ruler or the edge of a coin along the gap to estimate its width. Narrow joints, often around one eighth of an inch or less, usually point toward unsanded grout, while wider joints often call for sanded grout. These are general patterns, so rely on the label of the product you buy, which states the joint widths it suits.
Matching color
Grout color changes as it cures and again as the surrounding grout ages. Bring a chip of the old grout, or a photo taken in daylight, to the store and compare it with the maker’s color samples. Many makers sell small sample sizes, which is cheaper than redoing a patch. If the surrounding grout is stained, clean a small test spot first so you can see the true color underneath.
Powder, premixed and epoxy types
- Powder grout is mixed with water or a liquid additive and is the traditional choice for most floors and walls.
- Premixed grout comes ready to use and is convenient for a very small patch, though you should check that the label allows its use in wet areas.
- Epoxy grout is a two-part product that resists stains, but it sets quickly and is harder to work with. Beginners often find it demanding, so read the instructions carefully before choosing it.
Sealer and cleaner choices
Some grouts need a sealer after curing, while others contain additives that make one unnecessary. Check the instructions for the grout you buy. Choose a cleaner that is safe for both the tile and the grout, because some strong products can etch or dull certain stone and glazed surfaces.
Removing Old Grout Cleanly
The removal stage causes most of the damage in a repair. The goal is to take out enough old material for the new grout to grip, without scratching or chipping the tile edges.
Choosing the right removal tool
A hand grout saw has a hardened blade and gives the most control for a small area. An oscillating tool with a grout blade is faster, but it can slip onto tile, so it is better left to people who already have experience with it. If you use any power tool, wear eye protection and a dust mask, and follow the manufacturer’s instructions.
Technique along the joint
Hold the tool at a steady angle and pull it along the center of the joint rather than pushing. Let the tool do the work. If you press hard, it can jump out and score the glaze. Make several light passes instead of one heavy one. At corners, switch to a smaller tool or a sharp pick and work the last bit by hand.
Checking depth
Aim to take out roughly half the depth of the old grout, or until the sides of the joint are clean and the old material is gone from the gap. If the joint is shallow, avoid digging down to the backing material, which can open a path for water. Brush the joint and look along it with a flashlight to spot any loose bits you missed.
Cleaning before the new grout goes in
Vacuum thoroughly, then wipe with a barely damp sponge to remove fine dust. Let the area dry before mixing. Dust left in the joint acts as a barrier, and new grout will not bond to it well.
Mixing and Applying for a Solid Fill
Good technique here makes the difference between a repair that lasts years and one that cracks within weeks.
Reading the mixing instructions
Measure the water or liquid exactly as the maker states. Add liquid to powder slowly, stirring until the mixture looks like thick toothpaste or peanut butter. Let it rest for the time the instructions give, often called slaking, then stir again. Slaking lets the ingredients absorb moisture evenly so you do not need to add more water later.
Keeping batches small
For a small area, mix only a little at a time. Grout stiffens as it sits, and adding water to loosen a stiffening batch weakens it. A small batch also reduces waste. If it starts to harden in the bucket, discard it instead of trying to revive it.
Packing the joint
Hold the rubber float at an angle of roughly forty-five degrees and press the grout into the joint, moving across the line first and then along it. Press firmly so the joint is filled all the way down and there are no voids. Wipe away the bulk of the excess with the float’s edge held at a sharper angle.
Shaping and finishing
Once the grout firms up to the point the instructions describe, run a damp sponge lightly across the surface. Use as little water as possible, because too much washes color out and weakens the grout. Rinse the sponge often and wring it well. A final buff with a dry cloth after the haze appears gives a clean finish.
Time, Cost and Skill Expectations
A small regrout repair is a good project for a first-timer, but it is easy to underestimate the waiting time. The work itself may take an hour or two, while the curing takes much longer.
| Stage | Rough time | Note |
|---|---|---|
| Removing old grout | 30 to 90 minutes for a small patch | Depends on joint length and hardness |
| Cleaning and drying | 1 hour or more | Joint must be dry |
| Mixing and applying | 30 to 60 minutes | Work in small batches |
| First cure before wiping haze | Follow the label | Often a short window |
| Full cure before water use | Often 24 to 72 hours | Check the maker’s instructions |
Cost range
Supplies for a small patch are usually modest. A bag of grout, a float, a removal tool and sponges are a small purchase for most households, though prices vary by region and product. Epoxy grout and specialty sealers cost more. Check current prices at the store rather than relying on any figure here.
Skill level
This job suits patient beginners. The skills involved are steady hands, attention to the mixing instructions and willingness to wait. If you have never held a grout float, practice on a spare tile or a hidden corner first.
Safety, Cleanup and Disposal
Grout dust, grout slurry and some cleaning products call for sensible care. Treat the job like any small renovation task.
Protecting yourself
Wear safety glasses, a dust mask and gloves. Cement-based grout is alkaline and can irritate skin, so rinse your hands promptly if you get it on them. Work with good ventilation, especially if you use sealers or haze removers, and read the label for safety notes.
Protecting the room
Cover nearby surfaces and plumbing fixtures, and lay down drop cloths or old towels. Keep grout out of drains, since it can harden in pipes. Rinse sponges and tools in a bucket, then let the solids settle and pour the water away as local rules permit, rather than washing it directly down a sink.
Disposing of waste
Allow leftover grout and dust to harden, then put them in the trash. Check local rules for disposing of any chemical products, such as sealers or strong cleaners, and do not pour them down drains.
Knowing When a Small Repair Is Not Enough
Most small repairs hold up well, but some signs mean the grout is a symptom rather than the problem.
Signs of movement or water
- Cracks that return in the same spot after repair
- Tiles that rock, sound hollow or have lifted
- Soft, stained or musty areas near a tub, shower or sink
- A crack that runs across several tiles in a straight line
What to do next
If you suspect water behind the tile or movement in the floor, stop and ask a qualified contractor to look at it. Fresh grout over a moving or wet surface will fail again, and hiding the problem can let damage spread. For anything involving plumbing, ask a licensed plumber.
Planning a larger regrout
If most of the grout in a room is failing, a full regrout may be worth considering. That is a bigger job with more preparation, and many people choose to hire someone or tackle it one section at a time. Doing a small patch first is a good way to learn the process.
Ready to Buy? Start Here
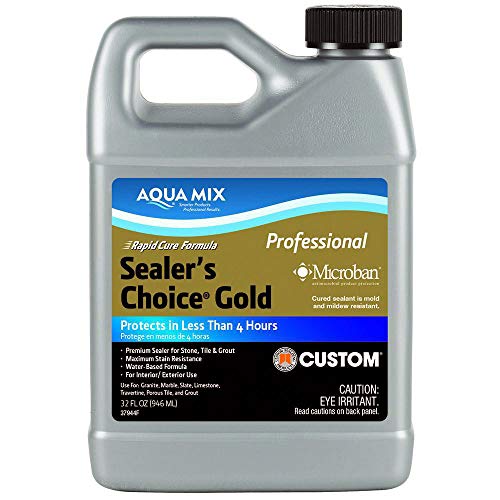
If this guide helped you decide what to look for, these products are a place to start.

As an Amazon Associate we earn from qualifying purchases. Prices and availability are shown on Amazon.
Regrouting Is a Water Decision Before It Is a Colour Decision
It is easy to treat a small regrout as cosmetic — scrape out the ugly line, press in a fresh one, admire the difference. But grout’s real job in a wet area is to be the sacrificial, maintainable skin over the assembly behind the tiles, and the state of the old grout is evidence about that assembly. Grout that is merely stained on the surface is a cleaning story. Grout that is cracked in one short length is a movement story. Grout that is crumbling, powdery, or missing in several places, especially low on a shower wall or near a bath rim, can be a water story — and water stories do not end with a prettier joint. Before you scrape anything, press the tiles either side of the damaged joint and look for movement, hollowness when you tap, or a musty smell at the base of the wall. Any of those findings moves this job out of the regrout category and into the investigate category.
That distinction protects your money as much as your wall. Fresh grout over a sound, dry backing will serve for years. Fresh grout over a backing that has been quietly soaking will look fine for a few weeks, then crack, stain from behind, and shed — and you will have spent the effort and materials to buy a short illusion. The honest sequence is always: diagnose, dry, then decorate. If what you find behind the failed grout is dry and firm, proceed with confidence. If it is soft, dark, or damp to the touch, the regrout waits until the underlying problem has been dealt with by you at a level you are genuinely equipped for, or by a professional — and that pause is the repair, even though it does not look like one.
The joint that should not be grout at all
One specific trap deserves its own warning because regrouting walks straight into it: changes of plane. Where a wall meets a floor, where two walls meet in a corner, where tile meets a bath rim or a shower tray, the joint is a movement joint, and movement joints belong to flexible sealant, not rigid grout. Grout in a corner is pre-cracked — it may hold for a season, but the two surfaces move differently with temperature and load, and the grout, which cannot flex, eventually splits along exactly that line. If the failed joint you are about to renew is a corner or a fixture edge, the correct repair is to rake it out and seal it with the appropriate flexible product, tooled neatly. Regrouting it because grout came out of it just schedules the same failure for next year.
Measuring the Job: Depth, Width, and a Small Sum
Two dimensions decide how the repair behaves. The first is width, which you already know chooses between sanded and unsanded material. The second is depth, which beginners overlook. New grout needs a reasonable depth of sound material to grip and to resist being pushed out by cleaning and use; a shallow smear over the old joint’s remains has almost no mechanical hold and powders out quickly. When you rake out the old grout, aim for a clean channel of consistent depth — roughly, a depth comparable to the joint’s width is a sensible mental picture — and stop congratulating yourself on speed: the channel’s consistency matters more than its exact figure, because a channel that wanders between deep and shallow produces a finished line that wanders in colour and strength to match.
Now the small sum that keeps a small job small. Estimate the total length of joint you are renewing — measure the runs with a tape and add them; a typical single-area repair might come to 2 or 3 metres of joint. Grout is sold by coverage, and the maker’s coverage guidance assumes a tile size and joint width, so scale it to yours rather than buying the big bag by default. The practical lesson runs the other way as well: because the quantity needed is tiny, mix tiny batches. A batch you can hold in one cupped hand, mixed fresh, behaves predictably; a bucket mixed for the whole job starts stiffening before you reach the far end, and stiffening grout tempts you to add water, which weakens it exactly where you can least afford weakness. Small area, small batch, no exceptions — that rhythm is the whole secret of consistent results.
Colour matching without self-deception
Old grout is not the colour it was when it went in. Years of water, cleaning products, and ordinary grime shift it, usually darker and warmer, and the shift is uneven — the splash zone ages differently from the dry zone. A new grout chosen to match the packet’s colour chip will therefore not match the wall; it will match the wall’s past. Choose instead against the actual joint, in the room’s actual light, using a sample dabbed and allowed to dry on a spare tile or card, because wet grout dries noticeably lighter. Accept, too, that a small repaired area may read as a slightly different tone for its first weeks and then settle as it cures and picks up the room’s life. Chasing a perfect match by mixing custom blends on a small repair usually ends with a patchwork of near-misses that draws the eye far more than one clean, close tone would have.
Application Technique: Packing, Not Smearing
The verb that matters in grouting is pack. Grout pressed firmly into the channel at an angle, with the float held so its edge drives material down rather than skimming it across the surface, fills the channel completely. Grout smeared politely over the top bridges the channel with a skin and a void beneath, and that void is where the joint will fail first — a fingernail pressed along the line a month later finds it soft or hollow. Work the float diagonally across the joints rather than along them; a float travelling along a joint scoops its own work back out, while diagonal strokes pack and leave the channel full. Keep the face of the work cleaner than feels natural: every smear left on the tile is haze you will polish later, and haze removal is where beginners scrub too hard, too early, and pull their own joints out.
Timing the wipe is the second skill, and it is learned by touch rather than by the clock. Too early, and the sponge drags grout out of the joints, leaving them dished and weak. Too late, and the surface film has hardened into a haze that takes real effort to clear. The test is a fingertip pressed lightly on a joint: it should feel firm with the faintest give, and your finger should come away almost clean. Rinse the sponge constantly and wring it nearly dry — a wet sponge is the enemy twice over, because it both drags joints and dilutes the grout surface, weakening and lightening it in patches. Two buckets, one for the first rinse and one for cleaner water, will teach you more about your technique than any instruction: if the second bucket stays clear, your sponge discipline is right.
Edges, corners, and the last half-metre
Small repairs usually end at a boundary — the edge of the damaged area, where new grout meets old. Blend that boundary by raking the old grout back a little further than the visible damage, into material that is fully sound, so the new section keys into strength rather than into the same crumbling that started the job. At corners and fixture edges, stop the grout cleanly and leave the movement joint to its sealant, masking if you need a crisp line. And resist finishing the last stretch with the dregs of a stiffening batch: mix a final small fresh batch for the final run, because the last half-metre is usually the most visible part of the whole repair — the bit at eye level, beside the door, where the light lands.
Troubleshooting by Symptom
The new grout dries a different colour in patches
Patchy colour almost always means patchy water: too much water in one batch, a sponge that was wetter on some passes than others, or joints wiped at different stages of firmness. The repair, once fully cured, is limited — gentle cleaning and time even things somewhat — so the real fix is procedural: consistent small batches, a consistently wrung sponge, and one steady rhythm from start to finish.
The joint feels sandy and sheds when rubbed
A sandy, shedding surface means the grout’s binder never got to do its work — usually from excess water in the mix or during wiping, or from the grout drying out too fast in a hot, draughty spot before it could cure. If the weakness is only skin-deep, a suitable sealer may consolidate it; if a fingernail can gouge the joint, rake it out and redo it with a tighter mix and a drier sponge.
A hairline crack runs down the middle of the new joint
A centreline crack is shrinkage talking: the channel was too deep for one pass, the mix was too wet, or the joint dried too quickly. Rake out the cracked length, dampen the channel lightly if the maker directs it, and repack in the correct consistency. If the crack reappears in the same place after a correct redo, suspect movement in the substrate — and a moving joint needs the movement addressed, or conversion to a flexible seal, rather than a third attempt.
Haze will not come off the tiles
Leftover haze that survives honest polishing is usually a timing debt from wiping too late. A dry cloth or a suitable haze remover used as its maker directs handles most cases on glazed tile. Work gently on polished stone or delicate finishes, test in a hidden spot first, and never reach for strong acids casually — the wrong cleaner can etch a tile face permanently, converting a grout repair into a tile problem.
Curing Is Part of the Job, Not a Delay After It
Grout gains its strength over days, not hours, and the cure is when small repairs are most often ruined by kindness — the shower used a night early, the floor scrubbed enthusiastically, the sealer applied over grout still giving up moisture. Follow the maker’s stated times for your specific product for water exposure and sealing, and treat them as minimums in a cool or humid room, where everything dries more slowly than the packet’s test conditions. Keep the repaired area ventilated but not blasted with heat. When the cure is complete and any sealer has been applied as directed, the joint asks little of you: clean it with gentle products, because harsh chemicals and abrasive pads erode grout steadily, and the area you repaired will tell you, years from now, whether its first week was respected.
Small Area, Full Standards: Treating a Short Run Like a Whole Wall
The temptation with a small regrout is to relax — it is only a metre of joint, only an hour, only a patch. Resist it in one specific way: a small repair is judged more harshly than a whole wall, because the eye compares it directly against the untouched grout on either side, millimetre by millimetre, in the same light. A whole regrouted wall is judged against memory; a repaired run is judged against reality standing right next to it. That is why the small job deserves the full standards of the large one — consistent channel depth, consistent mix, consistent wiping rhythm, consistent colour judgment from a dried sample. The area is smaller; the scrutiny is greater. Work that respects this paradox looks effortless, and work that dismisses it looks like a patch, which is the one thing a grout repair must never look like.
There is a second, quieter reason to keep standards high on small jobs: the repaired run becomes the youngest part of the system, and its neighbours are older, more worn, and closer to their own failures. A repair done properly — raked back into sound material, packed fully, cured patiently — will still be sound when the surrounding joints need their turn, and when that day comes, the pattern of your earlier work is the template the next repair will be judged against. A repair done hastily becomes the weak point that dictates the next job’s scope, and small areas have a way of growing, one compromised run at a time, until the small job you declined to do properly has become the wall you have to redo entirely.
Record-keeping for wet rooms
Wet rooms reward the same humble habit as patched walls: a note. Keep a card in the house file with the grout type and colour you used, the sealer if any and its date, and a line about what you found — sound backing, one movement joint converted to sealant, whatever it was. Grout colour names drift between batches and brands discontinue lines; the card is the only reliable bridge between this repair and the next one, which may be five years and one householder away. Photograph the finished repair in ordinary light, too. When a joint changes in the future, the photograph settles whether it changed — memory is generous, cameras are not — and that distinction is the difference between monitoring a stable joint and worrying about one, or between catching a developing problem early and meeting it late.
Working around fixtures: taps, rails, and glass
Small regrouts rarely enjoy open field conditions. The damaged run usually ends at a tap base, a shower rail fixing, a glass screen’s edge, or a soap dish — and each fixture edits the technique. Raking out near a fixture demands a lighter hand than the open run, because the tool that slips off grout lands on chrome or glass, and chrome forgives nothing. Mask fixtures with tape before you start, not after the first slip, and switch to the smallest removal tool you own for the last few centimetres approaching anything plated or polished. Where grout meets a fixture’s base, ask the movement question again: a tap or rail that flexes even slightly in use will crack a rigid joint against it, and those junctions often belong to sealant for the same reason corners do. Glass screens add one more consideration — their edges and channels trap old grout and water, so a regrout that runs to a screen should include cleaning the channel the glass sits in, or the new joint will be fed moisture from a reservoir you declined to empty. None of this lengthens the job by much. It merely acknowledges that the last centimetre of every run is the part most likely to be seen, touched, and judged — and the part where the repair either earns its invisibility or announces itself forever.
Testing your repair like water will
Before you declare a wet-area regrout finished, test it the way water will — persistently and at the joints. Once the grout has cured for the maker’s stated period, run the shower or splash the area deliberately and watch where the water goes and how the joints behave: a sound joint sheds water along its surface, while a pinholed or shallow joint drinks visibly, darkening as it takes moisture in. That darkening is your map; mark any drinking spots with a pencil while they show, because they will be invisible again by morning. A pinhole found this way is a five-minute local fix while the area is still a work site. The same pinhole found in six months, by the stain on the ceiling below, is a different and much more expensive conversation — which is why the deliberate splash test, unglamorous as it is, belongs in the method rather than in the category of things fussier people do.
Letting the room rest between stages
One rhythm is worth adopting deliberately on any wet-area regrout: let the room rest between the dirty stage and the clean stage. Raking out fills the air and every surface with grit and old-grout dust, and grout mixed and applied in that atmosphere picks up contamination you then polish into the finish. Finish the removal, clean the room properly — surfaces wiped, floor swept, fixtures rinsed — and only then open the grout. The pause costs twenty minutes and returns them in the wiping stage, where every pass of the sponge is working on grout alone rather than on grout plus the morning’s dust resettled into it.
FAQ
Will the new grout match exactly?
Perhaps not at first. Age and cleaning change color, so a small mismatch is common.
Do I need a sealer afterward?
Some grouts call for one and some do not. Read the instructions from the maker.
How much old grout should I remove?
Enough to leave a clean, solid channel for the new material, commonly around half the depth as noted above. Stop if you reach the tile edge or the base layer.
Can I regrout over the old grout?
Thin layers of new grout over loose, dusty or cracked old grout do not bond well. Remove the damaged material first and follow the maker’s guidance.
How long before I can use the shower or floor?
Wait for the time given by the maker of your grout. Rushing can wash out the new material.
How long does grout take to dry before I can wipe the haze?
It depends on the product, temperature and humidity, so follow the label. Many grouts firm up enough for a first wipe within about 15 to 30 minutes, but waiting too long makes haze harder to remove. Test a small corner first if you are unsure.
What tool is best for removing old grout by hand?
A hand grout saw with a hardened blade is a common choice because it gives good control and is inexpensive. Choose a blade narrower than the joint so it does not scratch the tile edges, and wear eye protection and a dust mask.
Can I mix leftover grout with a fresh batch?
Avoid it. Grout that has begun to set is weaker, and adding it to fresh material can cause weak spots and color variation. Mix small batches that you can use before they stiffen, and discard what remains once it begins to harden.
Why did my new grout crack after a few days?
Common causes include too much water in the mix, drying too fast, a joint that was not packed firmly or movement in the tiles. Remove the cracked grout, check for movement, and redo the repair following the label. Persistent cracks suggest a deeper issue.
Is it safe to regrout over a shower wall myself?
For a small cosmetic repair, many beginners manage it with care. If you see signs of water damage, soft spots or loose tiles, stop and consult a qualified professional, because hidden moisture needs proper repair rather than a cosmetic fix.
Can I regrout just one cracked line and leave the rest?
Yes, if the surrounding grout is sound — rake the damaged length back into firm material at both ends so the new grout keys into strength. If neighbouring joints are also crumbling or powdery, the area is telling you the failure is general, and a wider renewal will outlast a series of single-line patches.
Should the corner where the wall meets the bath be grout or sealant?
Sealant. Corners and fixture edges are movement joints, and rigid grout in them eventually splits because the two surfaces move differently. Rake the corner out and tool in a suitable flexible sealant instead; keep grout for the flat joints between tiles on the same surface.
Why does my sponge keep pulling grout out of the joints?
Either you are wiping too early, while the grout is still soft, or the sponge is too wet, or you are travelling along the joints instead of diagonally across them. Wait until a fingertip pressed on a joint comes away almost clean, wring the sponge nearly dry, and wipe diagonally with light pressure.
How deep should I rake out the old grout?
Deep enough that the new grout has a real channel to grip — a depth roughly comparable to the joint’s width is a useful mental picture — and consistent along the run. A shallow smear over old remains has almost no hold and powders out quickly.
My new grout dried lighter than the old. Did I do something wrong?
Probably not. Wet grout dries lighter, and old grout darkens with years of use, so a fresh repair commonly reads lighter at first. It settles somewhat as it cures and lives in the room. Judge the match from a dried sample before you start, not from the wet mix or the packet chip.
The Short Version
Remove the damaged grout, clean the joint, press in new grout, wipe carefully and leave it to harden. Follow the maker’s directions, use sealant where joints move, and get a professional opinion if tiles move or sound hollow.


