Disclosure: As an Amazon Associate, umtsmarttool.com earns from qualifying purchases. Links to Amazon on this page are affiliate links; they cost you nothing extra. Prices and availability change often, so check the current Amazon listing before you buy.
How to Choose an Office Desk: A Step-by-Step Procedure That Ends With the Right Desk
Knowing how to choose an office desk is a procedure, not a talent. The buyers who end up with the right desk are not luckier or more design-gifted; they run the steps in the right order — room, body, equipment, habits, power, shape, product — and let each step narrow the market before the next one begins. The buyers who return desks run the same steps backwards, starting with a photograph and discovering the measurements afterwards. This guide is the procedure written out: seven steps, each with its measurement or decision, its common failure, and its fix. Run it once, in order, and the market of hundreds of listings compresses into a shortlist of two or three desks that all fit — at which point the choice between them is taste, and taste is allowed. The criteria behind the steps are argued in full in our Office Desk Buying Guide Office Desk Buying Guide; this page is those criteria turned into actions.
In this guide
Key Takeaways
- Measure the room, your body and your equipment before you open a single listing
- Defend depth first: 24 inches minimum for a monitor setup, more if the room allows
- Inventory a week of what lands on your current surface to size storage honestly
- Decide the power architecture — built-in points or a planned strip — before choosing the desk
- Shortlist by criteria, then choose by taste between the survivors
Step 1: Measure the Room Like a Surveyor
Do this step with the room empty of optimism. Buyers measure the wall they wish they had — the run unobstructed by the radiator, the bookcase, the door’s true swing — and the desk arrives to meet the room as it is. Measure the obstructions as faithfully as the wall; the brief’s honesty here is the foundation every later step stands on, and a foundation measured in wishes settles exactly as you would expect.
Begin where the desk will live. Measure the wall run at skirting level — walls are least straight at the floor, and the desk lives at the floor. Note the socket positions, because they will co-author the desk’s placement; note the door’s swing and the window’s light, because glare and hip-bruises are decided here; note the route the flat-pack must travel — door widths, hallway turns, stairs — because a desk that cannot reach the room is not a candidate. Finally, mark the chair’s territory: the desk’s footprint plus the space to sit, push back and stand is the purchase’s true size.
One measurement in this step is habitually forgotten and constantly paid for: the height of the window sill and the direction of the afternoon sun. A desk placed for the morning’s convenience can spend its afternoons in a glare that no monitor coating forgives, and the fix — moving a loaded desk — is a weekend. Stand where the desk will stand at the worst hour of the room’s light, and look at where the screen will be. Thirty seconds, once, in exchange for years of un-squinted afternoons.
Write the numbers down as the room’s brief: maximum width, the socket’s location, the light’s direction. Every later step consults this brief. Problem: the room is mid-renovation or about to change. Postpone the purchase or buy the reversible, standard-sized form whose second placement is as easy as its first — the procedure forgives delay better than it forgives guessing.
Before the Steps: What “Choosing Well” Means
A desk is chosen well when its fixed decisions match your fixed facts. Every desk ships with decisions already made — its depth, its height, where its storage sits, how its power works — and those decisions cannot be renegotiated after delivery. Your room’s dimensions, your body’s measurements, your equipment’s footprints and your work’s habits are equally fixed. Choosing, therefore, is matching: the procedure below is simply the discipline of writing down your fixed facts before meeting the market’s fixed decisions, so the match is made on paper rather than discovered in the room. Buyers who internalise that single idea can compress the procedure into an afternoon’s common sense; buyers who skip it will meet each step again later, wearing the costume of a problem.
Step 2: Measure Your Body in Your Chair
Take this step seriously even if every desk you are considering claims the same height, because the claim conceals the variable that matters: the underside. The kneehole’s clearance — height for your thighs, width for your chair, freedom from drawer banks and crossbars — is measured against your seated body, and two desks of identical top height can differ by inches where your legs live. If a listing does not state the clearance, its photographs and the frame’s design are your evidence, and an open underside is the safest answer a listing can give.
Sit in the chair you will use, in the shoes you work in, and measure the height of your bent elbow above the floor. That number, give or take an inch, is your desk’s target top height — and it is why the market’s standard band exists, and why workers at the body’s extremes should treat “standard height” as a hypothesis to test rather than a fact to accept. If a standing desk is anywhere in your thinking, measure the standing elbow height too, and keep both numbers: they become the height range any candidate must cover.
While you are seated with a tape, take the measurement that decides the chair half of the partnership: feet flat or supported, knees at roughly a right angle, the chair’s height noted. If your current chair cannot achieve that posture at any setting, the procedure has just produced its first purchase, and it is not the desk. Sequence is a form of honesty — the desk chosen against a broken chair will be blamed for the chair’s failures for years.
Note your screen distance as well: sit back, extend an arm — your monitor will live roughly at its length. That distance, plus the keyboard’s depth in front of it, is the personal form of the depth requirement the next steps will use. Problem: you do not yet own the chair. Buy chair and desk as a pair, in that order of measurement — the chair first, because its range defines the numbers the desk must meet.
Step 2½: Set the Budget Band — and What It Buys
Between the body and the equipment, fix the budget band — not a product price, which this site does not print, but the tier of the market you are shopping in, because the tiers decide which criteria are negotiable. In the under-$50 tier, the procedure’s output will be an honest basic: depth and frame at compact sizes, features surrendered knowingly. Under $100, the market’s centre, the full brief becomes satisfiable for most workers — depth, a stated load figure, and one or two of storage, power and stand. Under $150, shape joins the brief: L configurations and gaming systems. Under $300, posture joins it, in the form of credible electric standing desks with one-piece tops.
The band has one more use: it disciplines the accessory budget. A workstation is desk plus chair plus screen solution plus the small infrastructure, and the band should be set for the system, not the desk alone — the buyer who spends the whole band on the desk and improvises the chair has run the procedure’s steps and ignored its arithmetic.
Setting the band early prevents the procedure’s most demoralising failure: a perfect brief that no desk in the band can meet, discovered at Step 7. If your brief and your band conflict, the conflict should be negotiated now, with the compromise order from the FAQ below — features, storage, shape, and only at the end depth and structure — rather than at the checkout, where the negotiation is rigged in the photograph’s favour.
Step 3: Inventory the Equipment — Footprints and Weights
Be literal in this step, because equipment is where wishful thinking hides. The monitor’s footprint is its base’s, not its screen’s diagonal; the printer’s is its open-tray working envelope, not its closed box; the laptop’s is the dock’s plus the cable’s bend. Measure the objects as they will actually sit, in a row along a tape on the floor if necessary — five minutes of floor theatre that has saved more purchases than any review.
List everything that will live on the desk, with two numbers each: its footprint and its weight. Screens with their bases or arms, the computer or dock, the printer if it must live on the desk, the lamp, the speakers. Sum the weights and add your own leaning load; that total is the figure you will check against each candidate’s stated load rating, with headroom. Sum the widths along the desk’s rear band; that total is your true minimum width — not the width that fits today’s setup in a photograph, but the width that fits it with the cables, the stands and an inch of grace.
The inventory has a second column buyers forget: the equipment’s cables. Every device on the list brings one, and their combined behaviour — where they must run, how much slack they need, which of them will be unplugged weekly — is part of the desk’s real specification. A setup that will be reconfigured often (the laptop that travels daily) specifies a desk whose rear band and power points are reachable without archaeology; a sealed setup can be tidier. Note the reconfiguration frequency beside the inventory; Step 5 will spend it.
Then add the growth line: the second screen you are considering, the larger monitor displays grow into. Equipment inventories that ignore growth produce desks that fit the unboxing and fail the second year. Problem: the total weight exceeds the class’s stated figures. The printer moves to a stand — it was always the candidate — and the desk’s load returns to the territory its frame was specified for.
Step 4: Inventory the Accumulation — a Week of Evidence
Do not skip this step because your current life looks tidy. Tidiness at a borrowed surface is often just displacement — the accumulation is happening in drawers, on beds, in the hallway — and the desk, when it comes, will inherit all of it at once. Photograph the displacement too: the piles that live elsewhere because the current surface cannot hold them are Step 4’s most honest data.
Storage is the step buyers guess and regret. Replace the guess with a week of observation: photograph your current work surface each evening, and list what is on it that is not equipment — papers, notebooks, chargers, mail, the not-today pile. That list is your storage specification, in your own handwriting. Paper-heavy weeks specify drawers; device-heavy weeks specify a harbour and charging points; clean weeks specify nothing, and the money earmarked for drawers moves to depth or structure, where it will be felt daily instead of never.
The photographs have one more lesson if you look at them as a sequence: the migration pattern. Objects that drift toward the desk from elsewhere in the house — the household’s homeless things — reveal whether your storage problem is really a territory problem. A desk that becomes the home’s lost-property office needs a border rule more than it needs drawers, and the procedure is honest enough to say so: sometimes Step 4’s output is not a product specification but a household agreement.
Size the storage by frequency as well as volume: daily things at hand distance, weekly things lower, annual things out of the desk entirely. Problem: the inventory shows chaos rather than categories. That is information too — it specifies a harbour and a tray, the open storage that imposes a gentle order, rather than drawers that would hide the chaos at a higher price.
Step 5: Decide the Power Architecture
Count generously, because devices multiply: the phone’s charger acquires a watch charger, the headset acquires a dock, the lamp acquires a companion. A power architecture sized exactly to today’s count is tomorrow’s daisy-chain. One spare point is the minimum act of foresight; two is wisdom.
Count the devices that charge or plug in at the desk: laptop, phone, headset, lamp, screens, dock. Five or fewer points, in a room with a reachable socket, can be served two ways — a desk with built-in outlets and USB, or a plain desk with a planned under-desk strip — and the choice between them is the subject of our Office Desk Reviews Office Desk Reviews, where the built-in form is examined at length. What is not optional is the architecture’s discipline: one lead to the wall, routed along the skirting, slack where the chair’s casters patrol, surge protection where the equipment’s value argues for it.
A word on the strip-versus-built-in decision, since Step 5 is where the cluster’s readers most often stall. The strip’s virtues are replaceability and independence — it can be upgraded, surge-protected and taken to the next desk. The built-in system’s virtues are position and permanence — points on the surface, part of the furniture, immune to rearrangement. Neither is the correct answer in the abstract; the correct answer is the one your reconfiguration frequency from Step 3 and your socket from Step 1 point to. The procedure’s job is to make that pointing visible, and it has.
Decide this step before choosing the desk, because it eliminates whole families of candidates in both directions — and because the socket’s position from Step 1 may already have decided it for you. Problem: the socket is across the room. Solve the room first — reposition the desk plan, or plan a channelled cable run — because no desk feature compensates for a cable across a walkway.
Step 6: Choose the Shape From the Work, Not the Room’s Photograph
By this step the brief has quietly eliminated most shapes already: the width floor from Step 3, the room from Step 1 and the work’s zones from Step 4 leave usually one or two candidates standing. That is the procedure working as designed — shape feels like the first decision in a catalogue because catalogues are organised by it, but in a life it is nearly the last, and the buyers who treat it so are the ones whose corners and walls look intentional rather than improvised.
Now, and only now, shapes. The straight desk is the default and fits one work zone against a wall. The L is justified when the work itself has two zones — screen plus paper, computer plus craft — and the room offers a corner; bought for the corner’s sake alone, it is a straight desk with a clutter annex. The compact desk is the small room’s honest answer, with depth defended and width surrendered. The standing desk is a posture decision wearing a shape’s clothing, and it belongs to buyers whose seated foundation is sound and whose body asks for rhythm — the full weighing is in our Office Desk Pros And Cons Office Desk Pros And Cons.
Shape has a social dimension the step should not skip: the desk’s appearance in the room’s other lives. A gaming-styled desk in a room that hosts clients, an industrial L in a room that hosts grandparents — shape and style are a decade-long aesthetic commitment, and the household that shares the room is a stakeholder in Step 6 whether or not they work at the desk. Consult them here, where consultation is cheap, rather than at delivery, where it is not.
Write the shape decision as a sentence with a reason: “L, because the printer and the paper work need their own zone.” A shape that cannot be justified in a sentence will not justify itself in the room. Problem: two shapes both fit the sentence. Choose the one with the easier second life — the straight desk moves, resells and hands down more gracefully than any other form.
Step 7: Shortlist by Criteria, Choose by Taste
Read each candidate’s listing against the brief line by line, literally — brief in one hand, specification table in the other. The exercise feels pedantic for exactly one desk, the first, and then becomes the fastest shopping method you own, because non-compliant listings dismiss themselves in seconds. Keep the dismissed ones dismissed: a desk eliminated on depth does not re-enter on a discount.
The final step is shopping, and it should feel anticlimactic. Take the brief from Steps 1–6 — dimensions, heights, load total, storage specification, power architecture, shape — and read listings as compliance documents: depth first, then the stated load figure, then the storage and power facts, then the frame’s material and fixings. Three to five listings will comply. Between those survivors, choose by finish, by the maker’s depth in the category, and by the honest tie-breaker of liking the object you will look at for a decade.
Our own application of this procedure to the current market is published as the cluster’s rankings — the Best Office Desk Under $100 Best Office Desk Under $100 guide is the procedure’s output for the market’s central band, and the Best Office Desk Under $300 Best Office Desk Under $300 guide extends it to the standing tier. Use them as a check on your shortlist, or as the shortlist itself if your brief matches the mainstream the guides assume.
After the Choice: The Delivery-Day Protocol
The procedure does not end at the order. On delivery day, inspect before you build: the top’s edges and finish, the frame’s parts counted against the manual, any power or lift components checked for transit damage — while replacement is a conversation rather than a project. Keep the packaging until the desk stands level and loaded; flat-pack returns without packaging are a special circle of inconvenience that one week of stored cardboard prevents.
One delivery-day habit separates careful owners from the rest: assemble the desk where it will live, or as near as the room allows. A built desk is far harder to move through doorways than its flat-pack was, and the corridor carry of a finished desk is where edges chip and joints twist. Build in place, and the desk’s first journey is the delivery van’s, not yours.
Build with the disciplines the cluster repeats because they work: parts inventoried, fixings started loosely, the frame squared before it is tightened, bolts closed in a cross pattern, the desk levelled in its final position before anything is loaded. Load in order — the heaviest and most structural first, screens before the small fleet — and route the power lead as part of the build, not as the epilogue. Photograph the finished cable architecture; the picture is the manual your future self will actually consult.
Gear That Makes This Easier
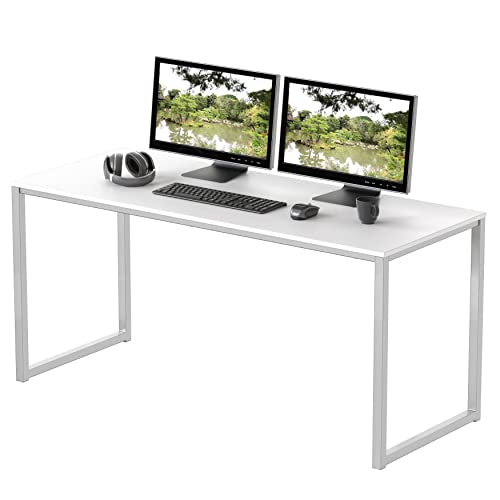
The procedure’s survivors, for the mainstream brief, are few enough to name. The reference fixed desk — full depth, a stated 200 lb figure, a finish that forgives — is the SHW Mission 48-Inch, reviewed at length in our Office Desk Review Office Desk Review. The power-architecture answer is the GreenForest 47 Inch with Power Outlets. The storage answer is the Huuger 47 Inch with 4 Drawers. The posture answer is the FLEXISPOT EN1 One-Piece Standing Desk. Four desks, four diagnoses — if your procedure’s brief names one of those diagnoses, its desk is probably on this list.
A Worked Run: The Procedure in Fifteen Minutes of Arithmetic
Abstract steps persuade few buyers, so here is one run, compressed. The room offers 66 inches of wall, a socket at its left end, a window to the right. The worker’s seated elbow height is 27 inches; the chair is owned. Equipment: one 27-inch screen now, a second planned; a docked laptop; a printer that can live on a stand. The accumulation photographs show notebooks, a charger tangle and a modest paper pulse. Devices to charge: four.
The brief writes itself. Width: 47 to 55 inches — two screens with grace, inside the wall’s allowance. Depth: 24 minimum, defended. Height: the standard band fits the 27-inch elbow measurement. Load: modest, but a stated figure is required anyway. Storage: a harbour plus two drawers’ worth — not a bank, not a slab. Power: four devices and a well-placed socket make either architecture viable, with a slight edge to built-in points for the charger tangle the photographs confessed. Shape: straight, one zone, against the wall, away from the window’s glare.
Notice what the run produced: not a product but a profile so specific that the market’s hundreds collapse to a handful — and, not coincidentally, to the territory of the four desks named in the gear section. Every reader’s numbers will differ; the collapse is the same. That collapse, from catalogue to shortlist, is the entire product this procedure sells.
Troubleshooting: When the Procedure Stalls
Problem: the brief is complete but nothing on the market matches it exactly. Rank the brief’s lines by the compromise order — depth and structure are the floor, everything else is negotiable by degrees — and take the desk that meets the floor and the most lines above it. A brief is a profile, not a unicorn hunt; the market’s centre exists because most briefs converge there.
Problem: every candidate fails on depth within budget. Widen the search by shape before surrendering depth — compact and gaming desks often defend depth at widths the office category abandons — and re-read Step 3 to confirm the width floor is real rather than inherited from a photograph.
Problem: the room fits the desk but not the chair’s territory. The desk is too big for the room as a workstation, whatever the wall run says; drop a size or change the wall. A workstation is furniture plus its user, and both halves must fit.
Problem: the desk arrives and a measurement was wrong — the wall run is shorter than the brief, the chair’s territory collides with the door. Do not force the fit. A desk placed against its brief teaches the room to resent it; exchange or reposition while the packaging survives, and correct the brief in writing so the error is spent once.
Problem: your body measurements fall outside every fixed desk’s band. That is the standing desk’s clearest case — adjustability exists for the bodies the standard band approximates worst — or a fixed desk plus a chair with exceptional range, tested with your Step 2 numbers in hand.
Problem: two survivors tie on every criterion. Break the tie on the exit: the standard size, the calmer finish, the maker with the deeper stake. A decade is long, and the desk you can move, resell or hand down is the desk whose wrongness, if it comes, costs least.
The Procedure for Special Cases
Choosing for a child or student. Run the same steps with two substitutions: Step 2’s measurements will change with growth, so choose the standard adult height and let the chair’s range cover the intervening years; Step 4’s inventory should be taken in term time, not in the holidays’ misleading tidiness. The output is a standard, sturdy, compact-to-mid-size desk — the one that will still be right at the first job.
Choosing for two workers. Run Steps 2–4 twice, once per body and setup, and let Step 6 arbitrate: two desks if the room and budget allow, one larger shared desk with divided storage if they do not, and a serious look at adjustability if the two bodies’ Step 2 numbers differ widely — a memory preset is, in a sharing household, two desks’ heights in one footprint.
Choosing for a paper-heavy profession. The archivist, the accountant in filing season, the teacher with marking: Step 4’s inventory dominates, and the procedure’s output is a desk whose storage is real drawers at the dominant hand, plus a surface sized for the open-file sprawl. These buyers should weight the Huuger pattern in the gear section — storage as the desk’s first feature — and defend the kneehole while they do it.
Choosing for a gaming-plus-work life. The equipment inventory grows teeth — multiple screens, a tower, peripherals with their own territory — and the load and width floors rise accordingly. The procedure is unchanged; its output simply migrates toward the gaming category’s desks, whose frames and surfaces were specified for exactly this inventory. Judge them by the same steps and the honest ones pass.
Choosing for a call-heavy professional life. Add a line to Step 3 for the broadcast kit — camera, microphone, light — with its sightlines: the background the camera sees is part of the desk’s specification, and Step 1 should record what is behind the chair as faithfully as what is in front of it. The desk that results is chosen partly as furniture for an audience of colleagues, which in 2026 is simply accurate.
Choosing in a rented room. Add one line to Step 1: the departure. Weight, disassembly and reversibility join the brief, and wall-dependent solutions leave it. The renter’s ideal output — a standard-sized desk that fits either corner of the next room and leaves with its owner — is a specification this procedure produces naturally once the line is added.
Frequently Asked Questions
What about choosing a desk as a gift or stipend purchase?
Run the procedure by proxy and weight its low-risk outputs: the recipient’s measurements requested rather than guessed, standard sizes, reversible layouts, calm finishes. A desk is a poor surprise and an excellent consulted gift, and a stipend spent against a measured brief buys a workstation instead of a desk and three surprises.
Should I involve my partner or housemates?
At Steps 1 and 6, yes — the room and the shape are household decisions with decade-long consequences, and a stakeholder consulted at the measuring stage is an ally at the living-with-it stage. The body and equipment steps are yours alone. Most household friction about desks is a Step 1 disagreement that was never had, surfacing at delivery.
What tools do I need for the measuring steps?
A tape measure, your phone’s camera for the accumulation photographs, and a notebook — paper or otherwise — for the brief. Nothing in the procedure requires instruments beyond those, which is deliberate: a method that needs equipment is a method that gets postponed, and postponed measuring is how desks get bought from photographs.
How long does this procedure actually take?
An afternoon of measuring and inventorying, plus the week of accumulation photographs running in the background if you want Step 4 at full strength. The shopping it produces takes less time than one returned desk. Buyers in a hurry can compress Steps 3–5 into a single honest list-making session and still capture most of the protection.
And if the desk still is not right?
Then diagnose by step, not by mood: re-run the measurement that the failure points to — depth complaints are Step 3, wobble is a build or structure question, clutter is Step 4 — and fix the step’s output with an accessory where one exists, or accept the exchange while it is cheap. A procedure’s failures are data; the second run is always shorter than the first.
One last question: how will I know the procedure worked?
By the first month’s silence. The right desk produces no stories — no wobble to report, no cable to curse, no measurement to regret — and the worker simply works. Furniture success is invisible, which is why this guide measures its method by the absence of the complaints that fill returns departments. If your desk has become unremarkable, the procedure worked.
What if two of us run the procedure and disagree?
Disagreement usually localises to one step — a shape, a finish, a band — and the procedure’s gift is that it shows you which one. Argue that step on its evidence: the room’s numbers, the inventory’s photographs, the band’s arithmetic. Couples who argue the step decide in an evening; couples who argue the desk argue until the delivery forces a verdict.
Does the procedure work for a standing desk?
Identically, with Step 2 producing two numbers instead of one and Step 5 gaining the travel clause — every cable must be architected for motion. The standing desk is not a different purchase; it is this purchase with a height range, which is why the cluster treats it inside the same guides rather than in a separate world.
When should I redo the procedure?
When a fixed fact changes: a new room, a new body of work, a second screen that becomes three, a household that gains or loses a worker. The procedure is cheap to rerun and its brief is a living document — keep yours, and the next desk decision starts from evidence rather than from memory.
How do I verify a listing’s claims at Step 7?
Read the listing as an auditor: dimensions in the specification table rather than the headline, the load figure stated or absent, the frame material named, the included features enumerated. Cross-check the model number against the maker’s own information where it exists, and treat any number that appears only in a lifestyle photograph as unclaimed. The cluster’s reviews exist partly to do this verification once, publicly, for the desks they cover.
What is the most commonly skipped step?
Step 4, the accumulation inventory — because guessing storage feels harmless. It is the step whose failure is discovered slowest and paid longest: the drawer bank that eats the knees, or the pristine slab under a landslide of paper. A week of photographs is the cheapest insurance in the entire procedure.
Is a wider or a deeper desk the better upgrade?
Deeper, in almost every real brief: width beyond the equipment’s need becomes accumulation’s invitation, while depth is consumed by the screen distance, the keyboard and the harbour every single day. When Step 3’s arithmetic leaves a choice between the two, spend the inches on depth and let the width be merely sufficient.
What if I rent and cannot drill or modify anything?
The procedure already assumes it: every step’s solutions — freestanding desks, mounted-under strips fixed with clamps or adhesive, cable channels along skirting — are renter-compatible by default. Note the constraint in Step 1’s brief so that Step 5’s architecture and any shelving ideas stay inside it, and the landlord never enters the story.
Can I skip straight to the shortlist guides?
If your room, body and setup are the mainstream the guides assume — a standard wall, a standard chair, one or two screens — yes, with one condition: run Steps 1 and 2 anyway. Five measurements are the difference between borrowing a shortlist and gambling on one.
A closing encouragement?
Only this: the measuring afternoon is not a tax on the purchase, it is the purchase’s enjoyable part — the moment the workstation exists on paper, exactly right, before a single box ships. Buyers who learn to like that afternoon stop fearing furniture decisions altogether.
What should I do with my old desk?
Run it through the exit the cluster always recommends: hand it down inside the household first — the student, the spare room, the partner’s start — and sell it second-hand if no internal heir exists, describing its joints and finish honestly. A desk chosen by this procedure a decade ago is, not coincidentally, a desk with a second life in it.
Is there a shortcut for repeat buyers?
Yes: your old brief. A worker who kept the first procedure’s measurements starts the second purchase at Step 6, updating only what changed. This is the hidden dividend of the written brief — it converts a decade-later replacement from a research project into an afternoon’s verification, and it is why this guide keeps insisting on paper.
How do I choose a finish at the end of all this measuring?
By the room’s light and the camera, in that order: pale finishes brighten dim rooms and forgive dust, dark finishes calm bright rooms and show every crumb, wood tones warm a space and must be checked against the floor’s own tone. Finish is the procedure’s reward — the one decision taste is allowed to make alone, because every structural question has already been answered.
What is the single step I must not skip?
Step 1, the room — because its errors are the only ones that cannot be compensated by any later virtue. A desk too wide for the wall, powered from the wrong side, glaring in the afternoon sun, fails daily in ways no specification can redeem. If the whole procedure had to shrink to one page, it would be the room’s brief and the body’s two numbers; everything else can be approximated, those cannot.
Is it worth paying for assembly or installation?
For most fixed desks, the assembly is genuinely manageable and the procedure’s delivery protocol suffices. For standing desks, large L configurations, or buyers whose time or mobility argues otherwise, paid assembly converts the flat-pack con into a line item — a legitimate trade, provided the cable architecture from Step 5 is still directed by you, because installers assemble furniture, not workstations.
What if my budget cannot meet my brief?
Compromise in the procedure’s order of reversibility: features first (they can be added), storage second (it can be supplemented), shape third — and depth and structure last, because they can never be added at all. A brief that survives budgeting is one whose cuts were made in that order.
What is the procedure’s most common point of failure?
Step 7 discipline: the brief is complete, the shortlist is compliant — and then a photograph of a non-compliant desk, wider or prettier or cheaper, reopens the decision. The procedure’s answer is unsentimental: a desk that fails the brief fails the decade, whatever its photograph promises. Taste chooses among survivors; it does not resurrect the eliminated.
How do I choose between a fixed and a standing desk at Step 6?
By the foundation test: if chair, depth and screen height are not yet correct, the fixed desk plus those corrections is the purchase; if they are correct and the afternoons still argue for motion, the lift has earned its premium. Our Is An Office Desk Worth It Is An Office Desk Worth It analysis walks the economics of both branches.
Can the procedure be reused for other furniture?
Yes — it is a general method wearing a desk’s clothes: fixed facts first, the market’s fixed decisions second, taste last. Chairs, shelving and even rooms yield to it. Readers who run it once for a desk tend to run it for everything afterward, which may be the most durable thing this guide gives them.
What should I do the week the desk arrives?
Build loosely, square, tighten in pattern; level in place; load in order — screens, then devices, then the small fleet; route the lead once, properly. Then re-check the fixings after the first week under load, and treat the first month as the placement’s trial: against the light, the socket and the door. The procedure’s last step is verification, and it is the one that makes all the others true.
The Procedure, in One Breath
Measure the room, measure yourself, weigh the equipment, watch the accumulation, plan the power, justify the shape, and only then read a listing. How to choose an office desk is how to choose anything that must fit a life for a decade: evidence first, product last. The desks that survive the procedure in our research are named above and ranked in the cluster’s best guides — start there, measure honestly, and the desk that arrives will be the desk you meant to buy.