A center punch makes a small dent that keeps a drill bit from wandering when it starts a hole. An automatic type is spring loaded: you press it down and it strikes itself, so you do not need a hammer. A classic punch is struck with a hammer. The main choices are the type, the length, the tip steel and how many you get.
The six tools below include five spring loaded punches and one hammer-struck set of five. Lengths, steels and set contents come from each listing page and are the makers’ own claims. We have not used these tools ourselves, and you should follow the maker’s instructions. Where a listing disagrees with itself, we say so.
As an Amazon Associate we earn from qualifying purchases. Links below are affiliate links, and they do not change the product information we give.
What to Look For
| Feature | Why it matters |
|---|---|
| Type | Spring loaded punches need no hammer, while classic punches do |
| Adjustable stroke | A cap that sets the force lets you mark soft and hard stock |
| Tip steel | A hardened tip holds its point longer |
| Spares | Extra tips and springs extend the life of a punch |
In this guide
Specs at a Glance
| Punch | Type and size | Steel | Notes |
|---|---|---|---|
| NEIKO 02638A | Automatic; 5 in | S2 tip; chrome-plated shank | Adjustable stroke; 2.4 oz |
| NEIKO 02639A | Automatic; 6 in | S2 tip; alloy steel | Adjustable; one-handed; knurled cap |
| Starrett 18C | Automatic; 5-1/4 in | Alloy steel | Adjustable stroke; 4.64 oz; heavier blow |
| TEKTON PNC95002 | Hammer-struck; 5 pieces | 5160 high carbon steel | 1/4, 5/16, 3/8, 7/16 and 1/2 in; made in USA |
| ALLY Tools 3 PC | Automatic; 6 in; 3 pack | CR-V steel body | Adjustable tension; knurled grip |
| Mulwark 2 pack | Automatic; 5 in; 2 pack | CRV6150 steel | Spare tips and springs; case |
The 6 Best Automatic Center Punches

Top pickBest for a single everyday punch
1. NEIKO 02638A 5-Inch Automatic Center Punch
A 5 inch spring loaded punch with an adjustable stroke and cap, a chrome-plated shank and a reinforced S2 steel tip. The maker says it can mark metal, wood, plastic, glass and leather, and describes a non-slip surface. The listing gives 2.4 ounces and 7.7 by 2.8 by 1.2 inches in the package.
Suits: a single everyday punch. Strengths: an adjustable stroke and S2 tip. Weaknesses: sold singly. Skip it if you want spares in the box.

Best for a longer grip
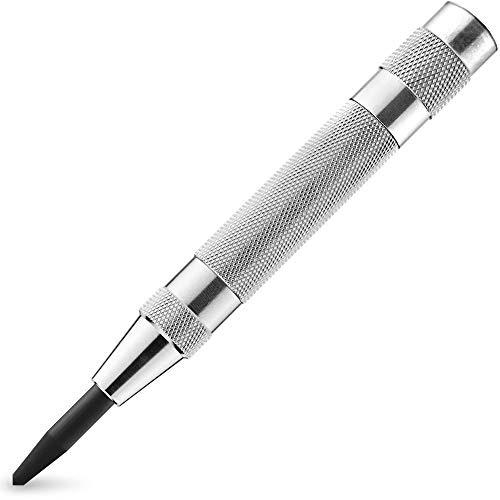
2. NEIKO 02639A 6-Inch Automatic Center Hole Punch
A longer 6 inch version with one-handed spring impact that you can adjust for light or heavy marking, a chrome-plated shank, a premium S2 steel tip and a knurled non-slip cap. The maker says the spring tension can be changed at any time to suit the surface. The listing gives alloy steel and about 0.14 kg.
Suits: a longer grip. Strengths: adjustable tension and a long body. Weaknesses: one punch only. Skip it if you want a short pocket punch.


Best for a heavier mark
3. Starrett 18C Automatic Center Punch
A 5-1/4 inch steel punch with an 11/16 inch diameter, an adjustable stroke set by turning the knurled cap, a knurled steel handle and a lightweight 4.64 ounce body. The maker says the 18C strikes a heavier blow than other sizes and that its spring tension gives a constant point with each strike.
Suits: a heavier mark. Strengths: a named brand and an adjustable blow. Weaknesses: the thickest body here. Skip it if you want a slim punch.

View Starrett Steel Automatic Center Punch, 5-1/4″ Length, 11/16″ Punch Diameter on Amazon

Best for a hammer and a range of sizes
4. TEKTON PNC95002 Center Punch Set, 5-Piece
A hammer-struck set, not a spring loaded punch, with five sizes: 1/4, 5/16, 3/8, 7/16 and 1/2 inch. Each is made from 5160 high carbon steel, individually heat treated at the tip and finished with a dry rust-preventative coating, with high-visibility laser markings. The maker lists it as made in the USA. The item highlight says 1/8 to 3/8 inch while the contents run from 1/4 to 1/2 inch, so the size field does not match.
Suits: a hammer and a range of sizes. Strengths: five sizes and a tempered striking end. Weaknesses: you need a hammer. Skip it if you want a hammerless punch.


Best for a spare for each toolbox
5. ALLY Tools 3 PC Set of 6 Inch Automatic Center Punch
A set of three 6 inch spring loaded punches with a CR-V steel body, adjustable impact strength and spring tension for light or heavy strokes, a knurled non-slip surface and a centered tip. The maker suggests keeping spare punches at home and in the garage. The listing gives 11.7 ounces for the set.
Suits: a spare for each toolbox. Strengths: three punches in one pack. Weaknesses: the text lists few details beyond the steel. Skip it if you only need one.


Best for a set with spares
6. Mulwark 5 in Automatic Center Punch Set, 2 Pack
Two 5 inch spring loaded punches in a case, made from CRV6150 steel, with two replaceable tips and two extra springs and an adjustable orange cap for the strike force. The maker describes one-handed, hammerless use and says tips can be replaced or sharpened. The listing also mentions palm caps.
Suits: a set with spares. Strengths: replaceable tips and springs. Weaknesses: only two punches. Skip it if you want a longer 6 inch body.
Care and Setup
- Follow the maker’s instructions and set the cap to the lightest force that marks the work.
- Rest the work on a firm surface before you strike.
- Wipe the tip and body after use.
- Store spring loaded punches with the spring relaxed.
Mistakes to Avoid
- Using too much force on thin stock.
- Buying a hammer-struck set when you want a hammerless tool.
- Marking a spot that is not on your layout line.
- Skipping spare tips and springs on a punch used a lot.
Spring-Loaded Versus Hammer-Struck Punches
The first decision is whether you want a punch that strikes itself or one you hit with a hammer. A spring-loaded punch holds a mechanism inside the body. You press the tip against the work, push down, and the spring releases a blow at a set force. A classic hammer-struck punch is a solid steel bar that does nothing until you hit the top of it.
Spring-loaded types are convenient because they work one-handed, which helps when you are holding a part steady with the other hand or reaching into an awkward spot. They also give a repeatable mark, so a row of layout points can all look alike. The trade-off is that they contain a spring and a few small parts that can wear over time, and the strength of the blow is limited by the mechanism.
A hammer-struck punch is simple and has nothing to wear out inside. You control the force with the hammer, so you can make a light dimple or a deep seat for a large drill. That control suits people who already keep a hammer within reach and who want to mark thicker or harder stock. It does need a second hand and enough room to swing.
- Choose spring-loaded for frequent layout work, thin sheet, and tight spaces.
- Choose hammer-struck for heavy marking, larger bit sizes and a no-moving-parts tool.
- Own both if you do mixed work, since they cover different jobs.
Matching Force to the Material You Mark
The purpose of a center punch is to make a small cone-shaped dent that guides the drill tip. Too little force and the dent is too shallow to catch the bit. Too much and you can distort thin material, leave a raised ring around the mark, or in the worst case crack brittle stock. Matching force to the material is the single biggest skill in using the tool well.
On soft metals such as aluminum and mild sheet, a light strike is usually enough. Harder steel needs a firmer blow, and very hard or hardened stock may resist marking altogether, in which case a punch may simply skid or dull. Plastics and glass are special cases: many makers list them as markable, but plastics can crack and glass can chip, so test on scrap first and keep the setting low. Read the maker’s instructions for the materials they say are suitable.
If you use an adjustable spring-loaded punch, start at the lightest setting and work up. Test on an offcut of the same material before touching the real part. On thin sheet, support the back with a firm, flat block so the mark does not dimple the metal inward on the far side. For hammer-struck punches, practise a few controlled taps rather than a single hard swing.
Always judge the result by whether the drill tip seats cleanly in the mark, not by how deep it looks.
Tip Condition, Wear and Replacement
The point of a center punch is its working edge, and a worn point gives a vague mark that lets the drill wander again. Tips are hardened to resist wear, but they still lose their sharpness with use, especially if they are struck against very hard metal or used as a general-purpose striking tool.
Inspect the tip occasionally under good light. A good point is symmetrical and comes to a small, sharp cone. If it looks rounded, chipped or bent, the mark will be off-center. Some punches have replaceable tips, which extends the life of the tool and means you replace a small part instead of the whole punch. Others are one-piece, and the only remedy is careful regrinding or replacement. If a listing mentions that tips can be replaced or sharpened, check what the maker says about the right method.
When regrinding a hammer-struck punch, keep the metal cool by dipping it in water often, because overheating can ruin the temper of the tip. Keep the original angle and grind evenly. A punch that has mushroomed at the struck end also needs attention: the edges can chip off and fly, so file the burr back or retire the tool.
- Replace or dress a tip as soon as marks become inconsistent.
- Keep spare parts in the same case so they do not get lost.
- Do not use the punch to pry, chisel or drive pins.
Marking Technique for Accurate Holes
A punch only helps if the mark lands where you intended. Good layout starts with a fine scribed cross at the hole position, because the intersection gives you a precise target. Place the punch tip in the intersection, tilt the tool slightly so you can see the tip land, then bring it upright just before you strike.
Hold the punch perpendicular to the surface. Leaning it will drive the mark off to one side, and the drill will follow it. With a spring-loaded type, press down smoothly and let the mechanism do the striking rather than adding extra force. With a hammer-struck type, a single clean tap is better than repeated taps that can double the mark.
After marking, check with a magnifier or the tip of your drill. If the mark is off, you can sometimes correct it by angling a second light punch mark toward the true center, then re-checking. For larger holes, start with a small pilot drill in the punch mark, then step up in sizes. This usually keeps the final hole truer than going straight to a big bit.
Secure the work in a vise or clamp when possible, and wear eye protection, since small chips or a slipping tool are always a risk. Clear the surface of oil and swarf before marking so the tip does not skate.
Single Punch, Pair or Multi-Piece Set
Whether to buy one punch or several depends on how and where you work. A single punch is enough for most home owners who mark a few holes a year. A pair or three-pack makes sense if you keep tools in more than one place, such as a workshop and a vehicle, or if you share tools with others and would like to stop losing yours.
For hammer-struck types, a set of different diameters lets you match the punch to the job. Larger punches are easier to hold and give a more visible mark, while smaller ones suit fine layout. Read the contents list carefully, because sizes in a title and in the detail table can disagree, as one listing in this guide shows. If sizes matter, rely on the item description and the photos rather than a short summary field.
Look at what comes with the tool. A case keeps the tips from knocking against other tools in a drawer. Spare springs and tips are a real benefit for heavy users, because they mean a worn part is a minor repair. Palm caps or grips may make a long job more comfortable, but they matter less than the quality of the steel and the mechanism.
Finally, think about storage. Spring-loaded punches are often stored with the spring relaxed, and a case helps keep them from being triggered accidentally in a drawer.
Which center punch should you buy?
The best center punch for you depends on whether you want a hammerless tool, how often you mark holes and whether you need spares. Here is how the picks above line up with common needs.
- One everyday punch: the NEIKO 02638A 5-Inch Automatic Center Punch is a single spring loaded tool with an adjustable stroke.
- A longer grip: the NEIKO 02639A 6-Inch Automatic Center Hole Punch gives you more body to hold and one-handed use.
- A heavier blow: the Starrett 18C Automatic Center Punch is described by the maker as striking harder than other sizes, which suits firmer stock.
- A hammer and a range of sizes: the TEKTON PNC95002 Center Punch Set, 5-Piece is hammer-struck, so choose it only if you already own a hammer.
- A spare for every toolbox: the ALLY Tools 3 PC Set of 6 Inch Automatic Center Punch gives three punches in one pack.
- A tool you can keep running: the Mulwark 5 in Automatic Center Punch Set, 2 Pack includes replacement tips and springs plus a case.
If you mark holes in sheet metal or work in tight spots, lean toward a spring loaded punch. If you drill larger holes in thicker stock and enjoy simple tools, a hammer-struck set gives more control over force.
Think about where the tool will live as well. A punch kept in a garage drawer, a vehicle kit and a workshop bench is easier to find when you own more than one.
What to check before you buy, and who should skip it
Before you buy a center punch, check the details that decide whether it suits your work. Use this list.
- Type: spring loaded or hammer-struck, and whether you have a hammer.
- Length and body thickness, so it feels comfortable in your hand.
- Whether the stroke or spring tension is adjustable.
- Tip steel and any maker statement about suitable materials.
- Whether spare tips, springs or a case are included.
- Pack count, and whether the listing contents match the title.
- Return terms and any warranty shown on the listing.
Now the trade-offs. Spring loaded punches are convenient but contain small parts that can wear, and their blow is limited by the mechanism. Hammer-struck punches have nothing inside to fail, but they need a second hand and room to swing. Multi-packs add spares but may include more punches than you will ever use.
Who should skip it? If you drill only soft material once in a while, a simple nail or an existing punch in your toolbox may do. If you mostly work with hardened steel, check the maker’s guidance first, because a standard punch can skid or dull. A person who wants a very light layout mark may prefer a dedicated prick punch.
Compare the picks above, check the current listing for size and what is included, then choose the one that fits how you will use it.
How Each Punch Performs in Daily Use
A center punch has one job: put an accurate mark exactly where you intend to drill, punch, or start a fastener, without wandering. The differences between the six options above show up in consistency, comfort over a long session, and how well each suits metal, wood, or mixed workshop work. This section looks at them the way they are actually used.
The NEIKO 02638A 5-Inch Automatic for Everyday Marking
The NEIKO 02638A is the straightforward automatic punch for general workshop marking. Press it to the work, push, and the internal mechanism fires a consistent mark without a hammer, which keeps your other hand free to hold the workpiece or a template. It suits DIYers and occasional metalworkers who want repeatable marks without developing hammer-and-punch technique. Its honest limitation is that an entry-level automatic punch asks you to keep expectations matched to its role: it is a marking tool for layout work, not a heavy-duty instrument for hardened materials all day. Choose it as a first automatic punch. Skip it if you mark tough stock constantly, where a heavier-duty option earns its keep.
The NEIKO 02639A 6-Inch Automatic for a Longer Grip
The 6-inch NEIKO variant suits users with larger hands or those who simply prefer more handle to hold, which matters more than it sounds during a long layout session with dozens of marks. The longer body can also feel steadier when marking on vertical or awkward surfaces. Its limitation is the flip side of size: in tight spaces, a longer punch is clumsier, and users with smaller hands may find the 5-inch version more controllable. Choose it if grip comfort is your priority. Skip it if most of your marking happens in cramped assemblies.
The Starrett 18C for Buyers Who Want the Benchmark
Starrett is the name machinists reach for when a measuring or marking tool has to be right, and the 18C automatic punch carries that reputation into this list. It suits users who mark metal regularly, care about a consistent, well-formed point, and expect a tool to stay in service for many years with proper care. The honest limitation is value logic: you pay for precision manufacturing and longevity, which only pays back if you use the tool often enough or keep it long enough. For a handful of marks a year, its advantages are real but rarely felt. Choose it as a long-term bench tool. Skip it if your marking is rare and light, where the NEIKO options do the job sensibly.
The TEKTON PNC95002 Set for Traditional Punch Work
The TEKTON set takes the classic route: solid punches struck with a hammer, in a range of sizes. It suits users who want control over how deep and strong each mark is, who work across varied materials, and who prefer a tool with no mechanism to wear. A set also covers the reality that one point size does not suit every drill and every material. Its limitations are technique and convenience: hammer punches need a free hand, a suitable hammer, and a little skill to avoid glancing blows and wandering marks, and they are slower for repetitive layout than an automatic. Choose it if you value versatility and simplicity. Skip it if one-handed, repeatable marking is the whole point of your purchase.
The ALLY Tools 3 PC Set for Multiple Stations
The ALLY 3-piece set of automatic punches suits a workshop that wants the same tool in several places at once: one at the bench, one in the toolbox that travels, one near the drill press. Matched automatic punches keep the marking feel consistent wherever you are working. The limitation is that a multi-pack of budget automatics shares the entry-level caveats on hard materials and long-term mechanism wear; the value is in coverage, not in heavy-duty performance. Choose it to equip several work spots affordably. Skip it if you want one best-possible punch rather than several good-enough ones.
The Mulwark 5 in 2 Pack for a Spare and a Partner
The Mulwark 2-pack plays a similar coverage role at the smaller size: one for the bench and one spare, or one each for two people who share a workshop. Having a second punch also solves the small but real frustration of a punch that has wandered into another toolbox mid-project. Its limitation mirrors the other budget automatics: fine for layout marking in common materials, not the choice for relentless use on hard stock. Choose it for affordable redundancy. Skip it if a single premium tool fits your habits better.
Head-to-Head Comparisons
Automatic Versus Hammer-Struck Punches
This is the real fork in the list. An automatic punch trades ultimate control for speed, one-handed use, and consistency: every mark gets roughly the same force, which is exactly what repetitive layout wants. A hammer-struck punch trades that convenience for adaptability: you decide the force for each mark, from a light registration point to a deep mark in tough material, and the tool itself is nearly indestructible. Machinists often own both, using the automatic for routine layout and the solid punches for deliberate, heavy work. If you must start with one, start with the style that matches your typical session: many similar marks, or fewer, varied ones.
Budget Automatics Versus the Starrett
Between the NEIKO, ALLY, and Mulwark automatics and the Starrett, the difference is consistency over time. A budget automatic usually marks perfectly well when new; the question is how it behaves after years of use, whether its point stays well-formed, and whether its mechanism keeps firing evenly. The Starrett is bought against that long timeline. Occasional users will likely never reach the point where the difference matters. Daily users reach it quickly, and for them the premium tool is the economical one.
One Punch Versus a Set or Multi-Pack
A single punch suits a single, predictable kind of work. Sets and multi-packs suit real workshops, where work varies and tools migrate. The TEKTON set varies the point sizes; the ALLY and Mulwark packs duplicate the same tool. Choose variation if your materials and drill sizes vary, and duplication if your locations vary. Buying duplication when you needed variation, or the reverse, is the most common small regret in this category.
Technique: Getting a Mark That Stays Put
Good marks are made before the punch touches the work. Lay out your position accurately, with crossed lines or a scribed reference, so the punch has a definite home to settle into. Hold an automatic punch truly vertical and press with steady body weight rather than a jab; a tilted punch makes a mark that leans, and a drill follows the lean. With a hammer punch, seat the point in your layout lines with a light tap first, check the position, and only then strike firmly. One confident strike makes a cleaner mark than several nervous ones, which can double-stamp and blur the point. After marking, look at the result before drilling: a mark that is off by a little is easy to correct now and expensive to correct after the drill has started. On finished or delicate surfaces, protect the surrounding area and consider whether a lighter mark will do, because a deep punch mark near an edge can distort thin material.
Marking Different Materials
Soft materials need a gentler touch than instinct suggests; a full-force automatic strike in soft wood or thin sheet can overshoot the mark you wanted. Hard materials need the opposite discipline: a firm, well-seated mark and a punch whose point is in good condition. In all materials, a sharp, undamaged point is what makes a mark precise; a mushroomed or chipped point wanders, and dressing or replacing it is basic maintenance, not an optional extra.
Troubleshooting Marking Problems
The Drill Still Wanders From the Mark
If drills wander despite a visible mark, the mark is usually too shallow for the drill size, or the drill is being started too fast and too hard. Deepen the mark appropriately for the material, start the drill slowly with light pressure until the bit seats in the mark, and check that your punch point is actually sharp. A blunt punch makes a wide, shallow dimple that guides nothing.
An Automatic Punch Fires Weakly or Inconsistently
Weak firing usually traces to how the punch is being used or to wear. Press straight down with full, steady pressure through the whole stroke rather than a partial push, keep the tool vertical, and check the point for damage. If a well-used punch stays inconsistent after correct use, its mechanism has likely worn, and replacement is more sensible than fighting it through important layout work.
Marks Land Slightly Off the Layout Lines
Off-centre marks are a seating problem: the point is sliding as force is applied, often because the punch is tilted or the surface is oily or rough at the mark point. Clean the spot, seat the point deliberately in the crossed lines, and use the light-tap-then-check habit with hammer punches. Accuracy in layout is a chain, and the punch is only its last link; if your lines are vague, no punch can rescue the position.
Care and Decision Scenarios
Keep punch points clean and protected, store punches so their tips are not battered by other tools, and wipe metal tools down in humid workshops. An automatic punch stored in a drawer of loose steel tools ages faster than one kept in a case or a rack. For decisions: choose the NEIKO 02638A for a first automatic, the 02639A if a longer grip suits your hands, the Starrett 18C for a long-service professional tool, the TEKTON set for hammer-struck versatility, and the ALLY or Mulwark packs to cover multiple workstations. In a category this simple, the right choice is mostly about honesty: how often you mark, how hard the material is, and how many places you need the tool to be.
Buying Criteria, Expanded: Point, Mechanism, and Duty Cycle
Three questions organise a center punch purchase better than any brand comparison. First, what will you mark? Layout work in mild steel, aluminium, and wood asks little of a punch; regular marking in tougher stock asks for a hardened, well-formed point and a mechanism or a hammer punch that can deliver force without damage. Second, how many marks, how often? A handful of marks per project suits any option here; hundreds of marks in a layout session reward the automatic’s consistency and the comfort of a grip that fits your hand, which is where the choice between the two NEIKO lengths is honestly decided. Third, where will the tool live and work? A single bench suits a single premium punch; a workshop with a drill press station, an assembly bench, and a travelling toolbox argues for the multi-packs. Answer those three and the six options sort themselves, with brand tier as the final refinement rather than the starting point.
The Point Is the Product
Whatever style you choose, judge it by its point. A center punch point should be symmetrical, smoothly tapered, and free of chips or flattening. On an automatic punch, fire it a few times on scrap when it is new and look at the marks: they should be round, centred on the tip’s contact, and consistent from strike to strike. On a hammer punch set, check that each size’s point is cleanly formed. A punch with a poor point cannot be technique’d into accuracy, and a good point kept in good condition is most of what you are paying for at every tier in this list.
A Worked Example: Laying Out a Drilled Plate
Follow a typical job: a metal plate that needs a pattern of holes drilled accurately. You begin by marking the hole positions with layout lines, crossed at each centre, working from a consistent reference edge so errors do not accumulate across the pattern. At the first crossing, you seat the punch precisely, make your mark, and inspect it before moving on; a magnifier or simply good light shows whether the mark sits dead centre. You repeat, mark by mark, resisting the urge to speed up, because layout errors multiply quietly and announce themselves only when the drilled pattern does not match its mating part. At the drill, each bit starts in its mark, slowly, and the marks do the guiding they were made for. Notice how little of that sequence depends on which punch you own, and how much depends on the punch being consistent and its point true. That is the honest summary of this category: buy the punch whose consistency and fit suit your volume of work, then let technique do the rest.
When a Center Punch Is Not the Tool
Knowing a tool’s boundary prevents misuse. A center punch marks positions; it does not start holes in very hard surfaces where a different approach is needed, it is not a drift for driving pins, and using it as a pry or a chisel destroys the point that is its whole purpose. Workshops accumulate damaged punches mostly through this kind of borrowing across jobs. Keep the punch for marking, keep a separate set of tools for driving and drifting, and your punch will stay accurate for years.
Extra Questions Owners Ask in the First Month
Should I keep an automatic punch at the drill press permanently?
It is one of the best placements for one, because most workshop marking serves drilling, and a punch that lives where the layout happens gets used instead of fetched. That is also the practical argument for the multi-packs in this guide: a punch at the press and a punch at the bench remove the small friction that leads to drilling unmarked work and hoping. Keep the press-side punch in a fixed spot, ideally in a small holder, so its point is protected and its location is muscle memory.
How deep should a center punch mark be?
Deep enough that the drill bit seats positively and cannot skate as it starts, and no deeper. In thin material, an over-deep mark can deform the far side or distort the hole’s start; in thick, hard material, a timid mark fails at its only job. Practise on scrap of the same material whenever the material changes, and let the drill’s behaviour at starting speed be your judge. The right depth is a property of the material and the drill size together, which is why experienced users adjust by feel rather than by rule.
Can I use a center punch on wood and plastics?
Yes, with a lighter touch than metal encourages. In wood, a gentle mark registers the position for a brad-point or an awl-started hole without splitting or crushing fibres around it; in plastics, a light mark guides the bit while reducing the chance of the surface crazing under a heavy strike. Automatic punches on their lightest effective press suit these materials well. The principle is the same as everywhere in this guide: the mark serves the drilling, so make the smallest mark that reliably guides the tool that follows.
When should a punch be replaced rather than maintained?
Replace a hammer punch when its point can no longer be dressed back to a clean, centred taper, or when the striking end has mushroomed enough to be a hazard. Replace an automatic punch when its firing stays inconsistent after correct use and a point inspection, because the mechanism’s wear is not user-serviceable on typical models. A punch is an inexpensive tool relative to the work it guides; retiring a tired one early is cheaper than the first workpiece its wandering mark ruins.
Final Advice: The Habit That Makes Any Punch Accurate
Whichever punch you buy, accuracy will come from one unglamorous habit: inspect the mark before you drill. It takes two seconds, it catches layout slips, seating errors, and wandering points while they are still free to fix, and it is the step hurried users skip on exactly the jobs where the hole pattern matters most. Build the pause into your routine until it is automatic, and your drilling accuracy will improve more than any tool upgrade could deliver, because most misplaced holes are born as unexamined marks rather than as bad punches.
Pair that habit with a tidy marking station. Lines drawn from a consistent reference, a punch that lives in a known place with its point protected, good light at the bench, and scrap of the current material for test marks: these small arrangements cost nothing and remove most of the friction that makes layout feel unreliable. Workshops rarely have a punch problem; they have a layout environment problem wearing a punch’s name.
Buy, then, for your real pattern of work, keep the point true and the marks inspected, and let the tool become invisible in the way good simple tools do. A center punch will never be the most admired object in the workshop. It may well be, across a year of projects, the one that quietly saved the most work.
One More Consideration: Pairing the Punch With Your Drilling Setup
A center punch does its work in partnership with what follows it: the drill, the bit, and the way the work is held. A mark that is perfect still fails if the workpiece shifts as the drill starts, so treat workholding as part of the marking system and clamp or support the piece before the bit spins, not after it wanders. Likewise, a sharp, appropriate bit starting slowly in a good mark will track truly, while a dull bit pushed hard will skate out of all but the deepest marks and then blame them. Judge your marking, in other words, as one link in a chain, and strengthen whichever link your last spoiled hole actually indicted. Most workshops find, on honest inspection, that the punch was the strongest link they owned and the habits around it were the ones asking for attention.
Center Punch FAQ
What is the difference between automatic and classic center punches?
An automatic punch has a spring that strikes the blow when you press down. A classic punch needs a hammer.
Which set includes spare parts?
The Mulwark lists two replacement tips and two extra springs.
How hard should I strike a center punch?
Use the lightest force that leaves a clear mark the drill tip can seat in. Test on scrap of the same material first. Thin or brittle stock needs less force than thick steel.
Why does my drill bit still wander after punching?
The mark may be too shallow, off-center, or made by a dull tip. Check the punch point and try a slightly firmer, perpendicular strike. Starting with a small pilot drill also helps.
Can I use a center punch on hardened steel?
Very hard material can dull or skid a standard punch, and some makers say their tool is for softer metals. Check the maker's guidance on suitable materials. Do not force a tool beyond its stated use.
Do I need a hammer for an automatic center punch?
No, a spring-loaded punch is pressed by hand and strikes itself. A hammer is only needed for classic hammer-struck punches.
How do I store a spring-loaded punch?
Keep it clean and dry, with the spring relaxed, as the maker advises. A case or pouch prevents accidental triggering and protects the tip. Follow the instructions that came with your model.
When should I replace a center punch?
Replace it, or its tip, when marks become inconsistent, the point is rounded or chipped, or the spring no longer delivers a steady blow. A mushroomed striking end on a hammer-struck punch is also a reason to retire it.
Is a center punch the same as a prick punch?
They are related but not identical. A prick punch makes a very small mark for layout, while a center punch makes a larger dent to guide a drill. Many people use the lighter setting of an adjustable punch for both.
What safety gear should I use?
Wear eye protection, and secure the work so it cannot slip. Keep your free hand clear of the strike area.
What is the best center punch for beginners?
An adjustable spring loaded punch is easy to start with because it works one-handed and gives repeatable marks. Begin on the lightest setting and test on scrap.
Do I need an automatic center punch or a manual one?
Choose automatic if you want hammerless, one-handed marking. Choose a manual hammer-struck punch if you want a simple tool and more control over force.
How long should a center punch be?
Most people pick a length that fits comfortably in the hand and reaches the work. The listed lengths here run from about five to six inches for the spring loaded types.
Can I use a center punch on wood?
Yes, makers list wood as a suitable material, and a small dent can help start a drill bit. Use a light setting so you do not split the grain.
Do automatic center punches wear out?
The spring and tip can wear with heavy use. Punches with replaceable tips and springs are easier to keep going.
Should I wear safety glasses with a center punch?
Yes, eye protection is a sensible habit, since tips can slip or chips can fly. Clamp the work so it cannot move.
The Short Version
For a standard 5 inch punch, the NEIKO 02638A. For a longer body, the NEIKO 02639A. For a heavier blow, the Starrett. For a hammer and many sizes, the TEKTON. For three spare punches, the ALLY. For replacement tips and springs, the Mulwark.


