A tubing cutter scores a thin wheel around a pipe and tightens a little each turn, leaving a clean square end for fittings. They are made for copper, brass and aluminum tube rather than thick steel pipe, and the real question is the diameter range and the room you have to swing the tool.
The six cutters below include four hand cutters from a size-focused range, a mini model for tight spots and one cordless tool. Capacities and materials come from each listing page. We have not used these cutters ourselves, and the durability claims are the makers’ own.
As an Amazon Associate we earn from qualifying purchases. Links below are affiliate links, and they do not change the product information we give.
What to Look For
| Feature | Why it matters |
|---|---|
| Capacity | The tube outside diameter must fit the range |
| Clearance | Close quarters models swing in tight spaces |
| Materials | Check whether the tube is copper, aluminum, brass or plastic |
| Spare wheel | Wheels dull, so easy changes help |
In this guide
Specs at a Glance
| Cutter | Capacity (maker) | Type | Notes |
|---|---|---|---|
| RIDGID Model 101 | 1/4 to 1-1/8 in | Hand, close quarters | Copper, aluminum, brass, plastic; spare wheel |
| RIDGID Model 150 | 1/8 to 1-1/8 in | Hand, constant swing | Enclosed feed screw; fold-away reamer; spare wheel |
| RIDGID Model 152 | 1/4 to 2-5/8 in | Hand, quick-acting | Fold-away reamer; tool-free wheel change |
| Klein 50047 | 1/8 to 1-1/8 in | Hand, mini | Aluminum and copper tube; compact spaces |
| Spurtar mini | 1/8 to 1-1/8 in | Hand, mini | Soft tube or wall up to 3.8 mm |
| Milwaukee 2471-20 | 3/8 to 1 in | Cordless M12 | 500 RPM; type K, L and M copper; battery not included |
The 6 Best Tubing Cutters

Top pickBest for small tube in crowded spots
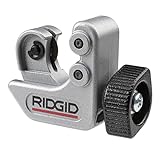
1. RIDGID Model 101 Close Quarters Tubing Cutter
A hand cutter with a 1/4 to 1-1/8 inch capacity for hard and soft copper, aluminum, brass and plastic, a knurled feed screw knob for controlling cutting pressure and a spare cutter wheel. The maker says it is made for small diameters in tight spaces.
Suits: small tube in crowded spots. Strengths: a spare wheel and several materials. Weaknesses: a 1-1/8 inch top size. Skip it if you cut larger tube.

Best for a wide small-tube range
2. RIDGID Model 150 Constant Swing Tubing Cutter
A zinc alloy cutter for 1/8 to 1-1/8 inch (3 to 28 mm) copper, brass and aluminum tube and thin-wall conduit, with an enclosed feed screw, grooved rollers for close-to-flare cuts, a fold-away reamer and a wheel pin for tool-free wheel changes.
Suits: a wide small-tube range. Strengths: a reamer and tool-free wheel swaps. Weaknesses: a full-size body. Skip it if room is tight.


Best for larger tube
3. RIDGID Model 152 Quick-Acting Tubing Cutter
A larger cutter with a 1/4 to 2-5/8 inch (6 to 66 mm) capacity, an I-beam body, thrust-bearing slide assemblies, a fold-away reamer and a ball-detent pin for changing the wheel without tools. The listing says it is made in the USA.
Suits: larger tube. Strengths: the widest capacity here. Weaknesses: bulkier for tight runs. Skip it if you only cut small tube.

View Ridgid 31642 model 152 Quick-Acting Tubing Cutter, 1/4 to 2-5/8 Tube Cutter on Amazon

Best for tight work areas
4. Klein Tools 50047 Mini Tubing Cutter
A compact hand cutter for 1/8 to 1-1/8 inch (3 to 28 mm) outside diameter aluminum and copper tube, with a knob for changing the size and a blade that the maker says gives extended cutting life.
Suits: tight work areas. Strengths: a compact body. Weaknesses: only aluminum and copper are listed. Skip it if you cut brass or plastic.


Best for thin-wall soft tube
5. Spurtar Mini Pipe Cutter Tool 1/8 to 1-1/8 Inch
A mini cutter for soft copper, aluminum and brass tube from 1/8 to 1-1/8 inch (3 to 28 mm). The listing says it is only for soft tube or wall thickness of 3.8 mm or less and is not recommended for stainless steel, PVC or acrylic.
Suits: thin-wall soft tube. Strengths: a small body and clear limits. Weaknesses: not for thick or hard tube. Skip it if you cut stainless.

View Spurtar Mini Pipe Cutter Tool 1/8 to 1-1/8 (3-28mm) Tube Cutter on Amazon

Best for repeated copper cuts
6. Milwaukee 2471-20 M12 Copper Pipe and Tubing Cutter
A cordless 16 ounce tool that adjusts automatically between 3/8 and 1 inch on type K, L and M copper pipe at up to 500 RPM. It works within about 1-1/2 inches of a wall, has a sealed head and needs an M12 battery, which is not included.
Suits: repeated copper cuts. Strengths: power and automatic sizing. Weaknesses: battery not included. Skip it if you cut only a few pipes.

Care and Setup
- Measure the outside diameter before choosing a cutter.
- Tighten the knob a little after each full turn.
- Ream the cut end before fitting it.
- Keep a spare wheel on hand.
Mistakes to Avoid
- Overtightening the wheel in one step.
- Using a mini cutter on thick-wall or hard tube.
- Skipping the reamer and leaving a burr.
- Forgetting the battery for the cordless model.
How a Tubing Cutter Makes a Clean Cut
A tubing cutter clamps around a tube, then a hardened cutting wheel is pressed into the wall as the tool is rotated around it. Each turn the wheel is tightened slightly, and the wheel gradually scores deeper until the tube separates. Done carefully, this leaves a square end with little distortion, which is why a cutter is generally preferred over a hacksaw for tube that will be fitted or soldered.
A square cut matters because fittings seat against the end of the tube, and a crooked or crushed end can cause leaks or weak joints. A cutter keeps the cut perpendicular as long as the tool is held steady and not forced. Cutting too fast or tightening too much can squash a thin tube or push the wheel off line.
Cutters leave a small burr on the inside edge of the cut, and often a raised ridge on the outside. Most full-size cutters include a reamer for the inside burr, which you should use before fitting. Skipping the reaming step can restrict flow or damage seals. The post lists this as a mistake to avoid for good reason.
Compare how each tool handles the rotation. Some designs need a full circle of clearance around the tube, while close-quarters designs are made to work where space is tight. Check the listing to see how much room each tool needs, and measure the space where you will work before you buy.
- Mark the cut line and align the wheel with it.
- Tighten gradually, about a small amount per turn.
- Ream the inside and clean the outside before joining.
Sizing and Material Checks Before Buying
The most common mistake is buying a cutter that does not cover the tube you need. Measure the outside diameter of the tube, and compare it with the range given on the listing. Tubing sizes are described in different ways, such as nominal size for pipe and actual outside diameter for tube, so confirm which one the cutter’s range refers to. If in doubt, check the maker’s size chart or the product description.
A cutter that covers a wide range may be convenient, but it can feel less precise at the extremes. If most of your work is in one size, a tool matched to that size can be easier to use. If you work across many sizes, look for a tool with an adjustable range and consider whether you need more than one.
Material also matters. The listings in this guide name materials such as copper, aluminum, brass and plastic. A cutter wheel suited to soft metal may not be appropriate for hard or thick-walled material, and using it on the wrong material can damage the wheel or the tube. Check the maker’s list of suitable materials, and do not assume a tool can cut steel or stainless unless the listing says it can.
Wall thickness is another variable. Thin-wall tube cuts easily, while thicker wall needs more turns and more care. Mini cutters are designed for small, soft tube and are not meant for heavy duty. Match the tool to the job you do most often, not the occasional exception.
- Measure the outside diameter and compare with the listed range.
- Confirm the materials the maker names.
- Match the tool size to your typical wall thickness.
Manual Versus Cordless Cutters
Most tubing cutters are manual. You turn the tool by hand and tighten the knob as you go. They are simple, light, require no batteries and are less expensive to maintain. For occasional work or small jobs, a manual cutter is usually sufficient. Skill matters, because the quality of the cut depends on steady pressure and rotation.
Cordless cutters, like the Milwaukee model in this guide, spin the tool around the tube with a motor. The listing describes automatic adjustment between sizes and says the tool needs a separate battery that is not included. These tools can save effort when you have many cuts to make, such as on a large plumbing or HVAC job, and they can reduce hand fatigue. They are heavier, cost more and require a compatible battery and charger.
If you consider a cordless tool, check whether you already own a compatible battery platform. Buying the tool alone can be cost-effective if you do, but it can add up if you need to buy the battery and charger as well. The listing says the battery is not included, so plan for that.
Think about the work environment too. Cordless tools are convenient where there is no power, but their size may limit use in tight spaces. Manual close-quarters cutters can reach where a motorized tool cannot. Check the clearance figures on each listing and compare them with your space.
- Choose manual for occasional, light or tight-space work.
- Choose cordless for repeated cuts when you have a compatible battery.
Wheel Wear, Maintenance and Replacement
The cutting wheel is the part that wears. A dull wheel needs more force, can leave a ragged cut and may distort the tube. Signs it is time to replace the wheel include a cut that takes many more turns than before, burrs that are larger than usual, visible nicks on the wheel edge, or a tool that wanders on the tube. Many cutters accept replacement wheels, and the listing or the maker’s site should say which wheel fits.
Keep a spare wheel on hand if you cut often, as the post suggests. Replace the wheel using the maker’s instructions, and make sure the pin or screw that holds it is seated properly. Handle the wheel carefully because the edge is sharp.
Care between jobs is simple. Wipe the tool clean of metal shavings, cutting oil and debris. Check the rollers and the feed screw for dirt, and apply a light lubricant if the maker recommends it. Do not use the tool as a hammer or a pry bar, because bending the frame can throw off the alignment of the wheel and rollers.
Store the cutter in a dry place, ideally in a pouch or a toolbox compartment so the wheel does not get knocked. Rust on the wheel or rollers can leave marks on tube and make rotation rough.
- Check the wheel before each job.
- Replace a wheel that is chipped or worn.
- Clean shavings from the roller track.
- Wear eye protection, especially when ending a cut or deburring.
If the frame is bent or the knob no longer tracks smoothly, consider replacing the tool.
Tubing Cutter FAQ
Can these cut steel pipe?
The listings name copper, aluminum, brass and plastic. Check the maker’s materials before cutting anything else.
What is a close quarters cutter?
It is a smaller design meant to fit where a full-size cutter cannot swing.
Why does my cutter leave a ridge on the tube?
Most cutters raise a small ridge where the wheel presses in. Tightening too fast can make it worse. Smooth it away if it interferes with fittings, and follow the maker's guidance.
Do I need to ream the tube after cutting?
Yes, in most cases you should remove the inside burr before fitting. Many full-size cutters include a reamer. Skipping it can restrict flow or damage seals.
How tight should I make the knob?
Tighten only a small amount after each full turn. Over-tightening in one step can crush thin tube and dull the wheel. Steady, gradual pressure gives a cleaner cut.
Can I cut tube that is already installed?
A close-quarters cutter is made for tight spaces, but you still need enough room to rotate the tool. Check the clearance on the listing and measure first. Make sure the system is shut off and drained.
What is the difference between pipe and tube sizes?
Pipe is usually described by a nominal size, while tube is often described by its outside diameter. The two do not always match. Check which one the cutter's listed range uses.
When should I use a hacksaw instead?
A saw may be an option for materials or sizes a cutter does not cover, or where there is no room to rotate a cutter. It usually leaves a rougher end that needs more cleanup. Check the material and the space.
How do I know if the cutter suits plastic tube?
Only if the maker lists plastic among supported materials. Some wheels may crack or deform soft tubing if used incorrectly. Check the listing and the manual.
Measuring and Marking Before You Cut
A tubing cutter produces a clean square end, but the cut is only useful if it lands in the right place. Most mistakes on tube jobs happen before the wheel touches metal. When you measure for a run, you need to know how much of the tube disappears inside each fitting, because the tube slides into a socket and the visible length is shorter than the total length you cut.
Use a tape measure to find the distance between the faces of the fittings, then add the depth of insertion at each end. Fitting socket depths vary by type and size, so check a chart or measure a sample fitting rather than guess. Marking the tube with a fine marker or a strip of masking tape gives you a visible line to align the cutting wheel with.
- Mark the tube all the way around, or at least on two sides, so the line is visible while you rotate the cutter.
- Dry-fit the pieces before you solder or tighten anything, to catch a short cut while it is still fixable.
- Cut a little long if unsure. You can trim a long tube, but you cannot lengthen a short one.
- Write down your cut list when you have many pieces, so you do not repeat measurements.
Square cuts matter. Align the cutting wheel exactly on the mark and make sure the tube sits flat against both rollers or the cutter’s guide surface before you tighten.
Preparing Cut Ends for Solder, Flare and Compression Joints
The cut is the first step of a joint, and each joint type asks for slightly different preparation. After cutting, the inside edge often carries a small lip that narrows the bore, and the outside may carry a slight ridge. Removing both makes joints seal reliably and restores full flow.
For a soldered copper joint, clean the outside of the tube end and the inside of the fitting with abrasive cloth or a fitting brush until the metal is bright. Apply flux, assemble, and heat evenly so the solder is drawn into the gap. Dirty or oxidized surfaces are a frequent reason solder will not flow. The joint depends on a tight, even fit, which a square end helps provide.
For a flared connection, such as those found on some gas, brake or refrigerant-style lines, the end is shaped with a dedicated flaring tool. The cut must be square and burr-free first, because a crooked or rough end can lead to a poor flare that leaks. For compression fittings, the tube end must be round and free of scratches where the ferrule seats, so avoid dragging the cutter along the tube surface.
- Ream the inside edge with the reamer on your cutter or a separate deburring tool.
- File or lightly sand the outside edge if a ridge is present.
- Wipe off metal chips so they do not end up in a valve or fixture.
- Look at the end under good light before assembling.
Working Safely and Tidily on Site
A tubing cutter feels low risk, but the job around it can be less so. Freshly cut tube has sharp edges, and the cut-off piece may be hot after friction against the wheel, especially on a long session. Wear gloves when handling it and eye protection when cutting, since small chips of metal can fly.
Before cutting any installed line, confirm what it carries and that it is shut off and depressurized. Water lines should be isolated and drained, with a bucket and rags ready for residual water. Gas lines, fuel lines and air-conditioning or refrigerant lines need particular care. Refrigerant should only be handled and recovered by properly certified people following local regulations, so do not cut into a charged system casually. When in doubt, hire a professional.
Tidiness helps too. Metal shavings and dropped cutters have a way of disappearing, so lay down a cloth or tray and sweep up afterward. Keep a small container of lubricating cutting oil for the wheel if your work calls for it, and wipe the tube before assembling so no oil contaminates a soldered joint, where residue can interfere with the solder.
If you cut in a tight cavity near wood framing, take care with any torch work that follows. A heat shield and a nearby fire extinguisher are standard habits for people who solder inside walls, not optional extras.
Building a Small Tube-Work Kit Around the Cutter
A cutter on its own does not make a finished joint. A few inexpensive companions turn it into a complete kit and prevent trips back to the store in the middle of a job. Most of these items are small, so assembling a compact kit is easy.
- A deburring tool or reamer, if the cutter does not have one built in.
- Abrasive cloth and a fitting brush for cleaning tube ends and sockets.
- Flux and solder, plus a torch, if you are sweating copper joints.
- A flaring tool and a tube bender if your work involves flared lines or bends.
- A tape measure, a fine marker and a pair of gloves and eye protection.
- Spare cutter wheels sized for your model, covered in the maintenance section above.
Think about the sizes you are likely to cut and whether one cutter covers them. A small cutter such as the Klein Tools 50047 handles small diameters and awkward spaces, while a larger model like those from RIDGID handles bigger tube. If you do both small and large work, owning two cutters is often more comfortable than stretching one to the edge of its range.
Store the kit together in a pouch or small tool bag, so every piece is in one place when you arrive at the job.
Frequently Asked Questions
How do I measure tube so it seats fully in a fitting?
Measure between the fitting faces, then add the insertion depth for each end. Socket depth varies by fitting type and size, so check a chart or measure a spare fitting. Dry-fit the pieces before soldering or tightening anything to confirm the length.
Do I need a flaring tool as well as a tubing cutter?
Only if your work involves flared connections. The cutter makes the square, clean end, and a separate flaring tool shapes it. Flared joints are used for some gas, fuel and brake-style lines, so check your project requirements before buying one.
Can I cut refrigerant lines with a tubing cutter?
The cutter can physically cut the tube, but refrigerant must be recovered by certified professionals under local rules before a charged system is opened. Do not cut into a pressurized or charged line yourself. Hire a licensed technician for air-conditioning work.
How do I stop the tube from getting crushed while I cut?
Tighten the feed knob gradually, about a quarter turn per rotation, rather than clamping hard at the start. Thin-wall tube and soft copper deform easily under heavy pressure. A sharp wheel and a steady rotation also reduce the chance of crushing the end.
Going Deeper: Getting the Most From Your Tubing Cutter
A clean cut is the invisible half of a leak-free joint. The picks above — the RIDGID 101, 150 and 152, the Klein 50047, the Spurtar mini and the Milwaukee M12 — range from pocket-size close-quarters tools to a cordless cutter, and that spread matters because tubing work is rarely one job repeated. A homeowner replacing a supply line under a sink, a remodeler running new copper through studs, and an HVAC helper trimming line sets all cut tube, but they cut it in different spaces, at different volumes, and with different tolerance for a burred or slightly out-of-square end. The sections below walk through how to match the cutter to the space and the material, how to keep wheels cutting instead of crushing, and how to tell when a disappointing cut is your technique, your wheel, or simply the wrong style of cutter for the run in front of you.
Start by picturing the tightest cut you expect to make, not the easiest one. If that cut is between a pipe and a wall, swing clearance decides everything and a full-size frame will frustrate you no matter how sharp its wheel is. If your cuts are mostly on a bench or on open runs during a repipe, swing and feed speed matter more than compactness, and a larger frame earns its keep. Buy for the tight cut first if tight cuts are common in your work; buy for volume first if you will make dozens of open cuts in a day.
Head-to-Head: How the Picks on This List Differ in Real Use
Spec tables flatten differences that your hands notice immediately. Put the picks on this list — the RIDGID 101, 150 and 152, the Klein 50047, the Spurtar mini and the Milwaukee M12 — side by side in a real task and three gaps open up. The first is effort over repetition: a tool that feels fine for one use can tire your hand, slow your rhythm or demand constant readjustment across a full afternoon of cutting copper and other soft tubing square and clean. The second is forgiveness: some designs tolerate slightly imperfect technique, awkward angles or worn materials, while others punish the same habits with a slipped grip, a damaged workpiece or a reading you cannot trust. The third is upkeep: some picks ask for little more than a wipe and dry storage, while others reward a regular check, a fresh consumable part or careful handling to stay at their best.
Use that lens when you reread the individual reviews above. If your work is occasional and forgiving — a few jobs a year, plenty of time, easy access — the simpler and lighter picks on this list will feel like the smart buy, and they usually are. If your work is repetitive, time-pressured or done in poor positions, the picks described as sturdier, better balanced or easier to read earn their place not through any single feature but through dozens of small moments where they ask less of you. Neither answer is wrong; mismatching the tool to the rhythm of your work is the only real mistake.
When the budget pick is genuinely enough
Budget picks on a list like this one are not consolation prizes. For light, infrequent work with good access and no deadline, they complete the same job as the premium options, and the money saved can go toward materials, a case or a second complementary tool. The honest limit is durability under repetition and precision under pressure. If you expect to cut weekly, to work in cramped or awkward positions, or to stake a finished result on one careful attempt, step up within this list. If you expect a handful of jobs a year in open space, stay at the sensible end and buy with confidence.
When stepping up actually changes the outcome
Stepping up changes the outcome when the job punishes small weaknesses: a workpiece that is expensive to replace, a fastener or fitting that is already damaged, a measurement or setting that everything else depends on, or a position where you cannot easily apply force or see what you are doing. In those moments the better-balanced, better-finished picks on this list are not luxuries — they are insurance. Notice that this logic is about the job, not about owning impressive tools. Buy the step up for the hardest job you do regularly, not for the hardest job you can imagine.
A Practical Setup and First-Use Routine
Whatever tubing cutter you choose from this list, give it a deliberate first session instead of throwing it straight at an important job. Start by reading the maker’s instructions fully, including the warnings — not because the tool is mysterious, but because each model on this list has one or two model-specific habits, adjustments or limits that generic advice misses. Inspect the tool out of the box: moving parts should travel smoothly, markings should be legible, and any included case, accessory or spare part should be accounted for before packaging goes in the bin. If something feels rough, bent or incomplete, that is a return conversation, and it is far easier on day one than after a job has marked the tool up.
Next, rehearse on scrap or on a low-stakes task. Practice the core motion of cutting copper and other soft tubing square and clean slowly, watching what the tool does rather than what you expect it to do. Notice how much force the task actually needs, where your hands naturally grip, and whether you can see the relevant mark, edge or contact point without contorting. Most early frustration with a new tool is really unfamiliarity with its feedback — the sound, resistance or visual cue that says things are going well. Ten unhurried practice repetitions teach that feedback better than any review can, and they cost you nothing but scrap material and a few minutes.
Finally, set up your storage and your supporting kit in the same session. Decide where the tubing cutter will live, what it will live next to, and which small companions it needs — the cleaning cloth, the spare consumable, the case or the organizer that keeps it findable. Tools that have a home get used and maintained; tools that migrate around a bench get damaged and lost. This small act of organization, done once, pays out on every future job.
Technique That Separates Clean Results From Repairs
Across every pick on this list, technique matters more than tier. Begin each task by preparing the workpiece and the area: clean contact surfaces, good light, and a stable position for both the work and your body. Rushed setups produce the classic failures — slips, skewed results and damaged finishes — far more often than weak tools do. Work in a steady rhythm, applying force progressively rather than in sudden bursts, and stop to reassess the moment feedback changes. A tool that suddenly feels different mid-task is telling you something: the material shifted, the contact point moved, or something is about to fail. Listening to that change is a learnable skill, and it is the single habit that most protects your work.
Support the work, not just the tool. Many disappointing results blamed on a tubing cutter trace back to a workpiece that flexed, rolled or vibrated while being worked on. Clamp, brace or back up the piece whenever the task allows it, and position yourself so your force travels in the direction the tool was designed to take it. Keep your non-tool hand out of the line of travel, and keep your eyes on the contact point rather than on your hands. When a task needs more force than feels controlled, the correct response is almost never to push harder; it is to reset your position, check the tool’s adjustment, or step to the larger or more suitable pick on this list.
A short pre-flight check before important work
Before any job where failure would be costly, run a thirty-second check. Confirm the tool is clean and undamaged, confirm any setting or adjustment matches the task, confirm the workpiece is secured and correctly oriented, and confirm you have the companion items — lighting, a rag, the next tool in the sequence — within reach. Then do the first small increment of the job and inspect the result before continuing. That first-increment inspection catches wrong settings, wrong accessories and wrong assumptions while they are still free to fix.
Troubleshooting: When Results Disappoint
When a job goes sideways, diagnose in a fixed order so you fix causes instead of symptoms. First, check the consumable or contact element: on tools like a tubing cutter, wear at the working edge, teeth, jaw, vial, blade or tip explains most sudden declines in performance, and it is the cheapest thing to renew. Second, check your settings and setup against the manual — a surprising share of poor results come from an adjustment left over from the previous task. Third, check the material: harder, softer, dirtier or more corroded stock than usual changes what correct technique even looks like. Only after those three should you suspect the tool itself.
Keep a simple log if a problem recurs. Note the material, the setting, the pick you used and what happened, in plain words on your phone or a shop notebook. Patterns appear quickly: a problem that follows one material is a technique adjustment; a problem that follows one pick across all materials is maintenance or replacement; a problem that follows you across every pick is a habit worth retraining. This sounds formal, but three lines per incident is enough, and it turns frustration into information.
Knowing when to stop and get help
Some situations outgrow any tool on this list. Work involving gas lines, refrigerant, live electrical conductors, structural members, pressure systems or safety-critical fasteners carries rules and risks that no buying guide can waive. If a task involves those systems, if a fitting or fastener resists reasonable force, or if you cannot verify your result with confidence, stopping is the professional move. A licensed tradesperson is cheaper than the repair that follows a confident mistake, and every experienced tradesperson has a story that proves it.
Care, Storage and Making the Tool Last
Longevity is mostly housekeeping. After each use, clean the tubing cutter before you put it away: wipe down working surfaces, clear debris from moving parts and recesses, and dry the tool fully if the job involved moisture. A tool put away dirty deteriorates in storage — corrosion starts in damp grime, mechanisms stiffen with packed dust, and the next job begins with a tool that is already compromised. Periodically, work through the maker’s maintenance guidance: the adjustment to check, the part to inspect for wear, the storage condition to avoid. Put that check on a seasonal rhythm rather than waiting for failure, the way you would change a filter or test an alarm.
Store the tool the way it arrived or better: in its case if it has one, in a drawer or on a rail where it will not be knocked onto concrete, buried under heavier tools or left in a damp vehicle. Temperature swings and humidity in garages and trucks age tools quietly; a simple indoor home for precision or frequently used pieces repays itself. If the tool uses batteries or has electronic parts, follow the maker’s storage guidance for those components, and remove or refresh power sources on the schedule the manual suggests rather than after a mid-job failure.
When repair, parts or replacement make sense
Judge a tired tool by its working surfaces and its consistency. If renewal parts exist for the worn element and the body, frame or mechanism remains sound, renewal is usually the economical path. If the tool has become inconsistent — results vary without explanation, adjustments drift, or damage affects alignment or grip — replacement is the honest answer, because an inconsistent tool costs you materials and confidence on every job. When you replace within this list, you will usually find your second purchase is easier than your first: you now know your rhythm, your materials and your real priorities.
Decision Scenarios: Matching a Pick to Your Situation
If you are outfitting a first home or a first real toolbox, favour the pick on this list described as the most versatile rather than the most specialized. Versatility covers the unpredictable mix of small jobs a home produces, and you can add a specialist later when a hobby or a renovation makes the need concrete. If you are replacing a tool you wore out, buy one tier of robustness above the one that failed — your usage has already told you its intensity, and repeating the same purchase repeats the same lifespan. If you are buying for a specific project, list the project’s hardest single task and choose the pick that handles that task comfortably; the easy tasks will take care of themselves with any pick here.
If two people will share the tool, weight comfort and clarity more heavily: the pick whose grip, markings or feedback suit the less experienced user will be the one that actually gets used correctly by both. If the tool will travel — in a truck box, a site bag or a club kit — weight the case, the weight and the resistance to knocks, because travel kills more tools than work does. If the tool is a gift, choose the pick with the gentlest learning curve and the clearest instructions on this list, and include the small companion items that make the first session go well.
Whatever scenario is yours, apply one final filter before buying: read the individual review of your leading pick once more and check its stated limitation against your life. Every pick on this list has an honest limitation, named in its review. If that limitation touches a job you do often, believe it and choose differently. If it touches only jobs you rarely or never do, you have found your tool — buy it, set it up carefully, and put it to work.
Ownership Lessons From the First Season of Use
One more question owners ask after the first month
Owners often ask whether they should have bought the next tier up. The honest answer is to look at your last ten jobs: if the tool completed nine of them without drama, your tier is right and the tenth job is a technique or setup problem worth solving directly. If several jobs strained against the same limitation — the same reach, the same capacity, the same fading feedback — that pattern is the tool telling you its ceiling, and stepping up within this list for that specific reason is money well spent. Patterns justify upgrades; single bad afternoons justify practice.
Keep a small bench ritual around this tool and your results will tighten up noticeably within a few jobs. Lay out everything the task needs before you begin, work in the same order each time, and inspect the finished result under good light before you call it done. Ritual sounds like overkill for home work, yet it is exactly how professionals stay consistent when they are tired, rushed or working in a borrowed space. The ritual also protects you from the most common home-work failure of all: discovering a skipped step only after everything has been put away, assembled or closed up, when going back costs ten times the effort it would have cost to check in the moment.
Think about the second tool in the system, because few jobs on this list are truly one-tool jobs. The companion might be a clamp that holds the work steady, a light that shows the contact point honestly, a rag and a brush for cleanup, or the measuring tool that verifies the result. Buying the headline tool and neglecting its companions is why some well-reviewed purchases still disappoint: the system around the tool was never completed. When you budget, reserve a modest share for those companions and for the consumables the tool will eat over its first year. A complete, modest system outperforms an incomplete premium one on almost every real job you will do.
Experience changes what you value, so revisit your choice after a season of use rather than treating the purchase as permanent wisdom. Beginners prize forgiveness and clear feedback, because those qualities teach good habits. With a year of jobs behind you, you may find that speed, compactness or a particular adjustment now matters more than the quality that first sold you. That shift is normal, and it is why many owners end up with two tools from a category like this one: the forgiving first purchase that still handles rough or loaner duty, and the refined second purchase matched to the work they now know they love. Neither purchase was a mistake; together they describe your learning curve.
Pay attention to how the tool behaves at the edges of its range, because that is where honest differences between picks live. Almost every tool on this list performs pleasantly in the comfortable middle of its capacity. The edges — the smallest and largest workpieces, the hardest and softest materials, the tightest spaces — are where grips run out, adjustments bottom out and readings or results start to drift. If your regular work lives near an edge, weight the reviews’ comments about that edge heavily and forgive weakness in the middle. If your work lives in the middle, do the opposite: choose the pick that feels most pleasant there, since edge performance you never use buys you nothing.
The Short Version
For crowded small tube, the RIDGID 101. For a reamer and wide small range, the Model 150. For large tube, the Model 152. For a mini from Klein, the 50047. For thin soft tube, the Spurtar. For repeated copper cuts, the Milwaukee.


