A pocket hole jig guides a drill bit at a slant so the screw can pull one board tight against another. It is a common way to build cabinet frames, face frames, shelves and table aprons without visible fasteners. The choices that matter are how the jig sets the depth, what drill bit and accessories come in the box, and whether the body is metal or plastic.
The six kits below run from a manual 34 piece set with a clamp and toolbox to a self-adjusting benchtop unit. Sizes, weights and materials come from each listing page and are the makers’ own claims. We have not used these jigs ourselves. Amazon pages for this category often give only bullets and no spec table, so where something was not stated we say so.
As an Amazon Associate we earn from qualifying purchases. Links below are affiliate links, and they do not change the product information we give.
What to Look For
| Feature | Why it matters |
|---|---|
| Depth setting | The jig must match the thickness of your boards |
| Body material | Metal bodies and bushings wear differently from plastic |
| Drill bit | A step bit with a stop collar sets the hole depth |
| Clamping | A built-in clamp or a bench mount keeps the jig still |
In this guide
Specs at a Glance
| Jig | Body | Depth setting | Notes |
|---|---|---|---|
| VEVOR 34 piece | Aluminum alloy | 1/2 to 1-1/2 in, adjustable | 11 in C-clamp, toolbox, step drill |
| General Tools 850 | Aluminum, steel | Not stated in what we read | 1.91 lb; built-in clamp; hex wrench |
| Milescraft Jig200 | High carbon steel or stainless | 1/2, 3/4, 1, 1-1/2 in presets | 2.05 lb; spring-loaded sled button |
| BORA Automatic | Not stated in what we read | Self-adjusting to thickness | 4.4 lb; 50 screws; benchtop |
| Massca M1 | Aluminum | Depth knob | 4.64 lb; hex key, stop collar, screws |
| GOINGMAKE All Metal | Aluminum, metal | Not stated in what we read | 4.4 lb |
The 6 Best Pocket Hole Jigs
Top pickBest for a first full set
1. VEVOR 34 Pcs Pocket Hole Jig Kit
A 34 piece kit with a CNC machined aluminum alloy body, an adjustable depth range of 1/2 to 1-1/2 inch with dual metric marks, and a titanium plated two step drill bit with a stop ring. The title also lists an 11 inch C-clamp, a fixture, wrenches, square drive bits and a toolbox.
Suits: a first full set. Strengths: a wide list of accessories and a case. Weaknesses: the listing page we read gave no weight. Skip it if you only want the bare jig.

Best for small home projects
2. General Tools 850 Pocket Hole Jig Kit
An all-in-one aluminum jig with a built-in clamp, a replaceable 3/8 inch step drill bit, a steel stop collar, a 6 inch square drive bit and a hex wrench, supplied in a carrying case. The details list 1.91 pounds, and the maker offers a one year parts warranty. The table says 76 pieces while the bullets mention 25 coarse and 25 fine screws, so check the contents before you buy.
Suits: small home projects. Strengths: a light, complete kit with a case. Weaknesses: the piece count is described two ways. Skip it if you want automatic depth setting.
Best for repairs and shop work with common board sizes
3. Milescraft Pocket Jig200
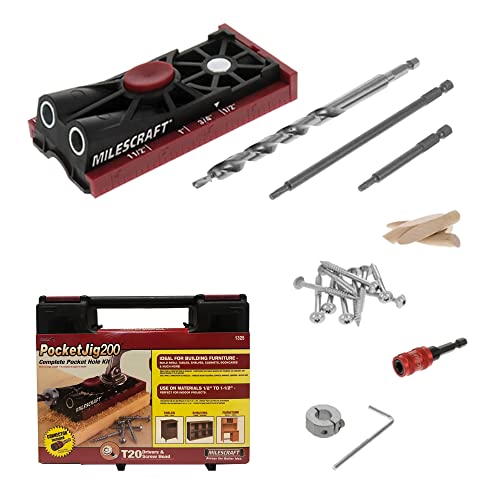
A single jig with a spring-loaded sled button, built-in imperial and metric scales and four preset board thickness settings of 1/2, 3/4, 1 and 1-1/2 inch. The maker says tight tolerances between the bushing and the bit reduce tear-out. The listing gives the weight as 2.05 pounds and the material as high carbon steel or stainless.
Suits: repairs and shop work with common board sizes. Strengths: clear preset thicknesses. Weaknesses: the part list for the bundle is not spelled out in the bullets we read. Skip it if you need a big accessory bundle.
View Milescraft Pocket Jig200 Pocket Hole Kit, Red on Amazon

Best for repeat work at a bench
4. BORA Automatic Pocket Hole Jig Kit
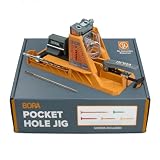
A benchtop jig that the maker says calibrates itself to the thickness of the board. The kit lists the jig, a square pocket hole drill bit and a 50 piece screw set. The details give 4.4 pounds and a 15 by 6.7 by 7 inch box.
Suits: repeat work at a bench. Strengths: no manual depth setting. Weaknesses: bigger and heavier than the handheld styles. Skip it if you want a jig you can carry in a pocket.
View BORA Automatic Pocket Hole Jig Kit and 50 Screws Drill Guide for Woodworking on Amazon
Best for general cabinet and frame work
5. Massca M1 Pocket Hole Jig Kit
An aluminum jig with a drill depth knob, a hex key, a stop collar, a set of self tapping screws, a driver bit and a drill bit. The details list 4.64 pounds and a body measuring 10.8 by 4.6 by 5.31 inches. The maker calls the frame heavy duty.
Suits: general cabinet and frame work. Strengths: a depth knob and a metal frame. Weaknesses: the heaviest of the group at 4.64 pounds. Skip it if weight matters.

Best for buyers who want a metal body
6. GOINGMAKE All Metal Pocket Hole Jig Kit
A pocket hole screw system whose listing describes it as all metal, with aluminum and metal named as the material and a weight of 4.4 pounds. The bullets call it accurate, easy to set up and durable, but the text we read did not give a depth range, a piece count or a drill bit size.
Suits: buyers who want a metal body. Strengths: a metal construction. Weaknesses: thin technical detail in the listing. Skip it if you want every dimension spelled out.

View GOINGMAKE All Metal Pocket Hole Jig Kit,Pocket Hole Screw Jig System on Amazon
Care and Setup
- Set the stop collar on the bit to the depth that matches your board.
- Clamp the work and the jig before you drill.
- Clear the chips from the guide holes after each session.
- Use the screw length the maker lists for the board thickness.
Mistakes to Avoid
- Setting the depth for the wrong board thickness.
- Skipping the clamp so the jig shifts.
- Assuming every kit includes screws, a clamp or a case.
- Counting on a spec the listing never states.
How a Pocket Hole Joint Works and Where It Fits
A pocket hole joint starts with an angled hole drilled into the face or edge of one board, ending in a small flat shoulder. A special screw with a washer-style head is driven through that hole into the second board, and as it tightens it pulls the two pieces together. Because the screw sits at an angle, the joint grips end grain to face grain and edge to face, which are the situations that are hard to fasten with plain screws.
That makes the method a good fit for face frames, cabinet carcasses, drawer boxes, shelves, bed frames and simple tables, as well as quick repairs on existing furniture. Its strengths are speed and that it needs little more than a drill and a clamp. The holes are normally on the hidden side of the work, and where they are visible they can be filled with plugs.
It is not the best choice for every job. Fine furniture that will be moved a lot may call for traditional joints, and very thin stock can split because the hole and screw take up so much of its thickness. Outdoor use needs screws rated for exterior conditions, so check the screw type before building anything exposed to weather. Some woodworkers also prefer to add glue to the joint for stiffness and to reduce movement. A jig is simply the tool that makes the angle and depth repeatable, so what you want to build should drive the kind of jig you buy.
Matching Depth Setting to Board Thickness
The single most common error with a pocket hole jig is an incorrect depth setting, and each jig style handles it differently. On a manual jig, the drill bit has a stop collar that you set to a measurement for your board, and the guide block or the jig body may also need adjusting. On a preset design, the jig has fixed positions marked for common thicknesses. On a self-adjusting design, the maker says the clamp sets the position itself, though it is still wise to test on scrap before you drill real parts.
The depth should be set so the angled hole leaves enough wood on the far side of the screw point. If it is too shallow, the screw may poke through the face of the board. If it is too deep or the screw is too long, it may exit through the other piece. Look at the maker’s chart for the right screw length for each thickness and stick to it.
Before drilling the first real piece:
- Measure the actual thickness of your boards with a ruler or calipers, since nominal lumber sizes are often smaller than the name suggests.
- Drill into a scrap piece of the same thickness and test a screw.
- Check how far the screw head sits below the surface and adjust if needed.
If you often work with thin or very thick stock, check the listing for the minimum and maximum thickness the jig can handle, because some do not cover the full range.
Drill Bit Quality, Stop Collars and Drilling Technique
The bit does the cutting, and a poor one can ruin a good jig. A step bit has a narrow section that drills the pilot and a wider section that cuts the shoulder for the screw head, and the transition is what makes the flat seat. Look for a bit that is described as hardened steel or similar, with clearly marked flutes that clear chips. Some listings mention coatings; treat those as the maker’s claim and focus on whether the bit fits the guide bushing snugly. A loose bit will wander and tear the hole.
The stop collar is a ring that locks onto the bit with a small screw. Tighten it firmly, and check it again after the first few holes, because vibration can loosen it. A collar that slips lets you drill too deep.
For technique, use a drill with enough power and run it at a steady speed. Start the bit spinning before it touches the wood, push in at a moderate rate and withdraw several times on deeper holes to clear chips from the flutes. Pull the bit out while it is still spinning to avoid binding. Hardwoods and thick stock produce more heat, so go slowly and clear the dust often.
Pocket screws also come in coarse and fine thread types. Coarse threads suit softwoods and plywood, while fine threads suit hardwoods. Check the listing to see which types are included, since not every kit ships with screws.
Clamping, Workholding and Bench Setup
A pocket hole jig is only accurate if both the jig and the workpiece stay still. Movement is the main reason holes end up misaligned or ragged. Many kits include a clamp or a built-in clamping feature, and this is worth checking carefully in the listing. A clamp that grips the workpiece against the jig body makes drilling quicker, while a jig without one needs a separate clamp, which adds cost.
There are two ways to hold the setup. A handheld or portable jig clamps onto the work, and you can use it on large assemblies, such as a cabinet that is too big to bring to the bench. A benchtop jig is secured to the bench, and you move the workpiece to it, which can be faster for repeated cuts. Heavier jigs generally feel steadier but are less convenient to carry around.
When assembling, use a face clamp or a corner clamp to hold the two parts flush while you drive the screw. Boards tend to slide as the screw pulls them together, which leaves a step between the faces. A clamp prevents this, and so does driving the screws in a sensible order. If you are joining two boards side by side, check that the jig placement is consistent so the holes line up.
A few other items improve results. A square driver bit that fits snugly stops the screw head from stripping. A dust brush or vacuum nearby keeps chips from building up in the guide. A depth stop on your drill, if you have one, adds a second safeguard against drilling too far.
Common Problems and Choosing by Project
Most pocket hole problems have simple causes. If the screw breaks through the face, the hole depth or the screw length is wrong for the board. If the board splits near the end, the hole is too close to the edge, the wood is too thin or the screw is too long. If the joint shifts as it tightens, the workpiece was not clamped or the pieces were not supported. If the bit overheats, it may be dull or clogged with chips.
Fixes are easy to try on scrap before committing. Move the holes in from the edge, use a shorter screw or switch to fine-thread screws in hardwood.
When choosing a jig by project, think about how you will use it. Occasional repairs and small builds favor a compact kit with a clamp and a basic set of screws. Cabinet makers and anyone doing frequent, repeated joints benefit from a benchtop design with quick setup. If you build large pieces that you cannot lift to the bench, a portable design is more practical. If you work with a wide range of thicknesses, look for adjustable or self-setting depth, or accept that you will need to reset a manual jig each time.
Check the contents list on each product page. Kits vary on whether they include screws, a driver, a clamp, spare bits and a case, and the listings above sometimes describe the same item differently. Metal bodies and bushings hold up better under repeated drilling, while plastic bodies are lighter and often cheaper. Buy for the work you will actually do, not the longest parts list.
Which pocket hole jig should you buy?
The right pocket hole jig depends on how often you build, how much bench space you have and how much you want to adjust by hand. Here is how the six kits in this guide fit common needs.
- You want a full starter set: the VEVOR 34 piece kit comes with a clamp, a step drill and a toolbox, so you can start without buying extras.
- You want a light, complete kit: the General Tools 850 has a built-in clamp and a carrying case. Check the contents list, since its piece count is described two ways.
- You mostly use common board sizes: the Milescraft Jig200 has preset thickness settings, which cuts down on measuring.
- You do repeated work at a bench: the BORA Automatic is a benchtop unit that sets depth itself. It is bigger and heavier than the handheld styles.
- You want a depth knob and a metal frame: the Massca M1 fits cabinet and frame work, though it is the heaviest of the group.
- You want a metal body and can accept thin details: the GOINGMAKE All Metal gives little technical information in the listing, so verify what is in the box.
If you only build occasionally, a compact kit with a clamp is usually enough. If you build cabinets or face frames, speed and repeatability count for more, which favors a benchtop design or presets. If you work on large assemblies you cannot lift to a bench, a portable jig that clamps to the work is more practical.
Think about the board thicknesses you really use. A jig that covers only a few settings is fine if your stock is standard, but irregular or very thin material needs a jig with a wider adjustable range.
What to check before you buy, and who should skip it
Before you buy a pocket hole jig kit, check the thickness range, what ships in the box and how the jig is held steady. These points cause most returns.
- The stated thickness range covers the boards you plan to join.
- The drill bit is a step bit with a stop collar, and the shank suits your drill.
- Screws, a driver bit and a clamp are either listed as included or planned as extras.
- The body material is stated, and you know whether you prefer metal or lighter plastic parts.
- The weight and footprint suit your bench or the way you will carry it.
- Warranty and return terms appear on the current listing.
There are real trade-offs. Pocket holes leave visible holes on one side unless you plug them, they are not a fit for very thin stock, and an automatic jig still deserves a test on scrap. A big accessory bundle can also include items you will never use.
Who should skip it? If you build only fine furniture with traditional joints, a pocket jig may sit unused. If you need a single quick fix, a basic kit is plenty and a bundle is not worth the extra.
Compare the picks above, check the current listing for the thickness range and what is included, then choose the jig that fits how you will use it.
Choosing a Pocket Hole Jig Around Your Builds, Not the Box
Pocket hole jigs all promise the same joint, but the experience of making fifty joints in an afternoon differs sharply between models. The decisions that matter are how the jig sets up for different stock thicknesses, how it clamps, how repeatable its depth system is, and how its build materials behave after a year of shop dust and being tossed in a tote. This section turns the six kits in this guide into a decision framework based on the projects you build.
How you build decides the format you need
Face frames, cabinet boxes, table aprons, drawer boxes, picture frames and quick shop furniture all use pocket holes differently. Bench-mounted work on long rails rewards a jig that clamps stock firmly and repeats settings without fuss. Small repairs and one-off joints reward a compact jig that comes out of a drawer, does two holes and goes back. If you build cabinets regularly, setup speed multiplied by dozens of joints dominates your choice. If you build occasionally, simplicity and clear markings matter more, because you will relearn the tool each time you use it.
Thickness range and the honesty of the scale
Every jig claims a thickness range, but the useful question is how positively it sets at the common stops you use most. A scale that clicks or locks at standard thicknesses prevents the slow drift that causes screws to emerge through faces. Check how the kit in front of you handles your most common stock, and whether switching thickness is a tool-free slide or a fiddly adjustment you will avoid making, because an adjustment you avoid is a wrong setting waiting to happen.
Clamping is half the system
A pocket hole is drilled at an angle under feed pressure, and any movement during drilling prints as a shifted hole and a joint that pulls out of alignment when the screw seats. Integrated clamps, C-clamp fixtures and bench-mount options in these kits are not accessories; they are core to accuracy. Judge a kit by how securely and quickly it holds your typical stock sizes, including narrow face-frame rails that challenge small clamping pads.
Each Pick at Work: Six Kits in the Workshop
VEVOR 34 Pcs Pocket Hole Jig Kit
This is the everything-in-the-box option, built around a fixture and clamp with a generous bundle of bits, stops and drivers. It suits a new woodworker equipping a shop in one purchase, or a DIYer who wants the jig, the clamp and the consumables to arrive together and live in one case. Kitchen cabinet projects, shelving builds and furniture repairs are its natural territory, and the included clamp makes bench setup straightforward for beginners.
General Tools 850 Pocket Hole Jig Kit
General Tools aims this kit at the home workshop that values a guided, repeatable setup. It fits users building face frames and small furniture who want the jig to help them get thickness and depth right without a long learning curve. Its appeal is confidence: a homeowner who builds a few projects a year can pick it up after months away and still produce sound joints.
Milescraft Pocket Jig200
Compact and project-focused, this jig suits the user whose pocket hole work is intermittent and varied: a repaired chair here, a garage shelf there, a picture frame on the weekend. Its size makes it easy to store and to clamp in awkward spots where a bench fixture cannot go. For apartment workshops and small garages where every tool must earn its storage space, that footprint is the argument.
BORA Automatic Pocket Hole Jig Kit
The automatic concept targets speed and consistency: set the stock in, and the jig adapts, reducing the setup steps between different thicknesses. That suits builders who switch stock constantly during a build, such as cabinetmakers moving between carcass and face-frame material in the same session. Fewer manual settings also means fewer chances to drill a whole batch at yesterday’s thickness, an error every experienced builder has made once.
Massca M1 Pocket Hole Jig Kit
The M1 leans into solid construction and straightforward adjustment, aimed at users who build regularly and want a jig that feels like shop equipment rather than a gadget. It fits garage workshops producing cabinets, tables and storage builds where the jig comes out weekly. Users who have worn out a lighter jig will recognize the upgrade logic: rigidity, repeatable stops and a clamp that does not flex under drilling pressure.
GOINGMAKE All Metal Pocket Hole Jig Kit
All-metal construction is the headline, and it speaks to durability-minded buyers who plan to keep one jig for many years and many projects. It suits frequent builders, small pro shops and anyone who has cracked or flexed a plastic jig mid-project. The weight that comes with metal construction also helps stability on the bench, turning a perceived drawback into steadier drilling.
Head-to-Head: Where the Kits Really Differ
VEVOR kit versus GOINGMAKE all-metal kit
Both court the serious DIYer, but with different currencies: the VEVOR kit spends on completeness, bundling the clamp, bits and accessories, while the GOINGMAKE spends on the jig body itself. If you own nothing yet, completeness gets you building today. If you already own clamps, bits and drivers, putting the whole budget into a metal jig you will never replace is the better arithmetic.
General Tools 850 versus Milescraft Pocket Jig200
Guidance versus portability. The General Tools kit emphasizes a structured setup for repeatable home projects; the Milescraft emphasizes a compact tool that goes to the work. Builders with a dedicated bench and recurring cabinet work will use the guidance. Renters, repairers and small-space woodworkers will use the portability more.
BORA Automatic versus Massca M1
Automation versus manual solidity. The BORA reduces decisions per joint, which pays off across long, mixed-thickness sessions. The M1 asks you to make the setting and rewards you with a rigid, predictable platform. Neither philosophy is superior in the abstract; your error history decides. If your mistakes have been wrong settings, automation helps. If your mistakes have been movement and flex, rigidity helps.
First Joints: A Setup and Practice Sequence
Clamp everything before you drill anything. Secure the jig to the bench or the stock as its design intends, secure the stock in the jig, and wear eye protection, because angled drilling throws chips toward the operator. Unplug or set aside other tools so the drill cord or battery changes never rush you. Set the jig for your stock thickness, set the drill bit stop collar using the kit’s gauge rather than eyeballing it, and confirm the screw length for that thickness from the kit’s chart.
Then drill two test joints in offcuts of the exact stock you will use, drive the screws, and inspect: the screw should pull the joint tight without poking through, splitting or pulling the pieces out of square. Adjust one variable at a time if the test fails. Mark your jig’s setting for this thickness with a pencil line or a note in the case, so the next session starts from a known-good point. Only after two clean test joints should project stock go under the bit. This ten-minute ritual feels slow exactly once; after that it becomes the fastest route to joints you do not have to fix.
Troubleshooting in Diagnostic Order
When a pocket joint misbehaves, diagnose in this order. First, thickness setting: a jig set for thinner stock than you are drilling is the most common cause of screws breaking through the face. Second, stop collar position: a collar that slipped or was set by eye produces shallow or deep holes that no screw length can rescue. Third, clamping: movement during drilling shifts the hole and makes joints creep as screws seat, so re-clamp and test again before changing anything else. Fourth, bit condition: a dull step bit tears rather than cuts, overheats, and wanders in hard stock, and it also enlarges the pilot portion unevenly. Fifth, screw selection: length and thread type must match the material, with coarse threads generally suited to softer stock and fine threads to hardwoods, and a screw that is too long will defeat a perfect hole. Sixth, assembly technique: overdriving pulls joints out of alignment, so use a clutch setting that seats the screw firmly and stops. Checking in this order finds the cheap causes first and keeps you from blaming a jig for a collar that moved a fraction.
Storage, Consumables and Building a System
Store the jig, its bit, driver and stop collar together, because a pocket hole system separated across three drawers is a system you will mis-set under time pressure. Keep spare step bits and the screw lengths you use most in the same case, sorted by thickness, and note on the case lid which screw goes with which stock. Brush dust out of the drill guide bushings after sessions in MDF or plywood, since packed dust accelerates wear and affects bit tracking. Over time, add the accessories your projects prove you need, such as right-angle clamps for assembly and plugs for visible holes, rather than buying every accessory up front. A pocket hole setup grows best by evidence: each addition should correspond to a joint you actually struggled with, and that discipline keeps a simple, fast system from becoming a cluttered one.
Project Scenarios: Pocket Holes in Real Builds
A kitchen cabinet carcass and face frame
This is the build the category exists for: plywood or solid carcasses joined quickly, face frames attached invisibly, and a kitchen’s worth of repeatable joints. The winning habits are batch discipline: set the jig once for the carcass thickness, drill every part, then reset once for the frame stock and drill again. Kits with clear stops and sturdy clamping, like the VEVOR fixture kit and the Massca M1 in this guide, repay their setup thought across dozens of identical joints, while a wrong setting discovered late costs a whole batch.
A farmhouse table with aprons and legs
Table aprons joined to legs with pocket screws are a classic first furniture project. The joints hide inside the apron, the angles are forgiving, and the build teaches clamping during assembly, because a table that racks was usually pulled out of square at the screw-driving stage, not the drilling stage. Any kit here handles the drilling; the General Tools and Milescraft options suit the occasional furniture builder who wants guidance without a bench-dominating fixture.
Repairs: the wobbly chair and the split drawer
Pocket holes rescue furniture that dowels and patience cannot: a drawer box rebuilt in an evening, a chair rail re-secured, a cabinet side replaced. Repair work happens in awkward positions, often with the piece partly assembled, which is where a compact jig like the Milescraft earns its storage space. Keep the repair standard honest: a pocket screw repair is strong and serviceable, and on a hidden face it is also invisible, which is why so many professionals reach for it without apologizing.
Shop furniture and storage builds
Workbenches, shelf units, garage cabinets and tool stands are pocket hole territory: fast, square and strong enough, built from sheet goods and construction lumber. This is where an automatic or heavy-duty jig, like the BORA or the GOINGMAKE metal kit, pays across a weekend of repetitive drilling, and where screw inventory in the right lengths matters as much as the jig itself.
Decision Guide by User Type
The first-time builder equipping a shop should buy completeness: the VEVOR kit’s bundle removes a dozen small purchasing decisions at the moment they are least qualified to make them. The occasional project builder should buy simplicity and storage size, pointing to the Milescraft or General Tools kits. The regular cabinet builder should buy rigidity and repeatable stops, pointing to the Massca M1 or the GOINGMAKE metal kit. The builder who switches stock thickness constantly should seriously consider the BORA’s automatic approach, because their error pattern is settings, and the tool should attack the error pattern. Notice the principle: the best jig is the one whose strengths cancel your most common mistake.
Ownership Habits: Screws, Bits and Settings
Treat screws as part of the tool system. Keep the lengths for your two most common thicknesses in labeled compartments in the jig case, and restock when a compartment empties rather than when a project stalls. Replace the step bit when holes start tearing instead of cutting; a dull bit is also the hidden cause of many split workpieces, because it demands force that a sharp bit never asks for. Write your known-good settings on a card in the case: jig position, collar measurement and screw length for each thickness you use. That card, written once, converts every future setup from memory into verification, and verification is what separates consistent joints from hopeful ones across a whole kitchen of cabinets.
Technique Notes: Assembly Is Where Joints Succeed
Drilling the hole is only half of a pocket joint; the other half is assembly discipline. Dry-fit every assembly before glue, because pocket screws pull parts in predictable directions and a dry run shows you where a joint wants to creep. Clamp the assembly in its final position before driving screws, ideally with a right-angle or face clamp holding the joint flush, since the screw’s job is to hold alignment, not to create it. Drive screws in a sequence that balances the assembly, alternating sides on wide panels, the way you would tighten a wheel, so no single screw gets to decide the final geometry alone.
Glue, screws and patience
Glue adds long-term strength to pocket joints in most furniture applications, but it also lubricates the joint for the first minutes, making creep more likely exactly when screws are being driven. Compensate with firmer clamping during driving and a lighter hand on the driver clutch. Respect cure time before loading the piece; a joint that feels solid at handling strength is not yet at working strength, and early stress is a common cause of joints that loosen mysteriously in their first season. Keep a small stock of plugs and a flush-cutting method ready for the holes that will show, and decide which holes will show while you can still choose their orientation, not after the piece is assembled.
Materials Notes: Stock Behavior at the Joint
Solid wood, plywood and the in-between materials
Solid pine and softwoods accept pocket screws readily and forgive minor setting errors, while dense hardwoods demand correct fine-thread screws, a sharp bit and respect for splitting near ends. Plywood behaves well when the pocket is placed so the screw crosses plies favorably and the face veneer is protected during drilling. Manufactured boards with low-density cores are the honest limit of the system: screws hold modestly there, glue and joint design must carry more of the load, and knowing that limit keeps pocket holes a strength instead of a habit applied where it does not belong.
End grain, edges and minimum distances
Pocket screws near board ends and edges live close to splitting territory. Keep sensible distances from ends, test in offcuts of the same board when a design pushes those distances, and remember that a slightly repositioned pocket that survives is better joinery than a perfectly placed one that splits. On visible work, plan pocket orientation at the design stage, choosing faces that will hide inside, under or behind, so the finished piece shows wood rather than a row of plugs.
Skill Progression: From Kit User to Joinery Judge
The mature pocket hole user is defined less by drilling skill than by judgment about where the joint belongs: hidden structural work, carcasses, frames and shop furniture, yes; fine exposed joinery and heirloom show surfaces, usually other methods. Learning that boundary, project by project, is the real curriculum. Keep notes on joints that held and the rare ones that disappointed, including stock, screw and setting, and your future designs will route around weaknesses automatically. That notebook, more than any jig upgrade, is what turns a kit into a craft.
A Note on When to Reach for a Different Joint
Honest tool guidance includes the exits. Pocket screws are a poor choice where the joint will be a visible show surface, where the stock is too thin to hold the screw’s threads with margin, where the material is a low-density board that cannot grip, and where traditional joinery’s strength or appearance is the point of the piece. Recognizing those cases does not diminish the jig; it protects its reputation, because joints fail publicly when they are asked to work where they never belonged. Keep the jig for the large territory where it is genuinely excellent, carcasses, frames, shop furniture and repairs, and let other joints own their own ground. A workshop that assigns each joint its proper work has fewer failures than a workshop with more tools and less judgment.
Pocket Hole Jig FAQ
Do I need a special drill bit?
Most kits include a step bit that cuts the hole and the screw seat in one pass, with a stop collar that sets the depth.
Which kit sets the depth for me?
The BORA lists self-adjusting depth. The Milescraft has four presets and the VEVOR uses an adjustable slider.
Which wood thicknesses can a pocket hole jig handle?
It varies by jig. Many cover common thicknesses from about half an inch up to an inch and a half, but check each listing for the stated range before buying.
Do I need special screws?
Yes. Pocket screws have a washer-style head that seats on the shoulder of the hole. Coarse thread suits softwoods, and fine thread suits hardwoods, so match the screw to the wood.
Should I use glue as well as screws?
Many woodworkers add glue to increase stiffness. Clamp the joint while the screws pull it tight, and wipe away excess glue before it dries.
Why did my screw come through the board?
The depth setting or screw length was probably wrong for the thickness. Measure the board, set the stop collar as the maker directs, and test on scrap.
Can I use a pocket hole jig on plywood?
Yes, often with coarse-thread screws, but check the maker's guidance. Test on scrap first, since plywood can splinter at the edges.
Does the jig need to be clamped to the work?
It should be held steady one way or another. Some jigs have a built-in clamp, others need a separate clamp or a bench mount.
Are pocket hole joints strong enough for furniture?
They are widely used in cabinets and furniture frames, especially with glue. For heavy load-bearing parts, follow plans that account for the joint.
When should I replace the drill bit?
When it cuts slowly, burns the wood, or leaves rough holes despite clearing chips. A dull bit is safer to replace than to force.
What size drill do I need for a pocket hole jig?
Most kits use a step bit that fits a standard cordless or corded drill. Check the bit shank described in the listing and make sure your chuck can hold it. A drill with steady speed control makes cleaner holes.
Can I use a pocket hole jig on hardwood?
Yes, but go slowly and clear chips often, since hardwood creates more heat and resistance. Fine-thread screws are the usual match for hardwood. Test on a scrap piece first.
Is a benchtop jig better than a handheld one?
Neither is better in every case. A benchtop jig is faster for repeated joints, while a handheld or clamp-on jig works better on large assemblies and for repairs. Choose by where you will do most of your work.
How far should pocket holes be from the board edge?
Follow the maker's chart, since the spacing depends on the jig and the board width. Holes placed too close to the edge can split the wood. Test on scrap before drilling a finished part.
Do pocket hole screws come in different lengths?
Yes, and the right length depends on board thickness. Using a screw that is too long can break through the face, while one that is too short gives a weak joint. Match the screw to the chart that comes with your jig.
Can I hide pocket holes?
Yes. Plan the joint so the holes face the inside or underside of the piece, or fill them with matching plugs. Sand the plugs flush for a cleaner look.
The Short Version
For a full set with a case, the VEVOR. For a light all-in-one kit, the General Tools. For preset thicknesses, the Milescraft. For automatic depth, the BORA. For a depth knob, the Massca. For an all metal body, the GOINGMAKE.


