A pin punch is a straight steel rod with a flat tip. You use it to drive a pin or rivet out of a hole after a first punch has loosened it. Solid pins need a plain straight punch. Roll pins are hollow, so a roll pin punch has a small nub on the tip that keeps it from slipping. The main choices are the sizes in the set, the length and the type of pin you work on.
The six sets below cover short and long punches in sizes from 1/16 inch up. Sizes and steel come from each listing page and are the makers’ own claims. We have not used these punches ourselves. Where a listing is missing a size list or has a clear typo, we say so.
As an Amazon Associate we earn from qualifying purchases. Links below are affiliate links, and they do not change the product information we give.
What to Look For
| Feature | Why it matters |
|---|---|
| Type | Solid pin and roll pin punches are shaped differently |
| Sizes | The tip must match the pin diameter closely |
| Length | Longer punches keep your hand clear of the work |
| Steel and grip | Heat treating and knurling affect wear and handling |
In this guide
Specs at a Glance
| Set | Pieces and sizes | Type | Notes |
|---|---|---|---|
| Mayhew 89035 | 6; 1/16 to 1/4 in | Pin | Heat treated; made in USA |
| TEKTON PNC93001 | 8; 1/16 to 1/4 in | Roll pin | 5160 high carbon steel |
| TEKTON PNC92001 | 9; 1/16 to 3/8 in | Straight pin | 5160 high carbon steel; laser marked |
| GEARWRENCH 82309 | 5; sizes not listed | Pin | Phosphate coated alloy steel; 7 in |
| General Tools SPC75 | 8; 1/16 to 5/16 in | Drive pin | Hardened tool steel; knurled; case |
| Crescent CPPS456 | 6; sizes not listed | Pin | 7 in long; forged and heat treated |
The 6 Best Pin Punch Sets

Top pickBest for shop and plant maintenance
1. Mayhew Tools 89035 Pin Punch Set, 6-Piece
Six tool steel punches in 1/16, 3/32, 1/8, 5/32, 3/16 and 1/4 inch, heat treated and shot-blast finished. The maker says they are for driving out loosened pins and keys after a solid punch has moved them, and lists the set as made in the USA.
Suits: shop and plant maintenance. Strengths: a clear size list and USA origin. Weaknesses: no punch over 1/4 inch. Skip it if you need larger pins.
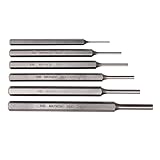
View Mayhew Tools 89035 Pin Punch Set, 6-Piece SAE Carded, Shot-Blast Finish on Amazon

Best for hollow roll pins
2. TEKTON Roll Pin Punch Set, 8-Piece (PNC93001)
Eight roll pin punches from 1/16 to 1/4 inch, including 5/64 and 7/32. The maker says each is individually heat treated, made from 5160 high carbon steel with a rust-preventative finish and laser size marks. They are built to drive out or insert hollow pins.
Suits: hollow roll pins. Strengths: many small sizes and clear marks. Weaknesses: not for solid pins. Skip it if your pins are solid.


Best for a wide range of solid pins
3. TEKTON Pin Punch Set, 9-Piece (PNC92001)
Nine straight pin punches from 1/16 up to 3/8 inch, also in 5160 high carbon steel and individually heat treated. The maker says they drive out or insert solid pins without damaging them. The page lists a weight of 1.4 pounds for the set.
Suits: a wide range of solid pins. Strengths: the biggest size span here. Weaknesses: heavier than the roll pin set. Skip it if you only handle tiny pins.


Best for final removal of pins and rivets
4. GEARWRENCH 5 Pc Pin Punch Set (82309)
A five piece set in phosphate coated alloy steel with a softened, tapered striking end meant to reduce chipping and ground surfaces for easy identification. The page size field says 5/16 inch by 7 inches, but the individual sizes in the set are not listed.
Suits: final removal of pins and rivets. Strengths: a tapered striking end. Weaknesses: the sizes are not stated. Skip it if you must know every size before ordering.


Best for machine shop and automotive pins
5. General Tools SPC75 Drive Pin Punches, Set of 8
Eight punches in 1/16, 3/32, 1/8, 5/32, 3/16, 7/32, 1/4 and 5/16 inch, made of hardened tool steel with knurled bodies and ends ground square. They come in a snap-button plastic case. The listed weight of 0.01 ounces is clearly a typo.
Suits: machine shop and automotive pins. Strengths: a case and a full size run. Weaknesses: an obvious weight typo. Skip it if you want a metal storage roll.

View General Tools SPC75 Drive Pin Punches, Set of 8 , Grey on Amazon

Best for pins in tight spots
6. Crescent 6 Piece Pin Punch Set, 7 in (CPPS456)
Six forged, heat treated punches, each 7 inches long to keep the hand away from obstructions. The maker mentions a striking cap design that reduces mushrooming, recessed stock for control and high-visibility bold size markings. The page does not give the tip sizes.
Suits: pins in tight spots. Strengths: long reach and bold marks. Weaknesses: no size list. Skip it if you need to match exact diameters from the page.

View Crescent 6 Piece Set, 7″, Pin Punch – CPPS456 on Amazon
Care and Setup
- Pick a punch that matches the pin diameter closely.
- Strike squarely with a hammer made for the job.
- Wear eye protection as the makers advise.
- Wipe the punches and store them in a roll or case.
Mistakes to Avoid
- Using a solid pin punch on a hollow roll pin.
- Choosing a punch that is wider than the hole.
- Hitting a mushroomed head without dressing it first.
- Assuming an unlisted size is in the set.
Solid Pins, Roll Pins and the Punch Sequence
Pin removal usually takes more than one tool, and using them in the right order protects both the pin and the part. Mechanics often follow a simple sequence. First, a starter or drift punch with a tapered or short body is used to break the pin loose and begin moving it. After the pin has started to travel, a longer pin punch with a straight shank follows it through the hole and drives it out. This is the pin punch’s job, and it is the tool in these sets.
The type of pin changes the punch you need:
- Solid pins (straight, dowel, taper): a plain straight pin punch with a flat tip works. Tapered pins must be driven from the small end toward the large end, so check which way the taper runs.
- Roll pins (spring pins): these are hollow, split tubes. A roll pin punch has a small nub or pilot on the tip that fits inside the pin and prevents the punch from slipping off the edge or collapsing the pin.
- Clevis pins, cotter pins and clips: these are removed by taking out the retaining clip first, not by punching.
Using a solid punch on a hollow pin often deforms the end and can lock the pin in the hole. The reverse is also a problem, since a roll pin punch with a nub may not push a solid pin cleanly. Look at the pin before you buy and keep both types if your work covers both.
Matching Punch Size to the Pin
The tip of a pin punch should be only a little smaller than the pin it drives. A punch that is too small can mushroom, slip off the pin, or bend as it travels through the hole. A punch that is too large will not enter the hole at all, and forcing it can mar the surrounding metal. The best fit is usually the largest punch that still passes freely through the hole.
Measure the pin with calipers or a drill gauge if you can. Common sets cover sizes from 1/16 inch up to 1/4 inch or beyond, in steps such as 1/16, 3/32, 1/8 and so on. The listings here show different ranges. Some give the sizes in the description and others do not, so read the product page carefully. A set that skips a size you often need will be frustrating.
Consider whether the work uses fractional sizes or metric ones. Many sets are in fractions of an inch, and metric pins fall between them. A close fit is fine, but a punch that is much smaller than the pin is a poor choice. If you work on mixed equipment, you may need both inch and metric sets.
Think about the length as well. A long punch gives you more reach and keeps your hand away from the work, but long, thin punches can flex. Short punches are stiffer and better for tight spaces. Matching both diameter and length gives better control and fewer slips.
Striking Technique and Safe Habits
Good technique prevents damaged pins, injuries and ruined punches. Start by securing the part in a vise, on a bench block or against a solid support, so that it cannot shift. Support the metal around the pin, especially for thin parts, so the hammer blow does not bend the workpiece. Place the punch on the center of the pin, keep it square to the surface, and hold it between your fingers with the hand as far from the striking end as practical.
Use a hammer suited to the job. A ball-peen or small machinist’s hammer is the common choice. A hammer that is too heavy increases the risk of bending or mushrooming the punch, while a very light hammer may do nothing. Strike squarely and firmly with controlled blows, not wild swings. If the pin does not move after several solid blows, stop and check whether it is a tapered pin, whether you are driving it the wrong direction, or whether it is seized and needs penetrating oil.
Wear safety glasses or a face shield every time. Hardened steel punches can chip, and metal fragments can fly. Keep bystanders away. Do not strike a punch with a hammer made of a hardness that conflicts with the punch, and do not use a punch as a chisel or a pry bar. Follow the maker’s instructions and any warnings printed on the packaging.
Steel, Grip and Features That Affect Durability
Pin punches live a hard life. The material, heat treatment and finish all affect how long they last. Many sets use high-carbon or alloy tool steel, heat treated to be hard at the tip and slightly tougher at the striking end. A properly treated punch resists wear without shattering. Makers often describe their steel and treatment in the listing, but these are claims, so look for consistent details and be cautious with vague ones.
Look at the striking end. A chamfered or tapered head helps reduce chipping, and a slightly softer head can reduce the risk of fragments. The shaft may be knurled for grip, which helps with oily hands. Some punches have a ground, flat tip squared to the shaft. A tip that is not square can slip off the pin, so it is worth checking with a straight edge.
Markings help you find the right size quickly. Laser marks or stamped sizes are easier to read than faint ones, and a bold marking helps in poor light. Storage matters too: a case, roll or holder keeps punches in order and protects the tips. Loose punches rattling together can chip or dull.
Consider the typical use. Occasional home mechanics may be satisfied with a basic set, while someone who works on equipment every week may want a heavier, more complete set with a good case. Prices vary with materials and finishing, and a mid-range set from a reliable maker is often a sound compromise.
Maintaining Punches and Knowing When to Replace Them
A little maintenance goes a long way. Wipe the punches after use to remove oil, dirt and metal dust, and apply a thin film of light oil to prevent rust before storing them. Check the striking end regularly. With repeated blows, the head can spread out into a mushroom shape. A mushroomed head can send chips flying and is a safety hazard. If the head is only slightly flared, you can dress it with a file or on a grinder, keeping the original chamfer, and avoid overheating the steel. If it is badly deformed, retire the punch.
Inspect the tip as well. A tip that has been chewed, rounded or bent will not drive pins well and can mar the workpiece. A slightly bent punch may be straightened, but a kink usually means it has been overloaded and may break. Do not heat and reshape punches unless you know how to temper them correctly.
Replace a punch if:
- the striking end is cracked or heavily mushroomed;
- the tip is chipped, rounded or no longer square;
- the shaft is bent or has a visible crack;
- deep rust has pitted the surface;
- size markings have worn so much that you cannot tell sizes apart.
Before buying a set, ask: What pin types do I work on? What range of sizes do I need? Do I need long reach or short stiffness? Does the listing give clear sizes and materials? If it does not, check the maker’s page or choose a set that does. Keep your set complete, and replace missing sizes individually when you can.
A Pre-Job Checklist for Driving Pins
Pin work is quick when the setup is right and annoying when it is not. Before you pick up a hammer, spend a minute on the checks below. They apply whether you reach for the Mayhew Tools 89035 Pin Punch Set, the TEKTON Roll Pin Punch Set, the TEKTON Pin Punch Set, the GEARWRENCH 5 Pc Pin Punch Set, the General Tools SPC75 Drive Pin Punches or the Crescent 6 Piece Pin Punch Set.
- Identify the pin. Is it solid, hollow or tapered?
- Choose a punch slightly smaller than the pin diameter so it drives straight through.
- Support the part so it cannot shift when you strike.
- Wear eye protection and keep your free hand clear of the strike zone.
- Look at the far side of the hole to see where the pin will come out.
If the part belongs to a machine, firearm or other regulated item, follow the maker’s service instructions or ask a qualified technician.
Which Set Suits Which Kind of Work
The sets in this guide overlap, but they lean in different directions. Some focus on roll pins, others on plain drive pins, and a few mix both. Think about the pins you meet most often.
| Situation | What to look for in a set |
|---|---|
| Mostly hollow roll pins | A roll pin punch with a nub tip, as in the TEKTON roll pin set |
| Mostly solid pins | Straight drive punches with flat tips |
| Mixed jobs around a garage | A nine or eight piece set with a range of sizes |
| Occasional light repairs | A smaller set that fits a drawer |
| Tight spaces | Shorter punches, if the listing gives lengths |
Check the size list on the listing and compare it to the pins you plan to remove. A set that skips your most common diameter will leave you improvising.
Errors That Damage Punches and Parts
Most broken punches and chewed pin holes trace back to a few repeatable mistakes. Avoiding them keeps both the tool and the workpiece in good shape.
- Using a punch that is too large, which can mushroom the pin or mark the hole.
- Striking at an angle instead of in line with the pin.
- Reaching for a heavy hammer when a light one gives better control.
- Skipping a drop of lubricant on a pin that has not moved in years, if the maker allows it.
- Continuing to hit a punch whose head has begun to spread.
When a punch head flattens or chips, retire it. Small pieces can fly off, and a damaged tip will not seat properly. A quick look over the set after each job takes seconds and keeps the tools ready for the next one.
Storage matters as well. Keep the punches in the case or roll that came with the set, sorted by size, so you can grab the right one without hunting. Wipe off dirt and oil after each job, and add a thin film of light oil if the maker suggests it, to slow surface rust. A punch that is clean, straight and easy to find gets used correctly, and that is what protects both the tool and the part you are working on.
Choosing a Pin Punch Set by Pins, Not by Piece Count
Pin punches fail in predictable ways: the tip mushrooms, the shaft bends, or the punch is simply the wrong diameter and ruins the pin it was meant to save. The six sets in this guide divide by punch style, size range, length and intended work, and choosing well means matching the set to the pins in your machines, firearms, vehicles and shop equipment. This section builds that matching method.
Solid pins and roll pins need different tips
A flat-faced pin punch drives solid pins, dowels and rivets. A roll pin punch carries a small pilot nub that centers in the hollow of a roll or spring pin and keeps the punch from collapsing or skating off the pin’s curled edge. Using a flat punch on roll pins works until it does not, usually by folding the pin’s end and making extraction far harder. If your work includes roll pins, in machinery, hinges, or equipment linkages, a dedicated roll pin set like the TEKTON option here is not a duplicate purchase; it is the correct tool arriving before the lesson does.
Size coverage should bracket your pins closely
A punch should match its pin closely: undersized punches concentrate force, slip off-center and peen the pin’s end wider, while oversized punches strike the surrounding part and scar it. List the pin diameters from your most-serviced equipment and choose a set whose sizes step tightly around them. Fine steps matter most at small diameters, where the difference between sizes is the difference between centered and ruined. Length matters too: longer punches reach recessed pins but flex and wander more, while short punches are stiffer for starting stubborn pins.
Starter punches and the two-stage habit
Experienced mechanics start a tight pin with a short, stout starter or taper punch to break it free, then finish with the pin punch that matches the diameter. Driving the whole travel with one long pin punch invites bending, especially on corroded pins. When comparing sets, note whether your likely work needs that two-stage approach and whether the set, or a companion you already own, covers the starting role.
Each Pick at Work: Six Sets on the Job
Mayhew Tools Pin Punch Set, 6-Piece
Mayhew is a striking-tool specialist, and this set suits users who want punches from a maker whose whole reputation rests on steel that takes hammer work. It fits general mechanical work: machinery maintenance, automotive pins, equipment repair. Buyers replacing a bent bargain set will understand this purchase immediately, because the upgrade is felt in straight driving and tips that stay shaped.
TEKTON Roll Pin Punch Set, 8-Piece (PNC93001)
The roll pin specialist. Its piloted tips suit spring pins in linkages, hinges, starters, small machinery and the many roll pins hidden in modern equipment. If your pin work is mostly roll pins, this set is not the alternative to a standard set; it is the main set, and a flat set becomes the supplement. The eight sizes cover the small-to-middle range where roll pins concentrate.
TEKTON Pin Punch Set, 9-Piece (PNC92001)
The broad flat-punch set from the same maker, covering a wide run of diameters for solid pins. It suits a general repair shop or serious home garage that meets varied pins across vehicles, tools and machines. Nine sizes reduce the temptation to make do with a near size, which is where pin damage begins. For a one-set purchase covering solid pins, this breadth is the argument.
GEARWRENCH 5 Pc Pin Punch Set
A compact core set for the mechanic whose pin work clusters in a few common sizes. GEARWRENCH’s audience is the automotive and equipment technician, and five well-chosen sizes in a portable format fit a service cart or mobile kit better than a comprehensive roll. If your pins come from a known fleet of machines, a tight set you can carry beats a wide set that lives across the shop.
General Tools SPC75 Drive Pin Punches, Set of 8
An accessible eight-piece set for the home workshop and light mechanical work: hinges, small machinery, tools and household equipment. It suits the user whose pin driving is occasional but real, and who wants proper sizes available when a pin must move rather than improvising with nails and bolts that damage both pin and part. As a first punch set, it teaches correct sizing habits from the start.
Crescent 6 Piece Pin Punch Set
A mid-size set from a broad tool brand, suited to general maintenance drawers and mixed workshops. It fits users who want a recognized name, a half-dozen useful sizes, and a set that can live in a general tool chest serving wood, metal and machinery tasks alike. For the shop that does a little of everything, that versatility is the point.
Head-to-Head: The Decisions That Matter
TEKTON roll pin set versus TEKTON pin punch set
Same maker, different pins. The roll pin set’s piloted tips exist for hollow spring pins; the flat set exists for solid pins. Choosing between them is not about quality or count but about an honest census of your pins. Machinery with spring pins argues one way; dowels, solid pins and rivet work argue the other. Many working shops own both, bought in the order their pin census dictated.
Mayhew six-piece versus TEKTON nine-piece
Depth of striking-tool specialization against breadth of sizes. Mayhew’s set appeals to users who drive pins hard and often and judge punches by survival. TEKTON’s wider set appeals to users whose pin variety is the challenge. If your pins are few and stubborn, choose the specialist. If your pins are many and cooperative, choose the range.
Compact five-piece versus comprehensive sets
The GEARWRENCH set bets on portability and the common sizes; the larger sets bet on never meeting an unmatched pin. Mobile technicians win the first bet; fixed shops with varied equipment win the second. The wrong bet in either direction shows up as either a heavy kit carried for nothing or a job stalled for one missing diameter.
First Pins: A Safe Driving Routine
Support the work on a solid surface with a hole or gap beneath the pin’s exit path, so the pin has somewhere to go and the part is not stressed. A bench block with holes exists for exactly this. Wear eye protection without exception: punches and pins are hardened steel, and chips from a mushroomed tip travel fast. Keep the struck end of every punch dressed and discard or regrind any punch whose head has spread, because that lip is where chips are born.
Start with the pin soaked in penetrating oil if corrosion is suspected, given time to work. Seat the correct punch squarely on the pin, hold it with fingers well up the shaft or with a punch holder if you use one, and begin with light taps to confirm alignment before committing to full blows. Drive in stages, checking that the pin moves evenly and the punch stays centered. Switch from starter to finishing punch as the pin begins to travel, and stop driving the moment the pin clears, rather than hammering the punch into the part. Practice the whole routine on a scrap hinge or a sacrificial pin and block first, and the first real pin, the one inside something you care about, will feel familiar instead of fateful.
Troubleshooting in Diagnostic Order
When a pin refuses to move or a job goes wrong, diagnose in this order. First, direction: many pins are tapered or shouldered and only drive out one way, and ten minutes of hammering against a shoulder accomplishes nothing but damage, so confirm the exit direction from the part’s design before force. Second, corrosion and preparation: a dry, rusted pin that has had no penetrating oil and no dwell time is the most common cause of a stuck pin. Third, punch size and type: an undersized or flat punch on a roll pin will fold, peen or skate, and correcting the tool often frees the pin immediately. Fourth, support: a part flexing on a soft or hollow support absorbs the blow that should move the pin, so re-support on a solid block with exit clearance. Fifth, technique: glancing, off-center blows bend punches and mushroom pins, and slowing down to reseat between blows restores progress. Sixth, the punch’s own condition: a bent shaft or mushroomed tip is a hazard and a cause, not just a symptom, and it should be dressed or retired before the next blow. In this order, most stuck pins move without drama and without new purchases.
Storage, Dressing and Building a Punch Drawer
Store punches in their roll, tray or a drilled block, sorted by size, with the tips protected; a punch drawer where steel rattles together dulls tips and hides sizes. Keep a small file or stone practice for dressing struck ends back to a slight chamfer, and inspect heads before every job, not after a chip flies. Mark sizes that have become hard to read, because a misread punch is a wrong punch with extra confidence. Build the drawer by census: roll pin punches after the first folded spring pin, a starter punch after the first bent long punch, holders after the first sore hand. Each addition then corresponds to a lesson already paid for, and the set you end up with fits your machines the way no generic assortment can.
Job Scenarios: Pin Punches Across the Shop
Driving roll pins in linkages and hinges
Spring pins hold together everything from starter drives to folding mechanisms, and they punish flat punches by folding at the seam. Seat a piloted roll pin punch, support the housing on a block with exit clearance, and drive steadily, watching the pin emerge evenly. The TEKTON roll pin set in this guide exists for this exact scene, and owners who meet roll pins monthly will wonder how they managed without the pilot.
Removing solid pins from machinery and tools
Solid pins in arbors, hinges, tool heads and machine linkages usually need the two-stage method: a starter to break corrosion’s grip, then the matched pin punch to finish the travel. The Mayhew and TEKTON flat sets serve this work, and the discipline is in the support and the staging, not in swinging harder. A pin that moves a fraction with each blow is a success in progress, not a problem.
Automotive and equipment pins
Vehicles and outdoor equipment concentrate pins in places that corrode enthusiastically. Penetrating oil with dwell time, a solid support improvised from sockets or blocks, and a compact set like the GEARWRENCH five-piece that lives in the service cart define this work. Expect the first movement to be the whole battle; after it, pins usually travel willingly.
Household and light shop pins
Door hinges, tool handles, small appliances and toys all hide pins that occasionally must move. The General Tools and Crescent sets cover this territory, and their real value is presence: the right diameter already in the drawer when a five-minute job would otherwise become a workaround with a nail that bends and a pin that mushrooms.
Decision Guide by User Type
The mechanic with a known fleet should buy the compact set that matches the fleet’s pins and carry it, which is the GEARWRENCH logic. The general repair shop should buy breadth in flat punches, the TEKTON nine-piece logic, and add the roll pin set when the census of spring pins justifies it, which for most mixed shops is sooner than expected. The user who drives pins hard in machinery should weight maker specialization, the Mayhew logic, because their failure mode is bent and mushroomed tools, not missing sizes. The homeowner should buy the accessible eight-piece class and correct habits, since their pins are few but their improvisation risk is high. In all cases, the next purchase after any set is a bench block with holes, the unglamorous partner that makes every punch work better.
Ownership Habits: The Dressed, Sorted Drawer
Dress struck ends on a schedule, not after an injury: a mushroomed head gets ground back to a clean chamfer or the punch leaves service. Keep punches oiled lightly in damp shops, because rust on a shaft makes a punch stick in the bore it just cleared. Test a suspect punch for straightness by rolling it on a flat surface before blaming your aim. And keep a written size map inside the roll or tray if markings fade, because a punch chosen by measurement beats a punch chosen by memory every single time. These habits keep a punch set a precision kit rather than a bundle of steel sticks.
Technique Notes: Feel, Sound and the Moving Pin
Experienced mechanics read a pin job through the hammer. A solid, ringing blow that moves the pin slightly feels different from a dead blow absorbed by flexing support, and from the sharp change in note when a punch meets a shoulder instead of a pin face. Build the habit of pausing every few blows to look: is the pin emerging evenly, is the punch centered, is the part’s surface unmarked? Those pauses feel slow on an easy pin and save the job on a hard one, because nearly every pin disaster announces itself quietly several blows before it becomes irreversible.
Receiving the pin and protecting the part
Plan the pin’s exit before the first blow: where it will land, whether it can fall into a mechanism, and whether its exit will strike a finished surface. A magnet, a blob of grease on the punch tip for the final stage, or a hand cupped beneath the exit each solve the falling problem differently, and choosing one in advance beats fishing inside a gearbox. Protect surrounding finishes with tape or a shield plate when the punch might slip, because the slip you plan for rarely happens and the one you ignore leaves the mark. On reassembly, pins go back with the same care: cleaned, lightly oiled where appropriate, started square by hand pressure on the punch, and driven home in stages with alignment checked as the parts come together.
When to stop and change strategy
Judgment in pin work is knowing the escalation ladder and climbing it one rung at a time: penetrating oil and patience, then heat where the assembly allows it, then a press where one is available, and only then maximum hammer work. Each rung exists because the rung below it sometimes fails, and skipping rungs is how pins mushroom, housings crack and a maintenance job becomes a machining job. If a pin has not moved after honest effort at your current rung, stop, reassess direction and support, and climb deliberately. The mechanics whose work looks effortless are not stronger; they are simply never in a hurry at the moment hurry does the damage.
Materials and Corrosion Notes
What pins are made of changes how they move
Soft steel pins in cast housings, hardened dowels in steel plates, and spring steel roll pins each answer force differently. Hardened pins transmit the blow cleanly and move suddenly when they move; soft pins absorb and mushroom if the punch is undersized. Roll pins store energy in their spring and can jump on exit, which is another reason the exit path gets planned. Identifying the pin’s type before the first blow, by its end profile and the assembly it serves, sets the punch choice, the support and the expected effort in one decision.
Corrosion, galling and dissimilar metals
Pins seize for chemical reasons as often as mechanical ones: rust in steel assemblies, galvanic corrosion where metals differ, and galling where stainless meets stainless under pressure. Penetrating oil addresses the first, patience and sometimes heat the second, and anti-seize on reassembly prevents a repeat performance. A pin that will live in a corrosive environment deserves a note in your maintenance record, because the next removal is being scheduled by the conditions of this one, whether you write it down or not.
Skill Progression: Building a Pin Census
Professionals who service the same equipment keep a pin census: machine, location, pin type and size, punch used, and any drama from the last removal. Home mechanics can steal the idea in miniature with a note card in the punch roll. The census converts the second encounter with any pin from an investigation into a procedure, and it reveals which sizes your world actually contains, which is the only honest basis for expanding a set. Within a year, that card becomes the most valuable item in the drawer, outranking any single punch in it.
Punches as part of a striking toolkit
Pin punches live alongside center punches, starter punches, chisels and the hammers that drive them, and the kit works as a system: the right hammer weight for the punch size, a block that supports the work, eye protection that is actually worn. Review the system once in a while rather than tool by tool, because failures cluster at the joints between tools, the mushroomed head nobody dressed, the block that was not quite solid, the glasses that were across the room. A system kept whole makes pin work feel routine, which is the highest compliment mechanical work can earn.
A Note on the Punch You Reach For First
Every punch drawer develops a favorite, the size that fits the machine you service most, and that favorite quietly teaches the standard the rest of the set is judged by. Protect that punch: keep its head dressed, its tip true, and a spare in the same size if downtime matters, because favorites wear first precisely because they work most. When a favorite finally bends or mushrooms beyond dressing, replace it with the same quality that made it the favorite rather than demoting the job to whatever size is nearest. Jobs cluster around favorites for a reason, and a drawer organized around that truth, depth at the common sizes, breadth for the rare ones, serves a working shop better than uniform coverage bought on a chart.
Labeling, measuring and the honest fit test
Before any pin is driven, the punch can be test-fitted to the pin or its bore by hand, and that ten-second check catches most size errors while they are still free. Where markings have worn, measure the punch tip with calipers and write the size on the tray rather than trusting a memory that will be busiest exactly when it is consulted. Keep one inexpensive set of spares for lending and for dirty work, because punches lent casually return bent casually, and a shop’s best set should never be the set that travels. These are clerical habits, not mechanical ones, and that is their strength: they prevent the class of failure that skill at the hammer cannot fix, which is the wrong tool arriving confidently at the right pin.
A final word on patience as a driving force
Pin work rewards the mechanic who treats the first blow as a question rather than a statement. Ask the pin how it intends to move, with light, centered taps and honest support, and it will usually tell you before anything is damaged. The sets in this guide differ in size coverage, specialization and steel, but they all obey the same law: force applied in the right order, preparation, alignment, then power, moves pins that brute effort only ruins. Learn that order on forgiving work and it will be there on the day a pin inside something irreplaceable refuses to move, which is the day this whole category quietly earns its drawer space.
Pin Punch FAQ
What is the difference between a pin punch and a center punch?
A pin punch has a flat tip and drives pins out. A center punch has a point and marks a spot for drilling.
Which set covers the largest pins?
The TEKTON 9-piece lists up to 3/8 inch. The Mayhew set stops at 1/4 inch.
Can I use a nail or a bolt as a pin punch?
It is not a good idea. They are not hardened for striking and can mushroom, bend or throw fragments. A proper punch is safer and gives better control.
How do I know which way to drive a tapered pin?
Drive it from the small end toward the large end. Look at both ends of the pin before you start, and check the equipment's manual if you are unsure.
Why does my roll pin collapse when I drive it out?
A solid punch may crush the hollow end. Use a roll pin punch with a nub that sits inside the pin, and support the work from behind.
What hammer should I use with pin punches?
A small ball-peen or machinist's hammer is common. Choose one heavy enough to drive the pin with controlled blows without being awkward to swing.
Do I need a separate starter punch?
Often yes. A starter or drift punch breaks the pin loose, and a longer pin punch follows through. Many mechanics use both in sequence.
How do I keep the pin from falling into the mechanism?
Support the area and, if possible, hold a rag or magnet nearby. Some jobs use a pin holder or a backup punch to catch the pin as it exits.
Is penetrating oil useful on stuck pins?
It can help loosen seized pins, but let it soak for the time the product says and keep it away from sparks or heat.
The Short Version
For a USA made set, the Mayhew. For roll pins, the TEKTON 8-piece. For wide solid pin sizes, the TEKTON 9-piece. For a tapered striking end, the GEARWRENCH. For a case and knurled bodies, the General Tools. For long reach, the Crescent.