A flush cut saw trims a plug, peg, dowel or tenon end level with the surface around it. The blade is thin and flexible, the teeth usually have no set, and the cut is made on the pull stroke so the blade lies flat on the work. The points to compare are blade length, tooth count, whether the saw has one edge or two and whether the blade can be replaced.
The six saws below range from a 6 inch Japanese pull saw to a metal handled saw with a pivot blade and a two blade kit. Sizes, tooth counts and materials come from each listing page and are the makers’ own claims. We have not used these saws ourselves. Where a page gives two different figures, we say so rather than pick one.
As an Amazon Associate we earn from qualifying purchases. Links below are affiliate links, and they do not change the product information we give.
What to Look For
| Feature | Why it matters |
|---|---|
| Blade thickness | A thin plate flexes flat against the surface |
| Teeth | No-set teeth leave the surface less marked |
| Edges | Two edges give a coarse and a fine pitch in one tool |
| Blade change | A replaceable blade extends the life of the handle |
In this guide
Specs at a Glance
| Saw | Blade | Teeth | Notes |
|---|---|---|---|
| SUIZAN 6 in | 5.91 in; 0.016 in thick | 17 and 20 TPI | No-set; two screws hold the blade; beech handle |
| RUITOOL 6 in | 6 in; SK5 steel | 14 and 17 TPI (table says 17) | Double edge; beech handle; lifetime warranty listed |
| GYOKUCHO 1151 | 5 in or 12.5 cm (conflict) | 32 and 21 TPI | 0.0012 in blade as listed; beech handle |
| DEWALT DWHT20541 | 5 in | 22 (table) | Double-sided flexible blade; alloy steel |
| TAJIMA JPR-SET | Two blades | 16 and 19 TPI | Quick-release; elastomer handle; canvas case |
| Zona 35-400 | 6-1/2 in | 16 TPI | 0.012 in kerf; 1-1/4 in cut depth; no set |
The 6 Best Flush Cut Saws

Top pickBest for plugs, pegs and dowels
1. SUIZAN Flush Cut Saw, 6 in
A double edge Japanese pull saw with a 5.91 inch blade, 0.016 inch thick, with no-set teeth. One edge is 17 TPI and the other 20 TPI, each marked on the blade. The blade is held by two screws so a replacement can be fitted, and the handle is beech. The maker says it is made in Sanjo, Niigata. The listing weight is 2.47 ounces.
Suits: plugs, pegs and dowels. Strengths: a replaceable blade and marked edges. Weaknesses: the warranty is listed as 30 days. Skip it if you want a metal handled saw.

View SUIZAN Flush Cut Saw 6″ – Japanese Pullsaw Hand Saws Wood Cutting on Amazon

Best for finish cuts on hardwood and softwood
2. RUITOOL Japanese Hand Saw, 6 Inch Double Edge
A 6 inch Ryoba style pull saw with an SK5 steel blade, a beech handle and teeth the maker says are hardened to HRC 60 to 63. One side is listed as 17 TPI for hardwood and the other as 14 TPI for softwood, though the details table lists 17 teeth. A lifetime warranty is listed. The item weight is 0.11 kg.
Suits: finish cuts on hardwood and softwood. Strengths: two pitches and a long warranty listing. Weaknesses: the tooth figures are not consistent. Skip it if you want a saw with a replaceable blade.
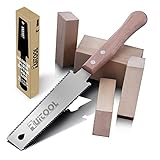
View RUITOOL Japanese Hand Saw 6 Inch Double Edge Ryoba Pull Saw for Flush Cuts on Amazon
Best for very fine cuts in narrow stock
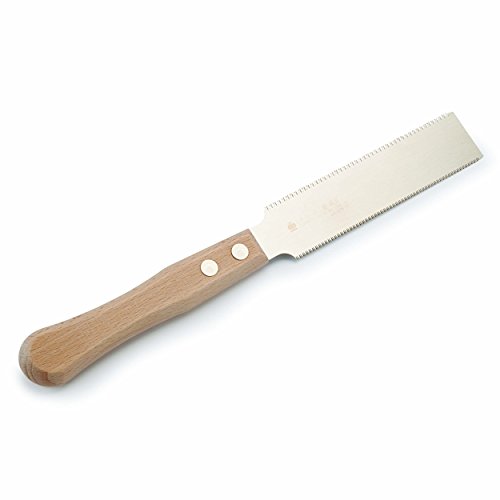
3. GYOKUCHO Flush Cutting Saw Ryoba, 125mm (1151)
A small dual-edge pull saw with impulse hardened teeth and a beech handle. A bullet gives the blade as 5 inches by 1-1/4 inches with 32 cross-cut teeth per inch on one edge and 21 on the other, and a very thin 0.0012 inch blade. The details table gives the blade length as 12.5 centimeters and the item weight as 1.92 ounces, and also shows a tooth count that does not match the bullets.
Suits: very fine cuts in narrow stock. Strengths: a fine 32 TPI edge. Weaknesses: conflicting figures on the page. Skip it if you cut thick plugs.

Best for trimming in a general toolbox
4. DEWALT DWHT20541 Flush Cut Pull Saw
A hand saw with a 5 inch alloy steel blade that is double-sided for inside cuts from the left or right. The listing says the blade is flexible for flush cuts and shows 22 teeth in the table. The weight is 4.64 ounces. The page gives few other details, and the surface recommendation reads plastic, so check the maker’s notes before using it on wood.
Suits: trimming in a general toolbox. Strengths: both sides cut, so left and right work is easy. Weaknesses: little detail on tooth pitch. Skip it if you need exact pitch figures.


Best for a user who wants a coarse and a fine blade
5. TAJIMA Pull-Stroke Saw Set, Handle and 2 Blades
A kit with an elastomer wrapped handle, a 16 TPI blade (GNB-265), a 19 TPI blade (GNB-250) and a tri-fold canvas case. The maker lists SK-95 high carbon steel, impulse hardened teeth and a quick-release blade retainer. The weight is 13.44 ounces. The table gives 14 teeth, which does not match the two blades named in the bullet.
Suits: a user who wants a coarse and a fine blade. Strengths: quick blade change and a carry case. Weaknesses: heavier than the wood handled saws. Skip it if you want a single light saw.
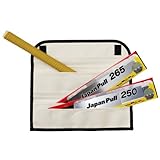
View TAJIMA Pull-Stroke Saw Set, Japanese Flush Cut Hand Saws, Handle and 2 Blades on Amazon

Best for reaching into tight spots
6. Zona 35-400 Medium Flush Cut Saw
A 16 TPI saw with a 6-1/2 inch blade, a 0.012 inch kerf and a 1-1/4 inch cut depth. The maker says the flexible, no-set teeth cut dowels, pegs and plugs flush without marring the surface and also cut tenon ends and trim. The details table oddly lists the power source as corded electric, which does not fit a hand saw, so treat that line as an error. The blade is high speed steel.
Suits: reaching into tight spots. Strengths: a deeper cut than the smallest blades. Weaknesses: a muddled spec table. Skip it if you want a wooden handle.

Care and Setup
- Cut on the pull stroke with light pressure and let the teeth work.
- Keep the flat of the blade against the surface you want to trim to.
- Wipe the blade clean after use and store it dry.
- Follow each maker’s instructions for blade changes.
Mistakes to Avoid
- Pushing hard on a thin blade, which can kink it.
- Expecting one saw to rip thick stock; flush cut saws are for trimming.
- Trusting a single spec line when the listing gives two figures.
- Forgetting that replacement blades are often sold separately.
When a Flush Cut Saw Is the Right Tool
A flush cut saw has one job: to trim something level with the surface it sits in or against. Typical tasks include cutting wooden plugs that cover screw holes, trimming dowel ends in a joint, shaving pegs from a mortise and tenon joint, and cutting the protruding end of a tenon. In trim work, it also cuts the bottom of a door casing so flooring can slip underneath. The thin, flexible blade lies flat on the surface, and the teeth, which have no set according to the listings in this guide, do not scratch the wood the way a saw with set teeth would.
It is not a general purpose saw. The blade is thin, so it will not cut straight through thick stock, and the flexibility that helps it lie flat can make it wander in deep cuts. If the job is to rip a board or cut a long straight line, use a different saw. Flush cut saws also have limits in tight spots, because the handle needs room to move. For very small plugs a chisel may be easier. Consider the frequency of your work: woodworkers who build furniture or install trim will use one often, while a home owner may use it a few times a year. Think about the material too, since softwood, hardwood and plastic respond differently, and check that the listing says the saw suits what you plan to cut.
Single Edge or Double Edge Blades
Several saws here, such as the SUIZAN, RUITOOL and GYOKUCHO, have teeth on both edges of the blade, while others cut along a single edge. Double-edged flush cut saws are designed so that both edges cut flush, often with different tooth counts on each side. A finer edge gives a smoother finish on hardwood or small work, while a coarser edge cuts faster in thicker stock or softer wood. Having both on one blade saves carrying two saws.
A double-edge blade has a tradeoff: the unused edge sits near the work, so be careful about where the teeth are while you cut, to avoid nicking the surface or your hand. Some saws, like the DEWALT in this guide, are double-sided so that you can make flush cuts with either side, which suits left- and right-handed work and cuts in tight spots. A single-edge saw is simpler and leaves one side of the blade free as a guide. Check which edges are flush with the surface, since on some saws only one is truly flat to the work. Look at the listing for tooth counts on each edge, and note that some listings disagree with themselves, as the post points out. If it matters, ask the seller or compare the specification with the photos.
Fixed Blade or Replaceable Blade Kits
Thin blades eventually dull or bend, and how you deal with that depends on the saw. Some flush cut saws are sold with a fixed blade, and when the teeth wear out you replace the whole saw or look for a repair. Others, like the SUIZAN and the TAJIMA set, use a blade you can replace, held by screws or a quick-release retainer. This is helpful if you cut often or hit the occasional nail or screw, since the handle can serve for many blades.
Check whether replacement blades are available, whether the listing includes spares and how much they cost. Remember that blades are often sold separately and that the model number matters, because blades from different makers rarely interchange. A kit with two blades, such as the TAJIMA, lets you carry a coarse and a fine cutting edge. A handle matters as well: wood handles feel warm in the hand, while rubberized or metal handles are more durable in a workshop. Think about the length of the blade in relation to the work. A longer blade gives a longer stroke but flexes more. A short blade is easier to control in a small space. Compare weights, which range from a few ounces to well over ten ounces among the saws listed, and choose the one that feels comfortable for the amount of work you plan to do.
Technique for Flush Cuts Without Marring the Surface
Protect the surface first. Place a thin shim, such as a piece of card or a sheet of thin plastic, between the blade and the work, or lay masking tape over the area around the plug. The shim sits between the teeth and the surface, and leaves a hair of wood standing proud that you can pare or sand flush afterwards. This is a good habit when you are working on finished furniture or hardwood floors.
Start with the blade flat against the surface, holding the handle low so the plate does not buckle. Pull gently with a light touch, since the saw cuts on the pull stroke. Keep the stroke steady and long, and let the teeth do the work. Do not bend the blade upward as you cut, because that makes it dip into the wood and gouges the surface. If the blade starts to bind, back off and ease the pressure. For a peg in a joint, cut in several passes around the peg from different sides, so you do not tear off the edge. Finish by planing, chiseling or sanding the last bit flush. Work in good light so you can see the gap between the blade and the surface. Clamp the work if it can move, and keep your free hand away from the line of travel. If you are unsure, practice on scrap wood first.
Maintenance, Storage and Signs of Wear
Thin blades are easily damaged. Keep a flush cut saw in a sheath, a blade guard or a case so teeth do not catch on other tools, and so the blade does not bend. Wipe off sawdust and resin with a soft cloth, and use a little solvent if resin builds up, following the maker’s advice. Keep the blade dry, and if you live in a damp area, add a thin film of light oil on the metal. Never leave the saw loose in a bag with heavy tools.
Look for signs that the saw is tiring. If you must press harder, if the cut burns or tears, or if the saw wanders, the teeth may be dull. A kinked blade is a common failure and usually cannot be repaired well, so replace it. Check that blade screws or retainers are tight and the handle is not cracked. Teeth that are missing or bent are a reason to replace the blade. Many Japanese-style saws have teeth that are impulse hardened and cannot be resharpened by hand, so replacement is the norm, but the maker’s notes will tell you. Watch your fingers when you change blades, and follow the instructions in the manual. If a listing has obvious errors, like a power source for a hand saw, do not rely on the specification table, and use the photographs and description instead.
Which Flush Cut Saw Should You Buy?
The best flush cut saw is the one that matches the size of your plugs and how often you will change blades. Match your main job to the saw below, then check the listing for the details that matter.
- Occasional plugs and dowels in furniture: the SUIZAN is a simple double edge saw with marked edges and a blade held by two screws, so it can be replaced when it dulls.
- Hardwood and softwood on one saw: the RUITOOL offers two pitches on one blade, though its listing gives inconsistent tooth figures, so read the page closely.
- Very fine work in narrow stock: the GYOKUCHO has the finest edge in the guide, but its page also contradicts itself, so confirm the blade size before ordering.
- A general toolbox saw for left and right cuts: the DEWALT is double-sided and suits quick trimming where you do not need exact pitch details.
- Coarse and fine blades with a carry case: the TAJIMA set gives you two blades and a quick-release retainer, at the cost of extra weight.
- Reaching a deeper cut: the Zona has a longer blade and a deeper cut depth than the smallest saws, which helps with thicker pegs and tenon ends.
If you are unsure, start with a double edge saw that has a replaceable blade. It lets you cut coarse and fine without buying two tools, and it keeps the handle useful after the first blade wears out. If you trim often, a kit with spare blades makes more sense than a single fixed blade saw.
What to Check Before You Buy, and Who Should Skip a Flush Cut Saw
Before you buy a flush cut saw, confirm that the blade length, tooth pitch and blade change method suit your work. These checks take a minute and prevent most disappointments.
- Compare the blade length with the size of the plugs or tenons you cut, and leave room for the handle to move.
- Read the tooth figures on both edges, and be wary of listings that give two different numbers.
- Check whether the blade is replaceable and whether spares are sold for that exact model.
- Look at what is included, such as a case, a second blade or a guard.
- Confirm the warranty or return terms on the listing, since they differ between makers.
- Check the materials the maker says the saw is meant for, especially if you cut plastic.
There are honest trade-offs. These saws only trim, they do not cut thick stock, and a thin blade can kink if you force it. Several listings here contain conflicting specs, which means you should rely on the photos and description rather than a single table line. A light wood handled saw is pleasant but gives less protection than a case.
Who should skip it: anyone who rarely trims plugs may manage with a chisel and sandpaper, and anyone who needs to rip boards needs a different saw. Compare the picks above, check the current listing for size and what is included, then choose the one that fits how you will use it.
Reading the Six Flush Cut Saws Side by Side
A flush cut saw has one job — trimming a protrusion level with a surface without damaging that surface — but these six approach it with different blade formats, edge configurations and replacement strategies. Compare them on how the blade flexes, whether one edge or two suits your work, and how you will feel about the blade’s end of life: resharpen, or replace.
SUIZAN 6 inch versus RUITOOL double edge
The SUIZAN is the focused single-purpose pattern most woodworkers picture: a flexible blade with teeth set to cut flush on one face. The RUITOOL’s double edge puts two tooth patterns on one blade, so one tool covers both finer and faster cutting — useful when you trim everything from delicate inlay pegs to chunkier dowels in the same session. The single-edge specialist rewards dedicated use; the double edge rewards variety and a smaller tool roll.
GYOKUCHO Ryoba flush saw versus DEWALT pull saw
The Gyokucho brings Japanese blade-making to the flush task, with the fine, clean cut that tradition is known for and a blade format that suits careful furniture work. The DEWALT takes the Western jobsite route: a familiar handle, a pull-stroke action, and availability that suits working carpenters who trim on site as often as in the shop. Both cut flush; the choice is between the finest finish at the bench and the most familiar feel in the hand on site.
TAJIMA set versus Zona 35-400
The TAJIMA set — handle plus two blades — is a system purchase: swap blades for different tasks, replace a worn blade without replacing the handle, and keep one handle in the kit. The Zona is the simple, dedicated saw from a hobby-tool maker, well matched to model work, small dowels and occasional trimming. If flush cutting is a weekly event, the replaceable-blade system usually wins on running cost and readiness; if it is a monthly event, the simple saw’s lack of parts to lose is its own virtue.
Your First Session: Setup in the Right Order
Learn this saw on scrap before it ever meets a finished surface. Glue or pin a few dowels into a scrap board, let them set, and trim them flush while you can still afford mistakes. Protect the practice surface with thin card or tape beside the cut, as you would on real work, so the habit forms early. Flex the blade gently so its face rides flat on the surface, start the cut with short strokes, and keep the blade’s flat side — the side with no tooth set toward the surface — registered down. Afterwards, run a fingertip lightly over the trimmed dowels: you are calibrating what flush feels like, and learning how much a final pare or sand is still needed.
Technique: Flex, Stroke and Surface Protection
Good flush cutting is mostly surface management. Keep the blade pressed flat with light, even pressure from the hand nearest the cut, and let the teeth work with a steady draw rather than forcing the blade through. Protect surrounding finish with card, tape or a thin shim under the blade’s spine wherever the surface matters — teeth are not the only part that can mark; a flexed blade’s corner digs in if you roll it. Work around stubborn protrusions from two sides rather than levering the blade, because levering is how blades kink and how protrusions snap below the surface instead of cutting at it. For very proud material, take it down in two passes: a rough trim slightly above the surface, then the true flush pass with the blade fully registered.
Troubleshooting in Diagnostic Order
If flush cuts are marking the surface or missing flush, check in order. First, blade orientation: the unset side must face the surface — a surprising share of scratches are simply a blade flipped the wrong way. Second, protection: if the surface is unprotected, add card or tape before blaming technique. Third, pressure distribution: pressing hard at the handle end lifts the far end of the blade and leaves a ramp; press near the cut instead. Fourth, blade condition: a kinked or burred blade cannot ride flat, and no technique compensates — replace or retire it. Only after those checks should you question the tool choice itself: very hard protrusions in very soft surrounding surfaces are genuinely difficult for any saw, and a paring chisel finish pass may be the honest answer.
Care, Storage and Blade Manners
Thin, flexible blades kink when they are stored badly and rust when they are stored damp. Keep the saw flat in a till or sleeve, teeth guarded, and never toss it into a toolbox where heavier tools land on it. Wipe the blade clean of resin and glue after use — build-up changes how the blade rides on the surface and can itself scratch finish. Check the teeth line against a straight surface occasionally: a blade that no longer lies flat has told you its service is over. Handle these saws by the handle whenever you move around the shop; the thin blade is easy to forget and unforgiving to brush against.
Choosing by the Work You Actually Do
Furniture makers trimming dowels, plugs and wedged tenons should favour the finest-cutting single-purpose saw. Makers who trim varied materials in varied sizes get more from a double-edge or the blade-swap set. Site carpenters should take the robust, familiar pull saw. Hobbyists and model makers are well served by the compact dedicated saw. And anyone who flush-cuts weekly should decide the replaceable-blade question up front, because a perpetually dull flush saw quietly trains you to accept scratched surfaces as normal.
Why does the protrusion sometimes snap off below the surface instead of cutting?
Snapping happens when the blade stops slicing and starts levering — usually because the cut is being forced, the blade is dull, or the protrusion is tall and unsupported. Take tall material down in stages, keep the blade flat and moving, and support the protrusion with your free hand’s fingers well clear of the teeth so it cannot flex away from the cut. A clean slice at the base leaves the surface intact; a snap tears fibres out from below it.
Can I use a flush cut saw left-handed?
Yes — flush saws are among the more ambidextrous hand saws, because the cut is guided by the surface rather than by a dominant-eye line. Keep the unset side of the blade down, position your body so the draw stroke is comfortable, and protect the surface as usual. If a blade has a distinctly handed handle, test the grip before buying; the blade itself does not care which hand drives it.
Work Scenarios, Walked Through
Trimming wedged tenons on a stool or a workbench top is the flush saw’s most satisfying job. The wedges and tenon ends stand proud, the surrounding surface is the show face, and the saw — protected by card at the blade’s corners, flexed flat, drawn steadily — brings each protrusion down until a fingertip finds nothing. A light pare or a few sanding strokes finish what the saw started, and the joint’s mechanical lock stays hidden under a surface that looks untouched.
Flushing dowels in frame repairs and flat-pack rescue work is the everyday scenario. Dowels shear, pegs stand proud, and plugs sit high; the flush saw corrects each in seconds without the collateral damage a chisel blow can cause in surrounding material. Work around each dowel from two directions so the fibres at the base are severed rather than bent, and check by touch rather than eye — flush is a condition fingertips judge better than vision.
Cutting protruding screws’ wooden plugs, trimming inlay stringing level, and shaving the nubs of through-tenons on the inside of a carcass — where no plane fits — complete the pattern: the flush saw works wherever a protrusion meets a surface that must survive. Once owned, it is reached for weekly by makers who previously managed without it for years, which is the surest sign of a tool that fills a real gap rather than a marketed one.
Flush Saws Among Their Neighbours
The flush saw’s neighbours clarify its narrow, genuine niche. A standard pull saw or panel saw can trim a protrusion, but its set teeth rake the surrounding surface — the flush saw’s unset face is the entire invention. A paring chisel finishes flush work beautifully and often follows the saw for the last whisper, but as a first tool it risks digging in and demands more skill per cut. A block plane levels protrusions on open surfaces superbly and cannot enter corners or work against obstructions at all. A multi-tool with a flush blade powers through site work but leaves a rougher surface and a louder afternoon. The hand flush saw’s claim is precision plus silence plus control on finished surfaces — modest claims, honestly delivered, which is why it coexists with all four neighbours instead of replacing any of them.
A Pre-Purchase Checklist
Five quick decisions sort the six picks. One: edge configuration — varied trimming argues for two edges or two blades; one repeated task argues for the dedicated single edge. Two: blade economics — frequent users should price the replacement-blade route before buying, because a saw you can afford to re-blade stays sharp, and a perpetually dull flush saw damages the surfaces it exists to protect. Three: protrusion sizes — match blade stiffness and tooth size to the dowels and pegs you actually trim; the finest blade on chunky hardwood dowels is misery in both directions. Four: handle comfort in a flexed-blade grip, which is unlike any other saw grip in the shop — you hold it more like a trowel than a saw. Five: surface sensitivity — if most of your work is finished furniture, favour the finest cut; if it is workshop jigs and site repairs, favour robustness. With those settled, the right saw is the one whose compromises all land on work you do not do.
Building Flush Cutting Into Your Everyday Workflow
The flush saw rewards being kept ready. A blade guard on, the saw racked at the bench rather than boxed in a cupboard, and a small stock of card and tape protectors in the same drawer — that is the whole system, and it means a protruding dowel gets corrected in the moment it is noticed instead of being added to a list of small defects that quietly multiply across a project. Small tools live or die by this friction: every step between noticing and cutting is a reason to postpone, and postponed flush work becomes visible finish work later.
Build the surface-protection habit until it is reflexive: card down before blade down, on every surface you would be sorry to scratch, including the ones you are sure you will not touch this time. The saw’s entire purpose is protecting surfaces while cutting against them; the card is cheap insurance for the moments when technique, fatigue or a hidden knot in the dowel conspire otherwise.
How do I flush-cut in a corner where the blade cannot flex flat?
Work the protrusion down in stages from the accessible sides, rotating the work if it can be moved, and finish the last material against the corner with the blade held as flat as the geometry allows and strokes shortened to the blade’s front section. If a final nub remains where no saw can lie flat, a sharp paring chisel used carefully, bevel registered on the surface, removes it without the saw ever being forced into a bend it cannot survive.
Can I flush-cut protruding wooden plugs in a floor or a large fixed panel?
Yes — this is one of the saw’s best uses, because the work cannot come to the bench. Protect the surrounding surface generously, since you will be working at an awkward angle, kneel or position yourself so the draw stroke stays controlled rather than reaching, and take the plug down in two passes. Awkward position is the main hazard to quality, so anything that improves your stance improves the cut more than any blade upgrade would.
How do I trim a protrusion on a vertical surface, like a fitted panel or a door?
Gravity stops helping, so your blade control must replace it: support the blade’s flat face against the surface with the hand nearest the cut, work in short strokes, and protect the surface even more generously than on horizontal work, because a tired arm drops the blade’s corner eventually. Work downward strokes where the design allows so any slip travels away from finished areas, and stage tall protrusions in two passes as usual. The cut itself is identical; only the ergonomics change, and respecting that difference is what keeps vertical flush work clean.
What should I do if I scratch a finished surface while flush cutting?
Stop, and assess the scratch before reaching for abrasives: a shallow mark in a film finish often responds to careful local repair of the finish itself, while a scratch in bare wood may steam out if the fibres are compressed rather than cut, or may need to be blended by lightly working the surrounding area so the eye stops finding it. Then fix the cause — protection, blade orientation or pressure — before the next cut, because an unrepaired process produces a matching scratch on the next piece with complete reliability.
How fine a finish does a flush cut leave?
Fine enough that on most work a light sanding or a few paring strokes complete the surface — but judge by species and direction: a flush cut across end grain, as on a dowel, leaves a surface that reads differently from the surrounding long grain no matter how clean the cut, and a whisper of sanding blends it. The saw’s promise is level, not invisible, and makers who expect level-plus-a-minute get exactly the result the tool advertises.
How do I trim softwood plugs in hardwood, or the reverse, without a step?
Mismatched hardness is the flush saw’s subtle test: the blade wants to dive into the softer material and ride over the harder. Slow down at the boundary, keep the blade registered on the harder surface if that is the show face, and finish with a paring pass that treats the two materials as one surface. Where the plug is softer than the surround, expect the saw to try to dish it — counter by taking the last material off with strokes that travel from the hard surface onto the plug, never the reverse, so the blade’s reference is always the material that must not be cut.
Is a flush cut saw useful outside woodworking?
Within reason, yes: trimming plastic wall plugs, cutting soft tubing and dowelling in model work, and similar household tasks all suit its fine, controlled cut. Keep it away from metal beyond the lightest non-ferrous trimming, and away from gritty materials entirely — abrasive dust destroys the fine teeth’s usefulness for the woodwork it was bought for. A tool this specialised stays excellent by staying in its lane.
A last word on owning a flush cut saw
This is the least glamorous saw in the shop and, for many makers, the most frequently borrowed by their future selves — the tool reached for in the last ten minutes of a project, when a dowel stands proud and the finish is otherwise perfect. Choose it for the surfaces you cannot afford to damage, keep its blade flat, clean and honestly sharp, and protect every surface as if the blade were already slipping. Do that, and the flush saw repays its modest cost on a schedule no other tool matches: not in dramatic rescues, but in the steady absence of small disasters — the scratch that never happened, the plug that never tore, the show face that stayed a show face.
Teaching a beginner on the flush saw
The flush saw is one of the kindest first saws to hand a beginner: the surface itself guides the blade, the cuts are short, and success is easy to feel with a fingertip. Set up the lesson on scrap with card protection in place, demonstrate the flex and the flat-side rule, and let the learner trim a row of dowels with supervision. The two habits to insist on from the first cut are the protected surface and fingers kept behind the blade’s path — everything else about this saw is forgiving enough to learn by doing, which is exactly why it builds confidence instead of caution fatigue.
Flush Cut Saw FAQ
Why are the teeth set differently on a flush cut saw?
Makers describe the teeth as having no set, meaning they are not bent outward, so the blade can lie flat on the work and mark the surface less.
Which saw lists a replaceable blade?
The SUIZAN uses two screws to hold the blade, and the TAJIMA kit has a quick-release retainer and two blades.
Can a flush cut saw cut through a nail?
It is not made for that, and hitting metal can dull or damage the teeth. Check the area for fasteners before cutting, and use a tool made for metal if needed.
Do I need to buy a flush cut saw if I own a pull saw?
A regular pull saw has set teeth that can scratch the surface, so a flush cut saw with no set is better for trimming against a finished face. If you rarely trim plugs, you could use another method.
Which edge should I use for hardwood?
The finer edge, if the saw has two, usually leaves a smoother finish on hardwood. The coarser edge cuts faster in softer wood. Check the tooth counts on the listing.
Can I use a flush cut saw on plastic or PVC?
Some listings mention such use, but check with the maker first, because tooth type affects results. Cut slowly to avoid melting or chipping.
How do I stop the blade from kinking?
Keep the strokes straight, avoid forcing the blade and do not twist it in the cut. Store it in a guard. A kink usually means replacing the blade.
Are flush cut saws safe for beginners?
They are simple tools, but the teeth are sharp and the blade can slip. Clamp the work, keep your hands clear and follow the maker's instructions.
Where do I find replacement blades?
Check the listing for the exact model, and look for blades from the same maker. Different makers' blades rarely fit each other, so confirm compatibility before ordering.
What is a flush cut saw used for?
A flush cut saw trims plugs, pegs, dowels and tenon ends level with the surrounding wood. The thin, flexible blade lies flat on the surface, and the no-set teeth cut without gouging it. It is a finishing tool, not a general purpose saw.
How is a flush cut saw different from a regular hand saw?
A flush cut saw has a thin, flexible blade with teeth that are not set outward, so it can sit flat against a surface. A regular hand saw has set teeth that leave a wider kerf and can scratch the face you are trimming to. The flush cut saw trades depth and speed for a cleaner finish.
Should I choose a saw with a replaceable blade?
A replaceable blade is a good choice if you cut often, because the handle keeps working after the teeth dull. Fixed blade saws are simpler and can be fine for occasional use. Check that spare blades exist for the exact model before you rely on that feature.
Can I sharpen a flush cut saw blade?
Many Japanese style saws have impulse hardened teeth that are not meant to be resharpened by hand. Replacement is the usual fix, but the maker's notes will say what applies to your saw. Do not file the teeth unless the maker allows it.
Do I need a second blade or a second pitch?
A second pitch is useful if you switch between hardwood and softwood or between fine and quick cuts. A double edge blade or a two blade kit covers that. If you only trim small plugs in one kind of wood, a single pitch is enough.
What can I use to protect the surface while I cut?
A thin shim such as card or plastic, or masking tape around the plug, keeps the teeth away from the finish. Cut slightly proud of the surface, then pare or sand the last bit flush. Practice on scrap wood first if the surface matters.
The Short Version
For a replaceable blade with two pitches, the SUIZAN. For a double edge saw with a long warranty listing, the RUITOOL. For the finest edge, the GYOKUCHO. For a double-sided toolbox saw, the DEWALT. For two blades and a case, the TAJIMA. For a deeper cut, the Zona.


