A veneer saw has a short, curved or toothed edge made to cut thin sheets of wood without tearing them. A curved edge lets you begin a cut in the middle of a sheet, and a fine, no-set tooth keeps the cut edge clean. Fine razor saws handle the same thin stock at a smaller scale.
The six tools below include two long Bahco veneer saws, a small Thomas Flinn curved saw, a Two Cherries veneer cutter and two Zona razor saws. Sizes and tooth counts come from each listing page and are the makers’ own claims. We have not used these saws ourselves. Several pages contain spec lines that look wrong, and we flag them.
As an Amazon Associate we earn from qualifying purchases. Links below are affiliate links, and they do not change the product information we give.
What to Look For
| Feature | Why it matters |
|---|---|
| Blade shape | A curved edge can begin a cut away from the sheet edge |
| Tooth count | More teeth per inch leave a finer edge |
| Set | No-set teeth cut a narrow kerf and tear less |
| Blade length | Long blades suit full sheets; short ones suit inlay |
In this guide
Specs at a Glance
| Tool | Blade | Teeth | Notes |
|---|---|---|---|
| BAHCO NP-12-VEN | 12 in | 11 TPI (bullet) | Solid one-piece handle; tooth protector |
| BAHCO PC-12-VEN | 12 in | 11 TPI | Rounded nose for pocket cuts; three sided teeth |
| Flinn Pax veneer saw | 3 in (bullet) or 5 in (table) | 15 TPI | No set; reversible; walnut handle |
| Two Cherries 520-2200 | Curved blade | 22 (table) | Pull stroke; cuts several sheets |
| ZONA 35-050 | 4-1/2 in (title) | 52 TPI | 0.008 in kerf; steel back; 7/16 in cut depth |
| ZONA 35-550 | 6-1/2 in (title) | 42 TPI | 0.010 in kerf; 1-3/16 in cut depth |
The 6 Best Veneer Saws

Top pickBest for long cuts in sheet material
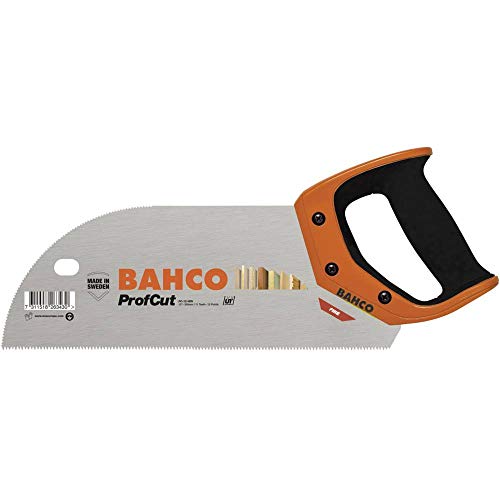
1. BAHCO NP-12-VEN 12 Inch Prizecut Veneer Saw
A 12 inch saw with 11 teeth per inch, a one-piece solid handle, a tooth protector and a hard point finish for longer life and rust protection. The maker says it suits fine and medium thick materials such as plywood, laminates and plastics. The details table lists 12 volts, 150 watts and 132 teeth, which cannot apply to a hand saw, so use the bullets. Bahco lists a limited warranty for the usable life of the product.
Suits: long cuts in sheet material. Strengths: a clear bullet list and a tooth guard. Weaknesses: a flat blade, so no mid-sheet entry. Skip it if you need to begin a cut away from the edge.

Best for pocket cuts in thin boards
2. BAHCO PC-12-VEN 12 Inch Professional Cut Veneer Saw
A 12 inch, 11 TPI saw with a rounded cutting nose for pocket cuts and a three sided ground tooth form. The handle is a thermoplastic elastomer and a tooth protector is included. The weight is 250 grams. It uses the same warranty wording as the other Bahco saw.
Suits: pocket cuts in thin boards. Strengths: a rounded nose and a soft handle. Weaknesses: the table calls the blade round and gives little other data. Skip it if you want a small saw for inlay.

View BAHCO PC-12-VEN 12 Inch Professional Cut Veneer Saw on Amazon
Best for inlay and mid-sheet cuts
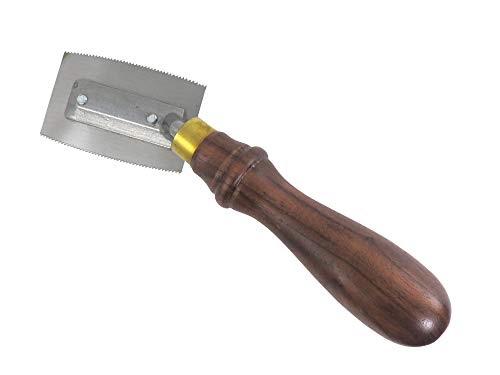
3. Thomas Flinn Pax Taytools Veneer Saw, 15 TPI
A small curved veneer saw with a reversible blade, a high carbon steel plate 0.022 inch thick with no set, one side with crosscut teeth and the other with rip teeth, and a walnut handle with a brass ferrule. A bullet gives the blade as 3 inches, while the table says 5 inches and oddly lists a corded electric power source. The page title also carries extra gift wording.
Suits: inlay and mid-sheet cuts. Strengths: two tooth forms in one blade. Weaknesses: a confusing listing. Skip it if you want a long straight cut.


Best for edge joining of veneer sheets
4. Two Cherries 520-2200 Veneer Cutter
A veneer cutter built for the pull stroke, with a curved blade that lets you begin in the middle of the material. The maker says it cuts a perfect edge for joining veneer and can take a single sheet for fine work or several sheets for a rough cut. The weight is 4 ounces and the table lists 22 teeth, though it also shows a corded electric power source, which is an error.
Suits: edge joining of veneer sheets. Strengths: a curved blade and a pull stroke. Weaknesses: little size detail on the page. Skip it if you need exact blade dimensions.

Best for very thin stock and small parts
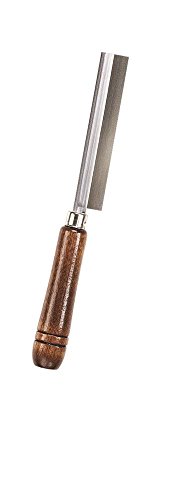
5. ZONA 35-050 Ultra Thin Razor Saw, 52 TPI
A razor saw with 52 TPI, a 0.008 inch kerf, a blade of 4-1/2 inches and a cut depth of 7/16 inch, as given in the title. It has a steel back and a hardwood handle, and the maker says the blades are the thinnest of its razor saws. The table gives the blade length as 2 inches, which conflicts with the title.
Suits: very thin stock and small parts. Strengths: a narrow kerf and a fine tooth. Weaknesses: shallow cut depth. Skip it if you cut thick boards.


Best for mixed hobby and woodworking cuts
6. ZONA 35-550 Fine Razor Saw, 42 TPI
A fine kerf razor saw with 42 TPI, a 0.010 inch kerf, a 6-1/2 inch blade and a 1-3/16 inch cut depth in the title. The maker says it cuts balsa and other wood, plastic, copper and brass, and that it is made in the USA. A limited lifetime warranty and a wooden handle are listed. The table shows a blade length of 2 inches and a voltage, which do not match the title.
Suits: mixed hobby and woodworking cuts. Strengths: more cut depth than the 35-050. Weaknesses: spec table errors. Skip it if you want a curved veneer blade.

Care and Setup
- Clamp the sheet between boards and cut along a straightedge.
- Use light, even strokes and let the teeth do the work.
- Keep the tooth protector on when the saw is stored.
- Wipe the blade dry after use.
Mistakes to Avoid
- Using a long flat saw when you need to enter mid-sheet.
- Pressing hard on a thin razor blade, which can bend it.
- Relying on a spec table that shows volts for a hand saw.
- Cutting without a backing board, which can tear the face.
How Veneer Cuts Differ From Ordinary Sawing
Veneer is a very thin layer of wood, and it behaves differently from a board. The grain runs through the whole thickness, so the fibers can lift, split or tear when a tooth exits the underside. A saw made for this job aims to cut cleanly with a narrow kerf and little pushing force. That is why makers describe fine teeth with little or no set and a design that suits a light touch.
Direction of cut matters. Cutting across the grain tends to tear fibers at the exit edge, and cutting along the grain can wander because the blade follows the line of least resistance. Many woodworkers score the line first with a knife and a straightedge, which gives the saw a groove to start in and reduces the chance of splintering.
- Support the veneer fully so it cannot flex or flutter under the blade.
- Cut slightly on the waste side of the line, then clean up the edge with a plane or sanding block.
- Use a sharp pencil or a marking knife for clear layout lines.
- Work in short strokes at first to establish the cut before lengthening them.
A veneer saw is not a tool to force. If you find yourself pressing hard, the blade may be dull, the sheet may not be supported properly or the tool may be wrong for the job.
Choosing Between Long Blades, Curved Blades and Razor Saws
The saws in this guide fall into three loose groups, and each has a place. Long, straight veneer saws suit full-length cuts in sheet material, where you want a steady stroke along a fence or straightedge. They give a clean line over a long distance but cannot start away from an edge.
Curved or rounded blades let you enter the material at a point where there is no edge to begin from. This is useful for cutting pockets, trimming a patch into the middle of a panel or making a joint cut where the sheet is already glued down. The curved shape also helps you control the depth of the cut as you rock the saw.
Razor saws have thin blades stiffened by a steel back, and they suit very fine work such as inlay, marquetry, small parts and modelling. Their cut depth is limited by the back, so they do not suit thick stock.
- Pick a long saw for edge work on large sheets.
- Pick a curved saw for mid-sheet entries and patching.
- Pick a razor saw for small, detailed cuts and thin materials.
Many workshops keep one of each, since the jobs rarely overlap exactly. If you can only buy one, think about the job you do most often rather than the one you hope to do someday.
Technique and Support for Clean Edges
Technique often makes more difference than the choice of saw. Start by clamping the veneer between two flat boards, with the cut line just proud of the edges, so the fibers are supported on both faces. Use a straightedge as a guide, and keep it clamped firmly. A saw with a flat blade can run along the straightedge, while a curved blade will need a steadier hand.
Begin with a light, controlled stroke. On a pull saw, draw the blade toward you with a gentle downward angle. On a push saw, start with the heel of the blade near you and lengthen the stroke gradually. Let the teeth do the work, because bearing down can cause the blade to wander or bend.
- Score the line with a knife before sawing to cut the surface fibers cleanly.
- Cut from the good face where possible, so any tear-out falls on the hidden side.
- Tape the cut line with low-tack masking tape for added fiber support.
- Keep your off hand firmly on the clamp or the work, and well behind the blade.
- Take a break from sawing to check the line often.
After sawing, clean the edge with a sanding block or a shooting board setup that holds the sheet square. A tidy edge helps joints close without gaps.
Blade Care, Sharpening and Storage
Fine teeth dull faster than coarse ones, and a dull blade is the most common cause of ragged veneer cuts. Many veneer and razor saws have hardened teeth meant to be replaced rather than sharpened, and some makers do not recommend resharpening. Check the listing or manual to see what the maker advises before you attempt any filing.
Whether or not you can sharpen, simple care extends the life of the blade.
- Wipe the blade clean and dry after use, since moisture and resin can cause rust or gum up the teeth.
- Keep any tooth protector or sheath on while the saw is stored or carried.
- Store the saw flat or hanging, away from other metal tools that could chip the teeth.
- Avoid cutting abrasive materials such as hard plastics or metal with a blade not designed for them.
- Never bend a thin razor blade to free it, because kinks are hard to remove.
A light coat of wax or a rust inhibitor helps in a damp workshop. If a blade develops rust spots, the teeth may be affected as well, and that is a sign to consider replacement. Handle the saw with care, as fine teeth are sharp enough to cut skin easily even when they look small.
Budget Tiers, Listing Checks and When to Replace
Think of veneer saws in three tiers. The entry tier covers simple blades for occasional jobs and light use. The middle tier adds better steel, comfortable handles and tooth guards. The top tier is for frequent users who want finer teeth, careful build and strong warranty terms. A higher tier does not automatically mean a better saw for your task, so compare blade shape and tooth form rather than cost.
Listings in this category can be confusing, as this guide has already noted. Before you buy, ask yourself:
- Does the title agree with the bullet list about blade length and tooth count?
- Does the listing describe the blade shape and the cutting stroke clearly?
- Is there a tooth protector, and does the handle suit your grip?
- What does the maker say about warranty and replacement blades?
- Is the stated cut depth enough for the thickness you work with?
Replace a saw when the teeth no longer bite cleanly, when the blade is bent or kinked, when the handle loosens or when rust has set into the teeth. Cutting with a worn blade tears veneer, wastes expensive material and encourages you to push harder than you should.
Which veneer saw should you buy?
Pick a veneer saw by the cut you make most often: long edge cuts, mid-sheet cuts, or fine work on thin stock. The six saws in this guide fit those jobs differently.
- If you cut long lengths of sheet material: the BAHCO NP-12-VEN 12 Inch Prizecut Veneer Saw has a flat blade and a tooth guard, but it cannot start a cut mid-sheet.
- If you need pocket cuts in thin boards: the BAHCO PC-12-VEN 12 Inch Professional Cut Veneer Saw has a rounded nose.
- If you do inlay and mid-sheet cuts: the Thomas Flinn Pax Taytools Veneer Saw, 15 TPI, offers two tooth forms in one blade.
- If you join veneer edges: the Two Cherries 520-2200 Veneer Cutter has a curved blade and works on the pull stroke.
- If you work on very thin stock or small parts: the ZONA 35-050 Ultra Thin Razor Saw, 52 TPI, has a narrow kerf and fine tooth.
- If you want a little more cut depth in a razor saw: the ZONA 35-550 Fine Razor Saw, 42 TPI, cuts deeper than the 35-050.
Skip the razor saws for thick boards, and skip the flat 12 inch blades when you need a small saw for inlay.
What to check before you buy, and who should skip it
Before buying a veneer saw, check the blade shape and size on the listing, since the specs vary and some pages are thin on detail. The wrong blade is the most common reason a saw disappoints.
- Blade shape: flat, curved or razor, matched to your cut.
- Blade length and cut depth: confirm the dimensions on the listing or manual.
- Tooth count and set: finer teeth leave a cleaner edge but cut slowly.
- Handle and guard: check whether a tooth guard is included for safe storage.
- Returns: read the terms in case the listing details turn out to be wrong.
The honest trade-offs: a veneer saw is a specialist tool. It does one job well, and it is not a general woodworking saw. Fine razor blades are delicate and can bend or lose their edge if forced. Several listings in this guide have confusing or missing spec data, so verify details before relying on them.
You can skip a dedicated veneer saw if you only cut veneer rarely. A sharp knife and a straightedge can handle simple straight cuts on thin sheets. Anyone who also needs thick-board cutting should buy a different saw alongside it.
Your work habits matter as well. If you are new to veneer, a forgiving saw with a clear tooth guard is easier to store safely and handle with confidence. If you already own one saw, add a second only when it fills a real gap, such as a razor saw for small parts alongside a longer blade for edges.
Plan your support surface too. A flat bench, a cutting board and a clamp or bench hook do as much for a clean edge as the blade does, so budget a little time for setup before you start.
Compare the picks above, check the current listing for blade size and what is included, then choose the one that fits how you will use it.
Reading the Six Veneer Saws Side by Side
Veneer is unforgiving material: thin, often brittle, frequently highly figured, and expensive enough that a torn cut is a real loss. These six tools approach it from three directions — traditional veneer saws with curved, fine blades; a dedicated veneer cutter; and ultra-fine razor saws borrowed from the model-making world. The right choice depends on the veneer you cut, the lengths involved and whether your cuts are straight production work or small, intricate fitting.
BAHCO NP-12-VEN versus BAHCO PC-12-VEN
These two share a maker and a format, and split on tier: the Professional Cut version is the refined option for frequent use, while the Prizecut version covers the same tasks at a more accessible point. Both use the classic veneer-saw layout — a blade that cuts with a slicing action guided against a straightedge. If veneer work is occasional, the standard version is entirely capable; if you cut veneer weekly, the professional version’s refinement in edge quality and handle comfort repays itself in cleaner exits and less fatigue. Either way, the technique matters more than the tier: support, scoring and a straightedge decide the cut before the saw does.
Thomas Flinn Pax versus the BAHCO pair
The Pax brings a traditional British saw-making approach to the same job, with its own tooth specification and feel. Makers choosing between the Pax and the BAHCOs are really choosing between individual tool characters — weight, handle shape and tooth behaviour — at a similar capability level. If you can, judge by the cut in figured veneer: the saw that exits your most difficult sample piece cleanest, in your hands, is the right one regardless of badge.
Two Cherries veneer cutter versus the saws
The cutter abandons sawing altogether, scoring and slicing veneer with a blade drawn along a guide. For straight cuts in thinner, cooperative veneer it is fast, clean and quiet, and it produces an edge that often needs no further preparation before taping a joint. Its limits appear on thick, brittle or wildly figured stock, where a saw’s progressive tooth action handles what a slicing blade wants to split. Many veneer workers own both: the cutter for production straight work, a saw for the difficult sheets.
ZONA razor saws: 52 TPI versus 42 TPI
The two Zona razor saws trade tooth fineness against speed. The finer pattern leaves the cleanest edge on small, delicate cuts — inlay, banding, small components — while the slightly coarser pattern moves a little faster on longer cuts and thicker material. Both are short-bladed, close-work tools rather than sheet-processing tools: they excel at trimming, fitting and detail cuts on the bench, and they are the wrong choice for breaking down full leaves of veneer efficiently.
Your First Session: Setup in the Right Order
Set the veneer up before you pick up a saw. Lay the sheet on a flat, clean cutting board or a sacrificial panel — never cut veneer over a bare bench with grit on it, because the back face picks up every scratch. Tape or weight the sheet so it cannot creep, position a reliable straightedge on the waste side of your line, and score the line lightly first. Take your first cuts on the least valuable offcut of the same sheet: veneer from one flitch behaves consistently, so the offcut tells you how the good material will tear, chip and respond to direction. Test cutting from both directions on that offcut — veneer frequently cuts cleanly one way and chips the other, and discovering that on scrap is the whole point of the exercise.
Technique: Scoring, Support and the Exit Edge
Clean veneer cuts are built from three habits. First, score before you saw: a knifed line severs the surface fibres so the saw’s teeth have a defined boundary to respect. Second, support the exit: the last fraction of a cut is where veneer tears, so back the exit edge with tape, a supporting strip or your straightedge arrangement, and ease off pressure as you approach the end. Third, let the teeth slice rather than scrub: short, controlled strokes with the blade angled to slice keep the cut in the scored line, while hurried long strokes wander and lift fibres. Work with the sheet flat and fully supported right up to the cut line — veneer that bridges a gap vibrates, and vibrating veneer chips.
For jointed edges that will be taped together, cut mating edges in the same session with the same setup, and check the joint by holding the two edges together against the light: gaps show instantly, and a matched pair of edges cut together often fits better than two individually perfect edges.
Troubleshooting in Diagnostic Order
When veneer cuts chip or tear, diagnose in order. First, support: is the sheet fully backed at the cut and at the exit? Most tearing is a support failure. Second, scoring: was the line knifed before sawing, on the show face? Third, direction: reverse the cut direction and compare on an offcut, because grain in veneer — especially figured veneer — has a preferred direction. Fourth, pressure and stroke: easing off and shortening the stroke cures cuts that wander or lift. Only after those checks should you blame the blade: a dull or damaged fine blade does tear rather than slice, and the giveaway is tearing that persists across supported, scored, correctly directed test cuts in plain veneer.
Care, Storage and Blade Manners
Fine veneer saw teeth are small and easily damaged by casual storage. Keep the saw in a sleeve or till, teeth protected, and wipe the blade clean of the dust and extractives that veneer work produces — some species are acidic enough to mark a blade left dirty. Razor saw blades are effectively consumables: when the cut quality falls away despite good setup, replace rather than fight. Store the cutter with its blade retracted or guarded, and treat every one of these tools as the razor it functionally is when reaching into a toolbox. A flat, clean cutting board kept solely for veneer work is part of the tool kit too — protect it from glue and grit like any other edge.
Choosing by the Work You Actually Do
Makers processing full sheets into panels and doors should start with a traditional veneer saw in the tier matching their frequency of use. Production straight-line work in cooperative veneer argues for adding the cutter. Inlay, marquetry and banding specialists should weight the razor saws, choosing fineness for delicate work and the slightly coarser pattern for speed. Restorers, who meet every species and condition imaginable, benefit most from owning a saw and a cutter together, because difficult old veneer chooses its own tool. And beginners should buy the standard traditional saw, a good straightedge and a cutting board — technique on that honest setup transfers to every other tool in this list.
How do I cut brittle or crumbling veneer without it falling apart?
Stabilise before you cut: tape the cut line on both faces, or consolidate fragile areas with a suitable veneer softening or stabilising approach for the species, and always cut on a fully supporting board with the line scored first. Use the finest teeth you have, the lightest pressure, and short strokes, and handle the cut piece by sliding it onto a flat support rather than lifting it by an edge. Brittle veneer punishes hurry more than any other variable — slow is not caution here, it is the technique itself.
Can I joint veneer edges with a saw alone, or do I need to plane them?
A well-made sawn edge, cut against a straightedge with the mating edge cut in the same setup, is often good enough to tape and press, especially in thinner veneer. Thicker or more valuable work benefits from a final pass with a plane on a shooting-style setup or a dedicated edge trimmer, which true the edge and remove any saw marks. Judge by the light test: hold the jointed edges together and look for gaps — if light shows through, the edges need truing; if it does not, the saw has done its job.
Project Walkthroughs: From Leaf to Panel
Book-matching a pair of leaves for a door or a panel shows the whole craft in one job. The two leaves are opened like a book, aligned so the figure mirrors, and the jointing edges are cut together in one setup so any slight deviation is shared and cancels. The edges are checked against the light, taped from the back, and the seam tested before any glue appears. In this work the saw’s contribution is a straight, clean edge on difficult figured material — the figure that makes the panel worth book-matching is the same figure most likely to tear, which is why scoring, support and direction testing on offcuts precede the real cut by minutes, not seconds.
Cutting veneer for a small box lid or a drawer front is the intimate end of the range. The pieces are small, the razor saws come into their own, and the work is mostly trimming to a template or a knifed line with the piece fully supported on the cutting board. Here accuracy is measured against a mating frame or a mitred edge, and the saw that leaves an edge needing no further work saves its owner a tool change on every piece.
Repair work — patching a damaged veneer surface on a restoration — is the third scenario. The patch must be cut oversize, offered up, knifed around in place so its shape is transferred from the actual defect, then trimmed to that line. No other tool in the shop cuts a fragile, irreplaceable patch material as controllably as a fine veneer or razor saw used with a light hand, and restorers’ loyalty to these modest tools is earned one saved antique at a time.
Veneer Saws Among Their Neighbours
The veneer saw competes and cooperates with four neighbours. The craft knife scores and slices thin, tame veneer beautifully and is the first tool many reach for — until thick, brittle or cross-grained sheets defeat it, which is the saw’s home ground. The veneer cutter in this list is the knife principle engineered into a guided tool: faster on production straight cuts, less versatile on difficult stock. The router with a straight bit and a template trims veneer edges at production speed with production noise and setup, earning its place on batch work and none on one-off fitting. The guillotine-style veneer trimmer owns the straight production cut in equipped shops. Against all of these, the hand veneer’s saw claim is universality at the bench: any species, any figure, any thickness, one-off or batch, with an edge quality that needs the least aftercare. It is the generalist in a field of specialists, and generalists are what small shops actually run on.
A Pre-Purchase Checklist
Five checks sort these six tools honestly. One: your material — name the species and figure you cut most, and weight every judgement toward performance in that material, tested on offcuts where possible. Two: your cut lengths — full leaves demand a traditional saw’s format; small fitting work rewards the razor saws; do not buy a close-work tool for sheet work or the reverse. Three: your volume — weekly production argues for the cutter as a companion or the professional-tier saw; occasional work is fully served by the standard tier. Four: your edge standard — if joints must close invisibly straight from the tool, favour the finest teeth and the cutter’s sliced edge; if edges are routinely trued afterwards anyway, speed may matter more. Five: your existing kit — a good straightedge and a dedicated flat cutting board are not accessories but half the system, so budget and bench space should include them from the start. Run the five checks and the right tool is rarely the most expensive one — it is the one matched to the leaves actually waiting in your rack.
Building Veneer Work Into Your Everyday Workflow
Veneer work rewards a prepared corner of the shop: a flat cutting board that lives clean, a straightedge that lives straight, tape and a knife within reach, and the saw racked with its teeth protected. Veneer sessions fail most often in the setup — a gritty board, a wandering straightedge, a sheet that creeps — long before the saw gets a chance to be the problem. Makers who veneer regularly keep the whole kit together so a session starts in two minutes and the material meets only clean, flat, deliberate surfaces.
Keep every offcut from a sheet until the project is finished. Offcuts are your test material for direction and tear behaviour, your patch stock for accidents, and your finish samples — and they cost nothing but a labelled corner of a drawer. The habit of testing on the project’s own material before cutting its show pieces is the single practice that separates calm veneer work from hopeful veneer work.
How do I store cut veneer pieces between sessions?
Flat, weighted lightly, and protected from shop dust — ideally between clean boards or in a flat folder, labelled by project and position. Cut veneer curls and cracks when stored rolled, leaning or exposed to the shop’s humidity swings, and a piece that was perfect at cutting time can be unusable a week later purely from storage. Treat cut pieces as finished components, not as material, from the moment the saw leaves them.
What do I do when a cut goes wrong on an irreplaceable sheet?
Stop and assess before cutting anything else: a torn edge can often be re-jointed by cutting both mating edges again in a shared setup, a chipped corner can become the hidden edge of the panel, and a mis-cut piece can sometimes be re-purposed to a smaller component of the same project. Veneer work forgives planners and punishes panic — the second cut made in haste to fix the first is the one that usually ends the sheet’s usefulness.
How do I cut long straight edges on a full leaf without the saw wandering?
The straightedge does the steering, so set it up like it matters: clamped or weighted so it cannot creep, positioned so the saw’s blade runs against it for the full length, with the veneer supported flat right up to the cut. Take the cut in a series of controlled strokes rather than one long pass, re-registering the blade against the straightedge at each stage, and score the line first so the teeth have a track. Wander on long cuts is almost always the guide moving or the sheet flexing — fix the setup, and the same saw and the same hands cut straight.
How do I handle veneer that has buckled or will not lie flat?
Flatten before you cut: buckled veneer cut under restraint springs back to a different shape the moment it is released, so the cut you measured is not the cut you get. Gentle flattening methods suited to the species — careful humidification and pressing between flat boards are the traditional route — restore the sheet to a state where measurements mean something. Work promptly once flattened, keep the sheet weighted between operations, and cut the most critical pieces first while the sheet is at its calmest.
Can I use a veneer saw to cut other thin materials?
The fine teeth handle many thin sheet materials respectably — thin plastics, card stock laminates and similar workshop materials — but reserve a blade for such work if you do it often, because non-wood materials dull and contaminate an edge you depend on for figured hardwood. The razor saws in this list are the usual sacrificial choice for mixed materials, keeping the traditional veneer saw’s edge dedicated to the work it was bought for.
How do I cut veneer to an exact template for a shaped panel?
Cut oversize first, then work to the template in stages: rough the shape with margin all round, offer the piece up to the template or the opening it must fill, knife the final line from the template itself so the shape transfers without measurement, and trim to that knifed line with the sheet fully supported and the show face protected. Shaped work magnifies every veneer vice — tear at curves, creep under the guide, chipping at tight radii — so shorten strokes at curves, support the exit obsessively, and let the final fitting be done with the finest tool you own. A shaped piece fitted this way drops into its opening with the quiet precision that makes veneer work look like magic from across the room.
A last word on patience as a veneer tool
Every technique in this guide reduces, in the end, to giving the material time to be understood before it is cut: the offcut tested, the direction checked, the exit supported, the sheet flattened and rested. Veneer punishes haste with a completeness that solid wood rarely matches, because there is no thickness in which to hide a mistake and no second face to turn to the wall. Choose the saw that suits your material and your scale of work, set the bench up clean and flat, and then work at the material’s pace rather than your own. The makers whose veneer work looks effortless are not faster than everyone else — they are simply the ones who stopped trying to be.
Veneer Saw FAQ
Why is a veneer saw blade curved?
A curved edge lets the saw enter the sheet away from the edge, which is why makers describe it for cuts in the middle of a panel.
Which tool lists the finest tooth count?
The ZONA 35-050 lists 52 TPI, ahead of the ZONA 35-550 at 42 TPI.
Can a veneer saw cut thick boards?
It is not the right tool for that. Veneer saws are made for thin sheets, and razor saws have shallow cut depth because of the steel back. Use a tenon or panel saw for thicker stock.
Is it better to push or pull when sawing veneer?
It depends on the saw. Some veneer cutters are designed for the pull stroke, while others cut on the push. Check the listing or the shape of the teeth, and use the stroke the maker intends.
Why does my veneer tear along the exit edge?
Tear-out usually happens when the fibers are unsupported. Clamp the sheet between boards, score the line first and keep the blade sharp to reduce the problem.
Do I need to score the line before sawing?
It is not mandatory, but it helps. A knife cut gives the saw a groove to follow and cuts the surface fibers cleanly, which reduces splintering at the top face.
Can I sharpen a razor saw?
Many are made with hardened teeth that are designed to be replaced rather than sharpened. Check what the maker says in the listing or manual before trying to file the teeth.
What is the benefit of a no-set tooth?
Without set, the teeth cut a narrower kerf and push less on the fibers, so the cut is cleaner. The trade-off is that the blade can bind more easily in a deep cut.
How do I store a veneer saw safely?
Keep the tooth protector on, wipe the blade dry and store it away from tools that could chip the teeth. A damp workshop calls for a light coat of wax or rust inhibitor.
What is a veneer saw used for?
A veneer saw cuts thin wood sheets without splintering, for tasks such as trimming and joining edges and cutting inlay. Its narrow blade and fine teeth keep the cut clean.
Can I cut veneer with a utility knife instead?
Yes, for simple straight cuts with a straightedge. A knife can follow the grain and wander, so a saw gives more control on figured or brittle veneer.
Which veneer saw is best for beginners?
Choose the one that matches your first project. A flat or curved veneer saw suits edge work, while a razor saw suits tiny parts. Start with light strokes and let the teeth do the work.
How do I stop veneer from chipping when I saw it?
Support the sheet close to the cut, use a fine-toothed blade and keep your strokes light. Taping the cut line or clamping a backing board can also help.
Can a veneer saw cut curves?
A narrow razor saw can handle gentle curves in thin stock, while long flat blades suit straight lines. For tight curves, use a smaller blade and cut slowly.
How do I know when to replace a veneer saw blade?
Replace or sharpen it when it drags, tears the edge or needs more pressure than before. Check the listing to see whether replacement blades exist for your model.
The Short Version
For long cuts, the Bahco NP. For pocket cuts, the Bahco PC. For inlay and mid-sheet work, the Thomas Flinn. For pull-stroke edge joining, the Two Cherries. For the thinnest kerf, the ZONA 35-050. For more depth, the ZONA 35-550.


