A handheld router spins a bit at high speed to shape edges, cut grooves and trim parts. The basics are to fit the bit properly, take shallow passes, move the tool in the correct direction and hold the work firmly. Always follow the maker’s manual, since routers can be loud, fast and unforgiving. For anything involving electrical supply or the tool’s safe use, follow the manual, your local rules and the advice of a qualified professional.
What It Is Used For
- Rounding or ornamental shaping of board edges.
- Cutting grooves and slots, such as for shelf supports.
- Trimming a part flush with a template.
- Cutting recesses for hinges with a guide.
The same tool does all of these jobs by changing the bit and the guide, which is why the setup steps matter more than any single technique.
In this guide
Prepare the Router
- Unplug the router, or remove the battery on a cordless model, before touching the bit.
- Insert the bit shank deep into the collet, then pull it back slightly as the manual describes, and tighten the collet with the supplied wrenches. A loose bit is dangerous.
- Set the cutting depth. Many cuts go better in several shallow passes than in one deep one.
- Clamp the workpiece firmly so it cannot shift, and keep clamps clear of the path.
- Wear eye protection, hearing protection and a dust mask.
Check the bit before fitting it. Look for chips, cracks or a bent shank, and do not use a damaged bit. Clean any resin from the cutting edges with the cleaner the bit maker suggests, since built-up residue can make a bit act dull.
Cutting Technique
Router bits turn clockwise as seen from above, so the tool tends to pull itself along the work depending on which way you move. For edge work, a general rule is to move the router so the bit cuts against its rotation, usually moving left to right along an outside edge. Moving the wrong way can grab and run off. Check the manual for guidance on your tool.
- Switch the router on with the bit clear of the wood and let it reach full speed.
- Bring the bit into the wood gently, with the base flat on the surface.
- Move at a steady pace. Too slow can burn the wood, and too fast can leave a rough edge.
- Take light passes and deepen the cut between them.
- Finish a pass fully, keep the base flat, and let the bit stop before setting the router down.
A Worked Walkthrough: Rounding a Board Edge
This example uses a bearing-guided rounding bit on a straight board. The details of your tool and bit may differ, so follow the manuals.
- Clamp the board to the bench with the edge you want to shape overhanging, and keep the clamps well out of the path.
- With the router unplugged, fit the bit, tighten the collet and set the depth so the bearing meets the edge while the cutter reaches the correct spot.
- Mark the board with a pencil line where the shaping should end, if it stops short of the board end.
- Plug in, hold the router with both hands, and rest the base on the board with the bit clear of the wood.
- Switch on, wait for full speed, and ease the bearing against the edge.
- Move along the edge in the direction the manual advises, keeping the base flat and the bearing in contact.
- For the end grain, shape it first and then the long edges, so any tear-out at the corner is cleaned up by the later pass.
- Switch off, wait for the bit to stop, then unplug before you check the result.
Helpful Add-Ons
| Accessory | What it does |
|---|---|
| Edge guide | Keeps a straight cut a set distance from the edge |
| Bearing-guided bit | Follows the edge or a template |
| Straight board as a fence | Guides grooves across a board |
| Dust port and vacuum | Cuts down on fine dust |
Practice on scrap wood first so you can feel how the router pulls and how deep each pass cuts.
Common Scenarios
Cutting a groove for a shelf support
Use a straight bit and a clamped fence. Take shallow passes and make sure the fence is on the correct side of the cut, so the base rides against it.
Trimming an edge strip flush
A flush-trim bit with a bearing follows the surface below. Keep the bearing in contact with the face and work in the direction the manual advises.
Shaping a small part
Small pieces are easy to lose control of. Clamp them firmly to a larger board, or fix them so the router base always has a supported surface to rest on.
Working with grain that tears
Take lighter passes and keep the bit sharp. If tear-out keeps happening, try a different direction as the manual allows.
Troubleshooting and Mistakes to Avoid
| Symptom | Likely cause | What to try |
|---|---|---|
| Burn marks on the wood | Dull bit, slow pace or deep cut | Use a sharp bit, keep moving, take a lighter pass |
| Chipped or torn edges | Cutting against the grain or too deep | Lighter passes, a sharp bit, try shaping end grain first |
| Router wanders from the line | No guide or unsteady base contact | Add a fence or guide, keep the base flat |
| Bit slips in the collet | Collet not fully tight or dirty shank | Unplug, clean and refit as the manual describes |
- Do not change bits with the tool plugged in, because an accidental switch-on can cause serious injury.
- Do not take a deep cut in one pass, because the tool can grab, and the load on the motor and bit rises sharply.
- Do not use loose clothing or long hair near the bit.
- Do not set the router down while the bit is still spinning.
Glossary
- Collet
- The clamping sleeve that holds the bit’s shank.
- Shank
- The smooth round part of the bit that fits in the collet.
- Feed direction
- The way you move the router along the work.
- Tear-out
- Wood fibres torn from the surface instead of cut cleanly.
- Pass
- One trip of the router along the cut.
- Bearing
- A small wheel on the bit that rides along the edge or template.
Care and Upkeep Over Time
Keep the router clean and dry. After use, unplug it and brush dust and chips from the vents, the base and the collet area with a soft brush, then wipe the base so it slides smoothly. Check the cord for cuts or crushed sections, and have any damage looked at by a qualified person before the next use. Look at the collet nut and sleeve for wear or buildup, and follow the manual for cleaning them. Store bits in a case or holder with the cutting edges apart, in a dry place, and keep spare collet wrenches with the tool so they do not go missing.
Fixed-Base, Plunge, and Trim Routers Compared
Routers come in several body styles, and the right one depends on the job. A fixed-base router locks at a set bit depth and is simple and sturdy, a good fit for edge profiles and for mounting under a table. A plunge router lets the motor slide down on spring-loaded posts, so you can lower the bit into the wood mid-board, which suits stopped grooves, mortises, and inlay work. Many kits include both bases on one motor. A compact trim router is a small, one-handed tool that works well for rounding over edges, trimming laminate, and light hinge recesses.
Motor size is usually described in horsepower or amperage. Smaller motors are lighter and easier to control for edge work, while larger ones handle big bits and deep cuts with less strain. Beginners often do well with a mid-size model, since it can handle most household jobs without being unwieldy. Variable speed is a valuable feature, because large bits need slower speeds for safety and a cleaner cut.
Bits, Shanks, and Collets
Router bits carry either a quarter inch or a half inch shank, and the collet must match. A half inch shank is stiffer and vibrates less, which helps with larger profiles. A quarter inch shank fits trim routers and small jobs. Never force a bit into a collet of the wrong size, and never tighten a collet without a bit inserted, which can damage it.
- Straight bits cut grooves, dados, and rabbets.
- Roundover bits soften edges with a quarter-circle profile.
- Chamfer bits cut a clean angled edge.
- Flush-trim bits have a bearing that rides the edge of a template or the work to trim material even.
- Cove and ogee bits produce decorative profiles for furniture.
Insert the bit so the shank sits well into the collet, usually leaving a small gap between the cutter and the collet nut as the manufacturer advises. Tighten firmly with the correct wrenches. Always unplug the router before changing bits or setting depth.
Sharp Versus Dull Bits
Carbide-tipped bits stay sharp far longer than plain steel, but they still dull. Signs include burn marks, rough surfaces, and a router that labors. Resin and pitch buildup also causes burning and can be cleaned with a bit cleaner or a gentle solvent while the bit is cold. Handle bits carefully, since the edges are sharp and carbide chips if dropped.
Direction of Feed and Why It Matters
The bit rotates clockwise when viewed from above. For an outside edge, move the router left to right as you face the work, so the cutter pulls the router toward the wood and the fence or bearing stays against the edge. Feeding in the wrong direction, called climb cutting, makes the bit try to pull the router along on its own, and control is hard to maintain. Climb cuts are sometimes used by experienced users for a very light first pass to reduce tear-out, but they are a risk for beginners and best avoided until you are comfortable.
When routing the inside of a cutout or a template, the direction reverses. A reliable habit is to check which way the bit wants to push, and to feed against that push. If the router feels like it is running away or pulling out of your hands, stop immediately and reassess.
Taking Multiple Passes
Deep or wide cuts should be made in stages. A common approach is to remove no more than about a quarter inch of depth per pass for hardwoods with smaller bits, and a little more in softwoods with a sharp bit and a stronger motor. These are starting figures, not rules, so adjust to what your router and the wood allow. Lower the bit between passes and take a final light pass for a clean surface. Multiple passes reduce burning, lessen tear-out, and keep the motor from straining.
Practice on Scrap First
Cut a test piece from the same board before touching your project. Check depth with a ruler or setup blocks, check the profile, and note how the grain reacts. A few scrap cuts cost very little compared with a ruined panel.
Securing the Work and Controlling the Tool
Clamp the workpiece firmly so it cannot shift, and keep clamps clear of the router path. Use a bench or a non-slip mat, and support the board along its full length. When routing a narrow edge, clamp a second board alongside to widen the support base. Hold the router with both hands, keep your body to one side of the cutting line, and start the router before the bit touches the wood. Let the motor reach full speed. Move at a steady rate and avoid stopping with the bit still turning in the wood, which leaves burn marks.
Safety essentials include safety glasses, hearing protection, and a dust mask, since routers throw chips and fine dust. Pair the tool with dust collection when possible. Keep the cord behind you and away from the cutter. Wait for the bit to stop completely before setting the router down, and unplug it when making any adjustment. Follow the manufacturer’s manual for your model.
Fixing Common Problems
- Burn marks: the bit may be dull, the speed too high, or your feed too slow. Clean or replace the bit, lower the speed for large bits, and keep moving.
- Chipped edges on cross-grain cuts: take a shallow scoring pass first or back the cut with a scrap board.
- Wavy edges: the guide bearing or fence lost contact. Keep steady pressure against the guide and use a longer fence.
- Depth changes mid-cut: the lock may be loose, or the base is tilting. Tighten the lock and keep the base flat on the work.
- Excess vibration: the bit may be bent or the collet worn. Replace the bit and inspect the collet.
Cost and Time Expectations
Beginners can start with an affordable router and a small set of bits, and then add specialty profiles as projects require. Prices range widely depending on the brand and features, so compare what is included. Setting up a first cut, including testing on scrap, can take longer than the cut itself. That time pays off as you build confidence. Over several projects your setup speed and accuracy will rise noticeably.
Guides, Fences, and Templates
A router is only as accurate as the guide that steers it. A bearing on the bit rides the edge of the workpiece or a template, which is how roundover and flush-trim bits follow a shape. An edge guide or fence attaches to the router base and slides along a straight edge, helping with grooves parallel to the edge. For long straight cuts away from an edge, clamp a straightedge to the board and run the base plate against it, remembering to account for the offset between the bit and the edge of the base.
Templates let you repeat a shape. Cut a pattern from thin plywood or hardboard, smooth its edges thoroughly because the router will copy every flaw, and then secure it to the work with clamps or double-sided tape. A template guide bushing or a bearing-guided bit follows the pattern. Test on a scrap first, since the bushing offset changes the final size.
Setting Bit Depth Accurately
Depth errors cause many ruined cuts. Place the router on a flat surface, loosen the depth lock, lower the bit until it touches the surface, and then raise it to the desired depth using a ruler, a depth gauge, or a set of setup blocks. Lock the depth and double check by measuring the exposed bit. For plunge routers, set the turret or depth stop and lock the plunge once you reach the cut depth. Make fine adjustments in small steps, and cut a test groove to verify before committing to the final piece. Remember that removing material in layers means your final depth is reached on the last pass, so set the stop to the final depth and lower the plunge gradually.
Planning a First Project
A simple first project builds skill without much risk. Good choices include rounding the edges of a small shelf, cutting a decorative edge on a cutting board blank, or making a shallow groove for a picture ledge. Choose straight, clean softwood or a mild hardwood, because it forgives small errors. Draw your layout lines, decide the bit and depth, and make a list of the steps before you start. Cut a practice piece from an offcut, then do the real part. Allow time for sanding, since router profiles still benefit from a light touch with fine sandpaper. As confidence grows, move to stopped grooves, hinge recesses, and template work.
Ready to Buy? Start Here
If this guide helped you decide what to look for, these products are a place to start.
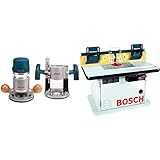
As an Amazon Associate we earn from qualifying purchases. Prices and availability are shown on Amazon.
FAQ
Why is my wood burning?
The bit may be dull, the pace too slow or the cut too deep. Try a sharp bit and a steadier feed.
Which bit should I use?
That depends on the shape you want. Match the shank size to your collet and check the bit maker’s notes.
Do I need a router table?
Not for basic edge work, which a handheld router does well. A table suits small parts and repeat shaping, but it brings its own safety rules, so read the manual for any table you use.
How deep can I cut in one pass?
There is no single figure. The best depth depends on the bit, the wood and the router’s power, so follow the manuals and prefer several light passes.
How do I look after my bits?
Clean off resin, dry them and store them so the cutting edges do not touch each other. Inspect them before each use.
Is a plunge router better than a fixed-base router for beginners?
Not necessarily. A fixed-base router is simpler and works well for edge profiles. A plunge router is more flexible for grooves and mid-board cuts but takes more practice. Many kits include both bases, which lets you start simple and learn plunge cuts later.
Which way should I move a router along an edge?
For an outside edge, feed so the bit pulls the router toward the work, generally moving from left to right as you face the edge. For inside cuts the direction reverses. If the router grabs or pulls away from you, you are feeding the wrong way.
What is the difference between a quarter inch and a half inch shank?
The shank is the part held by the collet. Half inch shanks are stiffer and vibrate less, which suits larger bits and heavy cuts. Quarter inch shanks fit smaller routers and lighter jobs. The collet must match the shank exactly.
Can I use a router on plywood and MDF?
Yes, with sharp carbide bits. Both materials dull bits quickly and make a lot of fine dust, so wear a dust mask and use dust collection. Take light passes and keep the router moving to avoid burning the edges.
How do I reduce tear-out when routing?
Use a sharp bit, take shallow passes, and feed at a steady rate. For cross-grain cuts, make a light scoring pass first or clamp a backer board at the exit. Routing in the correct direction against the grain also helps.
The Short Version
Unplug to change bits, tighten the collet, clamp the work, take shallow passes and move in the direction the manual advises. Practice on scrap and wear full protection.