A wood router spins a bit at high speed to shape edges, cut grooves and make joints. Routers come in fixed-base, plunge and compact trim styles, and the right choice depends on the work you plan to do. This guide covers the types and the features worth checking, then adds a worked project plan, common scenarios, mistakes to avoid and care notes. Follow the maker’s manual and local rules for every power tool.
The Three Common Styles
- Fixed-base: the bit depth is set before you cut. Good for edge profiles and use in a router table.
- Plunge: the motor drops onto the work while running, which suits stopped grooves, mortises and inlays.
- Compact trim: small and light for one-handed edge work, trimming laminate and light profiles.
Comparing the Features
| Factor | Why it matters | What to check |
|---|---|---|
| Collet size | Decides which bit shanks fit | Collet sizes supplied or available |
| Motor power | Larger bits need more power | Maker’s stated capacity |
| Speed control | Large bits need slower speeds | Variable speed dial |
| Depth adjustment | Accuracy of every cut depends on it | Fine-adjust knob, easy to read scale |
| Weight and handles | Control and comfort | Handle shape, switch access |
| Dust collection | Chips cover the layout lines | Dust port or hood |
Which Style Fits Which Person
- If you mostly rout edges by hand, a compact trim router or a fixed-base model is enough.
- If you cut grooves, mortises or work in the middle of a panel, choose a plunge router.
- If you plan to mount it in a table, check that the model is designed for table use.
- If you want one tool to grow with you, some kits offer both a fixed and a plunge base on one motor.
Practical Points
Router bits are separate purchases, and good bits matter. Keep them clean and sharp, and fit them with the shank fully seated in the collet as the maker describes.
Routers are loud and fast. Wear eye and hearing protection and a dust mask. Clamp the workpiece, keep your hands clear of the bit, and make shallow passes instead of one deep one. Unplug the router before changing bits and follow the manual.
Bits and Setup Tips
Straight bits cut grooves, roundover bits ease edges, and chamfer bits add angled edges. Choose bits with shanks that match your collet, and keep them clean of resin buildup. Try your setup on a scrap piece of the same wood before cutting the final piece. Heavy bites can grab the router, so make light passes and keep a firm grip with both hands. Switch the router off and wait for the bit to stop before lifting it from the work.
A Worked Project Plan
This is a general method using an invented project: rounding the edges of a small tabletop and cutting a shallow groove for a back panel in a bookcase side. For the tabletop edge, a roundover bit in a fixed-base or trim router suits the job. Fit the bit fully into the collet as the manual shows, then back it out a small amount if the maker says so. Set the depth on a scrap piece of the same wood. Hold the router base flat on the work, switch on, let the bit reach full speed, then move along the edge in the feed direction the manual describes. Take a shallow pass first and deepen it in stages for a larger profile.
For the groove, use a plunge router with a straight bit and a guide, such as a clamped straightedge or an edge guide. Mark both ends of the groove, set a shallow depth and plunge at the first mark. Make several passes, lowering the bit each time, until the final depth is reached. Switch off at the end and wait for the bit to stop before lifting the router. Check the groove on the scrap first, so that the panel will fit before you commit to the real piece. Keeping a vacuum or dust port connected keeps the layout lines visible.
Common Scenarios
- Finishing shelf edges: a trim or fixed-base router with a roundover or chamfer bit, light passes and a firm hold.
- Cutting hinge recesses or shallow pockets: a plunge or trim router with a template or guide, set to a shallow depth.
- Trimming laminate flush: a compact trim router with a flush-trim bit, which has a bearing that follows the edge.
- Making repeat profiles on many pieces: a router mounted in a table, if the model is designed for it, which holds the router still while you feed the wood.
- Cutting joinery: a plunge router with guides, plus careful practice on offcuts, before using good wood.
Mistakes to Avoid
- Taking one deep pass. It overloads the motor and the bit, and can tear the wood. Make several shallow passes.
- Feeding in the wrong direction. The router can grab and pull itself along the work, so follow the feed direction in the manual.
- Using a dull or dirty bit. It burns the wood and leaves rough edges, so clean resin off and replace worn bits.
- Not clamping the work. A moving workpiece and a spinning bit are a poor mix, so clamp it firmly.
- Bottoming out the shank in the collet. Leave the clearance the maker describes so the collet can grip properly.
Care and Upkeep
Clean the base and the collet regularly, because dust and resin build up and stop bits from seating. Check the cord and the switch before use, and make sure the base slides smoothly on its posts if it is a plunge model. Store bits in a case so the cutting edges do not touch each other, and wipe resin off with a cleaner the bit maker suggests. If the router vibrates more than usual, switch off, unplug and check the bit and the collet before using it again.
Quick Troubleshooting
| Symptom | Likely cause | What to try |
|---|---|---|
| Burn marks on the wood | Dull bit, slow feed or too high a speed | Clean or replace the bit, lower the speed and keep a steady feed |
| Chipped or torn edges | Deep pass or wrong feed direction | Make lighter passes and follow the feed direction |
| Bit slips down | Collet not tight or worn | Switch off, unplug, reseat the bit and tighten properly, or replace the collet |
| Uneven depth | Base not flat or locking lever loose | Check the base sits flat and the depth lock is tight |
| Router strains or slows | Bit too large or pass too deep | Reduce depth and speed and use a smaller bit |
Motor Size, Speed and What They Mean for Bit Choice
Router motors are usually described by horsepower or by amps, and the figures are not directly comparable between brands. A better way to think about it is in terms of capacity. A compact trim router handles small bits and shallow cuts, such as roundovers and laminate trimming. A mid-size router with a motor in the middle of the market range handles most hobby work, including grooves, rabbets and moderately sized profiles. Large routers, often used in tables, are built to spin big bits that remove a lot of material. The maker’s manual lists the maximum bit diameter and depth the tool is designed for, and that figure matters more than a headline power number.
Speed is just as important. Large-diameter bits have a higher rim speed than small ones at the same revolutions per minute, and running them too fast is unsafe and can burn the wood or damage the bit. Routers with variable speed let you slow down for big bits, and the manual or the bit packaging typically gives a recommended speed range. Single-speed routers are simpler and common in the trim category, but they limit you to smaller bits. If you think you will ever want to use large panel-raising or similar bits, look for a variable-speed model that is suitable for table use.
- Small bits and edge work: moderate power, fixed speed is often fine.
- General woodworking: mid-size motor with variable speed.
- Router table use: a motor designed for table mounting with easy height adjustment.
- Large-diameter bits: slower speed settings, firm clamping and light passes.
Handling, Weight and Ergonomics
A router that looks good in a listing can feel awkward in your hands. Weight affects control: a heavier tool resists vibration and can feel steady on a bench, but wears you out on long edge work. A lighter tool is easier to maneuver but can feel twitchy. Try to judge where the weight sits. A tall, top-heavy tool tends to tip, while a low center of gravity feels more stable on the work.
The base matters too. A large, smooth, flat base is easier to keep square on an edge. Check that the base opening is big enough to see the bit and the cut line. Look for a clear sub-base, since you can see through it to align the bit with your layout marks. The switch position is another detail: a switch you can reach without removing a hand from a handle is a safety advantage. Some routers have a soft start, which brings the motor up to speed gradually and reduces the jerk when you switch on. Others have an electronic brake or a spindle lock for fast bit changes.
Handles come in two main styles. D-handle models place a grip near the trigger for plunge-style control, while knob-style handles sit on either side of the base and give a more stable two-handed stance. Choose whichever feels natural. If you are left-handed, check that the switch and the depth controls are comfortable for you.
Depth Setting and Fine Adjustment
Accurate depth is the foundation of good routing. Fixed-base routers usually adjust depth by sliding the motor in the base and locking it, often with a ring or lever. Many have a fine-adjust ring to nudge the depth in small steps, which is useful for matching a groove to a board’s thickness. Plunge routers use a depth rod, turret stop and locking lever. A turret stop lets you set several depths in sequence so you can cut a deep groove in several passes without resetting the tool each time.
Take time to learn the zero point. Set the bit so the tip just touches the work surface, lock it, and then dial in the depth you need from that reference. Always make test cuts in scrap, and measure them with calipers or a ruler rather than trusting the scale on the tool, which can be approximate. Take light passes. Cutting a full depth in a single pass strains the motor, produces tear-out and can make the router grab, so most manuals suggest several shallow cuts, especially in hardwood or with larger bits.
| Feature | Fixed-base | Plunge | Compact trim |
|---|---|---|---|
| Depth set | Before the cut | During the cut, using a stop | Before the cut |
| Best for | Edges, table use | Grooves, mortises, inlays | Light trimming, small profiles |
| Control | Stable on edges | Needs steadiness at plunge | One-handed, but easy to tip |
| Typical bit size | Small to large | Small to large | Small |
Dust Control and Visibility
A router throws a lot of chips, and they bury your layout lines as you work. A dust port that connects to a shop vacuum makes a big difference, both for visibility and for your lungs. Fine wood dust is a health concern, and some woods are especially irritating, so a dust mask suited to fine particles is a good habit even with collection. Check the port size against your vacuum hose, as adapters are sometimes needed.
Some routers use a clear dust shroud or an edge guide with extraction, while others rely on the operator to hold a hose nearby. Collection is rarely perfect, so wear eye and hearing protection regardless, and keep the work area tidy. In a table, a port on the fence and one beneath the table work together.
Router Tables, Guides and Accessories
A router becomes more versatile with accessories. A straight edge guide lets you cut grooves parallel to an edge. A trammel arm or circle cutting jig allows round cuts. Template guide bushings let the router follow a template, which is the basis of repeatable shapes. Edge-forming bits with a bearing follow the edge of the work without a separate guide.
A router table holds the tool upside down so you move the work past the bit. It lets you handle small pieces more safely than you could by holding the router, and it makes consistent profiles easy. Not every router is suited to a table. Look for one the maker states is designed for table mounting, with accessible height adjustment from above and a way to lock the spindle. Use feather boards and push blocks to keep your hands away from the bit, and follow the table and router makers’ safety instructions.
When buying accessories, aim for quality over quantity. A few well-made bits and a good edge guide outperform a large box of low-grade pieces. Buy additional bits only when a project calls for them.
Budget Thinking
Prices span a wide range, and general rules are safer than specific numbers. A compact trim router costs less than a full-size model, and kits that include both a fixed and a plunge base cost more but give flexibility. Used routers can be good value, but inspect the cord, switch, collet and bearings, and make sure the base and depth mechanism move freely without wobble. Factor in the cost of bits, dust collection and safety gear, because these add up. Check the warranty and the availability of replacement parts such as collets and brushes, as these affect long-term ownership.
Safe Setup Before Every Cut
Routers cause injuries when people rush the setup. Build a short routine and follow it each time. Unplug the tool before changing a bit or adjusting depth. Insert the bit shank fully into the collet, then back it out a small distance as the manual describes, so the shank is not bottomed out, and tighten the collet nut firmly with the wrenches supplied. Clamp the workpiece so it cannot shift, with the clamps clear of the router’s path.
- Check the bit for chips, cracks or heavy resin before use.
- Set the speed for the bit size, following the maker’s guidance.
- Keep the cord clear of the cutting path.
- Let the motor reach full speed before the bit touches the wood.
- Feed against the bit rotation as the manual explains, and avoid climb cuts unless you know the risks.
- Wait for the bit to stop completely before setting the tool down.
If a router ever grabs or kicks, switch it off, unplug it, and check the bit, the depth and your technique before trying again.
Ready to Buy? Start Here
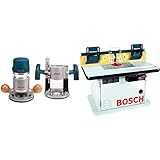
If this guide helped you decide what to look for, these products are a place to start.

As an Amazon Associate we earn from qualifying purchases. Prices and availability are shown on Amazon.
FAQ
Which direction do I move a handheld router?
The manual describes the correct feed direction for edge work. Moving the wrong way can cause the router to pull away from you.
Can a trim router replace a full-size one?
For light edge work, yes. For large bits and deep cuts, a full-size router is the better fit.
Do I need a router table?
Not at first. A table helps with small pieces and repeat cuts, but it adds cost in space and setup, and it is only suitable for routers the maker designs for it.
What collet size should I choose?
Many routers accept more than one shank size. A larger shank is stiffer and generally suits larger bits, while a smaller one suits light work. Choose the size that matches the bits you plan to use, and follow the maker’s guide.
How do I know when a bit is dull?
Look for burn marks, rough cuts, extra effort and a bit that makes more noise. Clean it first, and if the problem remains, replace it or have it sharpened by a service the maker recommends.
What is the difference between a collet and a chuck on a router?
A router uses a collet, a split sleeve that squeezes around the bit shank as the nut is tightened. A drill chuck has jaws and is not suitable for router speeds. Use the collet size that matches the bit shank, and never force a mismatched shank into it.
Why does my router burn the wood?
Burning usually comes from a dull bit, a feed that is too slow, speed that is too high for the bit size, or cutting too deep in one pass. Use a sharp clean bit, move steadily, lower the speed for larger bits and take lighter passes.
How deep can I cut with a router in one pass?
It depends on bit size, wood and router power, so check the manual. As a general habit, take shallow passes, often a fraction of the bit diameter, and finish with a light final cut. Deep single passes cause tear-out and strain the motor.
Do I need a dust mask when routing?
Yes, a mask rated for fine dust is a sensible habit even with dust collection, since routers produce fine particles and some woods irritate the lungs or skin. Add eye and hearing protection, and follow the dust and safety guidance in the manual.
Can I use a router to cut a straight edge?
Yes, with a straight bit and a clamped straight edge or guide that the router base runs against. Work in light passes, keep the base firmly against the guide, and test on scrap first. Clamp the work securely so it cannot move.
The Short Version
Choose a trim router for light edge work, a fixed-base for edges and table use, and a plunge router for grooves and mortises. Use sharp bits, shallow passes, a firm clamp on the work and the maker’s safety guidance.