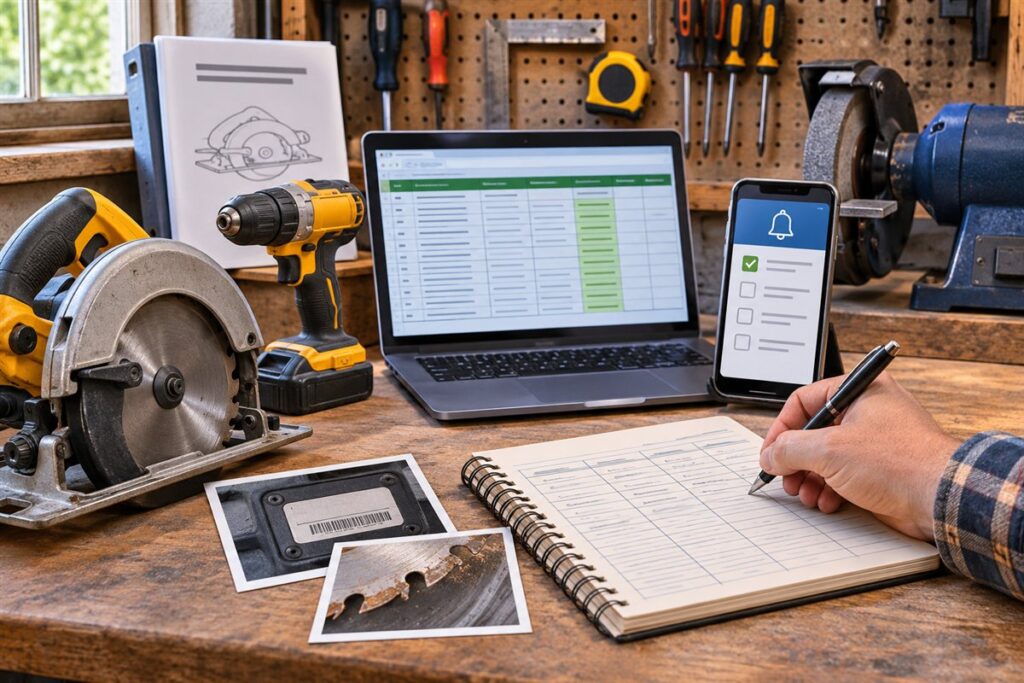
A tool maintenance log is a simple record of what you own and what you have done to it. Keep it short, keep it where you work, and update it right after each service so it stays accurate.
What a Log Is For
A log tells you when a blade was changed, when a battery was bought, which tool needs a service and where the manual lives. It helps when you talk to the maker about a fault, with deciding when to repair or replace, and with remembering regular care. A paper notebook, a clipboard or a basic spreadsheet all work.
What to Record
- Tool name, model and serial number (a photo of the label works).
- Date of purchase or acquisition, if you know it.
- Where the manual is kept or a link to the maker’s guide.
- Service dates and what was done.
- Parts changed, such as blades, brushes, belts and filters.
- Faults noticed and the date you noticed them.
- Who borrowed the tool, if you lend it out.
Setting It Up Step by Step
- Walk through your shop and list each power tool and major hand tool.
- Give each a page, row or card with the fields above.
- Check each manual for service intervals and write them in the log.
- Add a reminder column showing when the next check is due.
- Choose a regular time, such as the first weekend of each month, to go over it.
Sample Layout
| Tool | Last service | Next check | Notes |
|---|---|---|---|
| Circular saw | Blade changed, date written | Per the manual | Guard moves freely |
| Cordless drill | Chuck cleaned | Every few months | Battery two shows less runtime |
| Bench grinder | Wheel inspected | Before each use | Replace if cracked |
| Shop vacuum | Filter cleaned | When suction drops | Replace filter if torn |
Use the log to follow, not replace, the manual. Jobs such as opening a motor housing, repairing electrical parts or replacing grinding wheels belong to people with the right training, so write down what you notice and take the tool to a qualified service center when in doubt.
Photos help a great deal. A quick picture of a serial label, a worn part or a setting before you change it takes seconds and can save a long search later. Store the images in a folder named for the tool, and mention the folder in the log entry.
Choosing a Format: Paper, Spreadsheet or App
The best log format is the one you will actually open. A paper notebook or binder kept in the shop is quick to use with dirty hands, needs no battery and is easy to flip through. Its weak points are that pages can be damaged by moisture or oil, entries are harder to search and the notebook can be misplaced. A set of index cards in a box works similarly, giving each tool its own card, which makes adding and removing tools simple.
A spreadsheet is easy to sort and search, and it allows you to set up columns for dates and reminders. You can add filters to show what is due, and copy rows when you buy similar tools. It does require a computer or phone nearby, and you must remember to save and back it up. Dedicated apps for tracking equipment offer reminders and photo attachments, but they vary in features and in how they store data, so check the privacy and export options in the app’s description before relying on one.
Consider a mixed approach. Many people keep a short paper card on the tool box for quick notes and update a spreadsheet monthly. Whichever format you pick, think about backups. A phone photo of each page, or a copy of the spreadsheet in a second location, protects against loss. Choose a format that suits your habits, and be willing to change if it becomes a chore.
- Paper: fast and robust, hard to search.
- Spreadsheet: flexible and searchable, needs a device.
- App: reminders and photos, check data handling.
Setting Intervals, Triggers and Reminders
A log is most valuable when it prompts action. Start by reading the maintenance section of each manual, which often lists tasks and when to do them. Write these in your log as the baseline. Where a manual gives no interval, use sensible triggers instead of guessing at dates. A trigger is an event, such as after a set number of hours of use, after a particularly dusty job, after a long period of storage or at the change of season.
Calendar-based reminders suit tools that sit unused for long periods, as the log nudges you to check them. Use-based reminders suit tools that run for long stretches, such as a table saw or a compressor. If you do not track hours, count jobs or sessions instead. A simple tally mark beside the tool’s name on each session is enough.
Link reminders to routines you already have. If you tidy the workshop on the first weekend of each month, add the log review to that routine. Use your phone’s calendar for recurring tasks, or place a note where you will see it. Keep reminders short and specific, such as clean filter or check cord, instead of vague notes.
Review your intervals after a few months. If a task is always found unnecessary, extend the interval, and if problems keep appearing between checks, shorten it. Always give priority to the manual’s instructions and to safety-related checks.
Recording Faults, Repairs and Parts
Fault records turn a log from a diary into a diagnostic tool. When something goes wrong, note the date, what you were doing and what you observed, such as noise, smell, vibration, heat, smoke or loss of power. Add any steps you took, like cleaning a filter or replacing a blade, and the result. If the issue returns, a pattern may emerge that points to a cause, such as a worn brush or a loose guard. These records are also helpful when you speak to a repair service or the maker.
Record repairs in detail. Note who did the work, the date, the parts replaced and the cost if you wish. Keep invoices and receipts, or attach photos. Write down part numbers or specifications, which makes reordering simpler. If you replace parts yourself, record the source and any adjustments made. Be honest about what you did not understand, so that later you can have a professional check it.
Maintain a list of consumables and spares. For each tool, note what regularly wears out and what size or type you use, such as belts, filters, brushes, blades or pads. A shared spare parts list helps you reorder in time and avoids buying the wrong item. Record batteries and chargers too, including the date they went into service and any signs of reduced runtime or swelling.
- Include the symptom in plain words.
- Photograph worn or damaged parts before replacement.
- Do not use a tool with a known safety fault until it is fixed.
Safety Checks and Retirement Decisions
A log can support safety by prompting regular checks of the things that matter most. For each power tool, check the cord, plug and switch for damage, the guards for free movement and the blades, bits and wheels for wear or cracks. For battery tools, look for damaged cases, swelling, heat and leaks. For ladders, clamps and lifting gear, check structure and locking parts. Write down what you checked and what you found, even when it is nothing. A record of passed checks is helpful if a problem appears later.
Set clear rules for removing tools from service. If a tool has a damaged cord, a cracked housing, a missing guard or an unusual burning smell, tag it and put it aside. Write the reason in the log. Do not return it to use until it has been repaired according to the maker’s guidance or by a qualified service provider. Adding a visible tag or a strip of tape on the tool prevents someone else from picking it up without knowing the problem.
The log also helps you decide when to retire a tool. If repair costs, downtime and safety concerns accumulate, the record shows the pattern. Compare the cost of repair with replacement and weigh how critical the tool is. Some safety items, such as cracked grinding wheels, damaged helmets or worn safety harnesses, should be replaced and not repaired. Follow the maker’s retirement guidance, and dispose of old tools, batteries and chemicals under local rules.
- Tag out damaged tools immediately.
- Review safety items before each season of heavy use.
Keeping It Going and Sharing It
The biggest threat to a log is that it is abandoned. To avoid this, make the system lean. Record only the entries that help you make decisions, and skip fields you never use. Place the log where you will see it, whether on the wall, in the toolbox or on your phone home screen. Make entries at the moment of action, or at the end of each session, when the details are fresh. A two-minute habit is better than a long catch-up session once a year.
Start with the tools that matter most, such as the ones you rely on, the ones that are risky and the ones that are costly to replace. Add others over time. If you find the log too large, group similar items, such as hand tools in a single entry, while keeping power tools separate. Review the log at a regular time, such as a monthly check, and tidy it up at the end of the year.
If you share a shop, make the log a shared resource. Agree where it is kept and who updates it. Include a line for borrowed tools, showing who has them and when they are due back. Encourage anyone who notices a fault to write it down. Shared logs prevent duplicate repairs and make sure problems are not ignored.
Finally, keep manuals and receipts with the log, in a folder or scanned into a single location. When you sell or give away a tool, include the relevant maintenance notes and the manual. A tool with a documented history is easier to trust and often easier to resell.
FAQ
How detailed should the log be?
Only as detailed as you will keep up. A few lines per tool beats an elaborate system that you abandon.
Should I keep receipts too?
It can help. Keep a folder or photo of receipts and manuals alongside the log so they are all in one place.
Do I need to log hand tools as well as power tools?
Not necessarily every one. Group hand tools by type and note only the care tasks, such as oiling and sharpening. Focus detailed entries on power tools, safety equipment and expensive items.
What should I do if I cannot find a service interval in the manual?
Use a trigger-based approach, such as checking after heavy use or seasonally, and look at the maker's website. You can also ask the maker or a service center. Always follow any safety instructions that are given.
How do I log batteries?
Note the purchase date, which tools they fit, and any change in runtime, charging time or heat. Follow the maker's storage and charging guidance. Replace batteries that swell, leak or are damaged.
Is it worth photographing tools for the log?
Yes. Photos of serial labels, settings, wear and damage are quick to take and valuable later. Store them in a folder named for the tool, or attach them to the log entry.
How often should I review the log?
Monthly works for many people, with a deeper review each season. Adjust to your usage. The aim is to catch due tasks without turning the review into a burden.
Can a log help with insurance or resale?
A record of serial numbers, purchase dates and care can support claims and show buyers how a tool was treated. Keep copies of receipts and photos in a safe location, ideally in two places.
What if I lend tools to others?
Add a column for who has the tool, the date out and the expected return. Record the condition when it leaves and when it returns, and note any damage promptly.
The Short Version
Record each tool, its service dates and its faults in one simple place, and go over it on a regular schedule. Follow the manuals and use qualified service for anything beyond basic care.