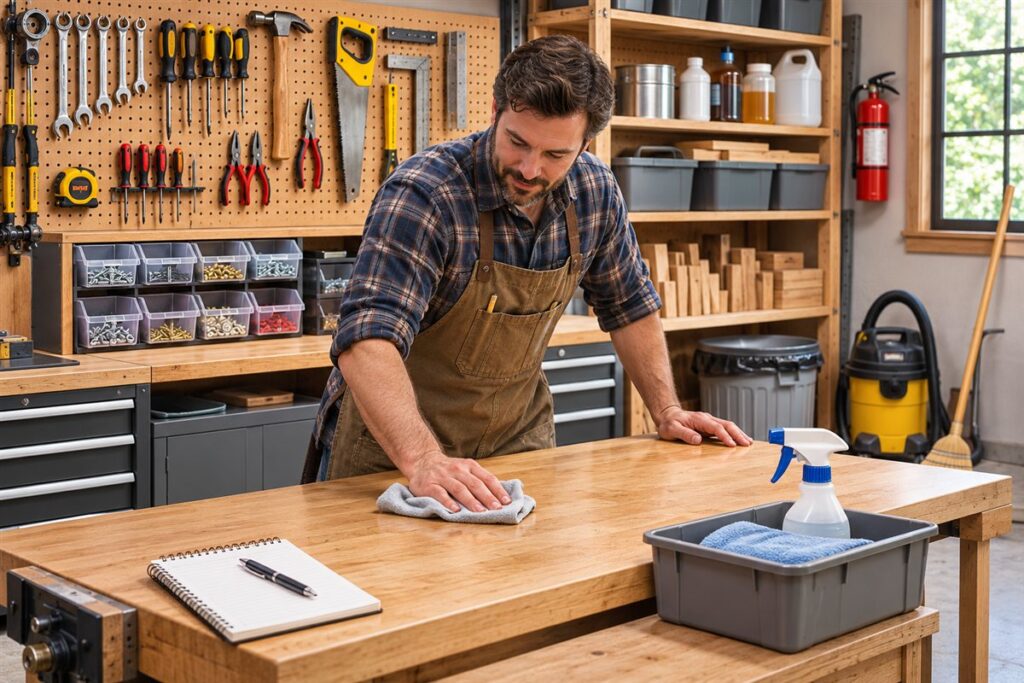
You keep a workshop tidy by giving every item a home, clearing the bench after each job and doing a short cleanup on a regular schedule. Small habits beat occasional big clean-outs.
Give Everything a Home
Clutter builds when items have nowhere obvious to go. Sort what you own into groups such as cutting tools, fasteners, finishing supplies and power tool accessories. Choose a spot for each group near where you use it, and keep the things you reach for most within arm’s length of the bench.
- Hang frequently used hand tools where you can see them.
- Use labeled bins or drawers for small parts.
- Keep heavy items low and light items higher.
- Store chemicals in their original containers, away from heat, as their labels direct.
The Weekly Routine
- Clear the bench completely and put tools back in their places.
- Sweep or vacuum floors, taking care with fine dust and a suitable mask.
- Empty the trash and scrap bins, and keep offcuts only if you have a plan for them.
- Wipe machine tables and tool surfaces with a dry or lightly oiled rag as each manual allows.
- Check cords, plugs and batteries for visible damage and set aside anything that looks worn.
- Write a short list of consumables you are running low on.
Cleanup Frequency at a Glance
| Task | How often | Why |
|---|---|---|
| Clear bench and return tools | After each session | Prevents piles from forming |
| Sweep floor | Weekly or as needed | Keeps slip and trip hazards down |
| Empty dust bins | When about two-thirds full | Keeps suction up |
| Look over stored items | Every few months | Spots duplicates and broken tools |
| Check for rust or damp | Seasonally | Protects metal parts |
Handling Waste and Hazards
Oily rags, solvents, old finishes and spent batteries should be handled as their labels direct, and may need special disposal. Follow your local collection rules rather than putting them in ordinary trash. Keep walkways clear, and keep a fire extinguisher or other equipment where your local guidance and the maker’s directions say it should be. If you are unsure about wiring or storage rules for fuels, ask a qualified professional.
A tidy shop also makes you faster. When tools return to the same place every time, you spend less time searching and more time working, and missing items are easy to notice. Even ten minutes at the end of a session pays off the next time you walk in.
Declutter First, Then Organize
Many workshops stay messy because there is simply too much in them. Before buying new storage, take stock of what you have. Pick one area at a time, such as a wall, a bench or a shelf, and empty it completely. Sort the contents into groups: keep and use, keep but store elsewhere, repair, give away or recycle, and dispose of. Be realistic about what you use. A tool or material you have not touched for a long time and have no plan for is taking up space that could serve your current work.
Set limits. A fixed amount of shelf space for offcuts, for example, forces you to decide what is worth keeping. Define a size for scrap wood storage and discard the smallest pieces when the space fills. Dispose of broken tools, dried paint, empty containers and leftover chemicals as labels and local rules direct. Do not throw hazardous items in general trash if local guidance says otherwise.
Once the clutter is gone, you can see what you need to store. Measure the remaining items and think about shelf heights, drawer sizes and wall space. Only then choose bins, racks or cabinets. Buying storage before sorting often leads to containers that do not fit and serve only to hide the clutter. Taking a photograph of the finished layout helps you maintain it later.
- Work in small sections so the job does not become overwhelming.
- Keep a box for items to rehome and remove it from the shop promptly.
Zones and Workflow Layout
A tidy workshop is organized around how you work. Divide the space into zones that reflect your tasks, such as measuring and marking, cutting, assembly, finishing and storage. Place tools and materials in the zone where they are used. Saw blades and measuring tools near the cutting area, clamps and glue near assembly and brushes and finishes near the finishing area. When tools sit where they are needed, putting them away is natural.
Think about the path of materials. Lumber should enter at one end, move to cutting, then to assembly and finally out. If the route crosses a crowded area, rearrange. Keep clear floor space around machines, as manuals specify, and keep walkways free. Locate dust-making work away from finishing zones. Place frequently used items between hip and shoulder height and near the bench, and put infrequently used ones higher or lower.
Mobile bases and wheeled carts help in small spaces, allowing machines and storage to move when needed. Make sure wheels lock. Wall-mounted storage frees the floor, but check that wall fixings suit your wall type and the load. A rail or a pegboard system offers flexibility, as hooks can be rearranged when needs change. Label zones and shelves so that visitors and family know where things belong.
- Sketch the shop on paper and test layouts before moving heavy items.
- Keep the main bench accessible on at least two sides if possible.
Comparing Storage Solutions
Different storage suits different items, and a mix usually works best. Open shelves make items visible and easy to grab, but they gather dust and can look cluttered. Cabinets and drawers hide contents and keep dust off, but you need labels to find things. Pegboards and slat walls hold hand tools at eye level, with hooks that can be moved, though heavier tools need strong hooks and supports. Magnetic strips hold steel tools neatly but should be used with care for items that should not be magnetized.
Bins and boxes suit small parts, fasteners and accessories. Clear containers allow you to see contents, while opaque ones look neater. Stackable, same-size bins use space efficiently. Drawer dividers and trays keep contents sorted. Rolling tool chests keep a set of tools together and move to the job. Overhead racks suit long, light items and seasonal gear, but heavy items overhead are risky, so follow the rack’s rated limits and mounting instructions.
When selecting storage, consider the environment. Damp spaces call for materials that resist rust and swelling. Think about weight limits for shelves and hooks, and anchor tall units to the wall. Keep chemicals in appropriate cabinets according to the labels. Avoid overfilling any container, as overloaded shelves and drawers are hard to use and dangerous.
- Match the storage to how often you use the item.
- Choose labelled, uniform containers for small parts.
- Leave some spare space for growth.
Dust, Offcuts and Fire Awareness
Tidying is also about safety. Fine dust, wood chips and offcuts build up quickly and create slip hazards, harm lungs and, in large quantities, increase fire risk. Clean dust with a vacuum suited to fine dust rather than a broom, which stirs it into the air. Empty collectors regularly, and check filters according to the manual. Wear a dust mask or respirator while cleaning if dust is heavy.
Manage offcuts with a plan. Keep a bin or rack for usable scraps, sorted by size or type, and a separate bin for waste. When the usable bin fills, clear it out. Stacks of scrap in corners or under benches gather dust and may hide pests. Store them off the floor where possible.
Be careful with materials that can ignite. Rags soaked in certain oils and finishes can heat up as they dry and may ignite. Dispose of them as the label directs, such as laying them flat outdoors to dry or storing in a sealed metal container. Keep flammable liquids in approved containers away from heat sources, and limit the amount kept in the shop. Keep exits clear and know where your fire extinguisher is, and check that it is within date and suitable for your hazards. Smoke alarms need testing at regular intervals.
- Never leave sawdust piles near heaters or sparks.
- Keep paths to doors and extinguishers clear.
Habits That Make Tidiness Last
A tidy shop is the result of small habits repeated, not a single big cleanup. Build a short routine at the end of every session: put tools back, brush off the bench, sweep the main work area and switch off and unplug equipment. Set a timer for ten minutes if it helps. Doing this while the work is fresh in your mind is faster than sorting a pile later. A small container or tray on the bench can hold tools in use, so they do not wander.
Adopt a one-in, one-out rule for tools and supplies. When you bring in something new, decide where it will live, and consider whether something else can go. Buy materials in amounts you will use, as bulk purchases that never get used are a source of clutter. Return borrowed items promptly, and keep a note of what you lend.
Review the layout every few months. Notice where mess keeps accumulating, since it often indicates that an item has no good home or that the storage is inconvenient. Adjust the system instead of blaming yourself. Involve other people who use the shop, and agree on a few simple rules. Place labels where everyone can see them.
Finally, reward the effort. A clear bench and a clean floor make projects faster and safer. Take a moment after a cleanup to notice how much easier it is to start the next job.
FAQ
How do I stop clutter from returning?
Limit what comes in. Before bringing in a new tool or material, decide where it will live, and let go of something if there is no space.
Is it better to clean daily or weekly?
A quick reset after each session plus a longer weekly pass works well for most people, though your own routine may vary.
Where should I start if my workshop is badly cluttered?
Pick one small area, such as the main bench, and clear it fully. Sort items into keep, rehome, repair and dispose groups. Finishing one section gives momentum and shows what storage you really need.
How do I store small screws and fasteners?
Use labeled drawers, divided organizers or lidded jars sorted by type and size. Clear containers help you see contents. Keep outdoor-rated and indoor fasteners separate.
How do I deal with leftover paint and chemicals?
Keep them in original, closed containers and store them as the label directs. Do not pour them down drains. Check local rules for disposal or collection events, and avoid keeping more than you need.
Is pegboard strong enough for heavy tools?
It suits light to medium hand tools when used with suitable hooks and fixed to a solid wall. Heavy tools may need sturdier supports or shelves. Check the board's and hooks' stated limits.
How can I keep a small shop organized?
Use vertical space, wheeled storage and multipurpose benches. Keep only the tools you use regularly in the shop and store the rest elsewhere. Folding or wall-mounted work surfaces can reclaim floor space.
Should I sweep or vacuum sawdust?
A vacuum suited to fine dust is generally better, as sweeping raises dust into the air. Empty it regularly and wear a mask. Check the vacuum manual for suitable use.
How do I keep tools from walking off?
Mark tools with a color or label, keep a simple lending note and set a standard place for each tool. Outlines on a pegboard or foam inserts make missing tools obvious.
The Short Version
Assign homes, reset the bench every session and run a short weekly cleanup. Handle waste and chemicals by their labels and local rules.