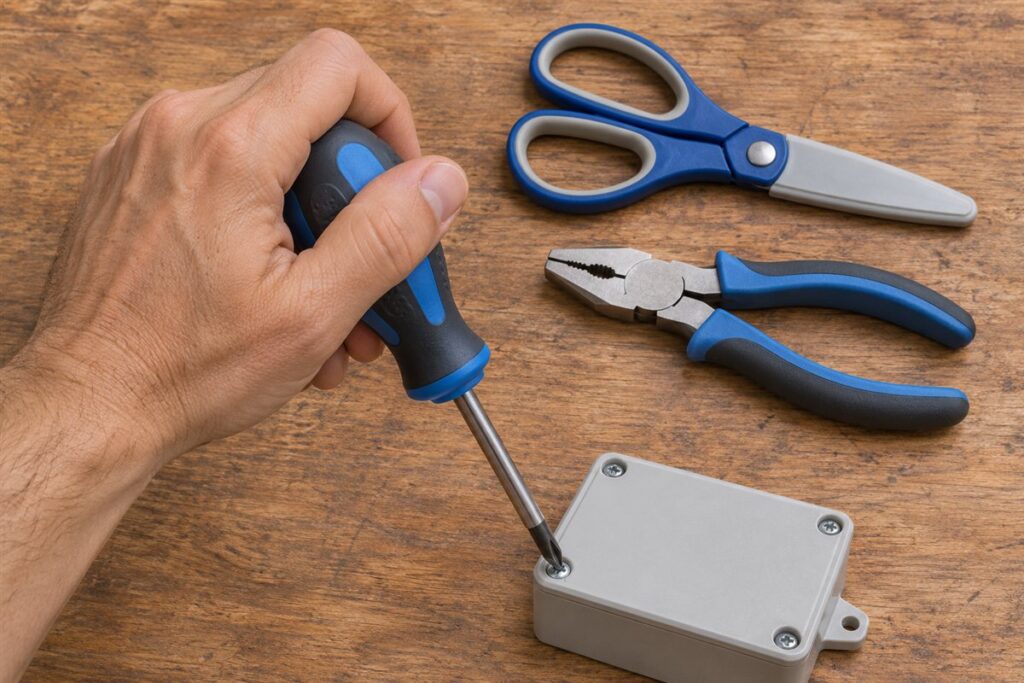
Most hand tools work fine for left-handed users, but some are shaped or marked for right-handed use, and those can be awkward or less accurate. Knowing which tools are affected helps you choose well and adjust how you work.
Tools Where Handedness Matters
- Scissors and shears, where blade overlap affects the cutting line and comfort.
- Tape measures with numbers that run in only one direction, which are easier to read from one side.
- Hand saws, where the angle of the handle and the visibility of the line vary.
- Circular saws, where the motor and blade position change what you can see.
- Utility knives and chisels with offset or shaped handles.
Many hammers, screwdrivers, pliers and wrenches are symmetrical and suit either hand.
Power Tool Considerations
With power tools, the position of switches, guards, dust ports and the cut line can all depend on handedness. Read the maker’s manual carefully, and make sure you can see the cut line and reach the controls without leaning across the tool. Some makers sell models with a different blade side, and some offer ambidextrous controls. Check the maker’s guide for details.
Never remove guards or change a tool in ways the maker does not allow, in order to make it easier to use.
Practical Adjustments
- Try the tool in the shop if possible and hold it as you would to work.
- Check that you can see the cut line, scale or marking while using it.
- Look for tape measures with markings on both sides or with reverse-reading numbers.
- Keep the work lit from the side opposite your dominant hand, to reduce shadows.
- Position the workbench so your dominant side has room to move.
Quick Reference
| Tool | Handedness issue | What to check |
|---|---|---|
| Scissors | Blade overlap | Handle shape and blade side |
| Saw | View of cut line | Body position |
| Tape measure | Numbers read one way | Both-way markings |
| Drill | Mostly neutral | Switch and trigger reach |
If you teach or supervise a left-handed beginner, let them set up their own workspace instead of copying a right-handed demonstration. Mirror the setup where you can, stand to see the cut line clearly, and let them try a few motions with a spare piece before beginning. Patience matters more than special equipment, and most people soon find a method that feels natural. Remember that safety instructions apply equally to everyone, whichever hand they use.
Cutting Tools in Detail
Cutting tools are where handedness makes the biggest practical difference. With scissors and shears, the blades cross in a way that suits one hand. When used in the other hand, the squeeze of the handles can push the blades apart, so the cut becomes ragged, and the top blade can hide the cutting line. Left-handed versions reverse the blade positions so the line stays visible and the blades close properly. Look for markings on the packaging, and try them if you can.
Knives behave differently. A plain utility knife with a straight blade is mostly neutral, but some have grips or lock buttons shaped for one hand. Check that the retraction slider is comfortable to reach with your thumb, and that the blade locks firmly. Chisels and carving tools with flat or shaped handles may be easier to control in one hand, so choose handles that give a secure grip in either.
Hand saws pose a visibility issue. Many people cut with the saw on the right of their line so they can see it, and left-handed users may prefer the opposite. Pull saws, which cut on the pull stroke, have thin blades and are easier to steer, and they work equally well in either hand. Handle shape is worth checking, since pistol grips and open handles may favour one side. Whichever tool you choose, keep blades sharp, since a dull blade needs more force and gives you less control. Wear appropriate gloves and protection as the maker advises.
Power Saws, Routers and Sanders
Power tools bring more complex handedness issues than hand tools, since the motor, guard, handle and controls are all arranged in a particular way. On a typical circular saw, the blade sits on one side of the motor, which affects whether you can see the cut line. Many designs place the blade on the right, so a right-handed person can see the line over the blade. A left-handed user may find the view blocked and may prefer a model with the blade on the left, which some makers offer. Check the product listing and manual to confirm the blade side.
Whatever the layout, never compromise safety to improve visibility. Keep your body out of the line of the blade and the path of kickback. Use both hands as the manual instructs, clamp the work and stand so that you can see the line without leaning across the saw. Use a straight guide or a straightedge for long cuts if it helps you track the line.
Routers, jigsaws and sanders are less tied to hand, but you should check switch placement, handle shape and visibility of the work. A tool with a trigger on one side only may require you to adjust your grip. Dust ports and cords can get in the way; a port positioned on one side may point toward your body, while a cord can drag across the cut. Test for comfort and clear sight lines before purchasing, and choose tools where the controls are reachable without letting go of the work.
Measuring, Marking and Reading Scales
Measuring tools are small, but they affect every project. A tape measure that is printed so numbers read upright from left to right is easiest to use when you pull the tape from the right. Left-handed users often pull from the other side, which leaves the numbers upside down. Look for tapes with markings on both sides, or reverse-printed models, to avoid reading errors.
Steel rules and squares usually have scales starting from the left. Some are available with reverse scales or double scales, which let you read from either end. Check that the markings are crisp and that the zero point is clear. When you use a combination square, hold the head against the edge in the way that suits you and make sure you can see the scale.
- Marking gauges and knives: pull a gauge toward you with the hand that feels natural, and keep the fence tight against the edge.
- Marking with a pencil or knife: hold the tool so your hand does not cover the line.
- Digital tools: displays that can be flipped or rotated are helpful, and many tape measures and calipers have this feature.
Whatever you use, practise reading in your normal working position and double-check critical measurements. Mark clearly so you are not guessing later. A well-lit bench with a light from the side helps avoid shadows over the scale.
Setting Up the Bench and Workflow
Your workspace can do a lot to reduce awkwardness. Arrange tools so that those you use most are within easy reach of your dominant hand, and place the work so you can approach it from the side that feels natural. A vise on the left end of the bench may suit you better than one on the right. Position clamps and stops so they do not block your arm.
Consider lighting. Light should come from the side opposite your working hand, or from above and in front, so your arm does not cast a shadow across the line. Make sure the floor around the bench is clear, with enough space to move your elbows freely.
- Tool racks and holders: hang them so tools come out handle-first on the side of your dominant hand.
- Stops and fences: place them where you can reach and read them without crossing over the cut.
- Power outlets and cords: keep cords behind you and away from the cutting line.
- Workpiece support: make sure long pieces are supported on the side you are not using.
Try small adjustments one at a time and notice what changes. A bench set up around your body is easier on your shoulders and wrists. If you share a bench with others, consider a movable stop or a reversible setup so everyone can adjust to their preference.
Learning and Teaching Techniques
Many instructions assume a right-handed worker, and diagrams and videos often show right-hand technique. Learning to translate is a skill in itself. When following a demonstration, mirror the movements in your head, or watch a mirror image if you can. Some video players and image editors allow flipping, and a mirror placed beside a book can help. Practise the motion slowly on scrap before using real material.
If you teach, ask the learner which hand they prefer and let them show you their natural grip. Avoid insisting on a particular technique unless safety demands it. Sit or stand opposite them so they see your actions as a mirror image, or stand beside them to match their direction. Encourage them to find the stance and grip that give a clear view of the cut and a stable base.
Seek out resources by or for left-handed people, such as guides, classes and communities, and ask other left-handed makers what works for them. Share your own findings. Remember that ambidextrous skill can be useful: practising with both hands can help in awkward positions, but never use a hand that feels unsafe with a sharp or powered tool. Take breaks, stay patient and make safety checks before every cut. Over time, most people develop a style that suits them, and the right tools simply remove obstacles along the way.
FAQ
Do I need a special set of tools?
Usually not. A handful of items, such as scissors and measuring tools, may be worth choosing carefully.
Should I learn right-handed methods anyway?
That is a personal choice. Work in whatever way gives you control, and follow the safety instructions for each tool.
Are left-handed tools more expensive?
They can be, because they are made in smaller numbers, but price varies widely and many everyday tools are neutral. Check the product listing and compare. For scissors and a few specific tools, the benefit may justify any extra cost.
How can I tell whether a tool is truly ambidextrous?
Look for symmetrical grips, controls reachable from either side and statements in the manual or product listing. Handle the tool in a shop if you can and check that you can see the work and reach the switches.
Which power tools tend to suit left-handed users best?
Models with the blade on the left, centered handles, controls on both sides and good visibility are usually easiest. Compare specific models using the manual and, if possible, hold them.
Are there left-handed versions of drills?
Most drills are essentially neutral, but trigger and switch layout can matter. Some have reversible chucks or side handles that mount on either side. Check the listing.
What can I do about a tape measure that reads upside down?
Look for tapes with double-sided or reverse printing, or practise pulling the tape from the other direction. A steel rule with scales from both ends is another option.
Is it safe to use a right-handed tool in the left hand?
It depends on the tool. Some work well, but those with guards, blades or controls placed for the other hand can be unsafe. Read the manual and do not change the tool.
Where can left-handed users find advice?
Look for woodworking and trade communities, local classes and online forums where left-handed makers share experience. Use their tips as ideas and always check against the maker's safety guidance.
The Short Version
Most tools suit either hand, but scissors, saws and measuring tools deserve a closer look. Make sure you can see the work and reach the controls, and rely on the manual.