Wall anchors let a screw hold in hollow or brittle walls where there is no solid wood behind. Choose the anchor for your wall material, drill the hole size the maker states, tap the anchor in flush and then drive the screw. Heavy shelves need extra care and sometimes professional advice. This guide adds a worked example, common scenarios, mistakes to avoid and a troubleshooting table.
Know Your Wall First
Different walls need different anchors, and using the wrong one is the usual reason shelves sag. Tap the wall and drill a tiny test hole in an unseen spot to see what comes out: fine white dust often means plaster or board, gritty gray dust suggests masonry, and wood chips mean a stud or framing.
| Wall type | Usual anchor family | What to check |
|---|---|---|
| Hollow board wall | Expanding or toggle-style anchors | Maker’s weight limit |
| Brick or block | Plastic or sleeve anchors | Drill bit type and depth |
| Solid wood framing | Screws straight into the wood | Screw length and size |
Limits depend on the maker, wall condition and shelf load, so read the packaging for each product.
In this guide
Installing an Anchor Step by Step
- Hold the shelf bracket in place and mark the screw holes with a pencil.
- Check with a small level that the marks line up.
- Before drilling, think about what could be inside the wall. Cables and pipes often run vertically from sockets and switches, so avoid those lines, and if you are unsure, use a qualified professional.
- Choose a drill bit matching the anchor size on the packaging and wrap a piece of tape around it to show the needed depth.
- Drill straight, with steady pressure, wearing safety glasses.
- Vacuum the dust from the hole.
- Tap the anchor in with a hammer until its collar sits flush.
- Drive the screw through the bracket into the anchor until snug, without crushing the wall surface.
- Test with a light load first, then add items gradually.
Tips for Better Results
- Spread the load over two or more fixing points.
- Put heavy items low on the shelf, near the wall.
- Use one anchor type per shelf, so the support is even.
- If a hole turns out too big, move to a larger anchor rather than stuffing it with filler.
Work near gas lines, wiring or structural walls belongs with qualified professionals. Never guess what is behind a surface.
Keep a small box of spare anchors and screws in matching sizes. Mixing sizes from different packs is a common cause of loose fixings, so keep each set with its original label.
How Anchors Actually Hold
There are three main ideas. Friction anchors, such as plastic plugs, push outward against the sides of a drilled hole and rely on a solid material around them. Threaded anchors cut their own thread into soft board or plaster. Toggle and butterfly types pass through a hole and then open behind the wall, spreading the load over a larger area of the board. Knowing which idea your anchor uses tells you where it is strong and where it is not. A plug in crumbly plaster has nothing firm to press against, while a toggle in solid brick has nowhere to open, so each belongs to a different wall.
A Worked Example With Invented Numbers
The figures below are invented. They show a sensible order of thought, not real limits. Suppose you plan two brackets that together carry a shelf, and you estimate the loaded shelf at 8 units.
- Divide the load by the number of fixing points. With two brackets and two screws each, that is four points, so about 2 units per point if the load is shared evenly.
- Remember loads are rarely even. Items near one end put more on that bracket, so plan for a larger share on one side, perhaps double.
- Read the pack limit for the board thickness and anchor type. The limit should sit comfortably above your largest estimated share.
- If it does not, choose a stronger family of anchor or reduce the load, rather than hoping for the best.
- Fit, then load the shelf gradually and look for movement after a day.
Common Scenarios
A shelf in a bedroom with a hollow wall
Locate studs first. Where none line up, use toggle-style anchors for the bracket holes and keep contents light.
A shelf in a garage with block walls
Use a masonry bit and plugs, drilling to the depth the pack lists. Block can be hollow inside, so check the pack for hollow block types.
A shelf in an older plaster home
Plaster can crack and crumble. Drill slowly, avoid hammer mode unless the maker allows it, and consider a professional for heavy loads.

Replacing a shelf that has pulled out
Do not reuse the weakened holes. Move the bracket along the wall or fill the holes and refix with a stronger type.
Mistakes to Avoid
- Using the wrong drill bit. A hole that is too large leaves the anchor loose and a hole that is too small can crack the wall.
- Not clearing the dust. Dust in the hole acts like a cushion and lowers the grip.
- Driving the screw too far. This strips the anchor or crushes the board behind the bracket.
- Mixing anchors on the same shelf. Different types flex differently and share load unevenly.
- Ignoring the screw length. It must reach well into the anchor but not into any hidden space behind it.
Quick Troubleshooting
| Symptom | Likely cause | What to try |
|---|---|---|
| Anchor spins | Hole too big or anchor wrong for wall | Use a larger or different anchor type |
| Anchor will not go in | Hole too small or blocked with dust | Check bit size and clear the hole |
| Shelf sags at the front | Load beyond the limit or fixings pulling out | Unload and refix into framing or stronger anchors |
| Crack near the bracket | Over-tightening or brittle wall | Stop, refix at a new position |
Care and Upkeep Over Time
Look at the shelf every few months. Check for hairline cracks around each bracket, gaps between bracket and wall and any change in tilt. Never add weight just because the shelf looks fine, as sagging may begin below the surface. Store spare anchors dry, in labelled bags.
Glossary
- Anchor: a fixing that gives a screw something to grip in a wall.
- Toggle: an anchor with wings or a bar that opens behind a board.
- Plug: a sleeve pushed into a drilled hole in solid material.
- Collar: the rim at the front of an anchor that sits against the wall.
- Masonry: brick, block, stone or concrete.
Anchor Types Compared: What Each One Does Well
The post lists anchor families by wall type. Here is a closer look at how the common kinds work, which helps you understand why a particular choice suits a particular job.
Expansion plastic anchors are plugs that widen as a screw is driven in, pressing against the sides of the hole. They are common for light loads in masonry and solid walls, and in some hollow walls where the maker approves. Their grip relies on the hole being the right size and the wall material being sound.
Sleeve and wedge anchors are metal and grip masonry or concrete by expanding in the hole. They suit heavier loads in solid material, and the packaging lists drilling requirements.
Self-drilling or threaded anchors screw directly into board walls and rely on their thread to grip. They are quick to fit, and their limits are modest, so check the stated weight.
Toggle and butterfly anchors have wings or a channel that opens behind a hollow wall. They spread load over a wider area on the back of the board, which makes them suited to heavier items in hollow walls, again within stated limits.
Molly or sleeve-type hollow wall anchors expand behind the board as the screw tightens. They are used for medium loads in hollow walls.
- The load limit depends on the anchor, the screw, the wall thickness and the wall condition.
- Different directions of load, such as straight down versus pulling out, can have different limits.
- Read the packaging for the hole size, screw size and the wall types the anchor is rated for.
When one type seems right but the limit is close to your load, move up to a stronger option or add more fixing points. Do not guess.
Matching Anchors to the Real Weight of a Shelf
A shelf looks light when empty, and then fills up. Work out what it will carry before you choose hardware, because anchors that suit a few picture frames may not suit a shelf of books.
Estimate the weight honestly. Books, crockery, tools, plants with soil and wet items all add up. Add the weight of the shelf and brackets. Then divide the load among the fixing points, bearing in mind that load is not always shared evenly. The fixing nearest the heaviest items works hardest.
Leverage matters too. A deep shelf puts more pull on the top screws than a shallow one, because the load acts away from the wall. The upper fixings are pulled outward while the lower part of the bracket pushes in. Heavy items placed far from the wall increase this effect, so keep them close to the wall, as the post suggests.
- Choose anchors whose stated limit is well above your estimated load per fixing.
- Use a bracket with enough fixing holes to spread the load.
- Use anchors at the top of each bracket where the pull-out force is strongest.
- Check that the screws are the right length for the shelf bracket, the wall surface and the anchor depth.
If the shelf will carry a lot of weight, or hold something valuable or dangerous if it fell, consider fixing into wood framing or masonry, or ask a qualified professional. Stud locations are not always where you expect, so use a detector and verify with a small test hole in an unseen place.
Testing Fixings and Troubleshooting Common Failures
Checking a fixing before you trust it with a load is quick and worth doing. Anchors that fail during installation or soon after usually give early warnings.
After driving the screw, apply gentle pressure to the bracket by hand. It should not wobble, spin or shift. Watch for movement at the anchor collar. If the anchor turns when you tighten, it is not gripping and the hole may be too large or the wall crumbling. Stop and rethink before putting load on it.
Common problems and likely causes:
- Anchor spins in the hole: the hole is oversize, the wall is soft or damaged, or the anchor is the wrong type. Try the next size up or a type made for the material.
- Anchor will not go in: the hole is too small or not deep enough, or dust is blocking it. Clean and recheck the depth.
- Screw feels loose after tightening: the screw is the wrong size for the anchor, or the anchor expanded badly.
- Wall surface crumbles around the hole: the plaster or board is old. Use anchors made for that wall or move to solid fixings.
- Shelf sags at the front: bracket pulling out at the top, or the shelf board is too thin for the load.
- Anchor hits something hard: stop. It may be a stud, pipe, conduit or metal. Do not push on.
When you need to remove a failed anchor, pull or cut it out as the maker suggests, and fill the hole with a suitable filler or move the position. Tapping a larger anchor into a damaged hole may work once, but the surrounding wall is weakened. If walls are crumbly across a wide area, a qualified professional can advise.
Shelf Hardware: Brackets, Boards and Hidden Supports
Anchors are only part of the system. The bracket and the shelf board decide how loads reach the wall, and a mismatch makes even a good anchor work harder than it should.
Fixed brackets such as L-shaped or triangular supports are the most common. A diagonal brace in the bracket, where there is one, helps resist sagging. Floating shelf supports hide the metal inside the shelf, and rely on a bar or plate fixed to the wall. They put strong leverage on the upper fixings, so follow the maker’s guidance on wall types and load, and be extra cautious. Rail or track systems use a long wall strip with movable brackets and spread load across many fixing points. Cantilever supports are rods or plates that slide into the shelf board.
The shelf board matters as well. Thin boards can bow under load, and long spans need extra support. Heavier materials need stronger brackets. Check that the board is attached to the brackets with suitable screws, and that screw length does not pierce the top surface.
- Space brackets within the board’s capacity, and use more of them for long shelves.
- Choose brackets whose depth matches the shelf to avoid overhang.
- Use all the fixing holes the bracket provides, not just one or two.
- Match the finish to the room, and check the packaging for corrosion resistance in damp spaces.
Look at the manufacturer’s guidance for the combination of bracket, board and wall. If the instructions disagree with your plan, follow the instructions and ask the maker if unsure.
Maintaining Shelves and Rechecking Over Time
A shelf that is secure today may not stay that way. Loads change, walls move with the seasons, and anchors can work loose. A little attention prevents surprises.
Give a new shelf a gradual start. Add items a few at a time and watch for sagging or movement over the first days. Heavy items should go low and close to the wall. Avoid sudden loading, such as dropping boxes onto the shelf.
Recheck at regular intervals. A reasonable habit is to look whenever you dust or reorganize. Gently test the brackets for movement, check for gaps opening between the shelf and the wall, and look for fine cracks in the wall surface around the fixings. Check screws for tightness and for rust in damp rooms.
- If a shelf begins to tilt or sag, unload it and find the cause before reloading.
- Do not climb on shelves or use them as steps.
- Keep a note of the anchor and screw types you used, with the packaging limits.
- If you move or reconfigure shelves, treat old holes as weakened and plan new fixing positions where possible.
When removing a shelf, take out the screws, check the anchors and decide whether to remove or retain them. Fill unused holes to keep the wall tidy, and use a suitable filler for the wall type. Paint after the filler has dried according to its label.
If you see cracks growing, walls bulging or anchors pulling out in several places, stop using the shelf and ask a qualified professional to check the wall.
Which wall anchor should you buy for your shelf?
Pick the anchor by wall material first, then by the load. The anchor types compared above each suit a different job.
- Solid brick, block or concrete: expansion plastic plugs for lighter shelves, or sleeve and wedge anchors for heavier loads.
- Hollow board wall, medium load: a molly or sleeve-type hollow wall anchor.
- Hollow board wall, heavier shelf: toggle or butterfly anchors, which spread the load behind the board.
- Light display shelf, quick job: self-drilling threaded anchors, within their modest stated limit.
- Heavy books or tools: screws into wood framing or solid masonry, or advice from a qualified professional.
If your estimated load sits close to the pack limit, move up a size or add fixing points. Do not rely on the margin holding. Deep shelves pull harder on the top screws, so a deeper shelf deserves a stronger anchor than a shallow one carrying the same weight.
Identify your wall, estimate the loaded shelf honestly, then match both to the anchor listing before you buy.
What to check before you buy wall anchors, and who should skip them
Check the wall types, hole size and weight limit on the pack before buying. A mismatch is the most common reason shelves sag or pull out.
- The wall types the anchor is rated for, and the board thickness it needs.
- The drill bit size and depth, and whether you own a suitable bit.
- The screw size and length, and whether screws are included.
- The stated limit, and whether it applies to straight-down or pull-out loads.
- How many anchors come in the pack, so you have spares.
- Return and warranty terms on the listing.
The trade-offs are plain. Anchors are inexpensive compared with the damage a falling shelf does, but they are only as good as the wall around them, and a stronger anchor does not rescue crumbling plaster.
You should skip anchors alone, and use framing or a professional, if the shelf will carry a lot of weight, hang over a bed or a seat, or sit on an old wall that crumbles. Also stop if you cannot tell what is hidden behind the wall.
Compare the anchor types above, check the current listing for wall type, limit and what is included, then choose the one that fits your wall and your shelf.
Ready to Buy? Start Here
If this guide helped you decide what to look for, these products are a place to start.
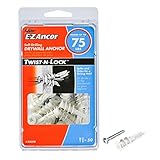
As an Amazon Associate we earn from qualifying purchases. Prices and availability are shown on Amazon.
Choosing Anchors by Failure Mode, Not by Packet Colour
The wall of anchor packets in a hardware shop is organised by size and colour, but the choice that matters is organised by how each anchor resists being pulled out, because shelves load their fixings in a particular and unforgiving way. A shelf bracket is a lever: the load sits out from the wall, so the top fixing of each bracket is pulled outward, trying to extract the anchor straight from its hole, while the bottom fixing is pressed into the wall and mostly looks after itself. That is why shelf anchors should be chosen for their resistance to straight pull-out in your specific wall material, and why the top hole of every bracket deserves the best anchor, the most accurate drilling and the most sceptical testing of the whole installation. An anchor that is excellent under a downward shear load, holding a picture, can be a poor citizen at the top of a shelf bracket, and the packet rarely explains the difference.
Run through the families with that lens. Expansion plugs hold by friction against the hole’s sides; in solid masonry, drilled accurately, they are dependable, while in hollow board their friction has little to grip and pull-out resistance is modest. Threaded self-drilling anchors cut a broad thread into board and resist pull-out by the circle of board their thread engages; they are a sound middle choice for light and medium shelves in sound board, and a poor one in board that is thin, crumbly or already perforated nearby. Toggle-style fixings open behind the board and resist pull-out with the board’s own back face, the strongest answer hollow board can give, provided the cavity behind is clear for the wing to open and the board itself is sound enough to bear the pressure. Sleeve and frame fixings in masonry spread their grip along a longer drilled depth, which suits heavier brackets in brick and block. The pattern to notice is that every family is really a claim about a material, so the first question is never which anchor, but which wall.
Investigating the Wall Until It Confesses
Before choosing, investigate the actual wall at the actual bracket positions, because the same room can offer studwork in one bay, a masonry chimney breast in another and a patched mystery in a third. Combine methods. A stud finder gives indications; the tape measure gives expectations, since studs repeat at regular intervals from corners; tapping gives a hollow or solid voice; and a tiny pilot hole in an inconspicuous spot, or inside the bracket’s footprint where it will be hidden, gives certainty about what the drill will meet and how thick the surface layer is. Note what comes out of that pilot hole on the bit: pale board dust, wood shavings, red brick dust, grey block crumb and old plaster each announce a different wall and therefore a different anchor family, and each also tells you the honest depth of material your fixing can grip.
While investigating, map the hazards with the same care. Services run in logical lines from sockets, switches and radiators, and shelf brackets, being placed for furniture rather than for wiring, have a talent for landing exactly on those lines. Treat a detector’s warning that agrees with the room’s logic as decisive and move the bracket; a shelf can sit a few centimetres along the wall with no loss, which is a trade you should make every time it is offered. Also probe for previous tenants’ archaeology: a wall that has carried shelves before may be peppered with filled holes whose filler looks like wall and holds like cake. An anchor that lands in an old filled hole has landed in nothing, so include a gentle screwdriver probe of any suspiciously smooth patches inside your bracket footprints.
The Load Arithmetic for a Real Shelf
Work the numbers for the shelf you are actually building, at its fullest plausible future, not its emptiest first day. Weigh or estimate the board and brackets, then the contents by category: a metre of hardback books is a serious load, a row of storage boxes hides its weight until they are full, and anything liquid is heavier than it looks. Total it, then divide by the number of brackets to get the load per bracket, and divide again by the number of fixings per bracket only with a correction in your head: because of the lever effect, the top fixing carries a share well beyond its fraction, so judge the top anchor against a generous portion of the bracket’s whole load, not a tidy half. Compare that figure with the anchor maker’s stated capacity for one fixing in your wall material, and require the comparison to pass with margin, because the maker’s figure assumes a perfect hole in perfect material, and your wall, like everyone’s, is merely good.
An invented example shows the thinking. Suppose a shelf and its planned books together weigh about as much as a full suitcase, on two brackets. Each bracket carries half a suitcase. If each bracket has two screws, the naive share is a quarter of a suitcase each, but the top screw should be chosen as if it might see half the bracket’s load on a bad day, a quarter of a suitcase from one fixing in board. That test passes a toggle or a well-chosen threaded anchor in sound board, and fails a small friction plug, which is exactly the kind of answer you want while the packets are still on the shop shelf. If the test fails everywhere, the levers are more fixings per bracket, more brackets, a shorter shelf, fixings into studs, or a lighter library, and all of them are cheaper than the same discovery made by gravity.
Drilling and Setting: The Craft That Makes the Packet’s Numbers Real
An anchor’s rated capacity lives or dies in its hole. Drill with the bit size the maker states, at a steady speed, square to the wall, without reaming the hole wider as you withdraw; in board, an oversize or oval hole silently demotes every anchor family by a class. Drill to the stated depth and clear the dust, because anchors seated on their own dust are seated on nothing. Set each anchor fully home, flush as directed, before the bracket is offered up, and drive the screw with a hand tool for the final turns so you can feel the bite: a screw that tightens with firm, rising resistance is reporting grip, while one that suddenly spins has stripped its anchor or its hole, and that fixing must be remade with a different anchor or a moved position, not left in service on optimism.
Prove the installation before the shelf earns trust. With brackets fixed and the shelf in place, load it progressively, heaviest items first and placed as they will live, watching the top fixing line of each bracket for movement and listening for any board noise. Press down at the shelf’s front edge above each bracket, the worst case the shelf will ever meet, and watch again. Then leave the full load in place for a day and re-inspect: creep, the slow surrender of a marginal fixing, announces itself early as a hairline gap behind a bracket’s top or a screw that has relaxed a quarter turn. A shelf that passes the day test and the front-edge test has been installed; a shelf that was merely screwed up has only been introduced to the wall.
Troubleshooting by Symptom, Months Later
A shelf that sags while its brackets stay tight to the wall is usually reporting the board or the brackets flexing, or fixings placed too close together to resist the lever, rather than anchors pulling out; check the bracket’s own stiffness and the span between brackets before blaming the wall. A bracket whose top has crept away from the wall, opening a shadow gap, is an anchor in retreat and should be unloaded and re-fixed with a stronger family or a move into structure. A shelf that wobbles sideways has fixings that are individually sound but a geometry that allows racking, often one bracket slightly out of line with the other, and it is cured by alignment, not by tighter screws. And a sudden failure, a shelf down in the night, almost always has a biography readable in the holes: anchors that came out wearing sleeves of crumbled board were in material that could not hold them, anchors that stayed in the wall while screws pulled through the bracket were overloaded at the lever, and anchors that came out clean were in holes too big from the first day. Read the biography honestly, because the re-installation that ignores it is a sequel, not a repair.
Battens, Rails and Other Ways to Change the Question
Sometimes the right answer to a difficult wall is not a cleverer anchor but a different distribution of the problem. A timber batten, introduced earlier in this guide, deserves its full explanation because it converts so many impossible shelves into routine ones. The batten is fixed horizontally at the shelf’s bracket line, with its own fixings placed wherever the wall is strong: into every stud it crosses, or at generous intervals into sound masonry. The shelf’s brackets then screw into solid timber at exactly the positions the shelf requires, with short wood screws whose behaviour is predictable and forgiving. The load path is honest at every stage, the batten spreads the bracket’s outward pull across all its fixings working together, and the whole assembly can be stronger than any single-anchor solution in the same wall. Its costs are visual and modest: a strip of timber, which most people paint the wall’s colour, where it reads as part of the room’s trim rather than as an apology.
A metal mounting rail works on the same principle where a slimmer profile is wanted, and a plywood pattress, a panel fixed behind or over the surface, serves in stud walls where a large area needs to become fixable, as behind a run of kitchen shelving. The shared idea matters more than the hardware: when the wall’s strong points and the shelf’s fixing points refuse to coincide, introduce an intermediary that negotiates between them, rather than forcing anchors to perform in material that has already told you it cannot. This is not a workaround in the pejorative sense; it is how professional installers approach old, patched, hollow and otherwise eloquent walls, and the shelves that result are the ones still level at their tenth anniversary.
Keeping Records and Handing the Wall Over Well
Walls accumulate history invisibly, and every shelf you install becomes part of the next installer’s puzzle. Do the future a small kindness that costs you two minutes: keep a note, in the house file, on your phone, or in pencil on the inside of a nearby cupboard door, recording where your shelves were fixed, what the wall turned out to be at each bracket, which anchor family you used, and where any retired or filled holes lie. When the shelf moves, when a new shelf is planned on the same wall, when a picture hook’s drill finds something unexpected, that note converts archaeology into information. Houses whose owners keep such notes get steadily easier to work on; houses that do not get steadily more perforated by guesswork.
Pair the record with a light inspection rhythm. Shelves that carry real loads deserve a glance at their bracket lines whenever they are dusted or reloaded, a press at the front edge each time the room is rearranged, and a proper re-check after any event that shakes the building or soaks the wall, from a plumbing leak two rooms away to a season of building work next door. Anchors do not send warnings by post; they whisper in hairlines, gaps and quarter-turns of looseness, and the owner who has learned to read those whispers, and who knows from the record exactly what is inside the wall doing the holding, will keep shelves up for decades with nothing more dramatic than attention. That, in the end, is the whole craft this guide has been describing: investigate honestly, calculate simply, fix appropriately, prove the result, and keep watching, lightly, for as long as the shelf serves.
A Worked Decision, From Wall to Shelf, in One Pass
Pull the whole method together on an imaginary but typical job. You want a shelf for books above a desk. The wall investigation finds studs at either end of the planned span and board between them, with a socket below warning you that a cable rises vertically somewhere near the middle. The load estimate, shelf plus a full row of books, comes to about a heavy suitcase. Two brackets would put half a suitcase on each; the end brackets can screw to studs, but you planned three brackets for the span, and the middle one would sit near the cable’s line, so you move it a hand’s width along, check it clears the danger line, and choose a toggle for its board fixing while the ends take screws into wood. The top fixings pass the pull test, the loaded shelf passes the front-edge test, and a day later nothing has crept. Every stage of that job was a small, ordinary decision, but they were made in the right order, wall first, numbers second, hardware third, holes last, and that order, more than any particular anchor, is what the shelf is really hanging on.
FAQ
Can I reuse an anchor hole?
Often not. Once an anchor has been pulled out, the hole is usually weaker.
How do I know the shelf is level?
Check with a level before the final tightening and adjust the bracket if it tilts.
Do I need different anchors for the top and bottom screws?
Not normally. The top screws take the pull-out force, so they matter most, but using the same type across the bracket keeps the load even.
What size drill bit do I use?
The one the anchor packaging states. Do not guess by eye, since a small difference changes how well the anchor grips.
Can anchors go into a ceiling?
Ceilings carry load differently. Follow the maker’s instructions for ceiling use, and ask a qualified professional if the structure is unclear.
Do I need a stud for every shelf?
Not always. Light shelves can use anchors rated for the weight, but heavy loads are better fixed into framing or solid masonry. Check the packaging limits and your estimated load.
What size screw goes with a given anchor?
The anchor packaging states the screw size or range. Use that size, and make sure the screw is long enough to pass through the bracket and fully engage the anchor.
Can I use plastic anchors in drywall?
Some are made for it, but others suit solid walls only. Read the packaging for approved wall types and stated weight limits before using them.
Why does my shelf sag even though the anchors hold?
The shelf board may be too thin for the span or load, or the brackets may be too far apart. Add support or choose a stronger board.
How deep should I drill for an anchor?
Follow the packaging, which gives the required depth. Wrapping tape around the bit marks the depth, and drilling slightly deeper than the anchor length gives space for dust.
Can I mix anchors from different packs?
It is better not to. Anchors and screws are sized as sets, and mixing sizes is a common cause of loose fixings. Keep sets with their original labels.
Is it safe to use a hammer drill on any wall?
No. Hammer action suits masonry but can damage plaster, tile or hollow boards. Check the anchor instructions and the drill's manual for the right setting.
What is the strongest wall anchor for a shelf?
Strength depends on the wall and the anchor type. Toggle anchors in hollow walls and sleeve or wedge anchors in solid masonry are generally the stronger options, within the limits stated on the pack.
How many anchors does a shelf bracket need?
Use every fixing hole the bracket provides. More points share the load, and the top ones matter most because they resist pull-out.
Can I use drywall anchors on a plaster wall?
Only if the pack lists plaster. Plaster can crumble, so use anchors made for it and drill slowly.
Do I need to pre-drill for self-drilling anchors?
Many do not need a full hole, but follow the packaging, since some call for a small pilot. Check the instructions for your product.
How do I fix a shelf anchor that keeps spinning?
Remove it and try the next size up or a different type made for that wall. If the wall is crumbling, move the bracket to fresh wall instead.
Can I remove wall anchors and reuse them?
Usually not, because they deform when installed. Use fresh anchors, and fill the old holes with a filler suited to the wall.
How many brackets does a shelf really need?
As many as the load arithmetic and the board’s stiffness jointly demand. A short shelf with light contents in studs may need two; a long shelf carrying books usually wants a bracket near each end and support in the middle, because the board itself bends between distant brackets even when every anchor is sound. Judge by two tests: the per-bracket load must pass the anchor comparison with margin, and the loaded board must not visibly bow between brackets. If either test fails, the answer is another bracket, placed where the wall investigation says it can be fixed honestly.
Can I anchor a shelf into the mortar joints between bricks?
It drills easily, which is the temptation, and holds poorly, which is the answer. Mortar is the weakest material in a masonry wall, varies enormously with age, and crumbles around an expanding anchor. Fix into the brick or block units themselves, centred comfortably within a unit, and adjust the bracket position by the small amount that requires. If a bracket’s two holes cannot both land in sound units, change the bracket or add a timber batten fixed at several sound points, and fix the shelf to the batten.
What is a batten, and when does it solve the whole problem?
A batten is a horizontal timber strip fixed to the wall at multiple points, ideally into studs or sound masonry, to which the shelf or its brackets are then screwed. It converts a few difficult fixing positions into many easy ones, spreads the load along the wall, and lets you place brackets where the shelf wants them rather than where the studs allow. It is the classic honest answer for heavy shelves on awkward walls, at the price of a visible strip that many people paint to match the wall and promptly forget.
Why do the anchors in my garage block wall hold worse than the same anchors indoors?
Because the material is probably different from what the anchor expects: many blocks are hollow, so an anchor that feels set may be gripping only a thin shell of block, and garage walls are often damper, which weakens both block and fixing over time. Probe a test hole to learn whether you are over a hollow cell or a solid web, choose fixings made for hollow block or drill into the solid parts, and expect to use the stronger families. The packet’s promise was written for the material it names; the garage is under no obligation to match it.
How do I remove anchors cleanly when the shelf comes down?
Work by family. Screws come out first, always. Expansion plugs can often be drawn out by reinserting the screw a few turns and pulling steadily, or pushed into the cavity in hollow board where they harm nothing. Threaded anchors unscrew in reverse with a driver. Toggles sacrifice their wing inside the cavity by design; push the bolt through and let the wing drop, then fill the hole. Fill, cure, sand and paint as the final step, and keep a note of where the old holes are if the wall will carry shelves again, because a future drill that finds a filled hole deserves the warning.
The Short Version
Identify the wall, choose a matching anchor, drill clean holes and tighten gently. Follow the packaging limits, keep away from hidden services, and ask a qualified professional when in doubt.