A drill bit sharpener restores the cutting lips of a worn twist bit so it bites cleanly again. The main choices are the range of bit sizes, the point angle it can set, whether it is a powered machine or a jig that holds the bit against a grinder, and how much of the geometry it controls.
The six tools below cover a plug-in 118 degree sharpener, a vise-mounted grinding attachment, a jig for a Tormek system, a small plastic electric unit and two machines with built-in wheels. Sizes, angles and power figures come from each listing page and are the makers’ own claims. We have not used these tools ourselves. Where a listing disagrees with itself, we say so.
As an Amazon Associate we earn from qualifying purchases. Links below are affiliate links, and they do not change the product information we give.
What to Look For
| Feature | Why it matters |
|---|---|
| Bit range | Check the smallest and largest bit you sharpen |
| Point angle | Fixed angles are simple, adjustable angles suit more materials |
| Power source | Plug-in machines, hand attachments and jigs work differently |
| Host needed | Some tools need a grinder or another system to work |
In this guide
Specs at a Glance
| Sharpener | Bit range | Angle | Notes |
|---|---|---|---|
| Truper AFB-118 | Not listed | 118 degrees | Electric; 2.82 lb; HSS and carbon steel bits |
| General Tools 825 | Not listed | 41 to 88 degrees listed | Hand attachment; vise mount; pivoting neck |
| Tormek DBS-22 | 1/8 to 7/8 in | 90 to 150 degrees | Jig only; needs a Tormek system; 7 to 14 degree clearance |
| GOODSMANN | 1/8 to 25/64 in | Not listed | Plastic body; 1350 or 1700 RPM in title |
| VEVOR MR-13A+ | 3 to 15 mm | 95 to 135 degrees | CBN wheel; 13 collets; 5800 RPM; 18.74 lb |
| MDPSDS RS-1 | 1/8 to 15/32 in | 130 degrees | 95 W; built-in wheel; 2.59 lb |
The 6 Best Drill Bit Sharpeners

Top pickBest for general purpose 118 degree bits
1. Truper AFB-118 Electric Sharpener for 118 Degree Drill Bits
A compact electric sharpener made for 118 degree bits, with a listed weight of 2.82 pounds and a footprint of about 7.9 by 7.9 inches. The maker says it works on high speed steel and carbon steel bits. The listing gives no bit size range, and the title says AFB-118 while the part number reads AFB-20A.
Suits: general purpose 118 degree bits. Strengths: small and light. Weaknesses: no listed size range and a model number mismatch. Skip it if you need other point angles.

View Truper AFB-118 Electric Sharpener for 118° Drill Bits on Amazon

Best for a bench with a grinder
2. General Tools Drill Grinding Attachment 825
A hand-held attachment that clamps in a vise and is meant to be used with a grinding wheel. The maker says a pivoting neck sharpens both sides of the bit equally and lists point angles of 88, 68, 59, 49 and 41 degrees, and it mentions countersinks. The page gives a weight of 9.07 grams, which cannot be right for a metal tool, and no bit size range.
Suits: a bench with a grinder. Strengths: adjustable angles and a pivoting neck. Weaknesses: odd angle list and a doubtful weight. Skip it if you want a self-contained machine.

Best for owners of a Tormek system
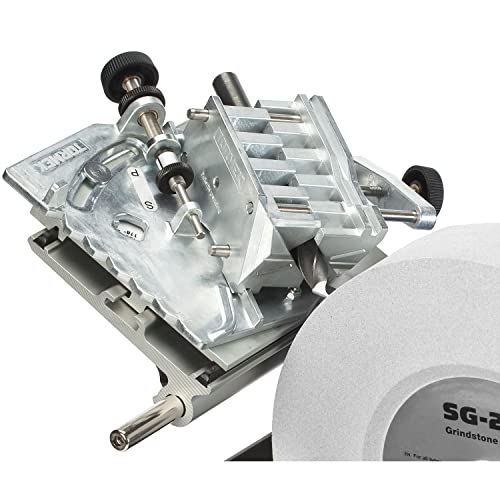
3. Tormek DBS-22 Drill Bit Sharpening Jig
A jig, not a machine, made for Tormek water-cooled sharpening systems. The maker lists point angles from 90 to 150 degrees, clearance angles of 7, 9, 11 or 14 degrees and bit sizes from 1/8 inch to 7/8 inch. It says the four-facet point shape keeps the bit from walking. The listing weight is 0.3 kg with a one year warranty.
Suits: owners of a Tormek system. Strengths: wide size and angle range. Weaknesses: useless without the Tormek machine. Skip it if you do not own one.
Best for common small bits
4. GOODSMANN Electric Drill Bit Sharpener 9923-0110-01
A small plastic-bodied electric sharpener with heads for bits from 1/8 inch to 25/64 inch. The title mentions 1350 and 1700 RPM, and the table lists diamond or tungsten carbide as the grit. The body is about 4.5 by 4.5 by 7.2 inches. The listed weight of 0.27 g is clearly a data error, and the point angle is not stated.
Suits: common small bits. Strengths: compact and light. Weaknesses: no angle listed and a plastic body. Skip it if you sharpen bits above 25/64 inch.
View Electric Drill Bit Sharpener, Heads 1/8″ – 25/64″, 1350 RPM/ 1700 RPM 9923-0110-01 on Amazon
Best for a workshop that sharpens many bits
5. VEVOR Drill Bits Sharpener MR-13A+
A benchtop machine for bits from 3 to 15 mm with a point angle adjustable from 95 to 135 degrees, a pre-installed CBN wheel and a 5800 RPM motor. It comes with 13 collets and two collet chucks, and the maker says it sets both the point angle and the lip relief angle. The body is 45 steel, the table lists 120 watts and the weight is 18.74 pounds.
Suits: a workshop that sharpens many bits. Strengths: adjustable angle and collet holding. Weaknesses: heavy at 18.74 pounds. Skip it if you want a pocket-sized tool.

Best for light home use
6. MDPSDS RS-1 Electric Drill Bit Sharpener
A 95 watt, 110 volt plug-in sharpener with a built-in grinding wheel for 130 degree twist bits from 1/8 inch to 15/32 inch. The maker says it handles high speed steel, carbide, hardened steel and high carbon steel and that a positioning plate sets the angle for you. The listing weight is 2.59 pounds, and it has a non-slip base.
Suits: light home use. Strengths: small and plug-in. Weaknesses: one fixed angle. Skip it if you need other point angles.

Care and Setup
- Follow the maker’s instructions for the tool you choose.
- Wear eye protection when grinding metal.
- Keep the bit symmetrical so both lips cut equally.
- Brush away grit and metal dust after each session.
Mistakes to Avoid
- Buying a fixed angle tool for bits that need a different angle.
- Forgetting that a jig or attachment needs a grinder or system.
- Trusting a listing weight that looks like a data error.
- Ignoring the bit size range of the tool.
How a Twist Bit Is Ground and What a Sharpener Must Reproduce
A twist drill bit cuts with two lips that meet at a point. Four geometric features decide how well it drills, and any sharpener you buy is really a way to restore them. The first is the point angle, the included angle between the two lips. A wider angle suits harder materials and sheet metal, while a narrower angle bites faster in softer stock. The second is lip relief, a small clearance behind each cutting edge that lets the edge touch the work without the heel rubbing. Too little relief and the bit squeals and heats up; too much and the edge chips.
The third feature is the chisel edge, the short flat section at the very tip where the two lips meet. A bit with a wide chisel edge walks across the surface and needs more feed pressure, which is why some sharpeners can thin the web or split the point. The fourth is symmetry: both lips must be the same length and at the same angle. If one lip is longer, only that side cuts, the hole comes out oversized and the bit wears fast.
When you compare tools, ask which of these features each one controls for you and which it leaves to your hand. A guided machine with a positioning plate sets symmetry mechanically. A jig or attachment gives you a repeatable angle but depends on your grinder. Whatever the tool, check the listing for whether it sets both the point and the relief, since a tool that only sets one still leaves you finishing the job by eye.
When a Bit Is Worth Resharpening and When to Replace It
Sharpening only pays if the bit is worth saving. Larger twist bits, long bits, and bits in a specialty size that is hard to buy locally are good candidates. Very small bits can be quicker and cheaper to replace than to regrind, particularly if you do not own a machine with small-size collets. Check the minimum size listed for the tool you are considering before you commit.
Signs a bit is dull include a squealing noise, smoke, needing heavy pressure to start a hole, long curled shavings that turn to powder, and a bit that wanders. Look at the tip under a bright light. A sharp bit shows two clean, narrow cutting edges, while a dull one shows a rounded or shiny tip. If the lips look bright and glassy, they are rubbing rather than cutting.
Know when not to sharpen. A bit that is bent, snapped back to a short stub, or has chipped flutes is usually better retired. A bit that has been overheated and turned blue has probably lost its temper, meaning it will not hold an edge. Cracks or missing chunks at the tip suggest the steel has failed. Also consider the coating: some bits carry a thin surface layer, and grinding the tip removes it there. The bit will still cut, but you lose that surface benefit.
A practical routine is to sort your bits periodically, set aside the dull ones, and sharpen a batch in one session. That makes a dedicated machine or jig easier to justify.
Wheel Materials and Bit Steels: Matching the Abrasive to the Job
The abrasive in a sharpener has to cut the steel of your bit without burning it. Common wheel materials include aluminum oxide and diamond or cubic boron nitride (CBN). Conventional wheels work for plain high speed steel and wear down, which changes their shape over time. CBN and diamond wheels hold their shape and cut cooler, and they are often favored for harder steels, though you should confirm the listing says which bit materials the tool handles, since makers differ.
Bit steel matters too. Carbon steel bits sharpen easily but dull faster. High speed steel holds an edge at higher temperatures. Cobalt-alloy bits are harder and tougher still, while carbide-tipped bits generally need diamond abrasives and are not suited to basic grinders. If the listing mentions carbide, read the details of what exactly it can sharpen.
Heat is the enemy. If you see the tip turn straw, bronze or blue, you have drawn the temper and softened the edge. Use light pressure and short touches, and let the bit cool in air rather than quenching it, since sudden cooling can crack hot steel. Water-cooled systems reduce this risk by design, which is one reason owners of such systems favor a matching jig.
Wheel grit is another factor. A coarser wheel removes material quickly and leaves a rougher finish, while a finer one gives a cleaner edge but works slowly. For routine touch-ups a fine grit is usually adequate, and heavy repairs may need a coarser pass followed by a fine one.
A Step-by-Step Sharpening Routine
Whichever tool you choose, a consistent routine produces better results than speed. Begin with eye protection and a dust-tolerant work area, and read the maker’s instructions for how the bit is seated and rotated. Inspect the bit first and clean off any oil or pitch so you can see the lips clearly.
- Set the angle. Select the point angle appropriate for your material, or accept the fixed angle if the tool has one.
- Seat the bit. Position it so the lip to be ground lines up with the guide or collet, with the chisel edge centered.
- Grind lightly. Make a few brief passes, removing only enough metal to restore a clean edge. Keep a bowl of water nearby for hand-held work, but avoid dunking very hot steel.
- Rotate and repeat. Turn the bit to the other lip and grind the same amount, counting passes so both sides match.
- Inspect. Both lips should be equal in length and show a clean, bright edge with no chips.
Then test on scrap material the same as your real workpiece. A good result is a bit that starts without wandering, produces two even spirals of chips and drills a hole close to its nominal size. If one side produces chips and the other does not, regrind to equalize them. Brush away metal dust after use, and store sharpened bits in an index so you do not mix them with dull ones.
Space, Power and Safety Checks Before You Buy
Before choosing a sharpener, think about where it will live and how it will be used. Benchtop machines are heavier and often need a fixed spot with a solid surface. If the machine is heavy, check that your bench can carry the weight and that you can reach the controls comfortably. Small plug-in units are easy to put in a drawer but may wobble on a thin surface, so a non-slip base is a useful feature.
Check the power details in the listing. Look at the voltage, plug type and whether the tool runs on household supply in your region. Some listings include a detachable cord, and some do not. If the tool is a jig or attachment, confirm what grinder or system it needs, including wheel diameter and tool rest style, because an attachment sized for one setup may not work with another.
Safety matters with any abrasive tool. Wear eye protection, keep loose clothing and long hair away from moving parts, and avoid gloves around spinning wheels. Never use a damaged or cracked wheel. Metal dust and sparks can ignite flammable material, so clear solvents and rags away from the area. Hearing protection is sensible with louder machines.
Finally, think about noise, dust and storage of spare parts such as collets and wheels. Replacement wheels may be available separately for some tools; check the listing or manual to see whether the wheel is serviceable. A tool that cannot be maintained may need replacing sooner than one with consumable parts you can swap.
Which drill bit sharpener should you buy?
The right drill bit sharpener is the one that matches the bits you own, the angle you need and the equipment already on your bench. Start with those three facts, then use the matches below.
- You mostly sharpen common 118 degree bits and want something small: the Truper AFB-118 is built around that single angle and is light enough to store in a drawer.
- You already have a bench grinder and a vise: the General Tools 825 attachment adds angle control without paying for a second motor.
- You own a Tormek water-cooled system: the DBS-22 jig is the natural fit, since it is made for that machine and lists a wide size and angle range.
- Your bits are small, up to roughly the 25/64 inch range: the GOODSMANN lists heads for that span.
- You sharpen many bits and want an adjustable point angle: the VEVOR MR-13A+ is the machine here that lists an angle range and collet holding.
- You want a light plug-in unit for occasional home use with 130 degree bits: the MDPSDS RS-1 is the simplest of the machines.
If two picks both look right, choose the one whose listed bit range covers your largest and smallest bits. A tool that cannot hold your most-used size is the wrong tool, whatever else it offers. Compare the picks, then use the buttons above to open each listing and confirm the details.
What to check before you buy a drill bit sharpener, and who should skip it
Before ordering a drill bit sharpener, confirm that it holds your bit sizes, sets the angle you need and does not depend on equipment you lack. Several listings in this guide are incomplete, so a few minutes of checking saves a return.
- Bit range: compare the listed smallest and largest size with the bits you actually use.
- Point angle: fixed, adjustable or not listed; confirm it suits your material.
- Host equipment: jigs and attachments need a grinder or a specific system.
- What is included: collets, wheels, adapters, and whether a wheel can be replaced.
- Power: voltage and plug type for your region, if it is a machine.
- Warranty and return terms shown on the listing.
- Data errors: treat odd weights or mismatched model numbers as a reason to read the description closely.
Be honest about the trade-offs. A sharpener only saves money if you regrind bits often or own bits that are costly to replace. Small bits are usually cheaper to replace than to regrind, so if most of your drilling uses small sizes, a tool that cannot hold them well may sit unused. A fixed angle machine is simple, but it will not suit a job that needs a different point. A bench machine takes up space, and a jig is useless without its host.
Skip a dedicated sharpener if you drill only a few holes a year, if you prefer buying new bits, or if you are not comfortable with a spinning abrasive wheel. Compare the picks above, check the current listing for bit range and what is included, then choose the one that fits how you will use it.
What Sharp Really Means: Reading a Bit Before and After the Wheel
A sharpener can only be judged by the bit it produces, so it helps to know exactly what you are looking at. A healthy twist bit has two cutting lips of equal length meeting at a centred point, clearance behind each lip so only the edge touches the metal, and clean flutes that carry chips up and out. When any one of those is off, the symptoms are predictable: an off-centre point makes the bit drill oversize and wander at entry, unequal lips make one lip do all the work and wear fast, and lost clearance makes the bit rub, heat up and squeal instead of cutting. Before you blame a sharpener, learn to read those three features under a bright light with the bit resting against a plain background. After sharpening, the same inspection tells you whether the tool did its job or simply made the end shiny.
The two-chip test and other quick verdicts
The most honest test happens at the drill press. A correctly sharpened bit throws two similar spirals of chip, one from each flute. One thick chip and one wisp of dust means the lips are uneven, whatever the sharpener’s settings claimed. A bit that grabs and pulls itself into soft material has too much effective rake or a thinned, hooked edge. A bit that needs heavy feed pressure and leaves a polished hole wall is rubbing, not cutting, which points to clearance rather than edge keenness. Run these checks on scrap of the same material as the real job, because a bit can behave acceptably in pine and disgrace itself in steel plate.
Point angle in plain language
The picks above split between fixed-angle machines and adjustable systems, and the angle question decides which camp suits you. The common general-purpose point suits most metals a home or farm shop drills, and a fixed-angle unit such as the Truper or the MDPSDS removes the chance of setting it wrong. Adjustable systems such as the VEVOR earn their keep when you regularly drill harder alloys or plastics and want to change the geometry to suit, or when you restore bits that were ground to a different angle in a previous life. The Tormek DBS-22 jig sits in its own camp: it lets an owner of that water-cooled system reproduce a refined, multi-facet point with unusual consistency, at the pace of a wet stone rather than a dry wheel. None of these approaches is wrong; they trade speed, flexibility and repeatability in different proportions.
Each Pick at Work: Six Sharpening Stations
Truper AFB-118: the set-and-forget bench unit
The Truper suits the user who drills mostly mild steel, wood and sheet goods and wants dull bits restored quickly without learning freehand grinding. Its fixed geometry means the routine is simple: seat the bit, work through the steps the maker lays out, test on scrap. It is the right answer for a maintenance bench where several people sharpen and consistent results matter more than exotic geometry. Its boundary is equally clear: bits outside its stated range or style belong to another method, and forcing an unsuitable bit into any guided sharpener produces a confidently wrong point.
General Tools 825: the grinder attachment for occasional use
The 825 attachment turns a bench grinder you already own into a guided sharpener, clamped in a vise and fed by hand. It suits the occasional sharpener who cannot justify a dedicated machine and is willing to spend a little setup time per session. Because it depends on your grinder’s wheel being true and dressed, its results rise and fall with the condition of that wheel, which is why the wheel dresser guides on this site pair naturally with it. Set it up once, carefully, on a batch of truly dull bits rather than one bit at a time, and the per-bit cost in effort drops sharply.
Tormek DBS-22: precision for owners of the system
The DBS-22 is not a standalone purchase; it is an extension of a Tormek sharpening system, and judged that way it is superb for users who already sharpen tools on that platform and want their bits to match that standard. The water-cooled stone cannot overheat a bit, the jig controls the geometry finely, and the resulting point is clean and repeatable. The honest trade-offs are speed and scope: it is a considered process, best for users who value edge quality and already own the machine it mounts on. If you do not own the base system, the other five picks are your shortlist.
GOODSMANN 9923: small bits, light duty
Small bits are the ones freehand grinding ruins most easily, because there is so little metal to hold and the margin between sharp and misshapen is tiny. A compact electric unit such as the GOODSMANN gives those small bits a guided path. It suits hobby benches, electronics and model work, and the drill drivers in a household tool kit. Keep expectations aligned with its class: it maintains working edges on small bits rather than regrinding damaged ones, and a bit with a chipped corner or a bent shank should be replaced, not presented to any sharpener as a rescue case.
VEVOR MR-13A+: adjustable angles and heavier use
The VEVOR is the pick for a shop that sharpens often and across materials, because its adjustable geometry lets you match the point to the work instead of accepting one compromise. That adjustability demands a little discipline: note the settings that work for your common materials and keep that note at the machine, so the flexibility becomes a small set of proven recipes rather than a fresh experiment each time. It also rewards a tidy routine of cleaning the collets and guides, since grinding dust in a precision holder is the enemy of the repeatability you bought it for.
MDPSDS RS-1: a light unit for a lighter workload
The MDPSDS suits the household and light workshop pattern: a drawer of common bits, used in wood, plastic and thin metal, dulled gradually rather than destroyed. A compact unit that lives near the drill and takes a minute per bit changes behaviour; bits get touched up when they first lose their edge instead of being forced until they burn the work. That habit, more than any single feature, is what separates shops whose bits always seem sharp from shops whose bits never are.
Head-to-Head: Machine, Attachment or Jig
The three families solve different problems. A dedicated electric machine, represented by the Truper, GOODSMANN, VEVOR and MDPSDS, is fastest to deploy and most consistent for users who sharpen regularly. A grinder attachment such as the General Tools 825 costs the least in dedicated equipment and leverages a grinder you own, at the price of setup time and dependence on your wheel’s condition. A system jig such as the Tormek DBS-22 delivers the most refined geometry to users already invested in that platform, at the slowest pace. Decide by frequency first: monthly sharpening favours a machine on the bench, yearly sharpening favours the attachment, and platform owners should stay in their platform. Decide by bit population second: a drawer dominated by small bits favours the compact guided units, while a set spanning large sizes favours the machine with the widest stated range, verified against your largest bit before purchase.
A First Session That Teaches You the Tool
Do not learn a sharpener on your best bit. Gather half a dozen genuinely dull bits of a common size, a piece of scrap steel and one of wood, eye protection, and the maker’s instructions open at the setup page. Dress or check the wheel first if your sharpener uses one, and confirm every guard and guide is secure. Sharpen the first bit, then drill a test hole and read the chips and the hole before sharpening the second. Change nothing between the first two bits, so you learn the machine’s baseline. Only then adjust one variable at a time: seating depth, angle where adjustable, or the number of passes. Keep the bit moving as instructed and let the abrasive do the work; pressing harder does not sharpen faster, it heats the edge, and a blued edge has lost hardness and will dull again quickly. By the sixth bit you should be producing two even chips and a hole that starts where you centre-punched it. Record the settings that got you there on a card kept with the machine.
Troubleshooting in Diagnostic Order
When a sharpened bit still drills badly, diagnose in this order. First, inspect the point against the light: is the chisel edge centred, and do the lips match in length and angle? Most failures are visible here. Second, check clearance by looking at the heel behind each lip; if the heel stands proud of the edge, the bit will rub no matter how sharp the lip looks. Third, check the bit itself for a bent shank by rolling it on a flat surface, since no point geometry fixes a bit that orbits. Fourth, check the sharpener’s setup: a loose guide, a worn holder or a glazed wheel reproduces the same flaw on every bit, and the giveaway is identical symptoms across several bits. Fifth, check your drilling rather than the bit: correct speed for the material, enough feed to keep the edge cutting, and cutting fluid on steel. A sharp bit drilled too fast in steel dulls in one hole and then gets blamed for the crime.
Care, Storage and Bit Habits That Compound
Keep sharpened bits in an index or case where tips cannot strike each other, and return them point-protected rather than loose in a drawer. Wipe grinding dust off a bit before it goes back, because that dust is abrasive and a dirty flute drags in the hole. Keep the sharpener itself clean: brush out the guides and holders after a session, and store it covered, since settled dust in a precision guide quietly ruins the next session’s accuracy. Dress grinding wheels as the maker directs and replace worn abrasive elements rather than compensating with pressure. Finally, adopt the maintenance rhythm that makes all of this cheap: sharpen at the first sign of dullness, when a few passes restore the edge, instead of after the bit has been forced, heated and possibly damaged. A bit maintained early can be resharpened many times; a bit abused once may never drill straight again.
Special Cases: The Bits That Break the Rules
Not every bit in the drawer plays by the standard routine, and recognising the exceptions prevents both ruined bits and ruined sharpeners. Left-hand bits, made for drilling out broken fasteners on a reversing drill, need a sharpener or a setting that respects their reversed geometry; presenting one to a standard cycle grinds a point that cuts nothing. Bits with specialised points for sheet metal, plastics or wood each carry geometry that a general sharpener will normalise away, sometimes acceptably and sometimes at the cost of the very feature you bought the bit for. Very small bits challenge holders and eyesight alike, and at the smallest sizes many users sensibly treat bits as consumables, sharpening the sizes where guided tools work well and replacing the tiny ones. Coated bits lose their coating at the point when reground, which is normal and not a failure; the steel beneath still cuts, and the flutes retain much of the coating’s benefit. Split-point bits can be restored on machines that support that geometry; on machines that do not, they come back as conventional points that still drill well but wander a little more at entry, which a centre punch mark compensates for. Knowing which of your bits are standard and which are special, and keeping the special ones identified in the index, turns sharpening from a gamble into a routine.
Decision Guide: Matching the Sharpener to the Driller
The household driller with one index of common bits and a weekend pattern of wood, plastic and light metal is best served by a compact electric unit such as the GOODSMANN or the MDPSDS, kept beside the drill so touch-ups happen when they should. The home machinist or fabricator who drills steel weekly and owns bits across a wide size range should look at the Truper for simplicity or the VEVOR for adjustable geometry, depending on whether variety of material or variety of size dominates. The woodworker or tool enthusiast already running a Tormek system should stay in that system with the DBS-22 and enjoy the consistency across all their edges. The budget-minded occasional sharpener with a sound bench grinder already on the bench is exactly who the General Tools 825 was made for. And the maintenance shop equipping several benches should standardise on one machine type across all of them, so that any user can sharpen on any bench without relearning, and so that wheels, holders and spare parts are common. In every case, confirm your largest and smallest regular bits against the tool’s stated range before buying, because range, not features, is the mismatch that actually strands buyers.
A Maintenance Calendar for Bits and Sharpener
Good edges are a rhythm rather than an event, and a light calendar keeps the rhythm. Each session, brush out the sharpener’s guides, wipe the bits you sharpened, and return them to the index point-protected. Monthly, or after any heavy session, inspect your most-used bits under light for chipped corners and blued points, and pull any bent bits out of circulation permanently. A few times a year, check the sharpener itself as its maker directs: wheel condition and dressing on grinder-based setups, holder and collet cleanliness on machines, stone grading on the water-cooled system. Once a year, audit the whole index: sizes you never use can go, sizes you always reach for deserve a duplicate so a dull one never stops a job, and any bit that has been sharpened back to a stub too short to hold safely should be replaced. None of this takes long, and all of it together is the difference between a drawer of tools and a drawer of disappointments.
Speeds, Feeds and Fluids: Getting the Life Back Out of a Sharpened Bit
A freshly sharpened bit can still be ruined in its first hole by the drilling that follows it, so the sharpener’s work deserves a word about what happens next. Every material has a sensible drilling speed range, slower for hard steels and faster for soft metals and wood, and the common home-shop error is running everything at the drill’s most convenient speed. Too fast in steel generates heat faster than the edge can shed it, and the bit dulls from the outside in while the hole work-hardens beneath it. Feed pressure matters just as much: enough to keep the lips cutting a continuous chip, never so little that the bit polishes and squeals, and never so much that it grabs and stalls. On steel, a proper cutting fluid cools, lubricates and flushes, and turns a marginal edge into a working one; on brass and some plastics, a dry hole or a lighter touch suits better, and the bit that grabs in brass usually wants its rake respected rather than its edge blamed. Peck drilling in deep holes, withdrawing to clear flutes and admit fluid, protects both the bit and the hole. Adopt those habits and the edge your sharpener just made will survive to be resharpened again and again, which is the entire economic point of owning one of the six tools above: not a single rescue, but a drawer of bits that stays in service for years because sharpening and drilling finally work as one system.
Keeping a Sharpening Log: The Habit Behind Consistent Edges
The shops that sharpen well year after year share a modest habit: they write things down. A card or notebook at the sharpener records which settings restored which bits, which bits were retired and why, and when wheels were dressed or holders cleaned. That record sounds like bureaucracy until the day a bit size you sharpen twice a year comes up again, and the card hands you the exact setup instead of a fresh round of experiments. It also exposes patterns a memory would miss: a bit that needs sharpening after every few holes is telling you about speed, feed or material, and the log makes that story visible. Keep the log where the work happens, keep entries to a line each, and let it grow into the quiet reference that turns a sharpener from a machine you operate into a system you understand.
Drill Bit Sharpener FAQ
Do I need a machine or a jig?
A machine has its own wheel. A jig or attachment holds the bit at an angle against a grinder or sharpening system that you already own.
Which tool covers the widest range of bits?
The Tormek jig lists 1/8 to 7/8 inch, but it needs a Tormek system. The VEVOR machine lists 3 to 15 mm.
Can I sharpen a bit by hand on a bench grinder?
Yes, with practice, but it is easy to get unequal lips or the wrong relief. A jig or guided attachment makes the angle repeatable. Use light pressure and avoid overheating the tip.
How do I know if both lips are even?
Compare the two cutting edges side by side. They should be the same length, meet at the center, and show the same angle. If a drilled hole comes out oversized or only one lip produces chips, the lips are uneven.
Is it worth sharpening small bits?
Often not, unless you have a machine with small collets. Small bits are quick to replace, and regrinding them by hand is difficult. Check the size range of any tool before you rely on it.
What does it mean if my bit turns blue while grinding?
Blue means the steel has been overheated and has likely lost hardness, so it will dull quickly. Grind with lighter pressure and short passes, and let the bit cool in air.
Can carbide-tipped bits be sharpened with these tools?
Only some tools list carbide, and it usually requires diamond or similar abrasives. Read the listing carefully and follow the maker's guidance. A standard wheel will not cut carbide effectively.
What point angle should I use?
Many general-purpose bits use a common standard angle, while harder materials often call for a wider angle. Check the guidance from the bit maker for your material, and choose a tool that offers the angle you need.
How often should I sharpen a bit?
Sharpen when you notice squealing, smoke, wandering, or heavy pressure being needed. Frequent light touch-ups remove less metal than waiting for a badly worn tip, so the bit lasts longer.
Is a drill bit sharpener worth buying for home use?
It can be if you own larger or specialty bits that are costly to replace. For a few small bits drilled occasionally, buying new ones is usually simpler. Think about how many bits you dull in a year before deciding.
Can a drill bit sharpener fix a bent bit?
No. A sharpener restores the cutting lips, not the shape of the shank or flutes. A bent or snapped bit is better retired than ground.
What is the difference between a CBN wheel and a standard grinding wheel?
A CBN wheel is a harder abrasive that tends to hold its shape and cut cooler, while a conventional wheel wears down faster. Check the listing for which bit steels the wheel is meant for.
Do I need a vise for a grinding attachment?
Attachments like the General Tools 825 are described as vise-mounted, so yes, you need a solid vise or mounting point. Confirm how it clamps and what grinder it expects in the manual.
Can I use a drill bit sharpener on masonry bits?
Only if the maker says so. Masonry bits have carbide tips and a different geometry, and most twist-bit sharpeners are not designed for them. Read the listing before trying.
How do I store sharpened bits so they stay sharp?
Keep them in a bit index or case so the tips do not knock against each other. Wipe off dust and a little oil after sharpening, and keep dull and sharpened bits in separate places.
The Short Version
For a plug-in 118 degree unit, the Truper. For a vise attachment, the General Tools 825. For a Tormek owner, the DBS-22. For small bits, the GOODSMANN. For adjustable angles on a machine, the VEVOR. For a light 130 degree unit, the MDPSDS.


