A hand countersink is a cone shaped cutter that you turn by hand to bevel the top of a drilled hole. The bevel lets a flat head screw sit flush, and the same tool will also deburr and chamfer edges. The main choices are the cutter angle, the range of hole sizes, the number of flutes and how the handle is built.
The six tools below include two classic handled countersinks, a hand reamer style tool with a rubberized grip, a screwdriver and bit set, and two kits that add deburring blades. Sizes and materials come from each listing page and are the makers’ own claims. We have not used these tools ourselves. A few pages leave gaps, which we note.
As an Amazon Associate we earn from qualifying purchases. Links below are affiliate links, and they do not change the product information we give.
What to Look For
| Feature | Why it matters |
|---|---|
| Angle | 90 degrees suits most flat head screws |
| Hole range | The cutter must match the hole and head size |
| Flutes | More flutes tend to leave a smoother bevel |
| Handle | A fuller grip gives more control by hand |
In this guide
Specs at a Glance
| Tool | Size | Cutter | Notes |
|---|---|---|---|
| General Tools 196 | 3/4 in capacity | Five flute tool steel | 5-1/8 in long; also deburrs pipe |
| Alfa Tools CSF50566 | 1/2 in | Five flute, 90 degrees | Wooden handle; 2.64 oz |
| Wera 846/8 | 1/4 in hex bits | 90 degrees | Six bits, handle and bit holder in a case |
| eliphs BC1651 | Holes 1 to 16.5 mm | High speed steel blade | Hand reamer; 2.47 oz |
| Lirioden NG1000 | Holes 1 to 16.5 mm | M2 high speed steel, 90 degrees | Rubberized handle; 1 year warranty |
| Otoolling 3 Pcs | Two reamers, one deburrer | 90 degree reamers; 15 blades | Storage box; 13.7 oz |
The 6 Best Hand Countersinks

Top pickBest for small jobs and deburring pipe
1. General Tools 196 Short Length Hand Reamer and Countersink, 3/4 in
A compact five flute tool steel cutter with a heavy duty handle, made to deburr the inside of cut pipe, tubing and conduit up to 3/4 inch and to enlarge or countersink holes in wood, brass and plastic. The overall length is 5-1/8 inches. The page lists a weight of 0.6 ounce next to a larger package size, so treat the dimensions as packaging.
Suits: small jobs and deburring pipe. Strengths: a five flute cutter on a short body. Weaknesses: the size data is unclear. Skip it if you need a fixed 90 degree angle confirmed.

View General Tools 196 Short Length Hand Reamer and Countersink, 3/4″ on Amazon

Best for flat head screws in wood
2. Alfa Tools CSF50566 1/2 in Countersink with Wooden Handle
A hand countersink with a five flute, 90 degree cutter, a 1/2 inch diameter and a wood handle. The listing is short, and the measurement system reads metric although the size is given in inches. The weight is 2.64 ounces and the box holds one piece.
Suits: flat head screws in wood. Strengths: a fixed 90 degree angle and a handle you can palm. Weaknesses: little detail on the page. Skip it if you want a set.


Best for countersinking by hand or in a drill
3. Wera 846/8 Kraftform Countersink Bit Set, 8-Piece
A hand driven set with a Kraftform bit holding screwdriver, a Rapidaptor universal holder with a quick-release chuck and six 1/4 inch hex countersink bits in a plastic case. The cutting angle is listed as 90 degrees. The maker adds a limited lifetime warranty and states German engineering. The set weighs 13.6 ounces.
Suits: countersinking by hand or in a drill. Strengths: six bits and a comfortable handle. Weaknesses: a bulkier kit. Skip it if you want one small cutter.


Best for small holes in many materials
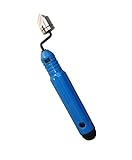
4. eliphs BC1651 Countersink Hand Reamer
A hand reamer style tool whose high speed steel blade is listed for holes from 1 to 16.5 mm. The maker says the blade rotates freely for quick chamfering on metal, wood and plastic, and the text refers to the RotoDrive line. It weighs 2.47 ounces. The page does not say how many pieces come in the set.
Suits: small holes in many materials. Strengths: a wide hole range. Weaknesses: the contents are unclear. Skip it if you want a listing with full details.

Best for chamfering drilled holes by hand
5. Lirioden NG1000-BC1651 Deburring and Countersink Tool Set
A two piece set with an M2 high speed steel 90 degree cutter for hole sizes from 1 to 16.5 mm and a rubberized handle. The material line reads alloy steel and high speed steel, and the maker offers a one year warranty. Uses named include wood, plastic, copper, PVC and metal.
Suits: chamfering drilled holes by hand. Strengths: a 90 degree blade and a rubber grip. Weaknesses: the listing text is heavy on claims. Skip it if you only need a wood handled tool.

Best for mixed deburring and countersinking
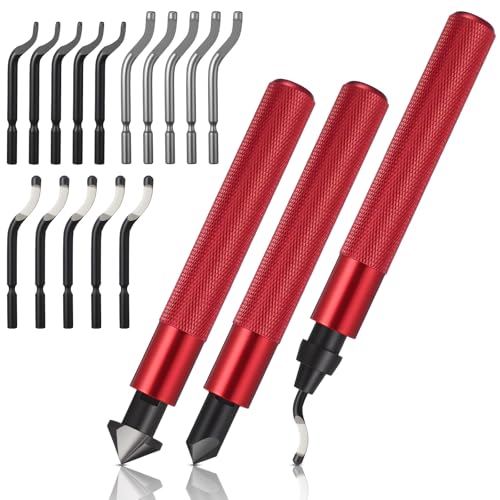
6. Otoolling 3 Pcs Hand Deburring Tool Kit with 2 Countersink Reamers
A kit with two 90 degree countersink hand reamers, one swivel blade deburring tool and 15 spare high speed steel blades, all in a storage box. The handle is metal with a textured grip. The weight is 13.7 ounces. The maker lists wood, plastic, resin, aluminum, copper and 3D prints as suitable materials.
Suits: mixed deburring and countersinking. Strengths: spare blades and a box. Weaknesses: reamer sizes are not clear on the page. Skip it if you only want a countersink.
Care and Setup
- Drill the pilot hole first, then bevel only as deep as the screw head needs.
- Turn with light, even pressure and check the depth often.
- Clamp small pieces so they do not spin.
- Wipe chips from the flutes after use.
Mistakes to Avoid
- Cutting too deep and leaving the screw head below the surface.
- Using a 90 degree cutter with screws made for another angle.
- Choosing a cutter that is too small for the hole.
- Pressing hard on thin material.
Matching the Countersink Angle to the Screw Head
A countersink cuts a conical recess so that a flat-head screw sits flush with or just below the surface. For a clean result, the angle of the cone should match the angle under the screw head. Many wood screws and general-purpose flat-head fasteners use a 82 degree head in some regions and a 90 degree head in others, while metric machine screws commonly use 90 degrees. Some specialty fasteners use different angles, such as 100 degrees. If the cutter’s angle is a poor match, the screw head will touch only at its rim or its center, which reduces holding power and can crack brittle material.
Check the angle printed on your screws or on their packaging, and compare it with the angle stated in the countersink listing. A tool with a fixed angle is simple and precise for one family of screws. A set with several cutters or an adjustable angle gives more flexibility if you work with different fasteners. Do not assume the angles are interchangeable, because a small difference may leave a visible gap.
Also think about the screw head diameter. The countersink needs to be big enough to receive the whole head, so check the maximum cutting diameter of the tool. In soft woods, a slightly deeper recess can be hidden with filler, while in metal or hardwood the fit must be accurate from the start.
When in doubt, test the fit with a scrap piece of the same material. Cut a shallow recess, set the screw, and compare the head to the surface. Adjust depth in small steps until it sits flush.
Cutter Types: Single-Flute, Multi-Flute and Zero-Flute
Hand countersinks come with different cutter designs, and each behaves differently in different materials. Multi-flute cutters have several cutting edges, which give a smooth finish but can chatter in softer or harder materials if the tool is not held steadily. Single-flute designs have a single cutting edge and a larger opening, so they clear chips well and tend to cut with less chatter, especially in metal and plastics. Zero-flute cutters use drilled holes in the cone, with sharp edges that scrape the surface; they leave a polished finish and are often used on metals and harder materials.
The material you work with should guide the choice. In softwood and hardwood, most designs cut well, but a sharp cutter with open flutes will clear shavings and reduce burn marks. In aluminum and mild steel, multi-flute designs may grab or chatter, so single-flute or zero-flute types are often preferred. In plastics and acrylic, keep the cutter sharp and the pressure light to avoid cracking or melting. Check the listing for the stated suitability, and use it as a guide.
The body shape matters in hand use. Some tools are a handled reamer that you rotate by hand, while others are bits that fit a brace, a hand drill or a bit holder. A handle gives a feel for how much material you are removing and provides a fine touch for small jobs. A bit works faster, but it is easier to cut too deep.
Look at the cutter finish and construction. Cutting edges should be even and free of burrs, and the cone should be centered on the shank so the recess is round.
Pilot Holes and Depth Control
A countersink works best when it follows a properly drilled pilot hole. The pilot guides the tip of the countersink and keeps the cone centered on the hole. If the pilot hole is off or too small, the recess will be uneven. Drill the pilot to the size recommended for your screw and material, which is commonly smaller in softwood and closer to the shank size in hardwood. A clearance hole in the top piece and a pilot in the bottom piece help the screw pull the pieces together.
Depth control is the main challenge with a hand countersink. Cutting too deep leaves the screw head below the surface, which weakens the surrounding material and looks untidy, while cutting too shallow leaves the head proud. Some tools have a depth stop or a collar, which sets the same depth every time and is valuable when you have many holes to cut. A manual tool without a stop relies on your eye, so stop often and test the fit with a screw.
Use light pressure and let the cutter do the work. Rotate steadily, and remove the tool and clear chips regularly. In metal, use a drop of cutting oil to reduce friction and extend the life of the cutter. Hold the tool square to the surface, because tilting makes an oval recess.
For repeated work, mark the target depth with a piece of tape on the shank, or practice on a scrap until the motion becomes consistent. In thin materials, be cautious because the cone can cut through the sheet.
Material-Specific Technique and Finish
Each material needs a slightly different approach. In softwood, the fibers compress and tear, so sharp cutters and a gentle touch avoid ragged edges. Hardwood cuts cleaner but heats quickly, so avoid pressing hard or spinning fast with a power drill. Plywood has alternating plies, and the surface veneer can chip, so a backing board under the work helps. In particle board and MDF, the recess crumbles easily, so use sharp tools and consider the strength of the surrounding material.
In metals, use a slow speed, steady pressure and cutting oil, and deburr the hole edges afterward. Hard steels may need cutters made for the purpose, so check the listing for materials. In plastics, a slow speed and sharp cutters avoid melting, and a scrap test shows how the material responds. In stone or masonry, a standard countersink is not suitable.
For a neat finish, deburr the hole with a light touch of the tool or a small file, and wipe away chips. If you plan to paint or fill the recess, set the screw slightly below the surface so filler can cover the head. For furniture, plugs or covers hide the screw head and make the surface smooth.
Keep the cutter sharp. A dull one rubs rather than cuts, leaving burnished edges, burns in wood and a rough finish in metal. Protect the cutting edge with a cap or in a roll, and store tools apart from hard objects that could chip them.
Choosing Between a Single Tool and a Set
The last decision is whether to buy a single countersink or a set. A single fixed-angle tool is a good choice if you work with one type of screw and one material. It is cheaper, easy to store and quick to use. A set, on the other hand, may include several cutters, sizes or angles, sometimes with a shared handle or holder. Sets suit people who work with a wide variety of fasteners or switch between wood and metal.
Before buying a set, check how many pieces are actually cutters you will use. Some sets include extras such as drill bits and stop collars that are useful, and others include sizes that you may never need. Think about how you will carry and store them. A case or a holder that keeps each cutter separated protects the edges and helps you find the right size quickly.
Questions worth asking include: What is the size range? Are the cutters fixed or interchangeable? Does the set include a depth stop? What shank size does it need, and does it fit your brace or drill? Is it suitable for hand use only, or can it be used in a power drill? The listing and manual should provide these details.
Signs that it is time to replace a countersink include chipped or dulled edges, chatter that persists after cleaning, a worn or bent shank, and a recess that is no longer round. Cheap cutters can be fine for occasional jobs, while frequent users will appreciate more durable steel.
Which hand countersink should you buy?
Choose a hand countersink by matching the cutter angle and hole range to your screws, then by how much you want to carry. The picks above cover single cutters, a bit set and deburring kits.
- Flat head screws in wood with a simple tool: the Alfa Tools CSF50566 is a single 90 degree cutter with a wood handle you can palm.
- Pipe deburring plus occasional countersinking: the General Tools 196 is a short five flute tool aimed at pipe, tubing and conduit as well as wood, brass and plastic.
- Several cutters and a handle in a case: the Wera 846/8 gives you a screwdriver-style handle, a bit holder and a set of bits, and it can be used in a drill.
- A wide range of small holes: the eliphs BC1651 and the Lirioden NG1000 both list the same hole range, with the Lirioden adding a rubberized handle.
- Mixed deburring work and spare blades: the Otoolling 3 Pcs kit adds a deburring tool, spare blades and a storage box.
If most of your work is wood and standard screws, a single 90 degree cutter is usually enough. If you also clean up metal, plastic or printed parts, a deburring kit earns its space.
What to check before you buy a countersink, and who should skip one
Before you buy a hand countersink, check the angle, the hole range and the contents listed on the current page. Some listings here are short or unclear, so look for the details you need.
- The cutter angle against the screws you use.
- The largest hole or screw head the cutter can handle.
- How many pieces are in the box, and whether blades are replaceable.
- The material the maker approves for the cutter.
- Warranty and return terms shown on the listing.
Weigh the trade-offs fairly. A handled reamer gives control but is slow for many holes. A bit set is faster in a drill but easier to cut too deep. Kits with extras can include pieces you never use, and a listing with little detail means more checking on your part.
You can skip a hand countersink if you drive hundreds of screws and need a depth-stop bit in a power drill, or if your fasteners are a different angle than the cutter. Many people also skip it when a self-countersinking screw is enough for their wood project.
Compare the picks above, check the current listing for size and what is included, then choose the one that fits how you will use it.
Putting the Picks to Work: Fastening Scenarios by Material
A hand countersink does two related jobs: it cuts the conical recess that lets a flat-head screw sit flush, and it deburrs and reams holes so edges are clean and safe. Working by hand gives you depth control that a power drill cannot match, because you feel the cutter bite and stop the turn the recess is right. The six picks split into dedicated handled cutters, a bit set for handles and drivers, and combination deburring kits.
Furniture, cabinets and visible woodwork
Where a screw head will be seen or felt, a bookshelf side, a cabinet frame, a table apron, the countersink’s quality shows directly in the result. Handled cutters such as the General Tools 196 reamer-countersink and the Alfa Tools CSF50566 with its wooden handle give slow, chatter-free cutting in wood, which is what a clean, round recess needs. Work in quarter turns with light pressure, lifting the tool every few turns to clear chips and inspect. The recess is deep enough when the screw head sits a hair below the surface for filled work, or exactly flush for exposed hardware; test with the actual screw rather than judging by eye alone.
Metalwork, brackets and hole finishing
In metal, the countersink’s second job takes over: breaking sharp hole edges so parts handle safely and fasteners seat squarely. The combination kits, the Lirioden set and the Otoolling deburring kit, pair countersink reamers with swivel-blade deburring tools, which is the right combination for someone finishing drilled holes in brackets, enclosures and sheet stock all day. Use slow turns and steady pressure in metal; a hand countersink rushed in aluminium grabs and chatters, and in steel it simply skates if the edge is dull. A drop of cutting oil on steel makes the cut smoother and extends edge life, and is wiped away in seconds.
Mixed benches and screw-driving systems
The Wera 846/8 Kraftform bit set answers a different workflow: countersink bits that fit a bit-holding screwdriver handle, so the countersink lives in the same system as your driving bits and comes out for one hole or fifty with equal convenience. This suits assembly and installation work where countersinking is one step among many and tool changes must be instant. The eliphs BC1651 hand reamer sits between camps, a handled reamer-countersink for general deburring and recess work across wood, plastic and soft metal.
Head-to-Head: Formats and Cutter Styles Compared
Handled cutter versus bit set versus deburring kit
A handled cutter is a dedicated tool: always ready, nothing to assemble, and the handle’s leverage and feel are tuned to the cut. A bit set trades that readiness for system convenience and compact storage. A deburring kit trades single-purpose excellence for breadth, covering countersinking, reaming and edge-breaking in one case. Choose by frequency: if you countersink wood screws weekly, the handled tool wins; if you countersink occasionally between driving tasks, the bit set wins; if you finish metal holes daily, the kit wins.
Single-flute, multi-flute and reamer behaviour
Flute count shapes the cut. Fewer flutes and reamer-style edges tend to cut smoothly by hand with less chatter, because each edge takes a manageable bite at hand speed. Many-fluted cutters, designed around power-tool speeds, can chatter when turned slowly by hand if pressure is uneven. Whatever the style, the cure for chatter is the same: lighter pressure, slower turns, and a pilot hole that is properly sized so the cutter is guided instead of wandering on the surface.
Fixed angle versus general-purpose reamers
A fixed-angle cutter matched to your screw heads produces repeatable, exactly-seating recesses, which matters in visible work and in metal where the screw’s cone must bear evenly. A general reamer gives an approximate cone that suits deburring and clearance work where exact seating is less critical. Owning one of each, a precise cutter for finish work and a reamer for everything else, is a common and inexpensive end state.
First Use: Setup and Checks in Order
Begin with the pilot hole, because a countersink cannot rescue a badly placed or wrongly sized one. Drill the pilot in scrap of the real material, then countersink in small increments, testing the actual screw after every few turns. Note how many turns your chosen tool needs in this material to reach flush; that count becomes your repeatable recipe for the remaining holes. Check the recess for roundness and smoothness under raking light, which reveals chatter marks invisible from directly above. Only then move to the workpiece, and re-check with the screw on the first real hole before batching the rest.
Troubleshooting in Diagnostic Order
The countersink chatters and leaves a lobed recess
Chatter is vibration, and its causes in order are: too much pressure, too fast a turn, a pilot hole too small to guide the cutter, and a dull edge. Lighten pressure first, slow down, and rock the tool as little as possible, keeping it perpendicular. If chatter persists in one material only, that material wants a different cutter style; soft, grabby plastics and hard metals sit at opposite ends of that preference.
The recess is too deep or uneven
Depth errors come from counting on feel alone in unfamiliar material. Work in increments with screw tests, as in the setup routine, and for repeated holes use a consistent turn count or a marked reference once the first hole is proven. Uneven depth across a batch usually means inconsistent pressure as hands tire; rotate the workpiece rather than your posture, and take breaks before the work shows them.
Screw heads sit proud or sink too far
A proud head with a full-depth recess means the angle does not match the screw: the cone bears at its rim instead of its face. A sinking head means the recess diameter is oversized for that screw. Both are matching problems, not effort problems, and both are solved by testing the actual hardware in scrap, the step most often skipped and most worth doing.
The cutter skates on metal or tears wood fibres
Skating on metal means the edge is dull or the surface is work-hardened; start the cut with firm, slow pressure to establish the cone, or retire the edge. Torn fibres in wood mean the cutter is dull or being turned too aggressively at the surface; sharp edges slice the cone cleanly, and a first light turn that scores the surface circle prevents most tear-out at the rim.
Care, Storage and Who Should Buy What
Brush chips from flutes after use, store handled cutters where their edges cannot strike other tools, and keep bits in their case. Edges dull fastest in metal and in dirty, gritty material; a cutter reserved for wood stays keen far longer than one that also reams steel. Judge sharpness by the cut: a keen countersink produces a smooth cone with light pressure, while a dull one demands force and returns chatter.
Decide by primary material. The woodworker finishing visible joinery should buy a quality handled cutter matched to their screw angle. The metal finisher should buy a deburring and countersink kit. The installer and assembler should buy the bit set that rides in their driver system. The general homeowner should buy one handled reamer-countersink and use it for everything from flat-pack fixes to picture-frame hardware. In each case the tool pays for itself the first time a screw sits perfectly flush instead of tearing, tilting or standing proud.
Batch Work: Getting Fifty Holes to Match
Prove one hole, then repeat its recipe
Production countersinking, a run of shelf sides, a set of brackets, succeeds by turning the first proven hole into a recipe: this pilot size, this tool, this many turns, this pressure. Write the turn count on masking tape stuck to the bench if the batch is long. Fatigue changes feel across fifty holes, but a counted recipe does not drift, and the last hole matches the first because both followed numbers rather than mood.
Order of operations on a workpiece
Countersink after drilling and before assembly, while the part can still lie flat and be inspected. Where both faces need treatment, finish one face completely across the batch before flipping, so setups and recipes stay consistent. Keep the actual screws at the bench in a small tray; a test fit every several holes catches drift early, when it is still a technique adjustment rather than a refinishing job.
Visible versus hidden fasteners
Hidden screws forgive an approximate cone; visible screws do not. On visible work, slow down, use the best-matched cutter, and inspect each recess under the light the room will actually have, because a recess that looks fine under a bench lamp can show chatter rings across a sunlit room. On hidden work, spend the saved time on consistent depth, which is what the structure feels.
More Questions Buyers Ask After the First Month
Why does the same tool chatter in one wood and not another?
Density and grain decide how a cutter’s edges engage. Soft, even timber feeds smoothly; ring-porous or very hard timber presents alternating soft and hard bands that excite vibration. The remedies scale with the cause: lighter pressure, slower turns, a sharper edge, and in stubborn species a different cutter style whose geometry takes a smaller bite per edge.
Can I countersink a hole that was drilled at a slight angle?
A countersink follows the hole it is given, so an angled pilot produces a recess centred on that angle, with a screw that will sit tilted. For hidden work this may be acceptable; for visible work the honest fix is to correct the hole first or accept a slightly enlarged recess that lets the head sit flat. The countersink cannot argue with geometry.
How do I deburr the back side of a hole in sheet material?
Flip the sheet and give the exit side a few light turns with the countersink or a deburring blade, just enough to break the sharp burr without cutting a real recess. Exit burrs are sharper than entry edges and are the ones that cut fingers during handling and assembly, so this quick pass is a safety step as much as a finishing one.
When should a hand countersink give way to a drill-mounted one?
Volume and diameter decide. A handful of holes in any material belongs to the hand tool, with its feel and control. Dozens of identical recesses in a jigged production setup, or large diameters that demand more torque than a wrist comfortably gives, justify powered cutting with a stop. Even then, many woodworkers finish visible work by hand, because the last fraction of depth is where hand control earns its keep.
Decision Scenarios and a Simple Buying Checklist
Decide in this order. First, name your dominant material: wood, metal, or a genuine mixture. Second, name your dominant screw: the flat-head hardware you use most sets the angle your primary cutter must match. Third, name your workflow: a dedicated bench tool, a bit in a driver system, or a finishing kit that travels to the work. The fine woodworker should buy the Alfa Tools handled cutter or the General Tools 196 and reserve it for wood, where it will stay keen for years. The fabricator finishing drilled metal daily should buy the Lirioden or Otoolling deburring combination, because edge-breaking, not recess-cutting, is their real workload. The installer who countersinks between driving tasks should buy the Wera bit set and keep it in the driver case. The general-purpose bench should buy the eliphs reamer-countersink as the honest middle tool. Whichever you choose, run the scrap test with your actual screws on the day the tool arrives, and note the turn count that produces a perfect seat in your commonest material. That small note, kept with the tool, converts every future batch into a recipe instead of a fresh experiment, and it is the habit that separates benches where every screw sits flush from benches where flush is a matter of luck.
The Feel of a Good Cut: Learning What Your Hands Know
A keen hand countersink talks through its handle. The cut begins with a smooth resistance, continues with a steady, slicing effort, and finishes as the cone’s full face engages and resistance evens out. Chatter arrives as a buzz, dullness as a squeak and a demand for force, and grabbing as a sudden lurch. Learning those three signals converts troubleshooting from guesswork into listening: buzz means lighten and slow down, squeak means clean or replace the edge, lurch means the material has caught the cutter and wants a smaller bite. Practise deliberately on scrap in each material you use, a minute per material, the first time a new tool arrives. That minute buys the calibration that makes every later hole faster and cleaner, and it is why experienced hands can countersink accurately while looking at the screw tray instead of the tool. The instruments in this roundup differ in format and finish, but all of them transmit the same three signals; the buyer’s real task is choosing the handle through which they prefer to hear them.
Plastics, Composites and Other Awkward Materials
Acrylic and similar plastics reward a countersink used gently: too much pressure or speed builds heat and stress at the rim, and the recess can craze or crack hours later. Turn slowly, clear chips often, and stop the moment the head seats in your scrap tests rather than chasing extra depth. Fibre-reinforced and filled materials dull edges quickly and produce abrasive dust, so dedicate an older cutter to them and keep your finish cutter for clean wood and metal. Soft materials such as leather and dense foam need only an edge break rather than a true cone, and a reamer-style tool excels there. The pattern across all awkward materials is the same: test in scrap, reduce aggression, and let the material, not habit, set the pace. A hand countersink’s great advantage is that it can be this gentle; no powered tool turns as slowly as a considered hand.
Matching the Tool to the Screw Drawer You Actually Own
Before buying, open your screw drawer and look at what is actually in it. Most benches run on two or three flat-head screw types, and the countersink that matches those heads will do nearly all your work beautifully, while exotic angles sit unused. Note the largest head diameter too, since a cutter must be at least that wide to form a complete recess. If your drawer is a chaos of inherited hardware, a versatile reamer-countersink earns its place; if it is a disciplined set of one system, a fixed-angle cutter matched to that system is the sharper choice. This ten-second audit, screw drawer first and catalogue second, prevents the commonest countersink disappointment: a fine tool in the wrong angle, bought confidently and forgiven slowly.
The Last Turn Matters Most
In countersinking, the final fraction of depth decides whether a screw sits flush, proud or sunk, and it is cut in the last turn or two. Slow down as the head approaches its seat in your test fits, and give those final turns your full attention even in a long batch, especially in a long batch, when fatigue argues for speed. The first hole of the day and the fiftieth deserve the same last turn; consistency at the finish is the whole craft.
A Note on Countersinking for Painted and Finished Surfaces
Countersinking into an already finished surface is unforgiving, because any chatter or tear at the rim shows against paint or varnish. Protect the surrounding finish with tape, score the recess outline with the cutter’s first light turn before applying real pressure, and work more slowly than you would on bare material. Test the full sequence, tape, score, cut, screw, on a finished offcut if one exists. Where the work allows, the better order is always to countersink before finishing, and to let the finish unify the recess with the surface; the in-place method is a rescue technique, and treating it with rescue-level care is what makes it succeed.
Countersinking Softwood Versus Hardwood: Adjusting Touch
Softwood forgives enthusiasm: the cone forms quickly, and the risk is going too deep before you notice. Hardwood resists: the cone forms slowly, and the risk is impatience, extra force, and the chatter that force invites. Adjust by material rather than by mood. In softwood, halve your expected turn count and test the screw early. In hardwood, keep pressure light, turns slow, and let the edge shave the cone into existence. The same tool, the same screw and the same hand produce professional results in both, provided the pace belongs to the material and not to the clock.
Final Thought: The Cheapest Finish Upgrade on the Bench
Few improvements in a workshop cost as little and show as much as a screw sitting perfectly flush. It is visible in furniture, felt in handles and hardware, and noticed, consciously or not, by everyone who uses the piece. A hand countersink, matched to your screws and used with the scrap-test habit, delivers that finish on demand, with no setup, no noise and no drama.
Hand Countersink FAQ
What does a countersink do?
It cuts a cone shaped recess at the top of a hole so a flat head screw can sit flush with or just below the surface.
Which tool is a fixed 90 degree cutter with a handle?
The Alfa Tools CSF50566 lists a five flute 90 degree cutter with a wood handle, and the Lirioden lists a 90 degree blade with a rubberized grip.
What angle countersink do I need?
Match the angle to your screw heads. Common angles include 82 and 90 degrees, but check the packaging or the screw specification. A mismatch leaves gaps and reduces holding power.
How deep should a countersink go?
Deep enough that the screw head sits flush or slightly below the surface, depending on whether you plan to fill it. Test on scrap, and cut in small steps.
Why does my countersink chatter?
Chatter is common with multi-flute cutters in hard materials or when pressure is uneven. Use a slower speed, steady pressure, a sharp cutter, and consider a single-flute or zero-flute design.
Do I need to drill a pilot hole first?
Usually yes. A pilot hole guides the countersink and keeps the recess centered. Size it to the screw and the material.
Can I use a hand countersink on metal?
Many can, but check the listing for suitable materials. Use a slow speed, light pressure and cutting oil, and deburr afterward.
How do I get the same depth on many holes?
Use a tool with a depth stop or collar, or mark the shank with tape. Test on a scrap first and check periodically as you work.
How do I tell if the cutter is dull?
A dull cutter burnishes or burns the surface, needs more pressure, chatters, or leaves a rough recess. Replace or sharpen it if the maker supports it.
What is the difference between a countersink and a deburring tool?
A countersink cuts a cone-shaped recess for a screw head, while a deburring tool removes sharp edges left by cutting or drilling. Some hand tools do both. Check the listing for the stated use.
Can I use a hand countersink in a power drill?
Only if it has a shank that fits your chuck or holder. Handled reamers are designed to be turned by hand. Check the listing or manual before using one in a drill.
Do I need a countersink for every screw?
No. Many screws can be driven without one, especially if the head can sit proud. A countersink matters when you want a flush surface, a smooth finish or a hidden head.
How do I countersink a hole in metal by hand?
Use a cutter listed for metal, turn it slowly with light pressure and add a drop of cutting oil. Check the depth often and deburr afterward. Clamp the part so it cannot spin.
How do I stop a countersink from tearing out wood fibers?
Use a sharp cutter, light pressure and a backing board on plywood or veneered stock. Cut in small steps and test on scrap. A dull cutter tears more.
Can a countersink be sharpened?
Some can be touched up with a fine file or stone, but many are replaced instead. Check the maker's advice. Protect the cutting edge in storage to make it last.
The Short Version
For a pipe and wood tool, the General Tools 196. For a wood handled cutter, the Alfa Tools. For bits and a screwdriver, the Wera. For a wide hole range, the eliphs. For a rubber grip, the Lirioden. For spare blades, the Otoolling.