A good knife maintenance kit covers the basics: something to sharpen the edge, something to clean it and something to protect the steel from rust. Whether you carry a pocket folder or keep a drawer of kitchen knives, a small set keeps them cutting safely. Buying a kit also saves you from hunting down separate parts, and it gives you one place to keep everything together.
The six kits and care tools below range from guided sharpening systems to rust protection. We have not used these ourselves, so confirm what is included in the current listing before buying. Contents change between bundles, and claims about results are the makers’ own.
As an Amazon Associate we earn from qualifying purchases. Links below are affiliate links, and they do not change the product information we give.
What to Look For
| Feature | Why it matters |
|---|---|
| Sharpening | A guided system holds the angle for you; stones need more practice |
| Protection | Oil or a rust inhibitor keeps carbon steel from corroding |
| Portability | A small kit can ride in a pack or a drawer |
| Versatility | Some kits fit pocket knives, kitchen knives and tools |
In this guide
Specs at a Glance
| Kit | Contents | Style | Notes |
|---|---|---|---|
| Lansky Deluxe 5-Stone Sharpening System | Clamp, guide rods and stones | Guided system | Controlled-angle design |
| Spyderco Tri-Angle Sharpmaker | Ceramic rods and base | Rod system | Fixed angles |
| Work Sharp Guided Field Sharpener | Guided base and stones | Portable | Compact field unit |
| Fallkniven DC4 | Diamond and ceramic stone | Pocket stone | Two grits |
| Boeshield T-9 | Rust inhibitor | Spray | Corrosion protection |
| Smith’s Pocket Pal | Compact sharpener | Pocket tool | Multi-function |
The 6 Best Knife Maintenance Kits
Top pickBest for learning to sharpen at set angles
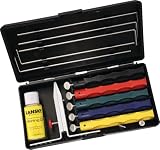
1. Lansky Deluxe 5-Stone Sharpening System
A controlled-angle kit with a clamp that holds the blade and several stones that you guide along set angles. It comes in a case and suits people who want repeatable edges.
Suits: learning to sharpen at set angles. Strengths: a repeatable edge and a case. Weaknesses: setup takes time and the kit is bulky. Skip it if you want a quick pull-through.
Best for keeping a good edge
2. Spyderco Tri-Angle Sharpmaker
A sharpening system with two ceramic rods that sit in a base at fixed angles. You hold the knife upright and pull it down the rods, which is quick to learn and tidy.
Suits: keeping a good edge. Strengths: simple use with fixed angles. Weaknesses: best for touch-ups, not heavy repair. Skip it if you need to reprofile a damaged blade.
View Spyderco Tri-Angle Sharpmaker on Amazon
Best for campers and hikers
3. Work Sharp Guided Field Sharpener
A compact guided sharpener designed for use in the field, with a built-in guide for angles and a set of stones. It is easier to carry than a full benchtop system.
Suits: campers and hikers. Strengths: a guided edge in a compact body. Weaknesses: small stones limit big jobs. Skip it if you need a benchtop machine.

Best for touch-ups in a pack
4. Fallkniven DC4 Diamond Ceramic Whetstone
A small pocket-size stone with a diamond side and a ceramic side. It is easy to bring along and lets you touch up an edge on the trail.
Suits: touch-ups in a pack. Strengths: a small, two-grit stone. Weaknesses: requires freehand skill. Skip it if you want a guided system.

Best for protecting steel blades
5. Boeshield T-9 Rust and Corrosion Protection
A spray that lays down a waxy film to shield metal from rust. It is useful for carbon steel knives and tools that live in humid places or travel with you.
Suits: protecting steel blades. Strengths: a long-lasting protective film. Weaknesses: waxy residue must be kept off food contact surfaces. Skip it if you only want to sharpen.

Best for quick pocket touch-ups
6. Smith’s Pocket Pal Knife Sharpener
A small, multi-function pocket sharpener with a coarse and a fine section and a few extra tools. It is meant for quick touch-ups rather than careful honing.
Suits: quick pocket touch-ups. Strengths: a small size and a fair choice for a pack. Weaknesses: a rough edge compared with stones. Skip it if you want a refined edge.

Care and Setup
- Wipe blades dry after cutting acidic foods.
- Store knives away from humid air.
- Keep stones clean and flat.
- Replace worn rods or stones as the maker suggests.
Mistakes to Avoid
- Sharpening at an inconsistent angle.
- Skipping a rust inhibitor on carbon steel.
- Using oil on a blade that will touch food.
- Pressing too hard on a ceramic rod.
The Core Jobs a Kit Should Cover
A maintenance kit is useful only if it covers the jobs a knife actually needs. There are four: sharpening to restore the edge, cleaning to remove grime and residue, lubricating moving parts and protecting steel against rust. A kit that does one of these brilliantly but ignores the others may leave you buying extras later.
Sharpening is usually the largest part. Kits may include stones, ceramic rods, guided systems or pull-through tools. Cleaning typically involves a cloth, a brush or a cleaning solution. Lubrication is handled by a small bottle of oil or a dry lubricant suited to pivots and lock faces. Protection may be a wax, a corrosion inhibitor or a light oil for long-term storage.
Think about your knives. A pocket folder needs oil for the pivot, a brush for lint and a way to touch up the edge. Kitchen knives need honing and occasional sharpening, but lubrication is usually unnecessary except on folding styles. Carbon steel knives require more attention to rust protection than stainless ones.
Before buying, make a quick list of what you already own. You may have a stone but lack oil, or have oil but need a guide. Avoid paying for duplicates, and check the listing for what is actually included, since bundles change. A kit should reduce friction in your routine by putting the essentials in one place.
Sharpening Systems: Guided, Freehand and Pull-Through
The sharpening component is where kits differ most. Guided systems clamp the blade and hold the stone at a fixed angle, which gives consistent results with little practice. They suit beginners and people who want repeatable edges, though they can be slower and take more space.
Freehand tools, such as whetstones and diamond or ceramic stones, offer flexibility and are the standard among enthusiasts. They require you to hold the angle yourself, which takes practice, but they work on almost any blade shape and are compact. A stone can also be used for kitchen knives, tools and more.
Pull-through sharpeners are quick and simple, using preset slots and abrasives. They are convenient for fast touch-ups but remove metal quickly and may suit only certain blade shapes. They are best for basic edge restoration rather than fine finishing. Some kits combine a pull-through with a rod.
Consider grit. Coarse abrasives remove metal quickly, medium grits set the edge and fine grits polish it. A kit with a range of grits gives you control, while one with a single grit may be limited. Read the listing for abrasive type and grit info, and be aware that labels vary between makers. Choose the system that you will actually use. A simple tool used regularly beats a complex system that stays in a drawer.
Cleaning, Lubricating and Protecting Steel
Cleaning is the part people skip, but grit and lint create wear. A soft cloth, an old toothbrush and mild soap often suffice for stainless blades. For folders, a small brush clears debris from around the pivot and lock. Dry thoroughly after cleaning, since moisture left in crevices can cause rust.
Lubricants come in different types. Light oils creep into tight spaces and are suited to pivots, while dry lubricants leave a thin film that does not attract dust. Greases can be used on certain mechanisms but may be too thick for small pivots. The right choice depends on your climate and use. If the knife touches food, read the label to confirm that the product is intended for such use.
Rust protection depends on the steel. Stainless steel resists rust but is not immune, particularly in salt, humidity or neglect. Carbon steel is more vulnerable and benefits from a thin oil film or wax after cleaning. Products that form a protective barrier can help in storage or humid environments. Apply sparingly and wipe off excess.
Also think about where you store knives. A dry drawer, a sheath with ventilation and a small desiccant packet help. Avoid leather sheaths for long storage if they trap moisture. Even the best kit cannot make up for storing damp knives in a closed container.
Building a Kit for Different Knife Owners
The right kit depends on who is using it. A casual pocket knife owner needs a simple setup: a small sharpener, a bottle of light oil and a cloth. A hunter or camper may add a field sharpener and a rust inhibitor, since gear gets wet and dirty. A kitchen user needs a honing rod, a sharpening stone or system and a cleaning routine.
Collectors and enthusiasts often want more control. A set of stones in several grits, a strop for finishing and a good lubricant lets them keep high-quality knives in top condition. They may also want tools for disassembling knives, such as drivers that fit the screws used.
Think about portability. A compact kit that fits in a pouch can live in a bag or a tackle box. A bigger kit is fine for a workshop. If you travel, check what you can carry and how to pack sharp tools safely.
Finally, consider whether to buy a kit or assemble your own. A ready-made kit offers convenience and a single purchase. Building your own gives more control over quality and lets you choose items that match your knives. Either route works as long as you cover the four jobs, and you can add or replace pieces as your needs grow.
A Simple Routine and When to Replace Kit Items
A routine makes maintenance easy. After use, wipe the blade and handle. Weekly or monthly, depending on use, clean around the pivot, check screws and apply a drop of lubricant. Test the edge on paper or a tomato skin, and sharpen only when needed. Before storage, dry and lightly protect the steel.
When sharpening, work slowly. Keep the angle consistent, use light pressure and check progress frequently. Raise a small burr along the edge on one side, then flip and repeat, finishing with a finer abrasive to refine it. Clean the blade afterwards and test it carefully.
Kit items wear out. Stones can become uneven and need flattening or replacement. Diamond plates lose abrasive, and ceramic rods can glaze. Oil bottles dry out or thicken, and cloths get dirty. If your sharpener seems to take longer or leaves scratches that do not refine, check the abrasive.
Replace items when they no longer perform. A stone that is dished, cracked or clogged will not produce a good edge, and old oil can gum up. Keep spare cloths and replace worn guides or clamps. Check the maker’s instructions for cleaning and care of each tool, and keep the kit in a dry place. A small, well-used kit is often better than a large one that you rarely open.
Knife Maintenance Kits FAQ
What belongs in a maintenance kit?
A sharpener, a cloth, something to protect against rust and a spot to keep it all together.
How often should I sharpen?
Whenever the knife stops slicing cleanly. Light, frequent touch-ups beat rare heavy sessions.
Do I need oil on stainless steel?
Stainless resists rust, but a light wipe still helps at pivots and in humid places.
Are guided kits better for beginners?
They help hold the angle, which is the hardest part for a beginner to learn.
Can one kit handle both pocket and kitchen knives?
Often partly. A stone or guided system can work on many blades, but kitchen knives also need honing. Check the listing for supported angles and blade types.
Do I need a strop?
A strop is optional but helps polish and refresh an edge. It is a good addition if you already sharpen by hand.
How do I know if I need oil or wax?
Oil suits pivots and general protection, while wax or similar products can protect surfaces in storage. Carbon steel benefits more than stainless.
Is a guided system better than freehand?
Guided systems give repeatable angles with less skill. Freehand is flexible and portable but needs practice. Choose by patience and preference.
How should I store my kit?
Keep it dry and clean, with abrasives protected and oils capped. Avoid damp spaces.
Can I use kitchen oil on a pocket knife pivot?
Cooking oils can turn sticky over time, so a purpose-made light oil is generally better. Check the label for food contact if needed.
When should I replace a sharpening stone?
When it is badly dished, cracked or clogged and no longer produces a clean edge. Flattening can extend life if the maker allows it.
Steel Hardness and Why It Changes Your Sharpening
Knife steel is not all the same, and the type of steel decides how a blade behaves on a stone. Softer steels, often found in kitchen knives and basic pocket knives, sharpen quickly and dull sooner. Harder, more wear-resistant steels hold an edge longer but need more time and the right abrasive to sharpen. This is why a kit that works well on one knife may feel slow on another.
Abrasives matter here. Standard stones can sharpen most steels, though very hard alloys with a lot of carbide wear them slowly. Diamond abrasives cut hard steels faster and stay flat for a long time, which is why diamond plates and rods are common in kits. Ceramic is a fine abrasive that polishes an edge and works well for touch-ups on harder steels. The steel type is usually listed on the knife page or the maker site, so check it before choosing a kit.
Hardness affects damage too. Harder steel can chip if it is twisted or struck, while softer steel is more likely to roll over and bend at the edge. A rolled edge can often be realigned on a fine rod, while a chip needs more material removed with a coarser abrasive. Knowing which problem you have saves time and steel.
What Grit Numbers Really Mean
Grit numbers describe how coarse an abrasive is. A lower number is coarser and removes metal faster, while a higher number is finer and polishes. Very coarse grits, in the low hundreds, are for repairing chips or reshaping a badly damaged edge. Medium grits, in the range of a few hundred to a thousand or so, are for regular sharpening. Fine grits and above refine the edge for a smoother cut and better push-cutting.
You do not need every grit. Many people do well with a medium stone and a fine finishing step. The idea is to move through grits in order, spending enough time on each to remove the scratches from the one before. Skipping from coarse to very fine makes the work slow because the fine stone cannot remove the deep scratches.
Grit numbers are not perfectly comparable between brands or between abrasive types, since the scales differ. Treat the figures as a guide and rely on how the edge feels after each step. A kit that lists its grits clearly makes the process easier to follow.
Setting Up a Safe Workspace
Sharpening is safe when you slow down. Work on a stable surface at a comfortable height, and place a damp cloth or non-slip mat under the stone to stop it sliding. Keep your free hand behind the edge, never in front of it, and move the blade away from your fingers. Good light helps you see the bevel and the burr.
- Wear cut-resistant gloves if you are unsure, but keep enough feel for the angle.
- Clear the area of children and pets, and put away loose items.
- Use water or oil only as the stone instructs, since mixing can clog it.
- Wipe the blade clean after each stage so you do not carry grit to the next stone.
- Store the knife with its edge protected once you finish.
Metal dust and slurry can stain surfaces, so protect the table and wash your hands afterward. Avoid breathing dust from dry abrasives, particularly with power tools or very fine powders.
Testing the Edge and Knowing When to Stop
You do not need special equipment to check an edge. Look at the edge under bright light: a dull spot reflects light as a thin line, while a sharp edge disappears. Try a gentle cut on paper or a tomato skin. A sharp knife bites in without pressure, while a dull one slides or tears. Feel for a burr, the thin wire of metal raised during sharpening, by drawing a fingertip carefully across the edge, away from the blade.
Remove the burr with light passes on a fine stone or strop, then retest. If the knife still does not cut well after proper sharpening, the problem may be a chip, a bent edge or a worn-out bevel that needs a coarser stone. Do not keep grinding in the hope that it will improve, because it removes steel you cannot replace.
Stop when the edge is sharp and even. Over-sharpening shortens a knife life, and a quick touch-up with a fine abrasive is often all that is needed between full sessions.
It also pays to keep a simple log. Write down the date, the knife and the stones you used, and how the edge performed afterward. After a few sessions you will see how often each knife needs attention, which grit gives the result you like and when a stone or rod begins to wear. A short note on the angle you used makes it easier to match the existing bevel next time, and that consistency does more for your results than any extra accessory.
Frequently Asked Questions
What grit should I start with on a dull knife?
For a knife that is dull but not damaged, a medium grit in the range of a few hundred to around a thousand is a sensible starting point. Use a coarser grit only for chips or a badly worn edge. Finish with a finer stone or strop to refine the edge.
How do I know when my knife is sharp enough?
A sharp knife slices paper or a tomato skin with very little pressure and the edge does not reflect light as a bright line. Check for a burr and remove it with light strokes on a fine abrasive. If the knife still drags, keep sharpening or look for damage.
Can I sharpen a serrated blade with a normal stone?
Not easily. Serrated edges have scallops that need a tapered rod or a small diamond tool that fits each curve. Sharpen the flat side lightly to remove the burr. Many kits include a tapered rod for this reason, so check the contents before you buy.
Why does my knife go dull right after sharpening?
A leftover burr that folds over, a rolled edge or an angle that is too thin for the steel can make an edge fail quickly. Remove the burr with light finishing passes, strop or hone the edge and keep the angle consistent. Also check that the knife is used on a suitable cutting surface.
The Short Version
For a guided kit, the Lansky Deluxe. For quick touch-ups, the Spyderco Sharpmaker. For field use, the Work Sharp Guided Field Sharpener. For a pocket stone, the Fallkniven DC4. For rust protection, the Boeshield T-9. For a pocket sharpener, the Smith’s Pocket Pal.