Kydex is a rigid thermoplastic that is heated and pressed around a blade, producing a sheath that clicks, holds the knife securely and shrugs off rain, sweat and mud. It does not stretch like leather and needs no oiling.
The six options below mix ready-made carry gear, forming sheet, hardware and knives that ship with their own molded sheath. If you are building your own sheath, you will need sheet material, fasteners and a belt attachment, plus a safe heat source. Fit is the whole point of a rigid sheath, so measure your knife before you buy anything and compare it with the sheath or sheet size on the listing. A sheath that is a little too loose rattles and a sheath that is too tight is hard to draw, and neither is easy to correct after the fact. Plan your carry position before you drill holes. Test every fit with the knife unloaded and the area clear. We have not used these products ourselves, so confirm the details on the current listing before you buy.
As an Amazon Associate we earn from qualifying purchases. Links below are affiliate links, and they do not change the product information we give.
What to Look For
| Feature | Why it matters |
|---|---|
| Fit | The sheath should click on and hold the knife without rattling |
| Thickness | Thicker sheet is stiffer; thinner sheet forms more easily |
| Carry | Belt clips, loops and MOLLE-style mounts change how you wear it |
| Hardware | Rivets or screws and eyelets keep the shell together |
In this guide
Specs at a Glance
| Item | Category | Use | Notes |
|---|---|---|---|
| Blade-Tech Tek-Lok Belt Attachment | Belt attachment | Mounts a sheath to a belt | Several belt widths |
| Kydex Thermoplastic Sheet | Forming sheet | Sold in sizes and thicknesses | Heat and press |
| Ulticlip Belt Clip | Belt clip | Mounts to a sheath | Sold in sets |
| Chicago Screws and Eyelet Kit | Hardware kit | Fasteners for the shell | Sold by the assortment |
| Morakniv Garberg | Knife with polymer sheath | Fixed blade | Multi-mount option |
| ESEE Izula | Knife with molded sheath | Fixed blade | Neck or belt carry |
The 6 Best Kydex Knife Sheath Options
Top pickBest for dIY builders and custom sheath owners
1. Blade-Tech Tek-Lok Belt Attachment
A well-known belt attachment that mounts to a Kydex sheath and clamps onto a belt. It is a popular upgrade for homemade or custom sheaths.
Suits: DIY builders and custom sheath owners. Strengths: secure belt grip and an established design. Weaknesses: you must match the hole pattern. Skip it if you only need a ready-made sheath.
View Blade-Tech Tek-Lok on Amazon
Best for dIY sheath makers
2. Kydex Thermoplastic Sheet
A sheet of Kydex for building your own sheath. You heat the sheet and press it around the blade in a form, then trim and finish the edges.
Suits: DIY sheath makers. Strengths: full control over the fit. Weaknesses: needs tools and practice. Skip it if you want a ready-to-use sheath.
Best for slim, lightweight carry
3. Ulticlip Belt Clip
A belt clip for sheaths and holsters that screws onto a Kydex shell. It is a low-profile way to carry a knife without a full loop.
Suits: slim, lightweight carry. Strengths: simple mounting hardware. Weaknesses: fixed clip holds less firmly than a belt lock. Skip it if you want a rigid mount.
View Ulticlip Belt Clip on Amazon
Best for dIY builders
4. Chicago Screws and Eyelet Kit
A hardware kit with screws or eyelets and matching fasteners, used to assemble and strengthen the shell of a sheath. A small assortment covers the most common sheath builds.
Suits: DIY builders. Strengths: a handy way to finish a project. Weaknesses: sizes vary, so match to your sheet. Skip it if you buy a finished sheath.
View Kydex Hardware Kit on Amazon
Best for bushcraft and camp
5. Morakniv Garberg
A Swedish fixed-blade knife offered with a hard polymer sheath and mounting options that give a Kydex-like, secure carry. It is a good example of a knife designed around its sheath.
Suits: bushcraft and camp. Strengths: a secure sheath that comes with the knife. Weaknesses: not a true Kydex shell. Skip it if you want a custom-fit sheath.

Best for everyday carry
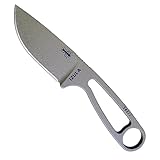
6. ESEE Izula
A compact fixed blade whose molded hard sheath holds the knife firmly. It shows how a rigid sheath can serve as part of a carry system.
Suits: everyday carry. Strengths: a compact and secure molded sheath. Weaknesses: small size limits chopping. Skip it if you want a large knife.
Care and Setup
- Rinse mud off the sheath and let it dry.
- Check fasteners every few weeks.
- Keep the sheath away from high heat.
- Replace worn retention elements when they loosen.
Mistakes to Avoid
- Overheating the sheet when forming it.
- Using too thin a sheet for a large knife.
- Skipping retention and relying on friction alone.
- Buying hardware before measuring.
Designing the Sheath Before You Cut
Most failed sheaths are decided on paper, not in the oven. Time spent on a plan prevents wasted sheet and a sheath that rides wrong or does not hold the knife.
Start with the knife. Trace its outline on paper, including the guard, handle and any protrusions such as a lanyard hole or a pommel. Decide how much of the handle you want the sheath to cover. A sheath that covers only the blade gives the hand a clear handle to grab, while one that wraps part of the handle can improve retention but takes more material. Add a margin for the seam, because the two layers need to meet with enough room for rivets or screws, usually a modest amount around the knife.
Next, choose the carry position and angle. A vertical sheath is simple and stays out of the way, while an angled one, known as a cant, makes the handle easier to reach when seated or when wearing a pack. Think about whether the knife will ride tip up or tip down, and which side of the body you prefer. Mark where the belt attachment or clip will go, and make sure it will not interfere with the knife or with your clothing. Plan for drainage, such as a small opening at the tip, so water and debris can leave the sheath.
- Trace the knife and outline the sheath on paper.
- Decide handle coverage and retention features before cutting.
- Choose carry position, height and angle.
- Plan fastener positions to avoid cutting into the knife path.
- Make a paper or cardboard mockup to test the fit.
A cardboard mockup lets you check ride height and draw feel without risking any expensive sheet. If you are working with a folded design, check whether the fold sits at the spine or edge, and keep the sharp edge away from the fold.
Forming the Shell Safely
Forming is the step that turns flat sheet into a shaped shell. It involves heat, pressure and a few risks, so proceed carefully and follow the instructions of the sheet supplier.
The sheet is heated until it becomes pliable, then pressed around the knife between two forming surfaces. The heat source can vary: some people use an oven set to the temperature the manufacturer recommends, while others use a heat gun. Whichever you pick, follow the supplier’s guidance on temperature and time, because too little heat leaves the sheet stiff and too much can warp or discolor it. Work in a well-ventilated area, as heated plastics may release fumes. Wear heat-resistant gloves and eye protection, and keep the work surface clear of anything flammable. Never leave the heat source unattended.
Protect the knife during forming. A bare blade can scratch or lose its finish when pressed into hot plastic, and some handle materials cannot take the heat. Wrap the knife in a thin layer of masking tape or a small plastic bag, or use a dummy replica if you have one. Make sure the knife is clean and dry before forming. Press the sheet firmly and evenly, working from the spine side toward the edge, and hold the pressure until the plastic has set. A foam press or a set of firm cushions gives a good, even form.
- Follow the supplier’s heating instructions.
- Test on a scrap piece of sheet first.
- Keep fingers and exposed skin away from hot material.
- Do not press with the knife edge facing your hand.
- Allow the shell to cool fully before removing the knife.
If the form is not right, the sheet can usually be reheated and reformed once, though repeated heating weakens the material. Take the time to practice on scrap.
Finishing Edges and Fastening the Shell
A formed shell becomes a sheath once it is trimmed, finished and fastened. Careful finishing makes it durable, comfortable and neat, and it gives you a chance to correct small problems.
Trim the shell to size with a saw, a sharp utility tool or a rotary tool, leaving a margin so you can refine the edges. Smooth the edges with files and sandpaper, working through grits until they are free of burrs. Rounded edges are more comfortable and resist cracking. Be careful with dust, since fine plastic particles should not be inhaled. Wear a mask and work in a ventilated space.
When it is time to drill holes for fasteners, mark them first, and check that they are clear of the knife and sit at a good distance from the edge of the sheet. Holes placed too close to the edge can tear out. Use a drill bit that matches the fastener size, and drill slowly to avoid melting or cracking. Eyelets and screws or rivets then secure the shell. Chicago screws are adjustable and can be removed, which helps with retention tuning, while eyelets are more permanent. Use washers or spacers where the maker advises, and tighten hardware gradually, checking the fit as you go.
- Leave a seam allowance and trim to the final line gradually.
- Round and smooth all edges.
- Test the knife in the shell before drilling.
- Use hardware sized for the sheet thickness.
- Add a drain hole at the tip if the design allows it.
Check that the fasteners do not protrude into the knife path, and test the draw in a safe, clear area. If you are unsure about any step, consult the instructions from the sheet or hardware maker before you proceed.
Comparing Carry Methods
How a sheath attaches to you decides how often you will carry the knife. The best carry method depends on your activity, clothing and preference.
A fixed belt loop is simple and secure but requires threading the belt through it, so it is not easy to put on or take off quickly. A clamp-style belt attachment, such as the Tek-Lok type mentioned in the picks, grips a belt without threading, so you can put it on or remove it in seconds. It holds well but may require specific hole spacing. A clip is low profile and good for slim carry, especially for smaller knives, but it holds less firmly than a clamp. MOLLE-style straps weave into webbing on a pack or vest, which suits tactical and outdoor loads. Neck carry works for small knives and offers quick access, but the sheath must be secure and the knife should be small enough that it will not swing and bump into you. Pocket or boot carry needs a compact sheath and careful thought about comfort and safety.
Think about how you will sit, bend and move in each setting. A large knife on a belt may dig into your hip when you sit in a vehicle. Left-handed users should check whether the attachment can be flipped or mirrored. Weight also matters: a heavy knife on a thin belt can sag, so choose a sturdy belt.
- Choose a belt attachment for stability and quick on-off.
- Choose a clip for slim, light carry.
- Choose a MOLLE-style mount for pack and vest use.
- Choose neck carry only for light, small knives.
- Try each option with the knife unloaded and the area clear.
Many people keep more than one carry method available, so they can switch from a belt at work to a pack on the trail.
Troubleshooting Fit, Noise and Wear
Even a well-made sheath can have quirks. Most are fixable with small adjustments, and knowing the common issues keeps you from scrapping a good sheath.
If the knife is too loose, tighten the retention hardware if the design allows it, or add a retention element such as a small wedge or an adjustable screw. If it is too tight, loosen the fasteners slightly or check for burrs on the inside edge. A sheath that rattles may need padding or a slightly tighter fit. A sheath that squeaks or grinds can be quieted by smoothing the contact points and removing grit. If the knife draws unevenly, check for a bent shell or a hardware interference, and try reheating and reforming the shell if you built it yourself.
Kydex can scratch the blade finish over time, especially coated finishes. Keep the sheath clean, and remove grit before inserting the knife. Rinse mud and sand off, let the sheath dry and check the fit afterwards. Watch for cracks near holes and stress points, which can grow with repeated flexing and cold weather. Inspect the belt attachment and clip for wear.
- Clean the sheath regularly to remove debris that wears the blade.
- Check fasteners and tighten them gently.
- Replace sheaths with cracks or deformed retention.
- Do not store the sheath in a hot car, where it can warp.
- Test the draw and re-seat the knife to confirm that it clicks securely.
If a sheath loses its retention or the shell is damaged, replace it. A secure sheath is a safety feature, and the knife is only as safe to carry as the sheath that holds it.
Which Kydex Knife Sheath Option Should You Buy?
Which Kydex sheath option suits you depends mainly on whether you want to build a sheath or simply carry a knife that already has one. Match your goal to the items below.
- You are building a custom sheath: start with the Kydex Thermoplastic Sheet, which gives full control over fit, then add hardware.
- You need fasteners to finish a shell: the Chicago Screws and Eyelet Kit covers common builds, though sizes vary, so match them to your sheet.
- You want a secure, quick on-off belt mount: the Blade-Tech Tek-Lok Belt Attachment clamps onto a belt, but you must match the hole pattern.
- You prefer slim, light carry: the Ulticlip Belt Clip is a low-profile option, though it holds less firmly than a clamp.
- You want a knife that arrives with a secure sheath: the Morakniv Garberg suits bushcraft and camp, while the ESEE Izula suits compact everyday carry.
If you have never formed Kydex, consider a knife with a sheath included first, then try a build once you know how you like to carry. If you already have a sheath that needs a better mount, the belt attachment or clip alone may solve the problem.
The sheet, hardware and mounts work as a system, so choose them together rather than one at a time.
What to Check Before You Buy Kydex Sheath Supplies, and Who Should Skip Them
Because fit is the point of a rigid sheath, measure first and then check the current listing against this list.
- Your knife’s length, width and handle shape, compared with the sheet size.
- Sheet thickness, which affects stiffness and how easily it forms.
- Hole pattern and belt width compatibility for any attachment.
- Fastener size and finish, matched to your sheet thickness.
- What is included, since some items are sold singly and some in sets.
- Warranty and return terms, and any heat or care guidance.
The trade-offs are real. Forming needs a heat source, tools and practice, and a mistake can waste sheet. Kydex can mark a blade finish over time. A fixed clip is convenient but less secure than a clamp. A knife with its own sheath is simpler, but it is not a custom fit.
Who should skip building? Anyone who wants a ready-to-use sheath today, or who is uncomfortable working with hot materials. A finished sheath is the better route for you.
Budget extra material for practice. Most people spoil a first attempt, so a spare piece of sheet and a few spare fasteners turn a mistake into a lesson instead of a setback.
When you are ready, compare the picks above, check the current listing for size and what is included, then choose the one that fits how you will use it.
Kydex Sheath FAQ
Is Kydex better than leather?
It resists water and needs less care. Leather is quieter and can look more traditional.
Can I make my own Kydex sheath?
Yes, with sheet, a heat source, a press and hardware. Follow safety guidance for hot materials.
Will Kydex scratch a blade?
It can leave marks over time, especially on coated blades.
How do I adjust retention?
Many sheaths use a screw or washer that tightens the grip around the knife.
How much of the handle should a sheath cover?
It depends on the knife and your preference. More coverage can improve retention, while less leaves the handle easier to grab. A cardboard mockup helps you decide.
What is cant?
It is the angle at which a sheath rides on the belt. An angled sheath can make the handle easier to reach when seated or wearing a pack.
Do I need to protect the knife while forming?
Yes. Wrap it in a thin layer of tape or a bag, or use a dummy replica, since heat and pressure can scratch the finish or damage some handle materials.
What safety gear should I use when making a sheath?
Wear heat-resistant gloves, eye protection and a dust mask, and work in a ventilated area away from flammable items. Follow the sheet supplier's instructions.
How do I make a loose sheath tighter?
Adjust the retention hardware if it allows, or add a retention element such as a small wedge. If the shell is formed wrongly, you may need to reform or replace it.
Why does my sheath rattle?
The fit may be too loose or the contact points are rough. Tighten the retention or add padding, and smooth any burrs.
Can I reform a Kydex shell?
Often once, by reheating it according to the supplier's guidance. Repeated heating can weaken the material, so practice on scrap first.
Should I carry on the belt or on a pack?
A belt is convenient for daily carry, while a pack mount can be more comfortable on long hikes or in a vehicle. Many people use both.
How thick should Kydex be for a knife sheath?
Thicker sheet is stiffer and suits larger knives, while thinner sheet forms more easily. Check the supplier's guidance for your knife size.
Can I use an oven to form Kydex?
Many makers use an oven or a heat gun, but follow the sheet supplier's temperature and time guidance. Work in a ventilated area and wear heat-resistant gloves.
Do I need a press to make a Kydex sheath?
You need even pressure while the sheet sets. A foam press or firm cushions can work, so check the supplier's instructions.
Will a belt clip hold a heavy knife?
A clip is best for slim, light carry. A clamp-style attachment holds more firmly, so consider that for larger knives.
How do I know if a belt attachment will fit my sheath?
Compare the hole pattern and spacing on the listing with your sheath. Also confirm the belt width it supports.
Should a Kydex sheath have a drain hole?
A small opening at the tip lets water and debris escape. It is a common design feature, so plan it before you cut.
The Short Version
For a belt lock, the Blade-Tech Tek-Lok. For forming your own, the Kydex sheet. For a slim clip, the Ulticlip. For hardware, the screws and eyelet kit. For a knife with a polymer sheath, the Morakniv Garberg. For compact carry, the ESEE Izula.