A mortise chisel has a thick, deep blade made to be driven with a mallet and levered out of a slot. Compared with a bevel edge bench chisel, the blade is taller than it is wide, so it can chop a narrow pocket for a tenon without bending. The main choices are the blade widths, the steel, the handle and whether you want a set or a single chisel.
The six picks below are mostly Narex, ranging from a four piece Richter set to a single 12 mm chisel. Sizes, steel and handle details come from each listing page and are the makers’ own claims. We have not used these chisels ourselves. Where a listing disagrees with itself, we say so.
As an Amazon Associate we earn from qualifying purchases. Links below are affiliate links, and they do not change the product information we give.
What to Look For
| Feature | Why it matters |
|---|---|
| Blade width | Match it to the thickness of the tenon you cut |
| Steel | Chrome vanadium and chrome manganese are both listed here |
| Handle and ferrule | A mallet needs a handle that resists splitting |
| Bevel angle | A steeper angle suits chopping in hard wood |
In this guide
Specs at a Glance
| Chisel | Sizes | Steel | Handle |
|---|---|---|---|
| Narex Richter 4 piece | 1/8, 1/4, 3/8, 1/2 in | Chrome vanadium | European ash |
| Narex 863600 | 4, 6, 10, 12 mm | Chrome manganese; 59 HRc | Stained beech |
| MKC set of 3 | 1/4, 3/8, 1/2 in | Chrome vanadium | Hornbeam |
| Narex 3 piece 6/10/12 | 6, 10, 12 mm | Chrome manganese; Rc 59 | Beech |
| Narex 3 piece 4/5/8 | 4, 5, 8 mm | Chrome manganese; 59 HRc | Stained beech |
| Narex single 12 mm | 12 mm (1/2 in) | Chrome manganese; Rc 59 | Stained beech |
The 6 Best Mortise Chisels

Top pickBest for a full run of narrow mortises
1. Narex 4 Piece Richter Mortise Chisel Set
A four chisel set in 1/8, 1/4, 3/8 and 1/2 inch widths, supplied in a wooden presentation box. The maker says the chrome vanadium blades are drop forged and cryogenically treated, ground with a small taper to avoid wedging, with a 25 degree front bevel and a higher secondary bevel suggested for hard woods. Handles are European ash with double stainless ferrules and a leather washer. The listing weight is 2.2 pounds.
Suits: a full run of narrow mortises. Strengths: four widths, a box and a clear grind description. Weaknesses: nothing wider than 1/2 inch. Skip it if you only need one width.


Best for small to mid mortises in metric sizes
2. Narex 863600 Mortise Chisel Set, 4/6/10/12 mm
Four chisels in metric widths, described as robust tools for chopping out joints. The maker says the blades taper in height and length from tip to shoulder for sidewall clearance, are forged from chrome manganese steel and are heat treated to 59 HRc. The handles are dark stained, waxed beech with a steel ferrule and hoop. The listing weight is 1.9 pounds.
Suits: small to mid mortises in metric sizes. Strengths: four widths and a stated hardness. Weaknesses: the listing gives no bevel angle. Skip it if you work only in inch sizes.

View Narex 863600Chisel / Mortise Chisel Set – 4/6 / 10/12 mm – for Mortises on Amazon

Best for a basic trio of common widths
3. MKC Mortise Chisel Set of 3, Hornbeam Handles
A three chisel set in 1/4, 3/8 and 1/2 inch widths with chrome vanadium blades and European hornbeam handles. The seller says the blades are sharp enough to use on opening and suit hard and soft woods. The listing gives no steel hardness, bevel angle or weight, so those details are unknown.
Suits: a basic trio of common widths. Strengths: three inch widths and wood handles. Weaknesses: few technical details are listed. Skip it if you want a stated hardness and grind angle.

Best for the middle widths used most often
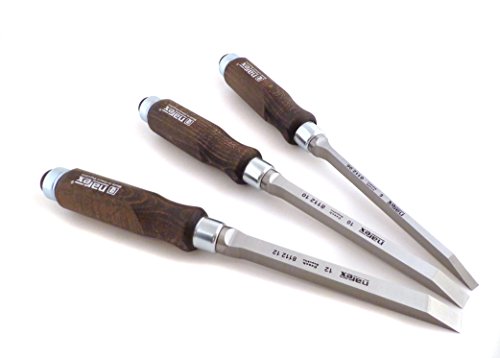
4. Narex 3 Piece Mortise Chisel Set, 6/10/12 mm
Three metric chisels made in the Czech Republic, according to the listing. The blades are fine grained chrome manganese steel hardened to Rc 59, with a 25 degree bevel. The brand field reads Go Outdoor while the manufacturer is shown as Narex, so the seller name is not the maker name. The handles are beech.
Suits: the middle widths used most often. Strengths: a stated hardness and bevel. Weaknesses: the brand and manufacturer fields do not match. Skip it if you want 4 or 5 mm chisels.
View Narex Czech Steel 3 piece set 6 mm, 10 mm, and 12 mm Mortise Chisels by Narex on Amazon

Best for small joinery and fine work
5. Narex 3 Piece Mortise Chisel Set, 4/5/8 mm
A set for narrow mortises in 4, 5 and 8 mm widths, model 863651. The maker says the chrome manganese blades are hardened to 59 HRc, ground at 25 degrees and tapered 0.030 inch from tip to shoulder, with blade thickness from 3/8 inch at the tip to 1/2 inch at the shoulder. Blade length is 149 mm and overall length is 304 mm, with stained beech handles and two steel ferrules. The item count reads 1 although this is a three chisel set.
Suits: small joinery and fine work. Strengths: the most complete dimensions of the six. Weaknesses: an inconsistent unit count and no width over 8 mm. Skip it if you cut wide tenons.


Best for adding one width to an existing kit
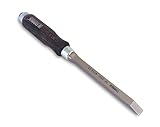
6. Narex Mortise Chisel, Single 12 mm (1/2 in)
One 12 mm chisel from a range sold in sizes from 4 mm to 12 mm. The blade is chrome manganese steel hardened to Rc 59 with a 25 degree bevel, and the stained European beech handle has two steel ferrules. The model number is 811212.
Suits: adding one width to an existing kit. Strengths: a single chisel in the most common width. Weaknesses: only one size. Skip it if you want several widths together.
Care and Setup
- Check that the back of the blade is flat before the first cut.
- Use a wooden or rawhide mallet and follow the maker’s guidance.
- Keep the edge sharp with a honing guide and fine stone.
- Wipe the steel dry and store the edges covered.
Mistakes to Avoid
- Choosing a chisel wider than the mortise you plan to cut.
- Prying on a thin edge instead of levering with the thick blade.
- Assuming every listing gives the same detail about bevel and hardness.
- Using a metal hammer on a wooden handle.
Blade Profile and Thickness: What Makes a Mortise Chisel Different
A mortise chisel is designed to chop deep, narrow slots, called mortises, in wood. The blade profile is the key difference from a bench chisel. A bench chisel has a thin, often beveled-edge blade that is good for paring and fine work, but it can bend or twist when levered in a deep slot. A mortise chisel has a thicker blade that is close to square in cross section, so it resists flexing and gives more strength when you pound it and lever the waste out of the cut.
Width and thickness work together. A chisel that is much thicker than it is wide has a stiffer blade but takes more effort to drive. One that is wide relative to its thickness is easier to push but more flexible. The ratio of thickness to width is often described in terms of the blade being almost square, which helps keep the sides of the mortise straight. Check the listing for the blade width, and if it gives thickness, compare it with the width.
The sides of the blade also matter. Straight, parallel sides let the chisel slide out of the cut without binding, while sides that taper too much make the chisel stick or leave rough walls. A slight taper that narrows toward the shank is usual because it gives clearance. Beveled or relieved edges can help in tight dovetail work but are less useful in mortises.
When choosing a width, think about the mortises you cut. Common sizes match typical tenon thicknesses in furniture and framing. A set with a few widths covers more work, while a single chisel suits repeated jobs of one size.
Steel, Hardness and Edge Holding
The steel in a chisel affects how well it holds an edge and how it responds to sharpening. Chisels are made from various types, including high-carbon steel, alloy steels and others. A harder steel holds an edge longer but is more difficult to sharpen and may chip if struck badly, while a softer steel is easier to sharpen but dulls faster. A well-made mortise chisel balances those traits, since it takes repeated blows and levering.
Listings sometimes provide a hardness number on a scale known as Rockwell C. If one is given, treat it as the maker’s statement, and remember that the right hardness depends on the steel and the use. Chisels that are too hard for heavy chopping may chip, and those that are too soft will roll or dent. Look for descriptions from the maker about the steel type and the heat treatment, and avoid assuming that a higher hardness number is always better.
How the chisel is ground and finished matters too. A flat back, the face opposite the bevel, is important, because that surface guides the sharpening and the cut. Some chisels arrive with the back and bevel ground well, and others need work on a stone before they are ready. Check the listing and user comments for details on how much preparation to expect.
The bevel angle at the factory may suit general purposes, but heavy chopping often calls for a slightly steeper bevel for strength. Many woodworkers adjust the angle to suit the wood they cut, with a steeper angle in hardwoods and a lower one in softwoods.
Handle, Ferrule and Striking Surface
Because a mortise chisel is struck with a mallet, the handle design is crucial. The handle should be strong, well attached and shaped to absorb blows. A traditional design has a stout wooden handle with a metal ring, called a ferrule, at the top or sometimes at both ends to prevent splitting. Look for a handle that is robust and seats firmly onto the tang or socket. If it is a socket-type design, the handle fits into a cup on the blade, which can be replaced if it breaks. A tang design pushes a pointed spike into the handle, and the fit is vital to avoid loosening.
The striking surface is where you hit the chisel with a mallet. A wooden handle with a metal ferrule is meant for a wooden or rubber mallet, not for a steel hammer. A hammer can split the handle or mushroom the ferrule. Check the listing for the recommended mallet, and use a wooden mallet of suitable weight. A mallet that is too light will do little, while one that is too heavy can tire you and reduce control.
Comfort and balance count over long sessions. A handle that is too thin or has sharp edges can hurt your hand when chopping many mortises. An oval or round handle with a good grip allows you to rotate and lever the tool. Check the length of the blade and handle together, since a long blade offers more depth but may be harder to control.
Over time, handles can loosen. If you notice movement between the handle and the blade, tighten or replace it before it becomes dangerous.
Chopping Technique and Mortise Layout
Good technique makes any chisel work better. Start with a precise layout, using a marking gauge to scribe the walls of the mortise from both faces. Clamp the work firmly to a bench, because a moving piece wastes effort and can be dangerous. Many woodworkers drill out most of the waste with a drill bit first, then use the chisel to square the walls and clean out the corners.
- Begin in the middle. Place the chisel with its back facing the end of the mortise, and take the first cuts to remove waste from the center, working outward.
- Chop in stages. Drive the chisel in a few millimeters at a time, then lever out the chips, and repeat to avoid jamming.
- Keep the walls square. Hold the chisel vertical, check it with a square, and do not rock it too far toward the walls.
- Finish at the ends. Pare to the scribe lines at each end of the mortise, and clean the bottom.
Mind the grain direction. The fibers can split if you lever too hard against the side of a narrow mortise, particularly near the end of a board. Leave enough wood between the mortise and the edge of the workpiece. Test the fit of the tenon in the mortise before assembly, and adjust with light paring cuts, not force.
Wear eye protection, because chips can fly out. Keep your free hand behind the cutting edge, and never position it in front of the chisel while striking.
Sharpening, Storage and When to Replace a Chisel
A sharp chisel is safer and more accurate than a dull one. Learn to sharpen it using a method that suits you, such as sharpening stones, diamond plates or abrasive films on a flat surface, and use a honing guide if you struggle to keep a steady angle. Flatten the back first, so the edge is formed by two flat surfaces, then grind or hone the bevel. Finish with a fine grit and a light strop if you like. Check the edge by cutting across end grain on scrap, where a sharp chisel leaves a clean, shiny surface.
Mortise chisels take hard use, so expect to hone them often. A small burr or chipped corner can be fixed on a stone, but larger nicks may require grinding. Avoid overheating the steel on a power grinder, because blue discoloration signals lost temper. Use light pressure and cool the blade frequently.
Store chisels so the edges do not touch each other or other metal tools. A roll, a rack or a wall-mounted holder works well. Use edge guards if the chisel came with them. Protect the steel from rust by wiping it dry after use and applying a thin film of oil or wax if you work in a damp space.
Signs that a chisel needs replacing include a bent or cracked blade, a handle that has split or will not stay fixed, a back that has pitted badly, or steel that chips repeatedly. Check the return policy and read the listing for details about the warranty before buying.
Which mortise chisel should you buy?
The best mortise chisel for you is the one whose widths match the mortises you cut and whose listing gives the details you want. All six picks here are mostly Narex, so the real choice is between widths, units and how much information the listing provides.
- If you work in inch sizes and want a full run with a box: choose the Narex 4 Piece Richter Mortise Chisel Set. It covers four narrow widths and has a described grind.
- If you work in metric sizes and want four widths: the Narex 863600 set covers small to mid mortises and states its hardness.
- If you want a simple trio in common inch widths: the MKC Mortise Chisel Set of 3 with hornbeam handles fits, though it lists few technical details.
- If you cut mid-size metric mortises most often: the Narex 3 Piece set in 6, 10 and 12 mm covers the widths used most.
- If you do small joinery and fine work: the Narex 3 Piece set in 4, 5 and 8 mm lists the most complete dimensions.
- If you already own a kit and need one more width: the single Narex 12 mm chisel is the simple add-on.
A set is usually better value than singles if you are starting out, since tenon thickness changes from project to project. A single chisel suits someone who repeats one joint size. Pick the width range first, then compare handles and ferrules.
What to check before you buy a mortise chisel, and who should skip it
Before you buy a mortise chisel, check the widths, the units, what is in the box and what the listing says about the blade and handle. A mismatch in units or sizes is the most common reason a set ends up unused.
- Widths and units: confirm whether the listing uses inches or millimeters, and compare with the tenons you cut.
- Listing consistency: some listings here show mismatched brand and manufacturer fields or an odd item count, so read the full description and confirm what is included.
- Handle and ferrule: make sure you have a wooden or rawhide mallet, since steel hammers can damage the handle.
- Edge readiness: expect to check the back for flatness and to hone the edge before heavy use.
- Returns and warranty: read the terms on the listing before ordering.
Is it worth paying for a set? A set costs more than one chisel, but it covers several tenon sizes, which helps if your projects vary. The honest downsides are that none of these goes much beyond a half-inch width, that sharpening takes time and that the steel and bevel details are the makers’ own claims.
You may want to skip these if you cut wide mortises, since a heavy-duty or wider tool would suit better, or if you only trim joints and a bench chisel is enough. Otherwise, compare the widths against your usual tenons, check the current listing for what is included, then choose the set or single chisel that fits your joinery.
Reading the Sets Side by Side
Four of the six picks here are Narex, which makes this comparison unusually useful: instead of comparing brands, you are comparing ranges, widths and handle specifications within one maker’s system, plus one alternative set and one single chisel. That shifts the decision to where it belongs — which sizes your joinery actually uses, and how much refinement you want in steel and handles.
Richter 4-piece set versus the standard 4/6/10/12 mm set
The Richter line is Narex’s premium range, and the difference shows in the finishing of the blade and the handle quality rather than in the basic shape — both sets chop mortises the same way. Choose the Richter set if mortise work is a weekly habit and you value an edge that arrives better prepared and handles that feel finished from day one. Choose the standard set if you are equipping a first joinery bench: the money saved buys the mallet, the marking gauge and the sharpening supplies that matter just as much to the finished joint.
MKC 3-piece set versus Narex 3-piece sets
The MKC set with hornbeam handles is the alternative voice in the list, worth considering if you prefer its handle shape or the specific width spread it offers. Between the two Narex 3-piece sets, the split is purely about widths: the 6/10/12 mm set centres on the sizes common in furniture-scale work with thicker stock, while the 4/5/8 mm set suits smaller-scale joinery, boxes, and frames where mortises are narrower. Neither is more correct — measure the tenons you actually cut, and let those numbers choose.
The single 12 mm chisel
A single wide mortise chisel makes sense in two situations: replacing or upgrading one size you use constantly, and equipping for a specific project built around one mortise width. It is rarely the right first purchase on its own, because joinery variety arrives quickly, but as a deliberate addition it is the most honest purchase in the list — one tool, one job, no filler sizes.
Your First Session: Preparation in the Right Order
A mortise chisel’s first session starts at the sharpening stone, not at the workpiece. Check the back for flatness near the edge and the bevel for an even grind, and hone until the edge is genuinely sharp — chopping with a dull mortise chisel bruises fibres instead of severing them, and the mortise walls show it forever. Mark out a practice mortise in softwood scrap with a gauge, knife the lines, and drill nothing: the first lesson is pure chopping, so you learn how the thick blade registers in the cut and how waste levers out.
Work the mortise in the classic sequence — chop across the width in small bites, lever the waste, move along — keeping the chisel’s back registered against the uncut end so the wall stays flat. Stop halfway, check depth and squareness, and only then finish. That pause-and-inspect habit, learned on scrap, is what separates clean mortises from hopeful ones on real work.
Technique: Layout, Leverage and Wall Quality
Three habits drive mortise quality. First, layout discipline: gauge lines set from the same reference face as the tenon, knifed shoulder lines, and a mortise width matched to the chisel rather than the other way round — choose the chisel first, then set the gauge to it. Second, bite size: a mortise chisel is strong, but taking modest bites keeps the blade tracking straight and the walls clean; greed makes the blade wander and the handle ring with every blow. Third, leverage direction: lever waste out toward the middle of the mortise, never against the end walls, because prying against an end wall bruises the very surface the tenon shoulder must meet.
Keep the work clamped or held so both hands are free — one guiding the chisel, one working the mallet — and keep the chisel vertical by sighting from two directions before the first blow of each new position. A mortise chisel follows its initial angle faithfully, which is a gift when the angle is right and a curse when it is not.
Troubleshooting in Diagnostic Order
If mortises come out rough or oversize, diagnose in order. First, sharpness: a dull edge crushes instead of cutting, and crushed walls crumble oversize — hone and recut a test mortise. Second, layout: confirm the gauge was set to the chisel’s actual width, not its nominal label. Third, technique: bites that are too deep lever the blade sideways and bell-mouth the mortise entrance; halve the bite and compare. Fourth, workholding: a workpiece that shifts even slightly under mallet blows smears every wall. Only after those checks should you suspect the chisel itself — a twisted or unevenly ground blade reveals itself by consistently favouring one wall on known-good technique.
Sharpening, Storage and Handle Care
Mortise chisels live on a cycle of honing little and often. The thick blade holds an edge well, but the moment chopping starts to feel like crushing, stop and hone — pushing on dulls faster and bruises work. Store them edge-guarded in a roll or rack, never loose in a drawer: the edges are heavy enough to damage each other and everything else they meet. Check handles periodically for looseness and keep the striking hoop seated; a handle that moves under the mallet wastes energy and eventually splits. Wipe blades dry after use, especially after green or acidic woods, and a whisper of camellia or similar light oil on the blade suits long storage between projects.
Choosing by the Work You Actually Do
Furniture makers cutting mortise-and-tenon joints regularly should buy the set whose widths match their common stock thicknesses, in the best line their budget comfortably allows. Beginners should start with a mid-range set in furniture sizes and spend the difference on sharpening kit. Makers of small boxes and frames should weight their set toward the narrow widths. And specialists who cut one joint size repeatedly — gate makers, bench builders — are well served by one excellent single chisel in exactly that width, backed by whatever general set they already own.
Should I grind a small secondary bevel on a mortise chisel?
Many woodworkers do, because it speeds honing: only the small secondary bevel needs regular attention, while the main bevel is refreshed occasionally. Keep it modest and consistent, and make sure the back stays flat near the edge — the back is the reference surface that steers the chisel in the cut, and rounding it over during careless honing is the one sharpening mistake that genuinely ruins mortise work.
How do I keep a mortise from blowing out on the far side?
Chop from both faces when the mortise goes through: work halfway from one side, flip the piece, and finish from the other, so the two halves meet in the middle. Support the work on a solid backing while chopping, keep bites small near the breakthrough zone, and let a sharp edge do the severing — breakout is mostly fibres being pushed rather than cut, and sharpness plus support removes both causes.
A Worked Mortise, Start to Finish
Walk through one furniture mortise with the habits above assembled. The stock is marked from a reference face, the gauge set to the chisel you will actually use, and the shoulder lines knifed. The work is clamped firmly with the mortise area fully supported underneath. You begin at one end of the mortise, chisel bevel facing into the waste, and chop a first shallow bite. Moving along in modest bites, you lever waste toward the centre, keeping the chisel’s back registered against the uncut end wall so that wall stays flat and square. Halfway through the depth, you stop: check the walls with a square, check the depth against your mark, and clear the accumulated waste properly rather than chopping into a cushion of chips, which steals force and accuracy alike.
The second half mirrors the first, with bites getting smaller as you approach full depth, because the last material is where an over-enthusiastic blow breaks through the bottom of a blind mortise or bruises the floor. You finish by paring the walls lightly with the chisel used by hand pressure — the same tool, a different mode — and test with the actual tenon or a gauge block. Tight in the middle and bruised at the mouth means the entrance was levered against; loose everywhere means the layout or the bite discipline drifted. Each mortise grades your technique, and the grade is readable in the walls.
Mortise Chisels Among Their Neighbours
The mortise chisel invites comparison with three neighbours. Against the bench chisel: the bench chisel is thinner, more delicate and more versatile, and using it for heavy mortising risks its edge and its handle — the mortise chisel exists precisely because that job needed a tool built like a lever with an edge. Against the drill and router: machines remove waste quickly and are the right choice for long production runs, but they leave rounded ends to square by hand — with, inevitably, a chisel — and they offer none of the mortise chisel’s quiet, dust-free control for one-off work. Against the sash mortise chisel: the sash pattern is lighter, made for the shallower mortises of window work, while the standard and oval-bolster patterns here are built for furniture-depth chopping. Knowing which neighbour a job belongs to keeps each tool doing the work its geometry was designed for.
A Pre-Purchase Checklist
Before choosing among these sets, settle four things. One: list the mortise widths your next few projects actually use, and let that list — not a sense of completeness — pick the set. Two: confirm you own, or budget for, the supporting kit: a suitable mallet, a marking gauge you can set to the chisel, and sharpening supplies that suit a thick blade; a mortise chisel without them is half a system. Three: handle the question of handles — striking hoops and robust handle materials matter because this tool is hit for a living, so favour the sets whose handles are specified for mallet work. Four: decide set versus singles by your project’s variety — varied joinery ahead argues for a set, one repeated joint argues for one excellent single. Answer those four and the six picks arrange themselves into an obvious order for your bench.
Building Mortise Work Into Your Everyday Workflow
Mortise-and-tenon joinery becomes ordinary — in the best sense — when the system around the chisel is ready before the project starts. Keep the common widths sharp and racked in order, keep the gauge set or quickly settable to those widths, and keep a practice offcut habit: two minutes chopping a test mortise in scrap at the start of a joinery session recalibrates your bite size and your eye for vertical before the real stock is at risk. Makers who do this stop experiencing mortises as events and start experiencing them as steps, which is when joint quality quietly jumps.
Track your own patterns as you work. If your mortises consistently lean, flare at the mouth or run deep, the fault is systematic and therefore fixable — and the chisel, faithfully following your hands, has been reporting it in the walls all along. Read the walls, adjust one variable, and let the next mortise grade the change.
How do I keep the mortise centred on the stock?
Centre comes from layout, not from chopping: set the mortise gauge from the reference face, mark both lines in one setting, and confirm the mortise’s position against the mating tenon’s actual location before the first blow. During chopping, register the chisel between the lines rather than chasing one line, and check with a square and a test fit early — a mortise corrected at half depth is a small thing, and the same mortise corrected at full depth is a new piece of stock.
Is it worth practising on softwood if my projects are hardwood?
Yes, with one adjustment: softwood teaches sequence, registration and bite discipline at low cost, and those transfer completely. What does not transfer is force calibration — hardwood needs a sharper edge, smaller bites and more patience — so finish your practice progression with a test mortise in an offcut of the project’s actual species before touching the real components.
How do I stop the chisel wandering sideways in wide mortises?
Wandering in a wide mortise usually starts with the first bites: if the initial row is not registered squarely between the gauge lines, every later bite inherits the error. Begin with a shallow, careful first pass that establishes the mortise’s true outline at low depth, then deepen within that established boundary. Keep the bevel oriented consistently into the waste so the blade’s steering tendency works for you rather than against you, and sight the chisel from the end of the bench as well as from the side — sideways lean is invisible from the side view alone, which is exactly why it surprises people.
What mallet weight suits mortise work?
Enough that the mallet does the work in a controlled swing rather than being thrown — most makers settle on a medium joiner’s mallet whose head mass lets the chisel bite with a firm, repeatable tap. Too light, and you strike more often with worse control; too heavy, and finesse at shallow depths disappears. If you find yourself either pounding or pecking, the mallet is mismatched to the chisel size or the wood, and changing the mallet is cheaper than changing the technique you have built around it.
How do I deepen a mortise evenly across its whole length?
Work in full-length passes at a consistent shallow bite rather than finishing one end and moving on: complete one depth level along the entire mortise, check with a depth gauge or a marked stick at several points, then take the next level. End-by-end deepening almost guarantees a ramped floor, which rocks the tenon and weakens the glue line. The pass method feels slower and is measurably faster, because the floor it produces needs no corrective work.
How do I chop a mortise in end grain situations, like a breadboard end or a leg top?
End-grain mortising — as in some bridle and breadboard constructions — reverses the usual fibre behaviour: the chisel severs fibres across their length, the waste does not lever out in satisfying chunks, and the walls bruise more easily. Work with the keenest edge you can produce, take markedly smaller bites, and clear waste frequently rather than levering against it. Support the piece so the exit side cannot blow out, and expect the job to take longer than the same mortise in long grain. The technique is identical in sequence; only the bite size and the patience change, and respecting that difference is what keeps end-grain mortises crisp.
Should I keep one mortise chisel dedicated as a roughing tool?
Makers with a spare older chisel often do: the rougher clears waste and absorbs the risky work — knots, suspect timber, demolition-adjacent repairs — while the best set stays keen for joinery. It is a sound system when the spare exists, and a poor reason to buy an extra tool when it does not. Your main set, honestly maintained, handles ordinary work indefinitely; dedication is a luxury of abundance, not a requirement of the craft.
A last word on building a set over time
Few makers need every width on day one, and the sets in this list should be read as maps rather than mandates. Start where your projects live, chop real mortises, and notice which missing width you improvise around twice — that improvisation, repeated, is the honest signal to expand. Singles bought in response to felt need integrate into a working kit immediately, while completeness bought in advance often sits keen and unused. Keep the rack honest, keep the edges honest, and let the work itself curate the collection. A mortise chisel kit assembled that way fits its owner the way a good mortise fits its tenon: exactly, and because it was measured against the real thing.
Mortise Chisel FAQ
How is a mortise chisel different from a bench chisel?
A mortise chisel has a thicker, taller blade made for mallet work and leverage. A bench chisel is lighter and made for general paring and trimming.
Which set has the widest chisel?
The Narex Richter set reaches 1/2 inch and the 12 mm Narex sets reach about the same width, so none of these goes beyond roughly 1/2 inch.
Can I use a bench chisel to cut mortises?
You can for shallow work, but a thin bench chisel may flex and twist in a deep slot. A mortise chisel has a thicker blade that resists levering and takes heavier blows.
What mallet should I use?
Use a wooden or rubber mallet if the chisel has a wooden handle with a ferrule. Avoid a steel hammer, which can split or mushroom the handle. Choose a weight you can control.
What width mortise chisel should I buy first?
Choose a width close to the tenon thickness you cut most often. A set covers more sizes, but a single chisel is fine if you work with one size.
How often should I sharpen a mortise chisel?
Often, because chopping dulls the edge quickly. Hone it whenever you notice more effort, crushed fibers or a ragged cut, and flatten the back as needed.
Should I drill out the waste first?
Many woodworkers do, since it removes bulk and reduces the effort of chopping. Then they use the chisel to square the walls and ends.
Why does my chisel get stuck in the mortise?
Possible causes include tapered walls, cutting too deep in one stroke, rocking the tool, or a blade that is wider than the slot. Chop in stages and keep the walls clean.
How do I stop the handle from loosening?
Check it periodically, avoid striking with a steel hammer, and follow the maker's guidance on tightening or replacing the handle. Do not use a chisel with a handle that moves.
Do I need a mortise chisel if I have a drill press?
A drill press removes bulk quickly, but you still need a chisel to square the walls and clean the corners. The two tools work together. A mortise chisel gives straight, crisp ends that a drill bit alone cannot.
What is the difference between a sash mortise chisel and a standard mortise chisel?
A sash type has a thinner, taller blade suited to lighter work, while a standard mortise chisel is thicker for heavy chopping. The listings here do not describe a sash type, so check the product page for the blade profile you want.
How deep can a mortise chisel cut in one pass?
Chop a few millimeters at a time and lever the waste out between strikes. Cutting too deep in one blow can jam the blade or split the wood. Depth also depends on the blade length listed for your chisel.
Can I use a mortise chisel for dovetails?
It is not the best choice, because the thick blade is made for deep chopping rather than fine paring in tight corners. A thinner bench or paring chisel does that work more easily.
Why are mortise chisel handles made of wood with metal rings?
The wooden handle absorbs mallet blows, and the metal ferrule helps stop it from splitting. This is why a wooden or rawhide mallet is recommended instead of a steel hammer.
Should I buy a mortise chisel set or single chisels?
A set suits you if your projects use several tenon thicknesses. Single chisels make sense if you repeat one size or want to fill a gap in an existing kit. Match the choice to the widths you actually cut.
The Short Version
For a four chisel inch set with a box, the Narex Richter. For metric widths, the Narex 863600. For three plain inch sizes, the MKC. For 6, 10 and 12 mm, the Narex three piece. For narrow work, the 4/5/8 mm Narex. For a single common width, the Narex 12 mm.


