A saw file is a triangular file used to sharpen the teeth of a hand saw. The file sits in the gullet between teeth and cuts the face of each tooth. The main choices are the file length, how slim the taper is, the cut of the teeth and whether the file suits the tooth pitch of your saw.
The six files below are five standard taper files from Nicholson and Bahco plus one diamond file made for a Japanese saw line. Sizes, cuts and materials come from each listing page and are the makers’ own claims. We have not used these files ourselves. Where a listing disagrees with itself, we say so.
As an Amazon Associate we earn from qualifying purchases. Links below are affiliate links, and they do not change the product information we give.
What to Look For
| Feature | Why it matters |
|---|---|
| Taper grade | Slimmer files fit finer teeth, wider files suit coarse teeth |
| Length | A longer file gives more stroke, a short one is easier to guide |
| Cut | Single cut leaves a finer edge than coarser cuts |
| Tooth angle | Triangular files suit 60 degree teeth |
| Handle | Most of these files come bare, so plan a handle |
In this guide
Specs at a Glance
| File | Length | Taper | Notes |
|---|---|---|---|
| Nicholson 14255MN | 7 in | Slim | Single cut; American pattern; 60 degree teeth |
| Nicholson 21874N | 6 in | Double extra slim | Single cut; no handle; alloy steel |
| Nicholson 14290MN | 8 in | Slim | Single cut; limited lifetime warranty |
| Bahco 4-188-06 | 6 in | Double extra slim | 15/64 in wide; fine crosscut teeth; cut type conflicts |
| Bahco 4-186-06 | 6 in | Slim | 21/64 in wide; 51 listed; cut type conflicts |
| Samurai DFH-70 | Not stated | Not stated | Diamond coated; made in Japan; Samurai saws only |
The 6 Best Saw Files
Top pickBest for general hand saws
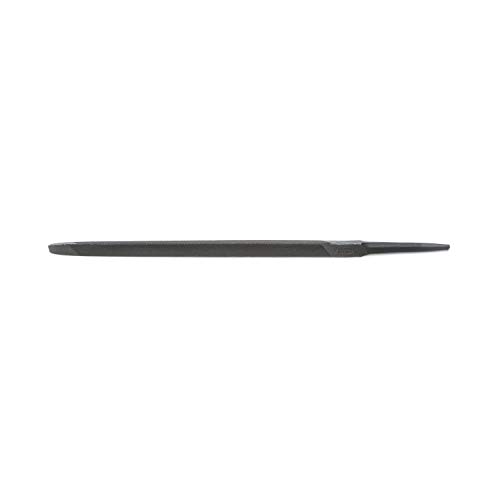
1. Nicholson 7 in Triangle Single Cut Slim Taper File (14255MN)
A 7 inch American pattern slim taper file that the maker says is made to file saws with 60 degree teeth. Its single cut suits sharpening and finish filing, and the edges are set and cut for filing the gullets between teeth. A standard limited lifetime warranty is listed. The item weight of 4.54 grams looks wrong for a steel file, and the listing shows an overall length of 8.62 inches.
Suits: general hand saws. Strengths: a clear tooth angle and a warranty. Weaknesses: the weight and length data do not agree. Skip it if your saw has very fine teeth.

View Crescent Nicholson 7″ Triangle Single Cut Slim Taper File | 14255MN on Amazon

Best for finer teeth
2. Nicholson 6 in Triangular Double Extra Slim Taper File (21874N)
A 6 inch double extra slim file sold without a handle, in an alloy steel body. The maker says the slight taper in width helps it reach into slots, and it is aimed at 60 degree saw teeth. The listing gives 7.52 inches by 0.24 inches and a weight of 22.68 grams, and notes a standard limited lifetime warranty.
Suits: finer teeth. Strengths: a slim profile. Weaknesses: no handle. Skip it if you file coarse rip teeth.

Best for larger teeth and longer strokes
3. Nicholson 8 in Triangle Single Cut Slim Taper File (14290MN)
The longest file here: an 8 inch slim taper with the same American pattern, single cut and 60 degree tooth focus as the 7 inch model. The listing shows a weight of 3.77 ounces and a limited lifetime warranty. The title text is formatted oddly and the dimensions field reads 1 by 1 by 1 inches, so treat the size fields with care.
Suits: larger teeth and longer strokes. Strengths: length. Weaknesses: messy size data. Skip it if you want a short file for small saws.
View Nicholson 8″ Triangle Single Cut Slim Taper File – 14290MN on Amazon

Best for fine crosscut teeth
4. Bahco 4-188-06-2-0 Double X-Slim Taper File, 6 in
A 6 inch triangular file, 15/64 inch wide, that the maker says is for sharpening saws with fine crosscut teeth. The title says single cut while a bullet says second cut. The details table lists a voltage of 28 volts and 366 teeth, which make no sense for a hand file, and a high speed steel blade and plastic handle that conflict with the bare tool description.
Suits: fine crosscut teeth. Strengths: a stated width. Weaknesses: confused listing data. Skip it if you want a clean spec sheet.

View Bahco 4-188-06-2-0 Double X-Slim Taper Files, 6-Inch, Single Cut on Amazon

Best for slightly larger fine teeth
5. Bahco 4-186-06-2-0 Slim Taper File, 6 in
A 6 inch slim taper file, 21/64 inch wide, for sharpening saws with fine crosscut teeth, sold as a single file. The listing includes 51 teeth in the title and fields, a second cut type in a bullet, and dimensions of 8 by 1.5 inches that do not match the 6 inch length.
Suits: slightly larger fine teeth. Strengths: a wider profile than the double extra slim. Weaknesses: conflicting dimensions. Skip it if you need exact size data.

View Bahco 4-186-06-2-0 51 TPI Slim Taper File, 6-Inch on Amazon
Best for owners of those Samurai saws
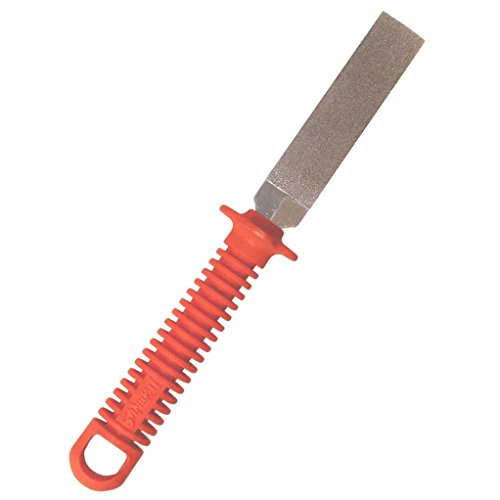
6. Samurai Kanzawa DFH-70 Japanese Saw Diamond Sharpener
Not a general triangular file: a diamond coated file made in Japan, listed for Samurai saws in the GC, JD and FC series. The maker also says it can sharpen other cutting tools. The listing gives no length or taper figure.
Suits: owners of those Samurai saws. Strengths: a diamond surface. Weaknesses: limited stated compatibility and no size data. Skip it if you use Western saws.

View Samurai Kanzawa Japanese Saw Diamond Sharpenner DFH-70 For Hand Saws GC JD FC on Amazon
Care and Setup
- Fit a handle on a bare file before use.
- Hold the saw firmly in a vise, with the teeth just above the jaws.
- File in one direction and lift on the return stroke.
- Keep files apart so the teeth do not rub together.
Mistakes to Avoid
- Using a file too wide for the gullet.
- Believing weight and dimension fields without checking the title.
- Filing without a handle.
- Applying a Japanese saw sharpener to other saws.
Matching the File to Your Saw’s Teeth
The most common mistake in saw sharpening is using a file that does not suit the teeth. A triangular file has to sit in the gullet, the valley between two teeth, while its edges cut the faces of the neighboring teeth. If the file is too wide for the gullet, it cannot reach the bottom and it damages the teeth or rounds the gullet. If it is too small, it works slowly, can chatter and may wear unevenly.
Tooth size is usually described in points per inch (ppi) or teeth per inch (tpi), and you can count it by laying a rule along the blade and counting tooth points over one inch. Coarse teeth, such as those on a rip saw or a large panel saw, need a larger, wider file. Fine teeth, common on dovetail saws, tenon saws and fine crosscut saws, need a slim or extra slim file. The listings here use grades such as slim and double extra slim, and the makers pair these with particular tooth sizes. Check the maker’s chart or the saw’s manual for the file recommended for your teeth, since sizing differs between makers.
The file’s profile should also suit the tooth angle. Most western hand saws use teeth with a 60 degree included angle, which is what a standard triangular file produces. Some saws, including certain Japanese designs, have different tooth shapes, and a standard triangular file may be wrong. One listing in this post is a diamond file made for a specific Japanese saw line, and the maker limits its stated compatibility to those models.
- Count the points per inch before you buy a file.
- Choose the narrowest file that still fills the gullet comfortably.
- If your saw has very small teeth, ask whether sharpening is practical or whether replacement blades are available.
When unsure, bring the saw or its measurements to a tool shop, or check the maker’s guidance.
A Sharpening Routine From Jointing to Finish
Sharpening a hand saw is a sequence, and the file is only one step. First clamp the saw firmly in a vise or a saw clamp, with the teeth just above the jaws to limit vibration. Good light and a comfortable height help you see the teeth.
The first step is jointing: running a flat file lightly along the tops of the teeth so they are all the same height. Without this, short teeth escape the file and the saw cuts unevenly. Jointing leaves small flats on the tooth tips, and those flats show you which teeth the file must reach. If the teeth are already worn into a shallow shape, you may need to reshape them before sharpening.
Next, file each tooth in sequence. Hold the file at the angles recommended for your saw type, rest it in a gullet and push forward with light even pressure, taking the same number of strokes at each tooth. Count the strokes so that teeth end up the same size. Work every second gullet from one side, then turn the saw around and file the gullets you skipped from the other side. When the flats on the tips are gone and a faint sharp point remains, the tooth is sharp.
- File in one direction only, lifting the file on the return stroke.
- Keep the file level with the saw plate unless the saw is designed for filing at an angle.
- Finish with a light pass to remove burrs, using a fine stone on the sides if desired.
Test on scrap wood. If the saw pulls to one side, check that you filed each side equally and that the set, the slight bend of teeth outward, is even.
Handles, Grip and Holding the File Steady
Most saw files come without a handle, and using one bare is a safety problem. The pointed end, the tang, can dig into the palm if the file slips or catches. Fit a handle before you start. Wood and plastic handles are common and are sold separately in several sizes. Choose one that fits the file’s tang width and gives a secure grip. A ferrule at the base prevents the handle from splitting.
To fit a handle, drill a pilot hole in the end of the wooden handle that is slightly smaller than the tang, or use a pre-drilled handle. Push the tang in by hand, then tap the handle down on a bench, not by hammering the file itself, since files are hard and brittle. Check that the file is straight along the axis of the handle. If you have to force it, stop and check the hole size.
Technique matters as much as the handle. Hold the handle with your dominant hand and grip the tip lightly with the other to guide it. Keep your wrists straight and let your arms and shoulders drive the stroke. Press on the push stroke only, and lift on the return to avoid dulling the file. A stable posture and a well-lit saw keep your strokes consistent.
- Use a handle that suits your hand size to avoid blisters.
- Do not use the file as a lever or a pry bar.
- Replace a cracked handle immediately.
Keep your fingers away from the saw teeth. Even a dull saw can cut skin, and a freshly sharpened one is much worse.
Cut Grade, File Wear and Keeping Files Sharp
The cut of a file describes the coarseness of the teeth on the file itself. Single cut files, which have one set of parallel ridges, give a smooth finish and suit sharpening. Double cut files have crossing ridges and remove more material faster but leave a rougher surface. Second cut and bastard are other grades, and listings often use different names for similar cuts, as some of the entries in this post show. For saw sharpening, a single cut file is a common choice, because it gives a clean edge.
Files wear out. A dull file skates over the steel rather than cutting, which makes you press harder and damages the saw. Signs of wear include shiny, smooth teeth on the file, a need for more strokes to produce a result and a gritty, scraping sound. A file clogged with metal shavings can also seem dull. Clean it with a file card or a stiff brush by pulling the bristles along the grooves, and use a pin to remove stubborn shavings.
Storing files properly extends their life. Keep them in a roll, a slotted block or a drawer where they do not touch each other, because contact chips the teeth. Keep them dry to avoid rust, and wipe off oil or chalk. A little chalk on a file can reduce clogging in some metals, but check suggestions from the saw maker. Diamond files wear differently and are cleaned with water or a soft brush, so follow the maker’s advice.
- Do not drop files or knock them together.
- Use each file only on its intended steel; hardened teeth can dull a plain file quickly.
- Keep a separate file for saws and for general work.
Retire a file when it no longer cuts or when its teeth are visibly damaged.
Deciding Whether to Sharpen or Replace the Saw
Not every saw is meant to be sharpened by hand. Traditional hand saws with teeth that are cut and set can be filed repeatedly. Many modern saws have hardened teeth, sometimes marked as impulse hardened or induction hardened, which are very hard and tend to dull ordinary files, and the makers often recommend replacement rather than resharpening. If your saw has hardened teeth, check the maker’s advice before filing, because a standard file may not cut them and a diamond file may be needed.
Think about the cost and time too. A decent traditional saw can last decades if you sharpen it, and filing is an essential skill for anyone using older tools. If a saw is cheap, hard to sharpen or very worn, replacement can make more sense. Check the teeth for damage: broken or bent teeth, deep rust and a bent plate are signs that a saw may be beyond practical repair.
If you only sharpen occasionally, a professional sharpening service may serve you better than buying several files. If you plan to maintain multiple saws, buying files in a couple of sizes pays off. Consider other supplies too, such as a saw vise, a saw set tool to adjust the sideways bend of the teeth and a jointing guide.
- Check the saw for rust and wipe it with a light oil after use.
- Replace saws with bent plates or cracked handles.
- Learn on an old, inexpensive saw before working on a prized one.
With patience, a sharp saw cuts straighter, with less effort and a cleaner edge.
Which saw file should you buy?
The right saw file depends on your saw’s tooth size, so match the taper grade to your teeth before thinking about brand or length.
- You have a general-purpose hand saw with ordinary teeth: the Nicholson 14255MN, a 7 inch slim taper file, is the all-round pick.
- Your saw has finer teeth: the Nicholson 21874N or the Bahco 4-188-06, both sold as double extra slim, fit smaller gullets.
- Your saw has larger teeth or you want longer strokes: the 8 inch Nicholson 14290MN gives more file to work with.
- You want a slightly wider file for fine crosscut teeth: the Bahco 4-186-06 is the wider option.
- You own a Samurai saw in the listed series: the DFH-70 diamond file is made for those saws.
If you are not sure of your tooth size, count the points over one inch of the blade and compare with the maker’s file chart. When two files seem possible, the narrower one that still fills the gullet is usually safer.
Remember that several listings here contain conflicting data, such as odd weights or cut types. Trust the title and the maker’s description of the grade, and verify on the current listing.
You may end up owning two files. One slim and one extra slim cover many hand saws between them, and the cost of a second file is small compared with ruined teeth.
What to check before you buy, and who should skip saw files
Before you buy a saw file, check the tooth size of your saw, the file’s grade and the listing’s stated length, and plan for a handle.
- Points per inch on your saw, and the file grade the maker recommends.
- File length and width, read from the title rather than odd size fields.
- Cut type, with single cut being a common choice for sharpening.
- Whether the file comes with a handle, since most are bare.
- Whether your saw has hardened teeth that a plain file may not cut.
- Warranty terms where the listing states them.
- Extras you may need: a handle, a saw vise, a jointing file and a saw set.
The honest trade-offs: hand sharpening takes practice, and your first attempts may leave uneven teeth. A bare file is a safety risk without a handle, and some listings here have confusing data that needs checking.
You can skip a saw file if your saw has hardened teeth the maker says not to file, if the saw is cheap enough to replace, or if you would rather use a sharpening service. A diamond file for a Japanese saw is the wrong tool for Western saws.
When you are ready, compare the picks above, check the current listing for size and what is included, then choose the one that fits how you will use it.
Reading Your Saw Before You Pick Up a File
Good sharpening starts before the file touches steel, because the file can only restore the geometry that is already there. Begin by cleaning the blade. Old pitch, rust bloom and dried oil hide the true shape of the teeth, and a file dragged across a dirty gullet wastes its sharpest corners on debris instead of cutting metal. A wipe with a cloth, a gentle pass with a brass brush along the tooth line, and a look under bright light will tell you more about the saw than any specification sheet. Sight down the tooth line from the handle end with the blade held at eye level. You are looking for three things: teeth that sit noticeably higher or lower than their neighbours, teeth bent further to one side than the pattern of the set suggests, and flat, shiny spots on the tips that catch the light. Those shiny flats are the honest measure of dullness. A sharp tooth ends in a point too fine to reflect light back at you, while a worn tooth develops a tiny plateau that glints. Run a fingertip very lightly across the tops of the teeth, moving from heel to toe, and you can often feel the difference between a crisp row and a rounded one before your eyes confirm it.
Next, test the saw in wood rather than trusting the inspection alone. Take a straight offcut of a medium-density board, mark a line, and make a few strokes on the waste side. A saw that starts reluctantly, skates across the surface, or demands downward pressure to keep cutting is telling you the points are rounded. A saw that tracks to one side is telling you the set is uneven or that one face of the teeth received more filing than the other during its last sharpening. A saw that cuts well at the heel but stalls near the toe usually has uneven tooth height, which is exactly what jointing is meant to correct. Write down what you observe, even if only as a short note on masking tape stuck to the blade. Sharpening involves several distinct operations — jointing, shaping, setting and final sharpening — and it is easy to lose track of which problem you set out to fix once the filing begins. The note keeps the session honest: you finish when the behaviour you recorded has changed, not when you feel you have filed enough.
Matching the diagnosis to the work the file must do
Each symptom maps to a different amount of work, and matching the job to the diagnosis saves both the file and the saw. Rounded points with even tooth height need only a light sharpening pass, one or two controlled strokes per gullet with the file that matches the tooth size. Uneven height needs jointing first, because sharpening teeth of different heights simply makes the tall teeth sharper while the short ones never touch the wood. Distorted gullets, often left by a previous sharpening with the wrong file size, need a shaping pass to restore a consistent profile before any edge work makes sense. A saw that was stored badly and rusted along the tooth line may need the rust removed and the gullets cleaned before filing, since rust pits hold moisture against the file corners and blunt them quickly. Deciding which of these situations you are in takes five minutes and determines whether the session is a quick touch-up or a full restoration. It also determines how much life the session takes out of your file, because heavy shaping work on a fine finishing file wears the corners that you depend on for crisp points.
Head-to-Head: How the Picks in This Guide Compare in Use
The two Nicholson slim taper files in this list, the seven-inch and the eight-inch, look similar on a shelf but behave differently at the bench. The shorter file suits the fine-toothed saws most woodworkers sharpen often, because its narrower faces sit inside small gullets without bridging across neighbouring teeth. The longer eight-inch file covers more ground per stroke and feels steadier on coarser teeth, where the gullet is wide enough to accept it, but that same width makes it clumsy on a fine dovetail saw. Choosing between them is really choosing which saws you own: match the file to the finest saw you sharpen regularly, and accept a slower pace on the coarse saw, rather than the reverse. A file that is too large for the gullet cannot be made to work by care or pressure; it will ride on the tooth tips, round them further, and leave the gullet bottom untouched.
The six-inch Nicholson double extra slim and the two Bahco files frame the other main decision, which is how fine a tooth you need to reach. The double extra slim exists for the finest teeth, where even a slim taper file is too broad to enter the gullet cleanly. Its trade-off is fragility and speed: the thin section flexes if you push sideways, and it removes metal slowly, so it rewards a light touch and punishes impatience. The Bahco slim and extra-slim pair give you two steps of fineness from one maker, which matters more than it sounds, because tooth size varies along a handsaw collection more than within it. Owning both Bahco sizes means the dovetail saw and the tenon saw each get a file that truly fits, instead of one compromise file that is slightly wrong for both. The Samurai Kanzawa diamond sharpener stands apart from all five files. It does not shape gullets the way a triangular file does, and it is not the tool for restoring a neglected saw. Its strength is maintenance: a few strokes along the tooth faces of a Japanese-style saw or a fine Western saw between full sharpenings, keeping points keen without a vise session. Think of it as the touch-up tool that stretches the interval between real sharpenings, while the files remain the tools that perform those sharpenings.
A practical way to decide between two files that both fit
When two files both fit the gullet, decide by stroke control rather than by specification. Seat each file in a gullet on the waste end of the tooth row and take one slow stroke. The better file is the one whose corners bite evenly on both faces of the gullet without chattering, rocking, or needing downward force to start cutting. Also check how much of the file face the tooth actually uses: a well-matched file works across most of its width, spreading wear, while a marginal fit concentrates all the wear on one corner and dulls that corner quickly. Finally, consider the handle you will fit. A file that balances well with your handle, at the length your arm naturally strokes, will produce more even teeth than a theoretically ideal file that feels awkward. Sharpening quality is mostly consistency, and consistency comes from a setup you can repeat without fighting it.
Your First Sharpening Session, Step by Step
Set the saw in a vise or between two battens so the tooth line sits just above the jaws, with the blade supported close to the teeth to stop vibration. A blade that sings or flexes under the file is not just unpleasant; the movement changes the effective angle of every stroke. Work in good light, ideally with a lamp raking across the tooth line from the side, because raking light makes the shiny flats on the tooth tips visible and lets you watch them disappear as the points come back. Mark the teeth you have completed as you go. A felt pen dot on the blade beside every finished tooth sounds fussy, but losing your place and double-filing some teeth while skipping others is the most common beginner error, and it produces exactly the unevenness you were trying to remove.
Hold the file with a handle fitted, both hands guiding it, and keep it level and square to the blade unless you are deliberately adding fleam to a crosscut saw. File on the push stroke only, lift or ease the pressure on the return, and count your strokes. The discipline of counting is what turns sharpening from guesswork into a repeatable process: two strokes per gullet along the whole row, then inspect, then one more stroke only where the flat still shows. Stop earlier than you think you should and test the saw in wood. An under-sharpened saw can always receive another light pass; an over-filed tooth, worn down below its neighbours, has to wait for the next jointing to come back into line. Finish by removing the wire edge. A file leaves a microscopic burr on the tooth tips, and a very light pass with a fine stone along the side of the tooth row, or a few strokes through the end grain of a hardwood offcut, knocks that burr off and leaves the saw cutting cleanly instead of dragging.
Safety and comfort during the session
Saw teeth and file tangs are the two hazards here, and both are managed with simple habits. Always fit a handle to the file before use; a bare tang driven into a palm during a slipped stroke is the classic workshop injury with these tools, and it is entirely preventable. Keep your free hand behind the direction of the stroke, never in front of the file, and clamp the saw firmly so neither hand has to hold the work. Keep a small first aid kit within reach of the bench, not across the room, so a nick gets cleaned and covered immediately rather than after the session. Work seated or standing at a height where your forearm stays roughly level through the stroke; a bench that forces you to hunch or reach will show up as uneven teeth long before it shows up as a sore back.
Troubleshooting in Diagnostic Order
When a freshly sharpened saw disappoints, work through the causes in the order that rules out the most likely problems first, instead of re-filing at random. First, check tooth height: sight along the row and look for teeth that stand proud or sit low, because height errors defeat everything else. Second, check the points: if flats still glint under raking light, the saw simply is not sharp yet, and another counted pass is the cure. Third, check the set: a saw that binds in the kerf needs slightly more set or a cleaner kerf path, while a saw that wanders needs the set evened, usually by reducing the side it wanders away from. Fourth, check for a burr: a saw that feels sharp to the touch but drags and leaves a rough surface is often carrying a wire edge that a light stoning removes. Fifth, check the blade itself: a kinked or bowed blade will never track straight no matter how perfect the teeth are, and no amount of filing corrects a bent plate.
Chatter marks and a file that skates rather than cuts point to a different cluster of causes. Skating usually means the file is worn, the tooth is hardened, or downward pressure is too light at the start of the stroke; try a fresh section of the file face before blaming the saw. Chatter usually means the blade is vibrating in its support, the file is being pushed too fast, or the stroke is too long for the gullet. Shorten the stroke, support the blade closer to the teeth, and slow down. A file that clogs repeatedly with metal filings needs brushing with a file card more often, and a touch of chalk rubbed into the teeth of the file can reduce pinning, where a chip welds itself into the file gullets and then scores every surface it crosses. Treat each symptom as information, change one variable at a time, and test in wood between changes. Random re-filing hides the cause and shortens the life of both saw and file.
Storage, Rust Prevention and Getting Full Life From a File
Files are precision cutting tools with many small edges, and they dull fastest when they are stored badly. Two files rattling against each other in a drawer blunt each other more in a month of storage than in a month of use. Keep each file in its own sleeve, wrap, or slot in a rack so the faces never touch another tool. Keep them dry: a light wipe of oil protects the steel in a damp shop, but oil left on the face before use can make the file skate, so wipe the face clean at the start of a session. Never use a saw file as a pry, a scraper, or a general-purpose triangular file for odd jobs around the shop. The corners are the working part, and one careless job on hardened steel or a burr on a bolt can ruin a corner you need for fine teeth. Rotate your use across the face when the job allows it, and retire a file honestly when it stops cutting. A worn file repurposed for rough work on soft metal is fine, provided it is marked so it never returns to saw duty by mistake.
Choosing by User: Four Common Situations
If you own one good dovetail saw and sharpen it a few times a year, the finest file that fits its teeth, plus a handle and a simple way to clamp the blade, is the whole kit; the diamond sharpener in this guide can stretch the time between filings but does not replace the file. If you maintain a working set of handsaws for site carpentry, the mid-size slim taper files earn their place, because coarse and medium teeth are the daily reality and durability matters more than the last degree of fineness. If you restore old saws, expect to do shaping work as well as sharpening, and choose the file sizes for the saws you actually find rather than the saws you wish you found; a range of two or three sizes covers nearly everything. If your saws are Japanese pull saws with hardened teeth, be honest about the limit: those teeth are generally not file-sharpened at home, and the diamond sharpener is for the softer traditional blades only. Knowing which situation is yours stops you buying a file for a saw you do not own and keeps the kit small, sharp and used.
Extra questions readers ask about saw files
How do I stop the file slipping out of the gullet at the start of a stroke? Begin each stroke with the file already seated and a moment of stillness, applying cutting pressure only once the corners are registered in the gullet. Most slips happen when the stroke starts before the file is placed. Should the file be exactly level? For rip teeth, yes, level and square is the baseline; crosscut teeth add a slight angle for fleam, but that angle must be identical on every tooth, which is why beginners should master the level stroke first. What do I do with a file that has one worn corner? Rotate it so a fresh corner does the cutting work in the gullet bottom, mark the worn corner with a pen so you can track the rotation, and accept that the file is in the second half of its life. Can humidity in the shop affect sharpening? Indirectly, yes: surface rust forms quickly on a freshly filed tooth row in a damp shop, so oil the blade lightly after sharpening if it will not be used the same day.
Rip Teeth, Crosscut Teeth and Why the Same File Works Differently
One distinction the main guide touches on deserves a fuller treatment, because it changes how every stroke feels. Rip teeth are filed essentially straight across, with the file held square to the blade, so each tooth becomes a small chisel that pares wood along the grain. Crosscut teeth are filed at an angle, creating fleam, so the teeth become small knives that sever fibres across the grain before lifting them out. When you file a crosscut saw, the file meets the tooth faces at that angle, and the stroke must be reversed for alternate teeth so each face is filed from the side that keeps the cutting edge clean. Beginners often notice that a crosscut saw seems to need more strokes on one face than the other; that is usually the fleam angle making one face present more metal to the file, not an error in counting. Keep the angle identical from tooth to tooth by setting your body position once and filing the whole row without shifting your stance, then turning the saw around for the opposing faces rather than leaning across it. A consistent stance is worth more than a careful eye here, because the file follows your shoulders.
Tooth pitch interacts with the file choice in a way worth stating plainly. The file must be small enough that its corners reach the bottom of the gullet while its faces bear on the tooth sides, yet large enough that it does not rattle in the gullet and file one side more than the other. On a saw whose pitch changes along its length, as some progressive-pitch saws do, no single file is perfect everywhere; work with the file that suits the majority of the row and accept slower, more careful strokes where the teeth run finer. Finally, remember that sharpening removes metal and therefore slowly changes the saw: teeth grow shorter across many sharpenings, gullets grow shallower, and eventually a saw needs its teeth re-formed rather than merely sharpened. Recognising that point — when honest sharpening stops restoring performance because the geometry itself has drifted — is the last sharpening skill, and it is the moment a saw goes to a specialist for re-toothing or becomes a practice saw for learning exactly these techniques.
Saw File FAQ
Why are saw files triangular?
The triangle matches the gullet between saw teeth. The Nicholson listings say their files suit 60 degree teeth.
Which file is the slimmest?
The Nicholson 21874N and the Bahco 4-188-06 are both sold as double extra slim.
How do I know what size saw file to use?
Count the saw's teeth per inch, then use the maker's chart or the file listing to choose a grade that fits the gullet. Finer teeth need slimmer files.
Can I sharpen a saw with a plain triangular file from the hardware store?
Sometimes, if the size fits the teeth and the saw has conventional teeth. Check that the file's width and angle suit the teeth first.
Why does my saw pull to one side after sharpening?
The teeth may have been filed unevenly, or the set may be uneven. File each tooth with the same number of strokes and check the set.
Do I need a handle for a saw file?
Yes. Bare tangs can injure your hand. Fit a handle that suits the tang before using the file.
What is jointing?
It is lightly filing the tops of the saw's teeth flat so they are the same height. It makes sure every tooth is reached when you sharpen.
Can I sharpen hardened saw teeth?
Often not with an ordinary file, since the teeth are very hard. Check the maker's advice, and consider replacement or a diamond file if suitable.
How do I clean a clogged file?
Use a file card or stiff brush along the grooves, and pick out stubborn shavings with a pin.
How should I store files?
Keep them dry and apart from each other in a roll, slotted block or drawer so the teeth do not chip.
How often should I sharpen a hand saw?
Sharpen it when it starts to bind, wander or need extra push, rather than on a schedule. Frequency depends on how much and what you cut. Light touch-ups keep it sharper longer.
What is the difference between a slim and a double extra slim taper file?
Double extra slim files are narrower, so they fit smaller gullets on fine teeth. Slim files are a little wider for larger teeth. Check the maker's chart for your tooth size.
Can I use a saw file on a chainsaw or knife?
Not a triangular saw file, which is made for hand saw teeth. Chainsaws and knives need tools designed for them. Follow the maker's guidance.
Do I need a saw vise to sharpen a saw?
A vise or saw clamp makes the job much easier and safer. It holds the blade steady and limits vibration. A rigid wooden clamp can work in a pinch.
Can I sharpen a Japanese pull saw with a triangular file?
Often not. Many have different tooth shapes and hardened teeth, and many are meant to have replaceable blades. Check the saw maker's guidance first.
How do I know if my saw file is worn out?
It glides over the steel without cutting and needs more strokes. The teeth look shiny or are chipped. Clean it first, since clogging can mimic wear.
The Short Version
For a 7 inch all-round file, the Nicholson 14255MN. For fine teeth, the Nicholson 21874N. For length, the Nicholson 14290MN. For crosscut teeth, the Bahco 4-188. For a slightly wider file, the Bahco 4-186. For Samurai saws, the DFH-70.


