The right workshop flashlight is the one that lights your work area without glare, fits your hand or your gear, and runs on a power source you can easily refill. Think about the jobs you do most, then match the beam, body, and battery type to them. This guide walks through the main factors in plain terms.
Match the Light to the Job
A workshop asks different things from a flashlight than a camping trip does. You are usually lighting a few feet of bench, the inside of a cabinet, or the space under a bike frame. A wide, even spread of light helps more than a narrow spot that reaches far away.
Some lights offer both a wide flood setting and a tight beam. That flexibility is handy if you also check the yard or the shed after dark.
In this guide
Decision Criteria at a Glance
| Factor | Why it matters | What to check |
|---|---|---|
| Beam spread | Even light shows tight corners and cuts shadows | Flood and spot modes, soft edges |
| Power source | Decides how often you refill and what you stock | Replaceable cells or built-in rechargeable pack |
| Body shape | Affects grip and where it can sit | Flat sides, a clip, a hook, or a magnetic base |
| Toughness | Benches and floors are hard on gear | Sturdy casing, lens protection, sealing details in the maker’s guide |
| Weight | Heavy lights tire your hand | Hold it for a minute before you commit |
Steps to Narrow Your Options
- List the three places you most often need light, such as under the workbench, inside a cabinet, or around a bike.
- Decide whether you want both hands free. If yes, look at head-worn or clip-on styles; if not, a handheld body is fine.
- Think about power. Replaceable cells are easy to swap mid-task, while rechargeable packs save on spares but need a charging spot.
- Check the switch. You should be able to work it with gloves on and without searching for it.
- Read the maker’s guide for care notes, storage advice, and any limits on use around fuel or dust.
Understanding Beam Descriptions
Makers describe lights with numbers for output, often in lumens, and sometimes for how far the beam reaches. Output tells you roughly how much light the lamp produces in total, while reach describes how far a narrow beam carries. A high output figure does not guarantee even light close up, because a tight beam puts most of the light in a small bright spot with dark surroundings. For bench work, the shape of the beam usually matters more than the largest number on the box.
Also look at how the light fades toward the edge. A soft edge blends into the surroundings and is easier on the eyes when your gaze moves around, while a hard edge makes a sharp ring. Warmer light tends to feel gentler on tools and wood, while cooler light can make fine detail on metal easier to see. Neither is wrong, so choose what you find clearer, and read the maker’s description before you decide.
Small Details That Add Up
A flat side stops the light from rolling off a bench. A magnetic base can hold it against a steel surface while you work. A lanyard hole gives you a place to hang it from a hook. None of these are essential, but together they make a light you actually reach for.
Keep a tool list handy for upkeep: a soft cloth for the lens, a small brush for dust around the switch, and a tiny screwdriver for any battery cover that needs one.
Common Scenarios
- Checking the back of a cabinet or the space under a sink: a slim flood light that fits through narrow gaps, perhaps with a flexible neck or a bendable stand.
- Working under a vehicle or bike frame: a light with a flat side or magnetic base that can sit on the ground or a metal part while you use both hands.
- Looking for a dropped screw on a dim floor: a wider beam or a low setting that lights the whole area, not a narrow spot that skips over small objects.
- Walking out to a shed at night: a light with a spot mode and a lanyard, so you can see where you step and hang it up when you arrive.
- Power outage in the workshop: a light that stands on its end and bounces its beam off the ceiling can fill a room gently, though check the maker’s notes for the intended use.
Mistakes to Avoid
- Choosing the highest output. It can dazzle you on shiny surfaces, so a lower setting is often more useful up close.
- Ignoring the switch. A switch that is hard to find with gloves on or that turns on in a pocket is a daily annoyance.
- Forgetting spare cells or a charging cable. A flat light is no help when you need it, so keep spares in a known place.
- Leaving cells in the light for long storage. Old cells can leak, so remove them if the maker advises.
- Using an ordinary light around fuel vapors. Use only equipment the maker lists for that setting, and follow local rules.
Care and Upkeep Over Time
Wipe the lens with a soft cloth so scratches and film do not scatter the beam. Clean dust from the switch and battery contacts with a dry brush, and keep the threads or seals the maker describes clean. Recharge or replace the power source before it is completely flat, and store the light in a dry place within the temperature range in the manual. If the casing is cracked or the lens is damaged, stop using the light until it is repaired or replaced, and follow local rules for disposing of old cells.
Quick Troubleshooting
| Symptom | Likely cause | What to try |
|---|---|---|
| Light flickers | Weak power or dirty contacts | Recharge or replace cells, clean the contacts gently |
| Beam looks dim | Dirty lens or low charge | Wipe the lens and recharge |
| Will not switch on | Cells inserted wrongly or switch locked | Check the direction of cells and any lock setting |
| Light turns on in a bag | Switch pressed by other items | Use the lock mode or loosen the tail cap slightly, as the manual says |
| Body feels hot | High output for a long time | Switch to a lower mode and let it cool |
Glossary
- Lumens: a measure of the total light a lamp produces.
- Flood: a wide, even spread of light.
- Spot: a narrow, focused beam.
- Run time: how long the light lasts on a charge or set of cells.
- Lens: the clear cover over the light source.
- Lock-out: a mode that prevents the light switching on by accident.
Brightness, Runtime, and What the Numbers Mean
Flashlight packaging leans heavily on lumens, which measure total light output. A higher number means more light leaving the lamp, but it does not tell you how the light is spread, how long it lasts, or how comfortable it is to use. Most lights also have several modes, and the highest figure is often available only for a short time before the light steps down to protect itself from heat.
Runtime claims are usually measured under standard test conditions, such as the ANSI FL1 method many brands follow, where a light is considered to run until output falls to ten percent of its initial level. That means a stated runtime can include a long tail of very dim light. Read the numbers as a rough comparison, and look for runtime listed at the specific mode you will actually use.
- Low mode: for close work, reading labels, and walking around in the dark, often useful for hours
- Medium mode: for general bench work or checking inside a cabinet
- High or turbo mode: for brief checks of far areas, not for continuous use
A light with a sensible spread of modes and a simple way to reach them is usually more practical than one with a large number and a confusing interface.
Beam Types and the Jobs They Suit
The same lumen figure can look very different depending on the optics. A tight beam throws light far with a small bright center, while a wide flood spreads light across a broad area with soft edges. For workshop use, the type of beam can matter more than the brightness.
Flood for close work
Flood beams suit under-sink repairs, engine bays, and cabinet interiors, where you want an even wash of light without a harsh hotspot. A wide beam also reduces glare on shiny surfaces.
Spot or throw for distance
Focused beams reach across a garage, up into rafters, or down a crawl space. They can leave dark areas around the hotspot, and they can produce harsh glare off metal.
Adjustable focus
Some lights let you slide or twist the head to go from flood to spot. This is flexible, but check that the mechanism feels solid and the beam stays smooth when you adjust it.
Color Quality and Light Temperature
Light color affects how well you see what you are working on. Warmer light has a yellowish tone and cooler light looks bluer. Many people find neutral to slightly cool white easiest for inspection work, though preferences vary. A related feature is how faithfully the light renders colors, often given as a color rendering index, or CRI, on some products. Higher values generally show wire colors, paint matching, and stains more accurately. If you sort colored wires or compare finishes, it is worth looking for lights that state this figure.
Work Light Formats for Different Tasks
Handheld torches are only one option. In a workshop, you may find that more than one format earns a place.
| Format | Strengths | Trade-offs |
|---|---|---|
| Handheld | Easy to aim, widely available | Occupies a hand |
| Headlamp | Hands-free, light goes where you look | Can feel heavy and glare at others |
| Pen light | Small, fits a pocket | Limited output and runtime |
| Area or stand light | Lights a whole workspace | Bulky, may need power or a stand |
| Magnetic or hook light | Attaches to metal and hangs overhead | Needs a suitable surface |
For under-hood or under-sink work, a headlamp or a magnetic light that holds itself in place often beats a handheld light, since both of your hands stay free.
Durability, Water Resistance, and Rugged Features
Workshop lights get dropped, splashed, and covered in dust. Look at the markings that describe what the light can survive, but treat them as general indicators and not as proof against all conditions.
- Ingress protection (IP) ratings describe resistance to dust and water. A higher second digit generally means better water resistance, but the details depend on the rating and test
- Impact resistance claims are usually given as a drop height, measured under the maker’s test. Real use can differ
- Body material, such as aluminum or tough plastic, affects weight and feel
- A lens made of glass or a hard polymer resists scratches differently, so consider how rough your work is
- O-ring seals help keep dust and moisture out, and may need occasional replacement or light lubrication as the manual says
If you work around fuels, solvents, or dust that can ignite, standard flashlights are not designed for hazardous locations. Special intrinsically safe lights exist with specific certifications. Check the rules for your environment and consult a qualified professional if you are unsure.
Power Choices and Practical Charging
Lights run on disposable batteries, rechargeable replaceable cells, or built-in packs. Each choice has a trade-off in convenience and cost over time. Replaceable rechargeable cells let you swap in a spare and keep working, while built-in packs charge through a port and keep the body simple. Check how the light charges, which cable it uses, and whether it indicates charge level. Keep spare cells in a protective case so the terminals do not touch metal. Never mix old and new batteries or different chemistries in one light, and use the cell type the maker specifies. Follow the charging instructions and remove damaged or swollen cells from service.
Safe Habits With Bright Lights
Strong lights can dazzle, so do not shine them at faces. Point a bright light away from your own eyes when testing and remember that reflections from glossy surfaces can come back at you. Switch down to a lower mode in tight spaces to avoid glare off nearby surfaces. Check the position of cables and hot components before you point a light into an engine bay, and keep the light itself away from sparks and open fuel. A hot light on turbo mode can warm up quickly, so be careful when touching it.
Where to Keep Lights So They Are Ready
A flashlight is only useful if you can find it, and it works when you need it. Many workshops benefit from lights placed in specific spots so you never search while a job waits.
- Near the main breaker panel or utility area, in case of a power cut, and check it a couple of times a year
- Hanging on a hook by the workbench, where a hands-free or magnetic light can grab attention
- In the vehicle or toolbox, kept out of extreme heat that can shorten battery life
- Close to the door, so you can walk out during an outage without hunting
Set a recurring reminder to test every light and replace or recharge cells before they run out. Keep spare cells stored separately in a case, and rotate old stock first. Wipe the lens and body occasionally, since sawdust and grease cut output. If a light has a lockout feature to prevent accidental switching on in a bag, learn how to use it. A little organization turns a handy tool into one you can rely on during a real problem.
Finally, think about who else uses the shop. If family members or coworkers borrow your lights, a clear spot and a simple habit of returning them saves frustration. A small label with the charging notes or cell type taped inside a drawer helps everyone put the right batteries back, and prevents mixing of old and new cells.
Review your lighting needs once a year. Projects change, and a light that suited woodworking may not suit car repair or electrical checks. Retire lights that flicker, overheat, or have damaged switches instead of trusting them for important work.
Ready to Buy? Start Here
If this guide helped you decide what to look for, these products are a place to start.
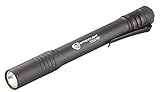
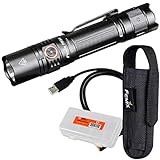
As an Amazon Associate we earn from qualifying purchases. Prices and availability are shown on Amazon.
Mapping Your Workshop’s Dark Spots
Before choosing a flashlight, notice where your workshop is hardest to see. A walk-through with the main lights off shows what you need.
- Crouch under the bench and look at the shadows near the floor.
- Peer inside cabinets, behind machines and into storage bins.
- Check the corners of the shop where overhead lights do not reach.
- Note the tasks that need two free hands, such as wiring or small repairs.
- Think about whether you work in damp or dusty spots, or near fuel and chemicals.
- Decide where the flashlight will live, so you can find it quickly.
The notes you make tell you whether you need a small pocket light, a larger torch or a work light that stands on its own.
Beam Pattern and Use: A General Comparison
Beams differ in how they spread light. The table lists common types and their typical uses.
| Beam style | Good for | Limit |
|---|---|---|
| Focused spot | Seeing into deep, narrow spaces | Leaves surroundings dark |
| Wide flood | Lighting a bench or a work area | Shorter reach |
| Adjustable focus | Switching between tasks | More parts to keep clean |
| Magnetic or hanging base | Hands-free work | Needs a metal surface or a hook |
Check the power source: replaceable batteries are easy to swap, while rechargeable ones need a charging routine. Read the maker’s instructions for safe battery handling.
If you work around fuels, gas or other flammable vapors, only use equipment the maker lists for such places.
Keep spare batteries or a charged backup within reach. A dead flashlight in a dark corner is a poor time to look for a replacement.
FAQ
Is brighter always better in a workshop?
No. Very strong light can bounce off shiny metal and make it harder to see detail. A moderate, even beam is often easier on the eyes up close.
Should I keep a spare light?
Many people keep a second small light near the door or breaker area so they are never working in the dark while looking for the first one.
Replaceable cells or a built-in rechargeable pack?
Replaceable cells let you swap in fresh ones mid-task, while a built-in pack saves buying spares but needs a charging spot and a cable. Think about how often you use the light and whether you will remember to recharge it.
Does a magnetic base matter?
If you work around steel benches, vehicles or tool chests, it can hold the light in place while your hands stay free. If you mostly work on wood or in a house, a flat side or hook may be just as useful.
How should I store a flashlight?
Keep it in a dry place at the temperature range the maker lists, with the lens facing out and the switch unlikely to be pressed. Remove cells for long storage if the manual recommends it.
How many lumens do I need for workshop tasks?
There is no single number. Many close-up tasks work well with a few hundred lumens or less, while lighting a whole garage needs more. Beam shape and having adjustable modes often matter more than raw output. Choose a light with a comfortable low setting.
What is the difference between lumens and candela?
Lumens measure total light output, while candela measure peak beam intensity in one direction. A light with the same lumens can throw farther if it focuses its beam tighter. For long-range viewing, candela and the stated beam distance are more informative.
What does an IPX rating on a flashlight mean?
IPX ratings describe how well a light resists water, and the number after the X indicates the level of protection, tested under specific conditions. A higher number generally suggests better resistance. Splash resistance is not the same as being safe for long submersion, so check the manual.
Is a headlamp better than a handheld flashlight for repairs?
For jobs where you need both hands, such as under-sink repairs or working in a cramped space, a headlamp is often easier because the light follows your gaze. Handheld lights are better for aiming at a particular spot or sharing the beam with someone else.
Can I use a regular flashlight around fuel or solvent fumes?
Not safely in every case. Standard flashlights are not certified for explosive atmospheres. If you work near gasoline vapors or flammable dust, look for lights with a recognized hazardous-location rating, ventilate the area, and follow your local safety rules.
The Short Version
Choose a flashlight by beam spread, power source, grip, and toughness, in that order. Hold it in your hand and check how easily you can work the switch. Keep spare power on hand and follow the maker’s instructions for use and care.


