Disclosure: As an Amazon Associate, umtsmarttool.com earns from qualifying purchases. Links to Amazon on this page are affiliate links; they cost you nothing extra. Prices and availability change often, so check the current Amazon listing before you buy.
Where to buy
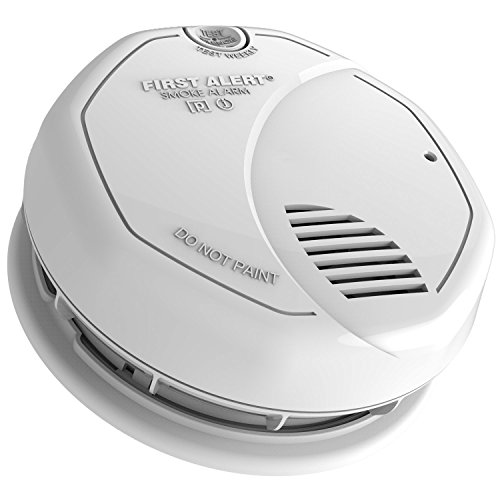
Units referenced in this walkthrough: the First Alert SA3210 (dual-sensor, sealed ten-year battery — twists onto its bracket and is done), the First Alert PR710 (slim photoelectric, sealed battery, kind to small ceilings), and the X-Sense SC07 (combination smoke and CO with a display, for fuel-burning homes). Full ranked picks: Best Smoke Detector For Home Use Under $50 Best Smoke Detector For Home Use Under $50. Read the full guide ↓
How to Install a Smoke Detector: Positions, Brackets, Testing and the Log
Key Takeaways
- Positions first: inside every bedroom, outside the sleeping area, and on every level — before any bracket is opened
- Ceiling centre is best; on a wall, the top of the unit sits between four and twelve inches from the ceiling
- Keep ten feet between an alarm and a cooking appliance, and out of the dead air at ceiling corners and peaks
- Sealed ten-year units activate when they twist onto the bracket — no battery step exists to forget
- The test is a household event: someone listening, doors closed, from the furthest bedroom
- Never solve a nuisance alarm by removing a battery or a unit — distance, sensing type and the hush button are the fixes
- Write the log entry the day you fit: model, room, manufacture date, replacement year
- Breaker off and confirmed off before any wired unit is touched — no exceptions for small jobs
Learning how to install a smoke detector properly is mostly learning where it goes, because the fitting itself — a bracket, two screws, a twist — takes ten minutes per unit. The positions, the distances and the test decide whether the next decade’s protection is real, and they are all in your hands before the ladder comes out. This walkthrough runs the job in order: gather, position, mark, fit, activate, test, log — with the safety notes where they belong, which is inside the steps rather than in a box at the end. Work through it once for the first unit and the rest of the house becomes repetition. Readers replacing an existing system rather than starting fresh should still begin at step two: positions chosen a decade ago deserve one fresh look before the new units inherit them. The walkthrough assumes nothing already on the ceiling works — an assumption that costs an afternoon to check and a great deal more to skip.
In this guide
Step One: What Do You Need Before You Start?
Gather once: a stable step ladder tall enough that the ceiling is at chest height rather than above your head, a pencil, a tape measure, a drill with a small bit for pilot holes, the screws and plugs from each unit’s box, a screwdriver, and a phone for photographing manufacture dates. Add painter’s tape for marking positions without marking paint, and a vacuum with a brush attachment for the dust that drilling a ceiling always produces. Check the units themselves before climbing: each box should hold the alarm, its mounting bracket, screws, and the instruction leaflet — and the leaflet, not this page, is the authority for that model’s bracket pattern and activation method. If a unit is hardwired rather than battery, stop and read step six first; wired work has an extra rule that comes before everything else. Lay the units out on a table in room order before starting — the fitting day then runs as a sequence rather than a series of searches, and any missing bracket or short screw count announces itself while the shops are still open. Charge the phone, too: it is the camera for dates, the torch for dark ceiling corners and the log’s backup, and fitting day leans on all three.
Step Two: Where Exactly Does Each Alarm Go?
The placement rules, in the order to apply them. Positions: inside every bedroom, outside the sleeping area in the immediate hallway, and on every level of the home including a finished basement. Surface: the ceiling is preferred, at or near its centre; smoke rises and spreads across it. If a wall is unavoidable, mount high — the top edge of the alarm between four and twelve inches below the ceiling — because smoke banks downward from the ceiling as it fills a room. Distances: on the ceiling, keep at least four inches between the unit and any wall; keep a full ten feet between the alarm and a cooking appliance, the single most effective nuisance-alarm prevention there is; keep away from bathrooms’ steam paths where you can, and out of garages and dusty workshops where particles and fumes defeat ordinary sensing. Dead air: avoid the four inches where wall meets ceiling, and on a peaked ceiling fit within three feet of the peak measured horizontally but not in the very apex, where still air can delay smoke reaching the sensor. Mark every position with tape and live with the marks for an hour if you can — positions look different from the floor than from the plan, and moving tape is free. Check each mark against the room’s life, not just its geometry: a position directly over a bed’s headboard will be stared at nightly (fine), one inside a wardrobe’s swing or a door’s arc will be knocked (move it), and one beside a ceiling fan sits in disturbed air that delays smoke — shift it clear of the fan’s sweep while keeping the clearances.
Step Three: How Do You Fit the Bracket?
Hold the bracket against the marked position and pencil through its screw holes. Drill shallow pilot holes, push in the plugs if the ceiling is plasterboard, and drive the screws until the bracket sits flat and does not rock — a rocking bracket makes the twist-on step fight you and can leave the unit seated at a tilt. On solid ceilings or joists the plugs may be unnecessary; on textured or artex ceilings, seat the bracket patiently and do not over-tighten, which warps the plastic and the unit’s fit with it. Renters fitting their own supplementary battery units should use the mounting method their tenancy allows — many brackets accept adhesive pads rated for the unit’s weight where screws are not permitted — and should leave any landlord-fitted wired alarms entirely alone: your units add to the provision, they never modify it. Whatever the mounting, test the bracket’s hold with a firm hand-tug before the unit goes on; a bracket that will fall will fall at 3 a.m., and the time to learn about adhesive limits is the fitting afternoon, with you standing under it awake. Vacuum the drill dust off the ceiling patch before the bracket seats — grit under a bracket is a slow rock waiting to happen.
Step Four: How Do You Activate a Battery Unit?
Most modern sealed units activate mechanically: the Kidde i9010, for example, switches on automatically when it is twisted onto its mounting bracket, and many First Alert sealed models follow the same principle — the bracket is the switch, which is why a unit cannot be fitted “dead” by accident. Units with a pull-tab activate when the tab is drawn out; units with replaceable cells activate when the battery is seated and the compartment closed. Whatever the method, the unit will usually confirm with a chirp or a light sequence — the leaflet names the exact confirmation for your model, and hearing or seeing it is part of the step, not a bonus. Twist the alarm onto the bracket until it seats with the maker’s alignment marks matched; a unit that resists is usually a bracket screw standing proud, so come down and check rather than forcing the twist at head height. Once seated, look at the unit from the doorway: it should sit level and flush, and any visible tilt is worth one more trip up the ladder now rather than a decade of wondering whether the seat — and with sealed units, the activation — is complete. Note the hush button’s orientation while you are up there — facing the door is the orientation your future half-asleep self will thank you for.
Step Five: How Do You Test So the Test Means Something?
Press and hold the test button until the alarm sounds — full volume, 85 decibels at ten feet by standard, which at arm’s length is startling and should be. Warn the household first, protect ears if you are close, and never test with real smoke or an aerosol unless the manufacturer specifies it: the button exercises the electronics and sounder, which is what routine testing is for. Then make the test honest: repeat it with a second person lying in the furthest bedroom with the door closed, and confirm the alarm is clearly audible there — audibility through a closed door is the entire point of the inside-bedroom positions. For interconnected units, trigger one and walk the house confirming every unit sounds. Log the test result beside the fitting entry while the ladder is still out. If a bedroom test disappoints — muffled through the door — the remedy is positional, not volumetric: alarms are standardised at 85 decibels at ten feet, so a quiet bedroom means the unit is too far, the door seals unusually well, or the inside-bedroom position was skipped; fix the geometry rather than shopping for a louder box that does not exist. Record the audibility result per bedroom in the log — “clear in back bedroom, door closed” — so a future test that sounds weaker has a baseline to be judged against.
Step Six: What Changes With a Hardwired Alarm?
One rule precedes all others: switch off the circuit at the breaker before touching a wired unit, and confirm the power is off at the unit before any connector is handled. Like-for-like replacement within the same brand family is the standard job — the existing harness usually connects directly, the wired interconnect stays intact, and the battery backup goes in fresh. Anything beyond like-for-like — new positions, a different family’s wiring, a system whose brand is discontinued — is an electrician’s work, not a weekend improvisation, and this walkthrough deliberately stops there. Two safety absolutes apply throughout: never leave a wired position empty or a unit disconnected to stop a nuisance sound (the hush button and correct placement are the answers), and never defeat an end-of-life or low-battery signal by removing power — a chirping wired unit is asking for replacement, and replacement is the reply. Keep the old unit until the new one has tested clean across the whole network; if the replacement misbehaves, the old unit’s label and harness are your reference for what the ceiling expects, and its presence turns a mystery into a comparison. Restore power only after every unit in the round is fitted and seated — cycling the breaker per unit multiplies both the trips and the chances of leaving one position dark.
Step Seven: What Do You Write in the Log?
One line per unit, written the same day: model, room, manufacture date (photographed from the unit’s label before it went up), fitting date, and the replacement year ten years on. Add the test result and, for interconnected systems, the family name — future replacements must match it. Keep the log with the house paperwork and a copy with the property’s other records if you are a landlord. The log is what turns this afternoon’s work into a system: every future test, chirp and replacement reads from it, and the household that skips it will be guessing at dates within two years. Photograph the finished log page too — paper burns, ironically enough, and the copy on a phone is the version that survives to be useful in the decade’s emergencies. Add one practical line to the log’s header: where the spare batteries live, if any unit uses them, and where the leaflets are filed — the two questions every future chirp asks first.
Troubleshooting the Installation
Problem: the new unit chirps within days of fitting. Resolution: read the leaflet’s chirp pattern first — a single chirp on a cycle usually means low battery or a fault, not end-of-life on a new unit; reseat the unit on its bracket (activation depends on the seat), confirm the confirmation signal from step four happened, and contact the maker if it persists. Time the chirps with a watch if the pattern is ambiguous; makers define their signals by interval, and thirty seconds of timing beats an evening of guessing.
Problem: the alarm sounds when cooking, despite planning. Resolution: check the distance honestly — ten feet from the appliance, measured, not estimated — then the sensing type at that position (photoelectric is the calm choice near kitchens), and use the hush button for episodes meanwhile; never move the unit below the placement rules or disable it. Log the episodes for a fortnight before relocating; a pattern tied to one dish or one hob ring sometimes has a kitchen-side fix that leaves the ceiling alone.
Problem: the unit will not twist onto the bracket. Resolution: come down and inspect — a proud screw head or a warped bracket from over-tightening is the usual cause; reseat the bracket flat and retry at bench height with the spare bracket if the box included one. Never solve resistance with force at head height; a unit dropped or cracked during a forced fitting has failed its first test before reaching the ceiling.
Problem: the test button produces nothing. Resolution: confirm activation (tab pulled, bracket seat, battery seated), wait the model’s stated warm-up if any, and retest; a unit that stays silent after correct activation is faulty — return it rather than fitting a silent alarm. Test every unit at the table before fitting day if the schedule allows; a dud discovered on the ground costs a return, a dud discovered on the ceiling costs the afternoon.
Problem: the interconnected system sounds from only one unit. Resolution: verify every unit is the same family, fully seated and activated, then re-run the maker’s pairing or interconnect check from the leaflet; mixed families do not interoperate, however similar they look.
Problem: the bracket screws spin without biting. Resolution: the pilot hole is oversized or the plasterboard is crumbling at that spot — move to the bracket’s alternate hole pattern if it has one, use the correct wall plugs for the material, or shift the position a few inches within the placement rules to sound material. A stud finder earns its keep here: one screw into a joist outperforms two into failing board.
Problem: the alarm sounds during the first shower or roast after fitting. Resolution: treat it as placement feedback, not product failure — re-measure the distances, confirm photoelectric sensing at that position, hush episodes in the meantime, and relocate within the rules if the pattern repeats. One episode in the first week is tuition; the same episode weekly is a syllabus telling you the position is wrong.
Gear That Makes This Easier
The easiest installs share a pattern: sealed power, bracket activation, nothing to schedule. The First Alert SA3210 covers bedrooms with dual sensing and a sealed decade. The First Alert PR710 is the slim, calm fit for living spaces and kitchen-adjacent ceilings. The X-Sense SC07 adds a CO display for the hallway of a fuel-burning home. The ranked field with full reviews is at Best Smoke Detector For Home Use Under $50 Best Smoke Detector For Home Use Under $50, and the choosing procedure that precedes installation is at How To Choose A Smoke Detector How To Choose A Smoke Detector. Beyond the units, the gear that genuinely earns its place on fitting day is unglamorous: a ladder that puts the ceiling at chest height, a tape measure long enough for the ten-foot rule, and painter’s tape — the three tools that decide positions, and positions decide everything. A head torch deserves an honourable mention for landing ceilings and cupboards, where both hands belong on the work and the light fitting is, by definition, already spoken for.
Mistakes to Avoid
Fitting before positioning. The bracket takes ten minutes; the position protects for a decade — tape first, live with it, then drill. Estimating the ten feet. Measure the cooker distance with the tape you already brought; estimation is how kitchen alarms end up at seven feet and loud. Skipping the closed-door test. A test heard from the ladder proves the sounder works; only the bedroom test proves the system works. Forcing a resistant twist. Resistance is information — a proud screw or warped bracket — and forcing it stores up a unit that may not be fully seated or activated. Leaving the log for later. Later never comes with dates attached; write the line while the ladder is out. Binning the old unit the same hour. Keep it until the replacement has tested clean across the network; the old label is the reference when the new unit misbehaves. Painting over a unit during decorating. Paint in a sensing chamber ruins it quietly — mask alarms before decorating, or remove and refit them, and never let a painted unit stay in service.
Installing in Tricky Rooms and Ceilings
The kitchen-adjacent hallway. The ten-foot rule is measured from the appliance, not the kitchen door, and in open-plan spaces it may push the unit further down the hall than instinct suggests — obey the tape, not the instinct, and specify photoelectric sensing there. The bathroom door. Steam is a nuisance source like cooking vapour: keep the bedroom-side unit positioned so shower steam does not roll straight across it, and never solve steam alarms by moving the unit out of the bedroom it protects. Peaked and vaulted ceilings. Fit within three feet of the peak horizontally, out of the apex dead air, and accept the taller ladder work as the price of the position — a lower, convenient fitting on the slope can sit in slower-moving air. Textured and artex ceilings. Seat the bracket patiently, check for rocking before the unit goes on, and consider the adhesive mounting the maker approves if screws bite poorly. Ceilings with beams. Fit on the beam’s underside or between beams per the leaflet’s guidance, keeping the four-inch clearances — beams channel smoke, and the position should meet the channel rather than hide from it. The garage door and workshop. Ordinary alarms do not belong inside garages or dusty workshops; the hallway position on the house side of the door is the install that protects sleepers from that direction. The nursery. Fit the unit before the baby arrives if you can — drilling above a furnished nursery is nobody’s favourite afternoon — and rehearse the alarm sound for older siblings so the room’s new voice is familiar. The rental’s existing wired unit. It stays exactly where and as it is; your supplementary battery units take their own positions, and any fault in the landlord’s unit goes to the landlord in writing rather than to your toolbox. The spare room that becomes a bedroom. The day a study gains a bed, it gains a position in the count — refit the plan, not just the furniture, and add the unit before the first night anyone sleeps there. The converted garage or basement. Conversions change a level’s status: a basement that gains a bed or a sofa-and-TV habit needs its own position reviewed, because levels are counted by how they are lived in, not by what the original plans called them. Re-run the count whenever a conversion finishes; it is the cheapest step in this entire walkthrough and the one conversions most often skip.
The Fitting Day, Room by Room
Work the house in a deliberate order: bedrooms first (the positions that matter most, fitted while you are freshest), then the sleeping-area hallway, then the remaining levels, then any supplementary positions. At each room the rhythm is identical — tape check, bracket, unit, confirmation, test — and the rhythm is the quality control: a step skipped at unit five is invisible until the log review, so let the sequence carry the discipline. Photograph each manufacture date before the unit goes up, not after; labels are easier to read at the table than at the ceiling. Keep the leaflets in one envelope as you go — the log, the leaflets and the date photographs together are the install’s paperwork, and gathering them during the work takes no extra time at all. Finish with the full-house test from step five, walking every room once, and only then write the log lines in a single sitting while the details are warm. Two people make the day half as long and twice as reliable — one up the ladder, one on the tape, the dates and the log — and the division is worth arranging even if it means waiting for a weekend when both are home. Solo installers should imitate the division across time: all the measuring and taping first, a break, then all the fitting — because the errors creep in when measuring and drilling blur into one continuous hurry.
After the Install: the First Year on the Ceiling
Installation ends; ownership begins, at a very light tariff. Test monthly with the button — pick a fixed day so the habit anchors — and vacuum the units gently with a brush attachment a couple of times a year, since dust in a sensing chamber is the slow cause of both false alarms and lazy ones. Expect a short settling period in which the household learns the hush button’s location and the alarm’s voice; rehearse children once, in daylight, so the sound is known rather than terrifying. Show every adult where the test button is and let each press it once during the first month — an alarm only one person knows how to test is an alarm tested only when that person remembers. Watch the first cooking-heavy weeks near the kitchen-adjacent position: if the hush is being used weekly, the position or the sensing wants the step-two review, and the fix is distance or type — never removal. At the first annual test, read the log against the ceiling: every line should correspond to a unit that tests, and any unit that has chirped its story during the year gets its pattern checked against its leaflet the same day. Keep a simple rule for the decade: any alarm event — real, nuisance or fault — earns a log line the same day, because the pattern across years is the diagnostic gold, and patterns exist only if somebody wrote the episodes down.
Replacing an Old Unit: the Swap, Step by Step
Most installs are actually replacements, and the swap has its own micro-procedure. First, photograph the old unit’s label and manufacture date before it comes down — the date confirms the replacement was due and starts the new log line honestly. Twist the old unit off its bracket; if the new unit shares the brand family, its bracket often matches the old one’s hole pattern or even the bracket itself, but fit the new bracket anyway unless the maker confirms compatibility — brackets age, warp and differ quietly between generations. For wired units, the breaker goes off before the harness is touched, and the new unit connects like-for-like per step six. Activate, test through the closed bedroom door, and only then dispose of the old unit: alarms with sealed lithium batteries go to battery-recycling or hazardous-waste collection, not the household bin, and a unit with a radioactive ionization source symbol follows the maker’s stated disposal route. Write the swap into the log as a replacement line naming both models — in ten years, that line explains why one room’s unit differs from its neighbours. Swaps are also the moment to re-audit positions: houses change between decades — a bedroom becomes a nursery, a garage becomes a studio — and the replacement round should re-run step two’s questions before repeating the old ceiling by habit. Budget the swap day like a small fitting day, not a five-minute errand: dates, brackets, tests and log lines all recur, and rushing a swap is how a new unit ends up on an old warped bracket with its decade quietly unstarted.
Installing in Someone Else’s Home
Fitting alarms for a parent, a tenant or a student leaving home adds three duties to the same steps. Demonstrate the test with the occupant present and let them press the button themselves — familiarity with the sound and the hush control is part of the installation, and it cannot be posted to them afterwards. Leave a note of what to do when it chirps — check the log, match the pattern, call you or the maker — inside a kitchen cupboard door, where problems at 3 a.m. are actually solved. A chirp note written in calm daylight is worth more than any amount of midnight reasoning, and it takes ninety seconds to leave behind. Leave the log in the home, with the leaflets, and keep a photographed copy yourself; the replacement year will arrive on your watch as much as theirs. Choose sealed units without exception in these fits: you cannot audit another household’s battery habits from a distance, and the kindest install is the one that asks its occupant for nothing but a monthly button press. Landlords run the same duties as compliance: fitting documented at tenancy start, dates photographed, the log filed with the property records — the install is identical, the paperwork carries legal weight. In all these fits, resist the helper’s temptation to also “fix” things beyond the alarms — a parent’s boiler, a tenant’s landlord-owned wired unit — because an install visit that stays in its lane gets invited back, and the alarms are the lane.
A Worked Fitting: One Landing, Start to Finish
Watch the steps run once, slowly, on the position most houses get wrong — the landing outside the bedrooms, in a home with a gas hob downstairs. The tape measure comes out first: the ceiling centre of the landing is eleven feet from the hob’s position measured through the open stairwell’s air path, so the centre mark stands — had it measured eight, the unit would have moved along the landing away from the kitchen side, and the sensing would have been specified photoelectric regardless, which it is here anyway because this hallway also serves an en-suite shower whose steam rolls out nightly. Bracket up with two pilot holes into plasterboard, plugs in, screws snug until the bracket stops rocking. The unit — a sealed combination model, chosen because the boiler cupboard opens off this same landing — is photographed at the table (manufacture date: this year), twisted on until the marks align and the confirmation chirp sounds. Test from the ladder first, then the real test: a partner in the furthest bedroom, door closed, confirms it is unmistakably audible. Log line written before the ladder folds: model, “landing”, manufacture date, fitting date, replacement year, test passed. Total elapsed, fourteen minutes — of which the measuring took five and the bracket two, which is the correct ratio for this job and the opposite of how most rushed installs divide their time. Run the same narration mentally for your hardest room before fitting day; the room you have rehearsed is the room that goes smoothly. Notice, too, what the narration never mentions: a product comparison. By fitting day the choosing is finished, and the installer’s whole attention belongs to distances, seats and tests.
Safety Notes That Run Through Every Step
Collect the absolutes in one place, because they are scattered through the steps where they bite. Never disable an alarm to stop a sound: the hush button exists for nuisance episodes, distance and sensing type fix recurring ones, and a removed battery or a disconnected unit converts an annoyance into an unprotected room. Never leave a wired position empty or a harness disconnected after a swap. Never paint a unit, and never let spray texture or decorating dust settle in a sensing chamber — mask or remove units before decorating. Never test with a naked flame or by holding a lit match under the unit; the button is the test, and anything hotter risks the sensor and the ceiling. Never fit a unit whose manufacture date is already old and call the job done — return stale stock, because the decade is the product. And never work on a wired unit with the circuit live: breaker off, confirmed off, every time, however small the job feels. These are not cautions bolted onto the install; they are the difference between an install and an incident with extra steps. Print them mentally on the inside of the ladder: every fitting day that ends boring has obeyed all six without noticing. Boring, in this trade, is the highest grade an afternoon can earn — the exciting fitting days are the ones the incident reports describe.
What a Finished Install Looks Like
Stand in the doorway of each room and audit the finished work with fresh eyes. Every bedroom has its unit, level and flush, clear of walls, fans and door arcs. The hallway unit sits where the tape said, ten honest feet from the hob’s air path. The basement and each level are covered. Nothing chirps, nothing tilts, no bracket rocks. The log holds a line per unit with dates that match the photographs in your phone. The household has heard the alarm from behind a closed bedroom door and knows where the hush button lives. The leaflets are filed with the log, the ladder is away, and the ceiling — this is the real test of a finished install — can now be forgotten about for a decade, apart from a monthly button press and a spring vacuum. If any item on this audit fails, it fails cheap today: fix it while the tools are out, and write the fix into the log so the decade starts from a true record. Photograph one finished unit for the log’s first page — a small vanity that pays off at replacement time, when the picture shows the next installer exactly what “done” looked like here. Walk the audit again at the first monthly test; the install you re-check once is the install you can trust for the remaining decade.
When the House Fights Back: Sequencing a Difficult Fitting Day
Some ceilings resist: lathe-and-plaster that crumbles, concrete that eats drill bits, a wired system of unknown parentage, a stairwell ceiling two storeys up. Sequence the day defensively. Start with the easiest bedroom unit to bank a success and calibrate your rhythm; tackle the difficult positions mid-day, when your patience and the hardware shops are both available; and leave the stairwell — the position needing the tallest ladder and the most care — for a two-person session rather than the end of a tiring solo afternoon. For the two-storey stairwell specifically, the honest options are a professional with the right ladder or a wall fitting at the top of the stairs within the placement rules; heroics on an undersized ladder are how fitting days become hospital visits, and no alarm position justifies that trade. If a wired system defeats identification, stop at photographs and call the electrician with the pictures in hand — you will have done the diagnostic half of their job, and the log will record the handover properly. Difficult days also argue for staging: fit the battery positions now, book the wired or two-storey work properly, and let the log carry the dated plan — a staged install with a plan beats a heroic one with a gap. Write the staged plan where the household will see it — the log’s first page — because a plan known to one person is a hope, and a plan on paper is a schedule.
Frequently Asked Questions
How long does it take to install a smoke detector?
About ten to fifteen minutes per battery unit once positions are marked — bracket, twist, test. A whole house is an afternoon, most of it spent on step two’s positioning and step five’s testing rather than on the fittings themselves. First-timers should double the estimate for the first unit and expect the rest to halve it; the learning lives in unit one. Anyone promising the whole house in an hour is planning to skip step two or step five, and both skips are visible in the ceiling for years.
Can I install a smoke detector on a wall instead of the ceiling?
Yes, where the ceiling is impractical — mount high on the wall with the top edge of the unit between four and twelve inches below the ceiling, and never in the corner dead-air zone where wall meets ceiling. Sloped ceilings in attic rooms are the common case; follow the peaked-ceiling guidance in the tricky-rooms section and the position remains honest. Whichever surface you use, the unit’s orientation follows the maker’s marks — a wall unit fitted sideways at a cheerful angle is a sensor pointed at the wrong air.
Do I need an electrician to install a smoke detector?
Not for battery units, which are this walkthrough’s main subject. Hardwired like-for-like replacements are commonly done by competent homeowners with the breaker off, but new wired positions or a change of system belong to an electrician. If you are in any doubt about which side of that line your ceiling sits on, the doubt itself is the answer — call the electrician and watch a professional do the first one.
Why does my new alarm chirp once every minute or so?
Match the pattern to the leaflet: on a newly fitted unit it usually indicates a seating or activation issue rather than age. Reseat the unit firmly on its bracket, confirm the activation confirmation, and if the pattern matches the end-of-life signal instead, check the manufacture date — the unit may be older stock. Note the episode in the log either way; a chirp explained is data, a chirp forgotten is a mystery scheduled for next year.
What if my ceiling is too high or awkward to reach safely?
Use the wall position within the placement rules, or bring in a professional for that one position — the stairwell guidance in the difficult-day section applies. A safely fitted wall unit beats a heroically fitted ceiling unit every time, and beats an unfitted one by more. The same logic caps the whole job: any position you cannot reach safely is a booking, not a challenge.
Should I write the install date on the unit itself?
The manufacture date is printed on the label and governs replacement; adding your fitting date with a marker on the inside of the cover is a harmless, genuinely useful habit — and the log entry remains the primary record either way. Future-you, standing on a ladder in ten years squinting at a faded label, will be grateful for both. Write legibly, in pencil or permanent marker as the surface prefers — a date nobody can read is a rumour, not a record.
Wrap-Up
Positions, brackets, activation, an honest test, and a log line: that is the whole of how to install a smoke detector so the installation deserves the name. Do the first unit slowly, the rest by repetition, and let the closed-door test — not the ladder test — be the moment you call the house protected. Then put the ladder away for a decade, with fifteen minutes of testing a year as the only rent the ceiling charges. Keep the tape measure’s lesson with you, though: in this job the measuring is the work, and the drilling is just how the work stays up. Fit carefully once, test honestly once, write it down once — the ceiling will handle the rest of the decade, and the log will remember how it started.