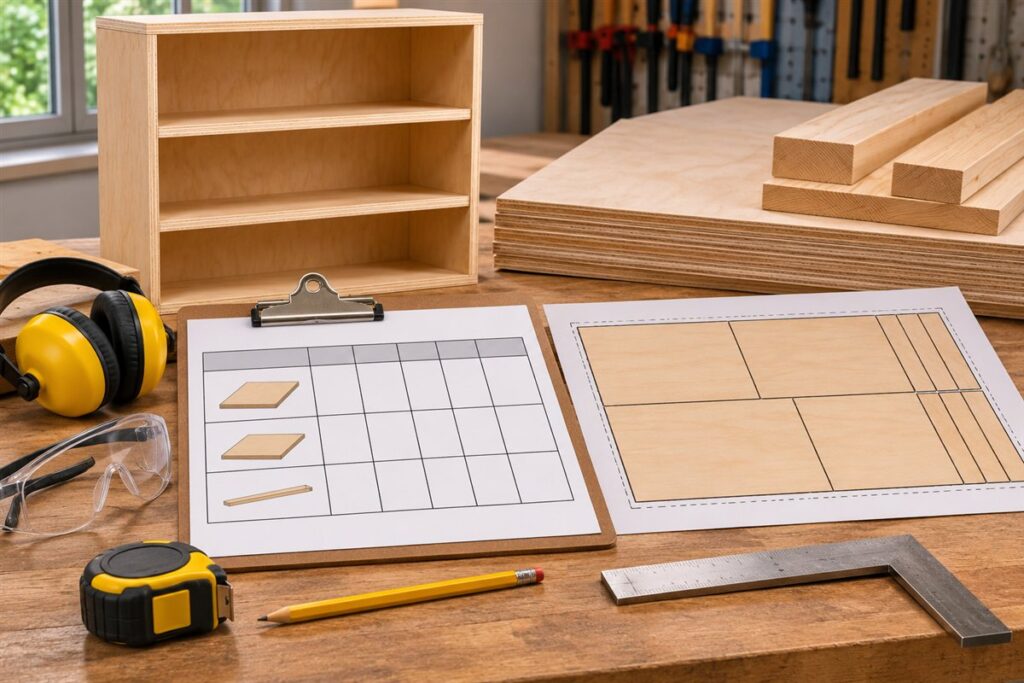
A cut list is a simple table that names every part of a project, with its length, width, thickness and quantity. Making one before you buy or cut material helps you order the right amount, reduces waste and cuts down on mistakes at the saw.
Build the List Step by Step
- Go through your plan and write down every individual part, including small ones.
- Give each part a short name or letter, such as “A, side panel”.
- Record the finished length, width and thickness in one consistent unit.
- Note the quantity needed.
- Note the material, such as plywood, solid timber or board stock.
- Mark any grain direction or visible faces that matter.
- Add a column for notes, like “cut after assembly” or “trim to fit”.
Example Layout
| Label | Part | Qty | Length | Width | Thickness | Material |
|---|---|---|---|---|---|---|
| A | Side panel | 2 | 900 | 300 | 18 | Plywood |
| B | Shelf | 3 | 764 | 280 | 18 | Plywood |
| C | Back rail | 1 | 764 | 60 | 18 | Timber |
Sizes here are only an example. Use your own plan and measure your actual material.
Allow for the Saw Blade
Every cut removes a thin strip of material called the kerf. Its width depends on the blade, so check the maker’s guide or measure a test cut on scrap. Add up the kerfs when you plan several cuts from one board, or you may come up short.
Plan the Layout on the Board
- Sketch the sheet or board and draw each part inside it.
- Place long parts first, then fill gaps with small ones.
- Keep grain direction and good faces in mind.
- Group cuts so that the first cut is a straight reference edge.
- Add a small allowance for trimming, and a spare piece for mistakes.
Use the List at the Saw
Check each piece off as you cut it, and label it on a hidden face. Use a stop block for repeated pieces so they match exactly. Follow the saw maker’s manual, wear eye and hearing protection, and support large sheets properly. If handling full sheets alone is awkward, ask for help or ask the supplier to make the first cuts.
Keep the list with the project. Save a copy on your phone and a printed one near the saw, then mark any changes as you make them. If you build the same item again, the list is ready to reuse, and a small note about what worked or failed makes it even more helpful.
Measuring and Recording Accurately
A cut list is only as reliable as the numbers in it. Most errors come from small habits: reading a tape from the wrong mark, mixing units, or copying a figure incorrectly. Choose one unit for the whole list, whether millimetres or inches, and write the unit at the top of each column. If you work in fractions of an inch, decide in advance whether to convert to decimals, and stay with that choice.
Measure real parts, not assumptions. If one part must fit inside another, measure the opening itself instead of calculating from a drawing, because actual material and earlier cuts rarely match the plan exactly. Mark the measured value, then recheck it before writing it down. A second look at a critical dimension takes seconds, while a wrong cut can ruin a board.
Use the same tape or rule for the whole project. Tape hooks can differ slightly between tapes, so cutting some parts with one tape and others with another can produce small mismatches. Where parts must match each other exactly, such as the two sides of a cabinet, mark them from a single reference instead of measuring each one separately. Tick off each dimension as you verify it, and note any figure that is a guess so you can confirm it later. A tidy, legible list with sensible rounding avoids confusion at the saw.
Working With Sheet Goods and Solid Timber
Sheets and boards behave differently, and a good cut list reflects that. Sheet goods such as plywood or fiberboard come in fixed panel sizes, so the main goal is fitting all your parts onto as few sheets as possible. Check the panel size at the supplier, since actual dimensions vary and edges may be slightly damaged. Allow for damaged corners and edges that you may have to trim off.
Plywood and veneered boards have a visible face and a grain direction. Decide which face of each part will show, and note it on the list. Parts that sit side by side often look best if grain runs the same way. Edge banding or trim adds thickness, so account for it when a part must fit a precise opening.
Solid timber is sold in lengths and widths that vary by supplier, and boards may have defects such as knots, splits or bow. Walk through the pile if you can, and pick straight boards. Inspect each board and plan cuts around flaws instead of forcing them into the list. Sawn timber moves as it dries, so give it time to settle indoors before cutting precise parts. Check the supplier’s description for whether sizes are rough or finished, and ask when it is unclear. Where a part is long, remember that many dealers sell in set lengths, so your cut list should group parts to use each length efficiently.
Turning the List Into a Shopping List
Once the parts are listed, the next job is to translate them into what you actually buy. Group parts by material and thickness, then add up the total length or area for each group. For boards, divide the total by the available stock lengths and see how the parts fit, remembering the kerf for each cut. Round up to whole boards or sheets, and add a margin for mistakes and flawed areas.
- List hardware separately: screws, hinges, brackets, glue, edging and finish do not belong in the cut list but belong on the shopping list.
- Check availability: some thicknesses or species may be hard to find, so have an alternative in mind and see how a change would alter other dimensions.
- Ask about cutting services: some suppliers will cut large sheets to size for a fee. Bring a clear list, labelled parts and note which edges matter.
- Compare grades: a better grade has fewer defects but costs more. Choose the grade that matches how much of each part will be visible.
Keep the shopping list with the cut list, and tick items as you buy them. Doing this saves return trips and helps you compare quotes from different suppliers on the same basis.
Common Cut List Mistakes and How to Avoid Them
Certain errors appear again and again. Knowing them lets you check your own list before you cut.
- Forgetting parts: backs, rails, cleats and small spacers are easy to miss. Walk through the plan once more, imagining the project being built step by step.
- Mixing finished and rough sizes: if a plan gives one and your material is the other, parts will not fit. Mark clearly which type each number is.
- Ignoring thickness effects: when one part sits between two others, its length depends on their thickness. Write the calculation beside the figure so you can check it later.
- Forgetting joints: tenons, rebates and laps add or remove material. Decide on the joint before listing the length.
- Not allowing for the blade: kerf adds up quickly across many cuts from one board.
- Cutting in the wrong order: cutting short parts first can leave awkward offcuts that waste material. Cut the longest or most critical parts first.
Read the list aloud, or ask someone to check it. A fresh pair of eyes catches transposed numbers and missing items. If a number looks odd, return to the plan before cutting anything.
Adapting the List When Things Go Wrong
Even a careful list meets surprises: a split in the board, a cut that comes out short, or a supplier who is out of the thickness you wanted. Treat the list as a working document, not a fixed contract. Mark what has been cut, what remains and what has changed, so you always know the current state.
If a part is cut too short, check whether it can be used elsewhere in the project before discarding it. Keep a small offcut box for test cuts, trial joints and later small parts. If you change a thickness, recalculate every dimension that depends on it, because one substitution can ripple through the plan. Update the list immediately so it stays accurate, and note why the change was made.
When you finish, compare the list with what you actually used. Note the true amount of waste, the parts that needed adjustment and any lessons about the material. This record makes the next list more accurate and shows how much extra to allow. If you share the project with someone else, a clear, updated list lets them understand what was built without guessing. Store the list with photos of the finished piece so you can repeat or modify the design later.
FAQ
Should the list use finished or rough sizes?
Use finished sizes for the parts, then add trimming allowance when planning how to cut the stock.
Do I need software?
No. A notebook or spreadsheet works. Software can help with larger layouts.
How much extra material should I buy?
There is no fixed figure because it depends on the material, your experience and how many defects the stock has. Many builders add a margin to cover mistakes and flawed areas. Ask the supplier about their standard allowances if you are unsure.
What is the best order to cut parts in?
Start with long or critical parts so any mistakes happen early and offcuts stay useful. Cut parts that must match one another in one session using the same setup. Leave fiddly small parts for last, using leftovers.
Can I use the same cut list for different materials?
Only if thicknesses and sizes are the same. A change of thickness affects every joint and fit, so recalculate the affected dimensions. Rewrite the list instead of crossing out numbers.
How do I label parts so I do not mix them up?
Write the part letter on a hidden face or edge in pencil, and mark the orientation with an arrow pointing to the top or front. Matching labels on the list and the part prevent confusion during assembly.
Should I list screws and hardware in the cut list?
Keep them in a separate hardware list, since they are bought and counted differently. Refer to them in the notes column if a part needs holes or a recess for a specific fitting.
What if my saw blade is thicker or thinner than I assumed?
Check the blade packaging, and run a test cut in scrap to measure the actual kerf. Update the list with the real value. Thin-kerf and standard blades remove different amounts of material.
Is it worth using graph paper or a diagram?
A sketch of each board or sheet showing the parts in place often reveals problems that a table hides. Graph paper makes it simple to draw to scale. Use it alongside the list, not instead of it.
The Short Version
List every part with size, quantity and material, account for the kerf, and plan the layout on the board. Check items off as you cut, and follow the saw maker’s safety guidance.