A pipe clamp is a pair of fixtures that ride on a length of pipe you supply. One end threads on or locks to the pipe and the other slides along it. Because you choose the pipe, the opening can be as short or as long as the job needs, which makes them a staple for edge gluing wide panels.
The six below are all made for 3/4 inch pipe, from a classic crank-handle fixture to a cast aluminum pair. Sizes, materials and weights come from each listing page and are the makers’ own claims. We have not used these clamps ourselves. None of the listings says a pipe is included, so plan to buy pipe separately.
As an Amazon Associate we earn from qualifying purchases. Links below are affiliate links, and they do not change the product information we give.
What to Look For
| Feature | Why it matters |
|---|---|
| Pipe fit | Check that the fixture matches your pipe size and thread type |
| Feet | Taller or H-shaped feet give clearance for the handle |
| Throat depth | A deeper throat reaches further in from the edge |
| Weight | Cast iron is heavy; aluminum is lighter |
In this guide
Specs at a Glance
| Clamp | Pack | Material | Notes |
|---|---|---|---|
| PONY 50 | 1 set | Hardened steel | Crank handle; 1-3/4 in square faces; 2.8 lb; lifetime warranty |
| Pony 56 | 1 set | Listed as blend | 2-1/2 in reach; reversible head; 2 lb |
| BESSEY PC34-2 | 1 set | Cast iron and steel | Traditional style; soft pads; 2.9 lb |
| QWORK | 2 | Cast iron | Multiple-disc clutch; weight not listed |
| WORKPRO | 2 | Cast aluminum | H-shaped feet; 1200 lb listed; 3.2 lb |
| IRWIN QUICK-GRIP | 1 set | Listed as blend | Clutch system; 1-7/8 in throat; 16 oz |
The 6 Best Pipe Clamps

Top pickBest for classic panel glue-ups
1. PONY 50 Clamp Fixture for 3/4 Inch Black Pipe
A two-piece fixture in hardened steel with a crank-type handle and 1-3/4 inch square clamp faces. The maker describes a baked enamel finish with no holes, rivets or notches, and lists the weight as 2.8 pounds with a lifetime warranty. It mounts on 3/4 inch pipe.
Suits: classic panel glue-ups. Strengths: a long-running design and a warranty. Weaknesses: you must supply threaded pipe. Skip it if you want an out-of-the-box clamp.

View PONY 50 Clamp Fixture for 3/4 Inch Black Pipe on Amazon

Best for reaching in from an edge and spreading
2. Pony 56 Deep Reach Clamp and Spreader Fixture
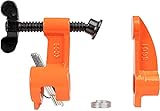
A deep-reach fixture with a 2-1/2 inch reach, a reversible fixed head so it can spread as well as clamp, and a 5/8 inch adjusting screw. The maker lists a multiple-disc clutch and a coil spring stop. It works with any length of 3/4 inch black or galvanized threaded pipe and weighs 2 pounds.
Suits: reaching in from an edge and spreading. Strengths: a deep reach and a reversible head. Weaknesses: the material is listed only as blend. Skip it if you need flat edge clamping only.
View Pony 56 2-1/2″ Deep Reach Clamp and Spreader Fixture for 3/4″ Pipe on Amazon

Best for shop and school use
3. BESSEY PC34-2 Traditional Style Pipe Clamp
A traditional style fixture in cast iron and steel with malleable cast jaws and field replaceable soft pads. The maker says the broad base steadies it and that the hex head on this model is a value added feature. It is described as suited to edge gluing and works with a variety of pipe lengths. The listed weight is 2.9 pounds.
Suits: shop and school use. Strengths: replaceable pads and a broad base. Weaknesses: pipe is not included. Skip it if you want a lightweight clamp.

Best for a pair for gluing panels
4. QWORK 3/4 Inch Pipe Clamps, 2 Pack
Two cast iron fixtures that the maker says fit any length of 3/4 inch black pipe. The listing describes a multiple-disc clutch for holding, a smooth screw with an ergonomic handle, and use for furniture and panel assembly. It gives no weight or size, so we cannot compare it on those.
Suits: a pair for gluing panels. Strengths: two fixtures in the pack. Weaknesses: few specs listed. Skip it if you want details such as throat depth.
Best for people who carry clamps around
5. WORKPRO 3/4 Inch Pipe Clamps, Cast Aluminum
A pair of cast aluminum clamps with H-shaped feet. The maker says they are 50 percent lighter than die cast iron clamps, with a carbon steel threaded rod and a TPU protective cover. The details table lists 1200 pounds and a 3.2 pound weight. One bullet gives the outer diameter as 1.05 inches, which is the nominal size of 3/4 inch pipe.
Suits: people who carry clamps around. Strengths: a lighter build and H feet. Weaknesses: aluminum is a different feel from iron. Skip it if you prefer cast iron.
View WORKPRO 3/4″ Pipe Clamps with H-shaped Feet, Lightweight Cast Aluminum on Amazon
Best for plain pipe lengths from the hardware aisle
6. IRWIN QUICK-GRIP 3/4 Inch Pipe Clamp 224134
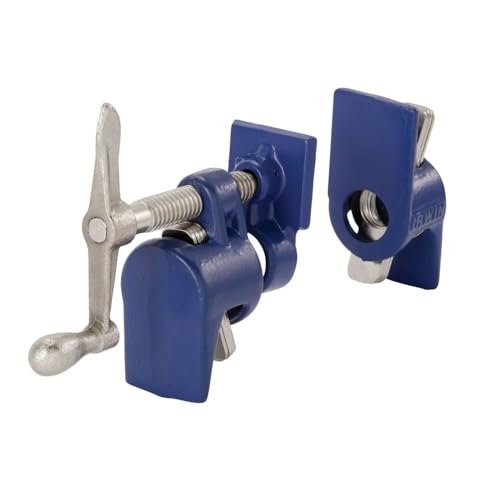
A clutch-style fixture that the maker says removes the need for threaded pipe. It has large feet for stability and handle clearance, large clutch plates that release easily and an ergonomic handle. The throat depth is listed as 1-7/8 inches and the weight as 16 ounces.
Suits: plain pipe lengths from the hardware aisle. Strengths: no threaded pipe needed. Weaknesses: a shallower throat than the Pony 56. Skip it if you want a spreader head.

Care and Setup
- Use straight, clean pipe of the right size and thread.
- Place scrap pads between the jaws and the work.
- Wipe glue off the pipe before it dries.
- Support long pipes so they do not sag.
Mistakes to Avoid
- Forgetting that the pipe is not included.
- Mixing a clutch fixture with a threaded-end fixture on the same pipe.
- Buying a pair when the glue-up needs more clamps.
- Overtightening on soft wood.
Pipe Clamps Versus Bar Clamps
A pipe clamp is a pair of fittings, a fixed head with a screw and a sliding tail stop, that you mount on a length of pipe you supply. The pipe becomes the bar, so you choose the capacity of the clamp by choosing the pipe length. That is the big attraction: one set of fittings can handle a short cabinet door or a long tabletop, simply by swapping pipes. Bar clamps and parallel clamps have the bar built in, so each size is a separate purchase.
Pipe clamps are often the practical choice for wide panel glue-ups, where you need many clamps of long reach. They are also useful in workshops that already have spare pipe. The trade-off is that pipe clamps are heavy, can be slow to adjust and generally have less alignment help than parallel-jaw designs. The jaws can lean slightly under pressure, and the pipe itself may bow if overtightened.
If most of your work is small frames and boxes, a few bar-style clamps might be easier to handle. If you build tabletops, workbenches and doors, pipe clamps give length and force at a sensible footprint. Think about the work you do most, and about how much storage space the finished clamps will take up.
Choosing the Right Pipe
The fittings are sized for a specific pipe diameter, so check the listing for the pipe size each clamp expects. Mixing sizes leads to slipping heads and poor grip. Be aware that pipe sizes are named by a nominal measurement, not the actual outside diameter, so buy pipe by the same nominal size the clamp states, and check the listing if you are unsure.
Black iron pipe is common for clamps because it is strong and the rough surface helps the head grip. Galvanized pipe has a smoother coating that can allow slipping, and the zinc may affect some glues or stain wood. Threaded ends are useful because they let you screw on the fixed head, and a coupling lets you join two pipes into a longer reach, though joined lengths flex more under load.
- Length: choose pipe somewhat longer than your widest assembly so you have room to open the jaws.
- Straightness: sight along the pipe and avoid bent pieces.
- Cleanliness: wipe off the factory oil before use.
Pipe is often sold by the hardware store in standard lengths and can be cut and threaded to order, so ask. Check whether the clamp listing includes pipe at all, since most do not.
Spacing and Pressure for Glue-Ups
For a panel made of several boards, clamp spacing matters more than raw force. As a practical habit, place clamps every few hand-widths along the joint so the glue line closes evenly, and keep end clamps close to the ends so the edges do not open. Alternate clamps above and below the panel, which counters the tendency of the boards to bow upward under pressure.
Tighten gradually. Snug each clamp, check that the faces of the boards are flush, and then apply a bit more pressure until you see a thin, even bead of glue along the joint. Overtightening can squeeze out too much glue, starve the joint, and bend the pipe. Follow the glue maker’s open and clamp times printed on the bottle.
Dry-fit the entire assembly first, with the clamps set to the right width, so you are not adjusting while glue is drying. Lay out wax paper or tape under the joints to prevent the panel from sticking to the pipes. Make notes of your best clamp placement for repeat projects, and keep a few cauls handy to hold boards flat.
Protecting the Workpiece
Steel jaws dent softwood and can mark hardwood under heavy pressure. Use scrap wood blocks, felt or cork pads between the clamp face and your piece, spreading the force over a larger area. Many fittings come with plastic or rubber pads, and others have bare metal faces. Check the listing, and plan to add pads if they are missing.
Iron and moist glue can react, leaving dark stains on certain woods, especially oak and other tannin-rich species. Keep bare pipe from touching wet glue lines by placing the workpiece on blocks or wrapping the pipe in tape or wax paper. Wipe up squeeze-out before it hardens, and remove it from the pipe, since dried glue makes sliding the head difficult.
Always support the work. A long glued panel hanging off the pipes will sag and twist, so rest it on cauls or a flat bench and keep clamps level. If the head tends to lean, check that the pipe is fully seated in the fitting. Misalignment can twist the assembly and produce uneven joints.
Storage and Signs to Replace Fittings
Pipe clamps are long and awkward, but they are easy to store with a few simple habits. A wall rack or a rail with pipe-sized notches keeps them off the floor, and a hook system lets you hang them by the head. Keep pipes in a cool, dry place to prevent rust and wipe them down with a light coat of oil or paste wax now and then.
The threaded screw is the part that wears. Keep it clean and lightly lubricated, and avoid hammering on the handle. If the screw feels gritty, wipe it down and apply a drop of machine oil, then work it back and forth. Check that the jaw faces are flat and not chipped, and that the tail stop still locks reliably on the pipe.
It is time to replace a fitting if the head slips even on a clean pipe, the screw is bent, the casting is cracked or the handle no longer turns smoothly. A clamp that can no longer hold pressure is unsafe, because it may let go suddenly. Replace the fitting, not the pipe, in most cases, as the pipe is generally reusable.
Pipe Clamp FAQ
Do these clamps come with pipe?
None of the six listings says a pipe is included. Each is described as a fixture or clamp for 3/4 inch pipe.
Which fixture can also spread?
The Pony 56 lists a reversible fixed head so it can be used as a spreader.
What diameter of pipe do I need?
Use the pipe size stated in each listing. The size is usually a nominal name, so buy pipe with the same nominal size, and test that the head slides on and locks properly.
Is black iron pipe better than galvanized for clamps?
Many woodworkers prefer black iron because it is strong and grips well. Galvanized can be smoother and may slip, so check how the fitting holds on it.
How many pipe clamps do I need for a tabletop?
It depends on the panel width, but a good habit is to space them along the joint and alternate above and below. Having a few extra on hand lets you add support in the middle.
Why did my glued panel bow?
Clamps all on one side tend to pull the boards upward. Alternate the clamps above and below and use cauls to keep the faces flat.
How do I stop dark stains where glue meets the pipe?
Keep bare iron from touching wet glue by using wax paper, tape or blocks. Wipe squeeze-out quickly so it does not sit on metal.
Can I couple two pipes to make a longer clamp?
You can, but a joined pipe flexes more under pressure than a single length. Use it for light pressure, and avoid overtightening.
How do I tell if a clamp fitting is worn out?
Look for slipping on a clean pipe, a bent or gritty screw, cracks in the casting and a handle that no longer turns smoothly. Replace the fitting if any of these appear.
Planning a Glue-Up Before the Glue Comes Out
Pipe clamps are forgiving tools, but the glue is not forgiving about time. Most wood glues give you a window of several minutes before they start to skin over, and a glue-up that needs a trip to find another clamp is a glue-up that goes wrong. A dry run costs five minutes and prevents nearly every common failure.
- Lay out every board in its final order and mark the grain pattern with a triangle or a pencil line across the joints so you can re-find the order quickly.
- Pre-set every clamp to roughly the right opening. A fixture that has to be slid a foot along the pipe in the middle of a glue-up costs you seconds you do not have.
- Place the pipes on the bench or on sawhorses with the fixtures already in position and the foot of each fixture clear of the workpiece.
- Check that a few cauls, straight strips of scrap used to keep the panel flat, are within reach.
- Test-clamp the dry assembly. Joints should close without gaps under moderate pressure. If a joint stays open on a dry run, it will not close better with glue, and you need to re-plane the edge.
When you glue, spread a thin, even film on one edge of each joint, bring the boards together and snug the clamps from the center outward. Tighten until you see a small, even line of squeeze-out, then stop. Cranking past that point squeezes the joint dry and distorts the panel. A pipe clamp has plenty of mechanical advantage, so most of the skill is knowing when to quit.
Using Pipe Clamps Beyond Edge-Gluing Panels
The classic job for this tool is the wide tabletop, but its adjustable reach suits many other assemblies. A few uses are worth knowing before you decide how many to buy.
Cabinet carcasses and boxes
Long pipes can span a whole cabinet side to side, pulling a face frame or a set of panels together in one pass. Because the pipe length is up to you, one pair of fixtures can handle a 12 inch box one day and a 6 foot carcass the next. Measure diagonals after clamping: if the two corner-to-corner measurements differ, adjust clamp pressure or nudge the assembly with a small piece of scrap until they match.
Frames and doors
Clamping a frame across the joints pulls the rails against the stiles. Here the shape of the fixture matters, because a tall foot or a wide clamp face can leave the frame rocking on the bench. Pads or scrap blocks under the frame keep it level.
Spreading and pushing
Some fixtures, such as the Pony 56 described above with its reversible head, can be flipped to push parts apart instead of pulling them together. That is useful for seating a stubborn joint or for holding a repair open while glue is worked into a crack. It is not a general-purpose jack, so keep the load modest.
Jigs and shop helpers
A pipe clamp can hold a straightedge for a router, press veneer or act as a temporary stop on a workbench. A pair of fixtures on a short pipe sitting on the bench makes a handy mini vise for small parts.
Building a Pipe Inventory That Fits Your Shop
The fixtures are the part you buy once. The pipe is the part you can change, and a thoughtful inventory of lengths is the difference between a handy system and a mountain of unused steel.
- Two or three short pipes, around 24 to 36 inches, handle boxes, drawers and small panels.
- A couple of medium pipes, about 48 to 60 inches, cover typical tabletops, doors and cabinet sides.
- One or two long pipes, 72 inches or more, serve for dining tables and workbench tops, but only if you have space to store and maneuver them.
You can often buy pipe pre-threaded at a plumbing or hardware store and have it cut to length. Because a fixture only grips along the pipe, it makes sense to buy lengths a bit longer than your typical stock width, so the clamp can slide on and still leave room at the end. Check that the pipe is straight by rolling it on a flat surface, and keep the ends deburred so the fixtures slide smoothly.
A simple rack on the wall, with slots sorted by length, keeps the pipes from rolling into your ankles. If you plan to buy multiple pairs of fixtures, such as the two-pack options in this guide, consider how many different lengths you will realistically use. Four fixtures and six pipes give far more flexibility than four fixtures and two pipes, but only if you can store them.
Matching Fixture Weight to Your Working Style
Weight shows up in the listings as a minor detail, but it changes how the clamp feels in a real glue-up. The fixtures here run from 16 ounces for the quick-grip style to about 3.2 pounds for the aluminum pair.
- A heavy cast fixture sits stable on a bench and resists tipping, which helps with big, slow glue-ups.
- A lighter fixture is easier to slide, hang and reposition, which helps when you work in a small space or move clamps frequently.
- A clamp that tips under its own weight makes the panel slip, so you may need cauls or blocks regardless of the material.
For a shop that makes a few large tables a year, heft is a plus. For someone who assembles small boxes every weekend and wants quick setup, a lighter or clutch-style fixture can be a better fit. Neither choice is wrong; it is about the job and the storage.
Frequently Asked Questions
Can I use pipe clamps to square up a cabinet carcass?
They can pull a carcass together, but they do not square it by themselves. Measure the two diagonals after clamping. If they differ, ease pressure on one corner or nudge the cabinet with a scrap block until the measurements match. Clamping pressure applied evenly across the joints helps keep things straight.
How long should I leave pipe clamps on after gluing?
Follow the glue’s label, which commonly calls for at least 30 minutes to an hour of clamping for a typical wood glue and about 24 hours before heavy stress. Leaving the clamps on a bit longer is safe, but removing them too early can let a joint creep open under tension.
What lengths of pipe should I buy first?
A mix works best: a couple of pieces around 24 to 36 inches for small work and a pair near 48 to 60 inches for panels and cabinet sides. Add longer lengths only if you build large tables. Buying a few fixtures and several different pipe lengths is usually more useful than buying many pipes of one size.
Are cauls necessary with pipe clamps?
They are not required, but they help keep a panel flat when you glue wide boards. Straight scrap strips clamped above and below the joint resist the bowing that pipe pressure can cause. Waxed paper keeps the cauls from sticking to squeeze-out. For narrow glue-ups you may get by without them.
Designing the Glue-Up as a System
A pipe clamp is only one component in a glue-up system that includes the pipes, the bench, the cauls, the glue, and the order in which everything happens. Think through the whole sequence before opening the glue bottle. The panel should rest on the pipes themselves or on supports at pipe height, so sliding a clamp head does not drag the boards out of alignment. Alternate clamps above and below the panel where the design allows, because clamps on one side only bow the panel toward that side as they tighten. Lay out every clamp, opened to roughly the right span, within arm’s reach; a glue-up is timed work, and a clamp that needs a pipe fetched from across the shop costs more than its price in spoiled joints.
Glue management belongs in the plan too. Apply glue to both mating edges where the wood is thirsty, spread it evenly, and bring the boards together promptly so the surface does not skin over. Expect squeeze-out and welcome a modest bead of it as evidence of full coverage, then remove the excess at the rubbery stage with a scraper rather than smearing it wet across the grain, where it seals the surface and shows later under finish. Keep a damp cloth for tools, not for the panel; water spread across the surface raises grain unevenly and can dilute the joint line.
Matching the six fixtures to your pipe inventory
The PONY 50 fixture is the reference point of this category: a traditional, weighty design for the standard pipe size used across this group, suited to users building a long-term inventory they expect to hand down. Its character is stability; a row of them on good pipe behaves predictably year after year. The Pony 56 deep reach variant answers the specific frustration of clamping where the pressure point sits well back from the edge, such as thick assemblies and centred joints, where a standard fixture’s throat runs out before the pad reaches the work. The BESSEY PC34-2 brings the same traditional layout with its own casting and screw feel, appealing to users who prefer its handling or who are matching an existing BESSEY row so every clamp in a glue-up tightens with the same rhythm.
The QWORK pair suits users entering the category who want serviceable fixtures at both ends of their first pipes without committing to a full premium row at once. The WORKPRO cast aluminium fixtures trade mass for lightness, which matters more than it sounds: a long panel glue-up may involve lifting and flipping an assembly with several clamps attached, and lighter fixtures make that manageable for one person. The IRWIN QUICK-GRIP fixture emphasises speed of adjustment, rewarding users who change spans frequently between varied projects rather than running repeated glue-ups at one width. In practice, mixed rows are common and entirely workable, provided the pipes are consistent and each fixture is proven before the glue comes out.
Head-to-Head: Weight, Reach and Adjustment Speed
Fixture weight cuts both ways. Heavy cast fixtures settle onto the pipe and resist the twisting that a tightening screw tries to impose, which keeps pads square to the work; they also add up across a wide panel, and the total assembly can become a two-person lift. Aluminium fixtures keep the assembly mobile and are kinder during long sessions, but they ask the user to steady them during the first tightening so the pad does not skate. Neither is better in the abstract: fixed benches and large panels favour weight, while small shops, site work, and solo workers favour lightness.
Adjustment speed is the second divider. A fixture whose tail stock slides and locks quickly lets you rough-set every clamp before glue, then fine-tune with the screw; a slower, threaded adjustment is perfectly accurate but punishing under time pressure. Deep reach, the third divider, is a yes-or-no property: either the fixture reaches your pressure point or it does not, and no technique fully compensates, though cauls can sometimes move the pressure point closer to the edge. Compare the six against your last three projects rather than your imagined largest one, and the right ranking usually becomes obvious.
Pipe preparation that prevents most problems
More pipe clamp trouble comes from the pipe than from the fixtures. Degrease new pipe thoroughly, because the oily coating that prevents shelf rust also lets tail stocks slip under load and stains pale timber. Check that pipe ends are cut square and deburred so threaded fixtures seat fully, and keep lengths organised: a matched set of shorter pipes for everyday panels, longer pipes for tabletops and doors, and couplers only as an occasional extension rather than a permanent arrangement, since every joint is a place where alignment can wander. Store pipes flat or vertical in a rack, off the floor, and wipe them before a glue-up; a pipe that has collected dried glue drips will hold the panel off level and print those drips into the next surface it touches.
Troubleshooting Bowed Panels, Slipping Tails and Stains
Work through glue-up failures in order. First, clamp balance: a panel that bows usually has all its clamps on one side or overtightened in sequence from one end, so alternate sides and tighten gradually, moving along the row in passes rather than fully seating each clamp in turn. Second, tail stock grip: a tail that creeps under load points to oily or undersized pipe, so clean the pipe and confirm the diameter matches the fixture. Third, board preparation: clamps cannot fix edges that were not jointed straight, and a gap that needs force to close will spring back or starve the joint, so dry-fit and correct the edges first. Fourth, stains: dark marks where the pipe meets glue squeeze-out come from the reaction between glue moisture and bare iron, prevented by tape, wax paper, or a finish-safe barrier along the pipe wherever it may touch the panel. Fifth, timing: joints assembled after the glue has begun to skin will look closed and fail later, so respect open time and enlist a second pair of hands for large panels rather than rushing.
Aftercare extends the system’s life. Scrape glue from fixtures and pipes once it has hardened rather than wrestling it wet, check clutch plates and threads for wear that lets a head slip a notch under load, and keep one pipe dedicated as a beater-free zone: never use clamp pipe as a lever, a roller, or a pry, because a slightly bent pipe quietly ruins every glue-up that follows. Built and kept this way, a modest row of fixtures and pipes becomes one of the most capable and expandable clamping systems a workshop can own, growing one pipe at a time as projects demand.
Choosing by Scenario: First Panel, Tabletop Ambitions, and the Shared Shop
The first-panel scenario deserves a calm plan. A new woodworker needs two fixtures and one suitable pipe length to glue a modest panel, plus the discipline of a dry run. Any of the six fixtures serves here, and the deciding factor should be local availability of the matching pipe and the feel of the screw in the hand, because the first glue-up teaches technique that transfers to every later clamp. Resist buying a full row at once; the second purchase, informed by the first panel, is always smarter than the first.
The tabletop scenario scales everything: wider panels, more fixtures, longer pipes, and a premium on keeping the assembly flat and liftable. Weight now matters at the system level, which is where the aluminium WORKPRO fixtures make their case, while users with a fixed bench and help available may prefer the settled feel of the heavy PONY and BESSEY rows. Plan clamp positions before glue, alternate above and below, prepare cauls, and rehearse the flip if the design requires one. The shared or teaching shop has a third logic: fixtures get mixed, pipes wander, and robustness plus easy replacement beat refinement, which favours buying several identical fixtures so any head fits any pipe and any user finds the same action at every station.
A worked example: gluing a wide tabletop in stages
Wide tops go better in stages than in one heroic glue-up. Join the boards into two or three sub-panels first, each narrow enough to control easily, let them cure, scrape them flat, and then join the sub-panels into the full top. Each stage uses the same clamps, the same cauls, and the same alternating pattern, but the alignment problems shrink at every stage because you are only ever persuading a few boards at a time. Check each stage for twist by sighting across winding sticks or a straightedge before the glue sets, and correct with clamp placement and caul pressure while correction is still cheap. The final stage then behaves like an ordinary panel, and the finished top emerges flatter than a single-stage attempt by the same hands, which is a fair summary of pipe clamping generally: the system rewards planning more than strength.
Reading Squeeze-Out and Other Feedback During the Glue-Up
A glue-up talks to you if you watch it. A thin, continuous bead of squeeze-out along every joint says the edges met and the glue coverage was complete. A dry section says the edge was starved or the joint stood open there, and it deserves a note even if the panel looks fine, because that section is where a future split will start. Boards that slide lengthwise as clamps tighten are telling you the clamping force has a sideways component; offset the next clamp or add a stop. A panel that rocks on the pipes is telling you a board is thicker than its neighbours or a pipe carries a dried glue drip; fix the cause, not the symptom. Learning to read these signals during the open time, while every correction is still possible, is the skill that separates panels that last generations from panels that last until the first dry winter.
After the clamps come off, keep reading. Scrape glue at the right stage, check flatness again after an overnight rest, and only then surface the panel; flattening a panel that is still equalising moisture invites a second correction later. Store finished panels flat or on edge with air around them, never leaning against a damp wall. And record what worked: pipe lengths, clamp count, spacing, and any surprises, in a notebook or on the shop wall. The next tabletop then starts from your own proven recipe rather than from memory, and your modest row of fixtures and pipes performs, project after project, like a system twice its size.
Expanding the System: Couplers, Corners and Unusual Assemblies
As projects diversify, the pipe system grows sideways as well as longer. Corner assemblies, such as frames and boxes, benefit from clamping in two directions in sequence: first the long direction to close the primary joints, then across, checking diagonals after each stage rather than at the end. For very long assemblies, coupled pipes extend reach, but treat the coupled span as slightly less rigid and place an extra clamp near the joint. For round or irregular work, pipe clamps step back in favour of band clamping, and recognising that boundary keeps both systems honest. The fixtures here also serve as spreaders in some configurations and as improvised presses for laminating curved work over a form, where several clamps along the curve share a load no single clamp could apply evenly.
Keep a simple inventory habit as the system grows: pipes labelled by length at the end with a paint pen, fixtures counted and stored on a short pipe stub so they stay together, and one pipe reserved, clean and straight, for the finest work. The system stays cheap to expand precisely because each addition is generic; a pipe bought for a tabletop this year holds a door next year and a carcass the year after. Few workshop investments compound as reliably, and the six fixtures in this guide are best chosen as the founding members of that growing system rather than as isolated answers to a single glue-up.
Teaching the Glue-Up: Passing the System On
A pipe clamp glue-up is one of the best teaching exercises in woodworking, because every principle of the craft appears in it at once: joint preparation, sequencing, even pressure, reading feedback, and patience during curing. Teach it by narrating a dry run first, letting the learner place clamps and spot the bowing that one-sided clamping causes, then run the real glue-up with roles divided, one person spreading and aligning, the other setting clamps in the rehearsed order. The learner discovers that the clamps are the easy part and the choreography is the skill, which is the deepest lesson the system has to teach.
Shops that teach this way also maintain their equipment better, because learners who understand why pipes are degreased, why tails slip, and why stains form become adults who wipe pipes without being asked. The equipment in this guide, maintained by people who understand it, effectively stops ageing; fixtures pass between generations of users with nothing more than cleaning and the occasional thread oiled. That is the quiet endpoint of every recommendation here: buy sound fixtures, build the system around them thoughtfully, and the glue-ups take care of themselves for a very long time.
A note on pipe storage safety
Long pipes stored carelessly become trip hazards and falling hazards in equal measure. A simple rack, vertical in a corner or horizontal at waist height, keeps them visible, countable, and off the floor, and end caps or a wrap of tape on cut threads protects both the threads and the hands that grab them. Retrieve pipes by lifting them clear rather than dragging them through the rack, which bends nothing and disturbs nothing, and return them the same way at the end of the job while the glue cures and there is nothing else to rush.
A final word on starting small
Every extensive pipe clamp collection in every serious workshop began as two fixtures and one pipe bought for a single panel. Starting small is not a compromise; it is the correct method, because the first glue-up teaches you your own panel sizes, your bench height, your working pace, and your preference for fixture weight, and every later purchase is then made by an informed buyer. Choose any of the six fixtures here with confidence for that first step, keep the pipes clean and the threads oiled, and let the system grow at the speed of your projects.
One last habit protects every other part of the system: keep the glue and the clamps in conversation. Note, even mentally, which adhesive you used, its open time, and how the clamping sequence felt, because the next panel with the same timber and the same glue will go measurably better for the memory. Workshops improve one remembered detail at a time, and the pipe clamp station, visited as often as it is, accumulates those details faster than almost any other corner of the shop.
The Short Version
For a classic crank fixture, the PONY 50. For deep reach and spreading, the Pony 56. For replaceable pads, the BESSEY. For a pair of cast iron fixtures, the QWORK. For lighter weight, the WORKPRO. For plain pipe, the IRWIN.


