A coping saw is a hand saw with a thin blade held under tension in a deep, U shaped frame. It is the tool used to cut curves and to cope the end of a trim piece so it fits against a neighboring profile. The points that matter are the frame depth, the blade length and tooth count, how the blade is held and how easily it turns.
The six saws below range from classic pin-end frames to a frame built around round spiral blades. Sizes, tooth counts and materials come from each listing page and are the makers’ own claims. We have not used these saws ourselves. Several listings carry data fields that make no sense for a hand saw, such as voltage, and we flag those instead of repeating them.
As an Amazon Associate we earn from qualifying purchases. Links below are affiliate links, and they do not change the product information we give.
What to Look For
| Feature | Why it matters |
|---|---|
| Frame depth | Sets how far from the edge the blade can reach |
| Teeth per inch | Finer teeth leave a smoother cut, coarser teeth cut faster |
| Blade type | Flat pin-end blades follow a line, spiral blades cut in any direction |
| Handle | Turning it sets blade tension, so the grip must be comfortable |
In this guide
Specs at a Glance
| Saw | Blade and frame | Teeth | Notes |
|---|---|---|---|
| IRWIN ProTouch | 6-1/2 in blade; 5-1/2 in frame depth | 20 or 17 (conflict) | Flat-bar frame; high-speed steel; lifetime limited warranty |
| IVY Classic 11110 | 6-1/2 in blade; 4-3/4 in cutting depth | 24 listed | 5 blades; hardwood handle; high-carbon steel |
| Bahco BAH301 | 6-1/2 in in the title | 14 TPI | Nickel-plated frame; beech handle; 360 degree blade turn |
| STANLEY 15-106A | 6-3/8 in in the title | 14 listed | 4 spare blades; cushion-grip handle; blade indexes every 45 degrees |
| KATA 6.5 in | 6.5 in; 65Mn blades | 14, 18 and 24 TPI | 6 blades listed; TPR grip; keyless blade change |
| FreeStyle Spyral | 5 in spiral blades | Spiral tooth | 5 blades in 3 diameters; also takes pin-end blades |
The 6 Best Coping Saws

Top pickBest for trim work that needs a deep frame
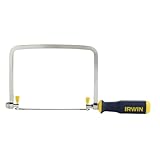
1. IRWIN ProTouch Coping Saw (2014400)
A flat-bar frame saw with DuraSteel pins, a triangular ProTouch handle and a high-speed steel blade. The bullets give a 5-1/2 inch frame depth and a 6-1/2 inch blade, and a lifetime limited warranty is listed. The details table says 20 teeth while a bullet says 17 points, and it also shows 15 volts and a 0.01 meter blade length, which cannot be right for a hand saw.
Suits: trim work that needs a deep frame. Strengths: the deepest frame on this list and a warranty. Weaknesses: conflicting tooth count and a single blade. Skip it if you want spare blades in the box.
View IRWIN Tools ProTouch Coping Saw (2014400), Blue and Yellow on Amazon

Best for a first coping saw with spare blades
2. IVY Classic 11110 6-1/2 in Coping Saw
A traditional saw with a hardwood handle, a rigid flat frame and five assorted blades: fine for veneers and thin wood, medium for hardwood, coarse for fast cuts and a hacksaw blade for metal. The maker lists a 4-3/4 inch cutting depth and says it takes other 6-1/2 inch pin-locking blades. The handle adjusts the tension and the blade can be turned to any angle.
Suits: a first coping saw with spare blades. Strengths: five blades and a wood handle. Weaknesses: a shallower frame than the IRWIN. Skip it if you want a cushioned grip.

View IVY Classic 11110 6-1/2″ Coping Saw with 5 Assorted Blades, Hardwood Handle, 1/Card on Amazon

Best for fine joinery and detail cuts
3. Bahco BAH301 6-1/2 in Coping Saw
A beech handle and a nickel-plated steel frame, sold with one hardened and tempered carbon steel blade at 14 teeth per inch. The maker says the blade turns a full 360 degrees on its pins. The listing also shows a 4500 rpm speed, a battery requirement and a 2 inch blade length, none of which fit a hand saw, so rely on the title and bullets.
Suits: fine joinery and detail cuts. Strengths: a plated frame and a wood handle. Weaknesses: one blade and several confusing data fields. Skip it if you want a ready-made blade assortment.

View Bahco BAH301 6-1/2″ Coping Saw, Beech Handle, Nickel-Plated Frame on Amazon

Best for trim and molding
4. STANLEY 6-3/8 in Coping Saw, 4 Replacement Blades (15-106A)
A steel frame saw with a cushion-grip handle and a blade that rotates and indexes in 45 degree steps. Four replacement blades are included and the maker describes the blade as hardened and tempered carbon steel. A limited lifetime warranty is listed. The table repeats odd fields, 15 volts, 4500 rpm and a 4 inch blade length, so treat those as errors.
Suits: trim and molding. Strengths: spare blades and indexed angles. Weaknesses: a messy specification table. Skip it if you prefer a wooden handle.

View STANLEY 6-3/8 in. Coping Saw, 4 Replacement Blades, Steel Frame (15-106A) on Amazon

Best for general craft and scroll work
5. KATA 6.5 in Coping Saw with 6 Blades
A steel frame with a TPR grip, keyless blade change and 65Mn blades in 14, 18 and 24 teeth per inch. The title says six blades, while the Included Components line says five, so count the blades when it arrives. The maker says it is for wood, plastic and soft metal and not for hard metal.
Suits: general craft and scroll work. Strengths: three tooth counts and a keyless change. Weaknesses: the blade count is unclear. Skip it if you cut hard metal.


Best for scroll shapes that change direction often
6. FreeStyle Coping Saw with Spyral Blades
A frame that holds round spiral blades, which the maker says cut in any direction without turning the blade. It comes with five Spyral blades in three diameters, .028, .040 and .050 inch, and keyless blade changes. The frame also takes conventional pin-end blades, which are not included. The listing says the ends of the thin blades can be twisted off to begin a hole cut.
Suits: scroll shapes that change direction often. Strengths: spiral blades and pin-end compatibility. Weaknesses: no flat blades in the box. Skip it if you cope trim and want a classic flat blade.

Care and Setup
- Fit the blade with the teeth pointing toward the handle so the saw cuts on the pull stroke, unless the maker says otherwise.
- Tension the blade by turning the handle until it rings lightly when plucked.
- Back the cut with a scrap board to limit tear-out.
- Keep spare blades handy, since thin blades wear out.
Mistakes to Avoid
- Trusting a table field that makes no sense for a hand saw.
- Buying a deep frame when a shallow one reaches your cuts.
- Forcing a coarse blade through thin stock.
- Over-tightening until the blade snaps.
Choosing a Blade by Tooth Count and Material
The blade decides what a coping saw can do. Teeth per inch, often shortened to TPI, controls the balance between speed and smoothness. A coarse blade in the 10 to 14 TPI range removes material quickly in thicker wood but leaves a rougher edge and tends to tear thin stock. A finer blade, around 18 to 24 TPI, cuts more slowly and leaves a cleaner edge, which suits thin wood, veneers, plastic and delicate shapes.
A good rule is to have at least three teeth in contact with the material at any time. If the blade is too coarse for thin stock, it grabs, chatters and may snap. Measure the thickness of what you cut most and choose a blade that fits it.
Blade materials vary. Some saws ship with hardened carbon steel blades, some with high-speed steel and others with alloy steel, and the post’s listings describe their own claims. Blades meant for metal are usually finer and hardened differently from wood blades, and a listing that says it handles soft metal does not mean it will cut hardened steel. Use a metal-rated blade for metal, and expect it to wear faster than a wood blade does.
Check how the blade is held, as this limits what you can fit. Pin-end blades are common and widely sold, while spiral blades need a frame designed to hold them. If you plan to buy spare blades in bulk, confirm the length and the pin style on the listing before you order, and note that a longer blade will not fit a short frame.
Coping Trim and Molding Joints
Coping is the classic use of this saw. When two lengths of molding meet at an inside corner, a coped joint lets one piece follow the profile of the other, which can look tidier than a mitered joint and tends to hide small gaps if the wall moves slightly. The first piece runs square into the corner, and the second is cut to match.
The usual method starts by cutting the end of the second piece at 45 degrees. That cut reveals the profile line on the face. Then you follow that line with the coping saw, angling the blade slightly back so the rear of the cut is relieved and only the front edge touches the first piece. Cut slowly and stay just outside the line, then clean up with a file or sandpaper wrapped around a dowel.
- Hold the trim firmly on a bench or against a hook board.
- Use a finer blade for painted or softer moldings and a medium blade for hardwood.
- Take short relief cuts on tight curves so the waste falls away.
- Test fit against a scrap piece of the neighboring molding before the final piece.
A deeper frame can reach farther from the edge, which helps with wide moldings, but most trim work needs only moderate depth.
Curves, Interior Cuts and Scrollwork
Because the blade is thin, a coping saw can turn tight curves that a larger saw cannot. Rotate the blade in the frame to point the cut away from the frame itself, especially when cutting deep into a board. Many frames have a blade holder that turns, and some index in steps, so you can set the blade at an angle that clears the work. Check the listing for how far the blade rotates.
For interior cuts, such as a hole in the middle of a panel, drill a small pilot hole inside the waste area first. Unhook one end of the blade, thread it through the hole, reattach it and tension it, then cut to your line. Spiral blades can cut in any direction without turning the frame, but they remove material more slowly and leave a different finish than flat blades.
Mark your line clearly and cut on the waste side. Support the work close to the cut, such as on a bench hook or a V-block, so that it does not flex or vibrate. Keep strokes steady and let the blade do the work. Pushing hard bends the blade and leads to wandering cuts, and relaxing the pressure on the return stroke prolongs blade life. For fine curves, slow down and rotate the work rather than forcing the saw sideways.
Tensioning and Avoiding Blade Breaks
Coping saw blades are thin, and they snap. Knowing why helps you break fewer of them. The commonest causes are too much tension, twisting the blade as you steer, forcing a coarse blade through hard material and binding in a tight curve. Spare blades are cheap compared with the frustration of stopping mid-cut, so keep several.
Tension should be firm but not extreme. Tighten the handle until the blade is straight and resists a sideways push, and release it a little when you put the saw away so the frame and blade are not under constant load. A slack blade wanders and bends, while an over-tight one is prone to snapping or popping off its pins.
Check that both pins are seated properly in the slots of the holders. A blade that is not fully engaged may slip mid-stroke. When you change a blade, make sure the teeth point in the direction the maker recommends, because some saws are designed to cut on the push stroke and some on the pull. Read the instructions that come with your saw. Wipe resin or dust from the blade after cutting, and replace it when it burns the wood, needs noticeably more effort or leaves ragged edges.
Frame, Handle and Comfort Checks
The frame holds the tension, so it should be rigid enough not to flex when you tighten the blade. Look at how the handle turns, how the tension locks, and whether the blade holders align. A frame that twists out of line makes the blade bind. Steel frames are common, and some are plated; wooden handles and cushioned grips suit different hands, so choose one that suits yours.
Consider frame depth against your work. A deeper frame reaches farther into a board but is bulkier and can be awkward to control. A shallower frame feels lighter and is quicker for small shapes.
Check how comfortable the saw feels when you cut for several minutes. A handle that is too thin can strain your hand, and a rough grip can blister. If you have a small hand or arthritis, look at handle diameter and the effort needed to turn the tension knob. Think about where the saw will live. A hook, a drawer slot or a tool roll keeps the blade from being bent or dulled by other tools. Finally, read the warranty wording in the listing, which is the maker’s own, and be wary of listings with confusing data fields. Rely on the title and descriptions when a table contradicts them, and ask the seller if you need clarity before buying.
Which coping saw should you buy?
The best coping saw is the one that matches your work: trim and molding favor a deeper frame and spare blades, while scroll shapes favor spiral blades. Use the needs below to narrow the six saws in this guide.
- Coping baseboard and crown molding: choose the IRWIN ProTouch for the deepest frame on the list, or the STANLEY if you want four spare blades and a blade that indexes in 45 degree steps.
- A first saw with spare blades in the box: the IVY Classic 11110 comes with five assorted blades and a hardwood handle, so you can try fine, medium and coarse cuts straight away.
- Fine joinery and detail cuts: the Bahco BAH301 has a beech handle, a nickel-plated frame and a blade that turns on its pins. Buy extra blades, since only one is listed.
- Different materials and tooth counts: the KATA lists 14, 18 and 24 teeth per inch plus keyless blade changes, which suits craft work in wood and plastic.
- Curvy scroll shapes and pierced holes: the FreeStyle Spyral takes round spiral blades that cut in any direction, and it also accepts pin-end blades you buy separately.
If you cope trim only a few times a year, a simple frame with a handful of blades is enough. If you cut small shapes every week, comfort and quick blade changes matter more than frame depth. Whichever way you lean, remember that the saw is only as good as the blade in it, so budget for a few extra blades.
What to check before you buy, and who should skip it
Before you buy a coping saw, check the blade length, the frame depth and what is actually in the box, because listings for hand saws are often messy. Several listings in this guide carry data fields that make no sense for a hand saw, so trust the title and the bullet points over the table.
- Confirm the blade length and pin style, so spare blades from other makers will fit.
- Count the blades included, and compare that against the title and the components line.
- Check the frame depth against the widest piece you plan to cope.
- Look at the handle shape and whether the tension turns easily with one hand.
- Read the warranty wording on the listing and note what it covers.
Be honest about the trade-offs. A coping saw is slow compared with a power jigsaw or a scroll saw, and thin blades break, so it takes patience. A deeper frame reaches farther but feels bulkier on small shapes, and a spiral blade removes material more slowly than a flat blade.
Who should skip it: anyone who needs long straight cuts, hard metal cutting or high volume production. A back saw, a jigsaw or a hacksaw serves those jobs better. If your work is trim, curves and small interior cuts, a coping saw is the right tool.
When you are ready, compare the picks above, check the current listing for frame size and what is included, then choose the one that fits how you will use it.
Setting Up the Cut: Work Holding, Layout and the First Pass
A coping saw does its best work when everything except the blade has been made easy, and the setup deserves as much attention as the sawing. Start with layout that survives contact with the blade: a knife line or a sharp pencil line on the face that will show, transferred carefully around the profile where the joint demands it. For coped trim joints, the profile line is the front face of the mating piece traced exactly, and any error in that tracing becomes a gap in the finished joint, so trace with the mating piece held in its true installed orientation rather than flat on the bench where its profile distorts. Secure the work so the cutting area is supported close to the cut: a bench hook, a vise with the work low and firm, or a coping board all serve, and the principle is the same as with any saw — unsupported thin stock vibrates, and vibration breaks blades, tears fibres and tires the hand that is trying to steer. Position the work so the cut runs in the direction your body handles best, which for most people is a downward or toward-the-bench stroke with the frame clear of the bench edge, and reposition the work rather than contorting yourself as the curve changes direction.
Cut on the waste side of the line and leave the line itself standing; you can pare or file back to a line, but you cannot replace wood the blade took from the finished side. On tight internal curves, drill a relief hole at the sharpest turn so the blade has room to change direction without being twisted in the kerf, and on long curves plan your entry and exit so the blade never has to reverse inside a cut it has already made. Keep the work clamped firmly enough that both your attention and your free hand stay on guiding rather than holding, keep the cutting path clear of your body, and keep a first aid kit in the workshop as a matter of course. These habits are not decoration around the real skill; with a tool this light and a blade this fine, setup is most of the real skill, and the sawing itself becomes almost quiet by comparison.
Reading the kerf as you cut
The kerf tells you how the cut is going while there is still time to correct it. A kerf that widens on one side means the blade is being twisted or the frame is being pushed sideways rather than drawn along the line; straighten the frame’s travel and let the teeth do the work. A kerf that fills with dust that will not clear suggests the blade’s teeth are too fine for the material’s thickness, or the stroke is too short to carry dust out; lengthen the stroke and let the full blade work. A cut surface that comes away polished and hot-looking, with the blade squeaking, means friction is doing what teeth should be doing — the blade is dull, pinched by a closing kerf, or being forced. A cut that consistently drifts to one side of the line points to a blade with uneven set, a frame under uneven tension, or a habit of steering with the wrist; swap the blade first, because it is the cheapest variable and the most common cause. Learning to read these signs mid-cut is what turns blade breakage from a recurring tax into a rare event, because nearly every break is preceded by a minute of warnings in the kerf.
Head-to-Head: The Frames and Blade Bundles Compared
The IRWIN ProTouch and the Bahco frame represent the considered end of the coping saw market, and their differences are about feel sustained over a long cut. Both hold a blade under honest tension and align it reliably; where they separate is in the handle shape, the balance of the frame, and the small ergonomics of the blade-changing hardware, which matter because coping work involves frequent blade changes for interior cuts. A handle that fills the hand without hot spots and hardware you can operate without tools, in the middle of a job, with dusty fingers, will be used willingly — and a saw that is pleasant to re-blade gets fresh blades when it needs them, which quietly improves every cut. The IVY Classic is the straightforward traditional frame: light, simple, and entirely adequate for the occasional user, with the understanding that its tensioning and fittings ask a little more patience. It is the saw that lives in a household toolbox for a decade and cuts every curtain-pole and trim job asked of it.
The STANLEY set and the KATA set compete as bundles, frame plus blades, and the comparison should be made on the blades as much as the frames, because the included blades define your first months with the saw. A bundle whose blades cover a sensible spread of tooth counts lets you learn what each count does in your materials; a bundle of identical blades is a frame with spares. Judge the frame for throat depth against your work — deeper throats reach further into a panel — and for the security of its blade pins, since a blade that slips a pin under tension ruins the cut and the moment together. The FreeStyle saw with its spiral blades is the specialist of the group: a spiral blade cuts in any direction without rotating the frame, which transforms work in confined shapes and on pieces too large to turn, at the cost of a wider kerf and a less crisp line than a flat blade leaves. It is not the saw for fine coped joints that must close invisibly, and it is unmatched for freeform cutting in sheet material where the frame simply cannot swing. Choose it as a second saw for that work, or as a first saw if that work is most of what you do.
Flat blades, spiral blades and the kerf they leave
The blade choice is a joint-quality choice, not just a cutting choice. A fine flat blade leaves a narrow kerf and a surface that can go straight to a fitted joint with a touch of a file; it asks in return that you rotate the frame, plan your turns, and respect its fragility in twist. A spiral blade trades that finish for freedom of direction and a degree of forgiveness — it will not bind in a turn the way a twisted flat blade does — but its kerf is wider, its cut surface rougher, and its line harder to hold to a fine tolerance because the teeth engage on every side at once. For coped moulding joints, picture-frame work and anything that must fit straight off the saw, the flat blade is the professional habit. For craft shapes, toys, and cutting openings in the middle of large panels, the spiral earns its place. Owning both costs little, because blades are consumables; knowing which job belongs to which blade is the actual skill this section of the guide is trying to hand over.
First Coping Session: A Practice Piece That Teaches Everything
Choose a practice piece that contains the whole craft in miniature: an offcut of the trim or board you actually work with, marked with a gentle curve, a tight curve, a square internal corner reached through a drilled entry hole, and one coped profile traced from a mating piece. Fit a medium blade with the teeth oriented for your frame’s cutting stroke, tension it until it gives a clear, high note when plucked and shows no sideways bow under a light finger pressure, and check that the blade sits untwisted in both pins. Make the gentle curve first, sawing with long, relaxed strokes and steering by rotating the frame and the work together, watching the line rather than the blade. Then the tight curve, shortening the stroke and turning the work in smaller increments. Then the internal corner: thread the blade through the entry hole, re-tension, and cut to each wall in turn, letting a relief hole at the corner absorb the turn. Then the coped profile, slowly, staying on the waste side and checking the fit against the mating piece twice before you think you are done.
Expect the first fit to be close but imperfect, and treat the gap as a lesson rather than a failure. Hold the coped piece against its mate and mark where it touches and where it gaps; touching points get a stroke or two of a small file, and gaps tell you where the blade left the line or where the profile was traced loosely. This fit-check-file cycle is the real workflow of coping, on practice pieces and on crown moulding alike, and learning it on an offcut is what makes the first real joint calm. Finish the session by inspecting the blade: teeth dulled evenly means honest work; a blade bent or with teeth stripped on one section means a twist or a forced turn happened, and recalling where it happened teaches more than the breakage costs.
Blade changing without the fumble
Interior cuts demand that one end of the blade be freed, threaded and refitted repeatedly, so make that operation a practised routine rather than an interruption. Learn your frame’s hardware until you can work it without looking, keep the tension fully released before unpinning so the blade does not spring, and thread the blade through the work before re-tensioning rather than forcing a tensioned blade through a small hole. Keep spare blades flat in their packet in a set place, and return the removed blade to a consistent parking spot — a loose coping blade on a bench is nearly invisible and finds hands and sleeves. A carver’s discipline applies here too: the tool is parked safely the moment it leaves your hand, every time, so the habit is there on the day your attention is on a difficult fit instead.
Troubleshooting Breaks, Drift and Rough Cuts in Order
When coping goes wrong, diagnose in the order of likelihood. First, the blade: dull, wrong tooth count for the thickness, or damaged teeth cause more bad cuts than every frame fault combined, and a fresh blade is the cheapest test in the workshop. Second, tension: a blade under-tensioned wanders and bows in the cut, while one over-tensioned on a light frame can distort the frame’s alignment; both produce drift that feels like a steering problem. Third, technique: forcing the feed, twisting the frame in the kerf, and sawing with short, hurried strokes overload a fine blade exactly where it is weakest. Fourth, the work’s support: vibration from a poorly supported thin piece fatigues the blade and tears the surface, and moving the support closer to the cut cures cuts that no blade change fixed. Fifth, the frame: worn pins, a bent frame or slipping blade hardware will defeat good blades and good technique alike, and the test is whether the same fault follows the frame across several fresh blades.
Rough, torn surfaces have their own short list. Tear-out on the exit side of thin material improves with a finer blade, a backing piece behind the work, and a stroke that eases as the teeth approach the far face. A surface that is smooth but wavy means the blade is flexing under side pressure; lighten the feed and steer earlier, in smaller corrections, so the blade is never asked to bend its way back to the line. A cut that starts well and degrades along its length usually means the blade is dulling in the material — abrasive-filled sheet goods and hard, dense hardwoods consume fine teeth quickly — and the professional answer is to change the blade mid-job without regarding it as waste. Blades are the consumable heart of this tool; the frame is the durable part, and economies should be taken in that order.
Blade Storage, Frame Care and Workshop Habits
Store blades in their packets, flat and dry, sorted by tooth count if you keep several, so the blade you reach for is the blade you intended. A blade left fitted under full tension for months is not ruined by the tension itself, but the habit of releasing tension for storage protects light frames from slow distortion and protects people from a tensioned blade in a toolbox. Keep the frame’s moving parts — the tensioning thread and the swivel pins — clean and very lightly lubricated so blade changes stay easy; gritty hardware is why blades get fitted carelessly, and careless fitting is why they slip. Wipe the frame after dusty work and store the saw hanging or in a drawer where the blade cannot catch on other tools. Keep a small file and a spare blade packet with the saw if it travels, because coping work away from the bench — fitting trim in a room, cutting an opening in situ — always seems to need the blade you did not bring. A coping saw asks almost nothing in maintenance; what it asks in return is that its consumable be fresh and its user unhurried.
Choosing by User: Trim Carpenter, Hobbyist, Crafter, Homeowner
The trim carpenter coping joints daily should choose the frame whose handle and blade hardware survive a full day pleasantly, and should stock flat blades in two tooth counts as a standing supply. The hobbyist woodworker adding coping to a hand-tool bench should choose a solid mid-range frame and spend the difference on a variety of blades and a practice offcut habit, because skill is the variable in their results. The crafter cutting shapes in sheet material should look seriously at the spiral-blade option, where freedom of direction is worth more than a fine kerf. The homeowner with occasional jobs is well served by a bundle set that arrives with blades included and a frame that will live in a toolbox without complaint. Across all four, the same truth holds: the frame is bought once and the blades are bought forever, so judge a first purchase by whether you will enjoy changing its blade and steering it for an hour — because that enjoyment, or its absence, decides whether the saw gets used enough for its owner to become good with it.
Extra questions readers ask about coping saws
How do I cope a joint when the mating profile is very small? Work under your best light, use the finest blade that will clear dust from the material, and take the final fit with a file rather than the saw; tiny profiles are filed joints with a sawn beginning. Why does my blade sing or vibrate on long cuts? The work is under-supported or the stroke is exciting a resonance in a thin panel; support the piece closer to the line and vary the stroke length slightly. Can I cut a straight line better with a different grip? For short straight cuts, choke up on the frame, keep the blade’s line in view from directly above, and let the work’s edge or a batten guide your first strokes until the kerf is established. What do I do with a frame whose blade keeps slipping one pin? Inspect the pin and the blade’s hole for wear or a burr, dress or replace the worn part, and confirm the blade is the correct fitting for the frame before blaming your tensioning.
Coping Profiles That Fight Back: Crown, Base and Chair Rail
Some profiles expose every weakness in a coping setup, and it is worth knowing how the craft adapts to each. Crown moulding is the famous case: the profile is large, the spring angle means the piece sits in the coping position at a tilt, and the visible face shows any error at ceiling distance under raking light. The working approach is to cut the miter first on a saw, then cope to the profile line that miter reveals, keeping the blade angled slightly to undercut the back of the cope so the front edges meet tightly while the hidden back stays open. That deliberate back-relief is the difference between a joint that closes with hand pressure and one that gaps at the face however hard it is pushed. Base moulding is simpler in profile but longer in run, and its challenge is consistency: a cope that fits at the first corner must be repeatable at the eighth, so keep the first good offcut as a reference and check each new cope against the actual mating piece rather than against your memory of the profile.
Chair rail and small picture mouldings invert the problem — the profile is small enough that the blade’s kerf and the file’s stroke are significant fractions of the detail. Here the fine blade, the lightest feed and a willingness to finish the fit with a file and a folded abrasive strip matter more than sawing brilliance. On all profiles, work with the piece secured and the cut directed safely, both hands attending to frame and work, and keep the first aid kit in the room as a standing habit of trim work. And on all profiles, the final judge is the mating piece itself, held in place at the actual corner: a cope that fits the bench test but not the wall is telling you the wall is out of square, which is information about the room, not an indictment of your saw.
Coping Saw FAQ
What is the difference between a coping saw and a jab saw?
A coping saw has a thin, tensioned blade in a frame and follows curves. A jab saw has a short stiff blade and cuts straight into a hole or opening.
Which saw takes spiral blades?
The FreeStyle Spyral frame is built for them and also accepts pin-end blades that you buy separately.
Which direction should the teeth point?
It depends on the saw and blade, so follow the maker's instructions. Many coping saws are set up to cut on the pull stroke, but check yours.
Can a coping saw cut metal?
Some blades are designed for soft metals and thin material, but check the listing. Hard metals need a different tool.
How tight should the blade be?
Tight enough to stay straight and resist sideways pressure, but not so tight that it risks snapping. Back off the tension when storing.
Why does my blade keep breaking?
Over-tensioning, twisting, forcing the cut and using a coarse blade on thin stock are the usual causes. Slow down and match the blade to the material.
What is the difference between a coping saw and a fret saw?
A fret saw typically has a deeper frame for reaching farther from the edge and uses finer blades for detailed work. A coping saw is shallower and commonly used for trim and general curves.
How do I cut a hole in the middle of a board?
Drill a pilot hole in the waste area, thread the blade through, reattach and tension it, and cut to your line.
How often should I change blades?
Change a blade when it burns the wood, cuts slowly, wanders or leaves ragged edges. Thin blades wear out sooner than most people expect.
Do coping saw blades fit every frame?
No, blades vary in length and in how they are held. Pin-end blades are the most common, while spiral blades need a frame built for them. Check the blade length and pin style on the listing before you buy spares.
Is a coping saw good for beginners?
Yes, it is an easy hand saw to learn because the blade is thin and the cuts are slow and controlled. Expect to break a few blades while you learn the right tension and pace. A saw that comes with spare blades is a sensible first choice.
Can a coping saw cut straight lines?
It can, but it is not the best tool for it. The thin blade tends to wander, so a back saw or a hand saw with a stiffer blade gives straighter results. Use the coping saw for curves, coped joints and small interior cuts.
What materials can a coping saw cut besides wood?
With the right blade it can cut plastic, thin sheet material and some soft metals. Always check the blade description on the listing. Hard metals call for a different tool.
How do I stop tear-out on thin plywood?
Use a fine tooth blade and cut slowly with the good face up or toward you, depending on the stroke direction. Clamp a scrap board behind the cut and support the work close to the blade. A sharp new blade also helps.
Should I buy a coping saw with spare blades?
Usually yes, because thin blades wear and snap. A saw with spare blades lets you match tooth count to the job and keeps work moving. If your pick includes only one blade, buy a few compatible extras.
The Short Version
For the deepest frame, the IRWIN. For a blade assortment in a wooden handle, the IVY. For a plated frame and beech grip, the Bahco. For spare blades and indexed angles, the STANLEY. For three tooth counts, the KATA. For spiral blades, the FreeStyle Spyral.


