A corner clamp holds two boards at a right angle while glue dries or while you drive screws. It frees your hands for picture frames, cabinet carcasses, drawers and boxes. The points to compare are the number of clamps, the size of the right angle squares, the material and how the jaw closes.
The six sets below run from four piece sets to a twelve piece box with three sizes. Counts, materials and weights come from each listing page and are the makers’ own claims. We have not used these clamps ourselves. Weight figures vary a lot between listings, so we flag them rather than rank on them.
As an Amazon Associate we earn from qualifying purchases. Links below are affiliate links, and they do not change the product information we give.
What to Look For
| Feature | Why it matters |
|---|---|
| Count | A box needs four corners, so four clamps is the minimum |
| Size | Larger squares hold wider boards |
| Material | Aluminum bodies are common, plastic is lighter |
| Jaw style | A swing jaw or screw handle sets the grip |
In this guide
Specs at a Glance
| Set | Count and size | Material | Listed weight |
|---|---|---|---|
| 12 pack squares | 4 at 5.5 in, 4 at 3.14 in, 4 more | Aluminum, plastic | 5.99 lb |
| 8 pack right angle | 8 clamps with toolbox | Anodized aluminum | 8 oz (looks low) |
| 4 pack 5.5 in | 4 squares, 8 fixing blocks, box | Aluminum | 1.6 oz (looks low) |
| WETOLS | 4 pieces, adjustable | Polyamide | 13.4 oz |
| AXIUM | 4 pieces, rubber handle | Aluminum alloy | 6.23 lb |
| Bates | 4 pack, adjustable swing jaw | Aluminum alloy | 6.54 lb |
The 6 Best Corner Clamps

Top pickBest for mixed jobs from small frames to boxes
1. 12 Pack Corner Clamps, 90 Degree Clamping Squares
A storage box holding twelve clamps: four at 5.5 inch, four at 3.14 inch and four of another size. The maker says the parts are CNC machined to 90 degrees. The details list aluminum and plastic at 5.99 pounds.
Suits: mixed jobs from small frames to boxes. Strengths: three sizes and a case. Weaknesses: the third size was cut off in the text we read. Skip it if you only need four.

View 12 Pack Corner Clamps for Woodworking, 90 Degree Clamping Squares on Amazon

Best for two corners at a time
2. 8 Pack 90 Degree Corner Clamps
An eight clamp set with a toolbox, made from anodized aluminum according to the maker. The listing weight is only 8 ounces for the whole set, which looks too low for eight metal clamps, so treat it with caution.
Suits: two corners at a time. Strengths: eight clamps and a box. Weaknesses: an unclear weight figure. Skip it if you want clear specs.

View 8 Pack 90 Degree Corner Clamps for Woodworking, Right Angle Clamps on Amazon

Best for small cabinet and frame work
3. 4 Pack 5.5 in 90 Degree Corner Clamps with Box
A set listed with four right angle squares of 140 mm (5.5 inch), eight fixing blocks and a toolbox. The material is aluminum. The weight is shown as 1.6 ounces, which cannot be for the full kit, so ignore it.
Suits: small cabinet and frame work. Strengths: a stated size and extra blocks. Weaknesses: a doubtful weight figure. Skip it if you need a very large capacity.

View 4 Pack 5.5″ 90 Degree Corner Clamps for Woodworking with Box on Amazon
Best for light frame work
4. WETOLS 90 Degree Corner Clamp Set, 4 Pcs
Four adjustable clamps made of polyamide, weighing 13.4 ounces in total on the details table. The maker describes quick, accurate 90 degree alignment of boards and frames and sells it in a gift box.
Suits: light frame work. Strengths: the lightest plausible set. Weaknesses: plastic rather than metal. Skip it if you want metal bodies.
View WETOLS 90 Degree Corner Clamp Set, 4 Pcs Adjustable Clamps for Woodworking on Amazon
Best for general box and cabinet work
5. AXIUM Corner Clamps, 4 Pcs
Four right angle clamps with adjustable jaws and rotating nuts, made of aluminum alloy that the maker says resists wear, rust and moisture. A non-slip rubber handle is said to give a comfortable grip. The listing weight is 6.23 pounds.
Suits: general box and cabinet work. Strengths: a rubber handle and metal body. Weaknesses: heavier than the plastic set. Skip it if you want a light kit.
View AXIUM Corner Clamps for Woodworking 90 Degree Right Angle Clamp 4PCS on Amazon

Best for cabinets and frames
6. Bates Corner Clamps, 4 Pack
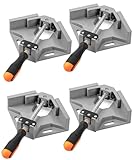
A four pack with an adjustable swing jaw and an aluminum alloy frame the maker calls high strength and rust resistant. It is described for cabinetry, framing and box work, with a listed weight of 6.54 pounds.
Suits: cabinets and frames. Strengths: a swing jaw. Weaknesses: the weight differs from the similar AXIUM set. Skip it if you want a case.
Care and Setup
- Check each corner with a square after tightening.
- Wipe glue from the faces before it dries.
- Do not over-tighten on soft wood.
- Store the set in its box.
Mistakes to Avoid
- Buying one clamp when a box needs four.
- Trusting a weight figure that looks too low.
- Using plastic clamps where you need a firm grip.
- Forgetting the clamps do not hold the glue joint square on their own.
Matching Clamp Size to Your Projects
Corner clamps are rated by how large a board they can hold, and the right size depends on what you build. A small square with a short throat suits picture frames, thin trim and small boxes. Larger squares with a deeper reach are needed for cabinet carcasses, drawer boxes and panels cut from thicker stock. Before buying, measure the widest and thickest boards you normally join and compare that with the capacity written on the listing, not just the headline size of the square.
Check how thick a board the jaw can open to. A clamp that fits 3/4 inch stock will not close on a thick leg or a stacked joint. Also look at the length of the arms. Short arms may hold a corner but give little support along the board, so a long piece can still twist. If you work with a mix of thicknesses, a multi-size set is usually more useful than four identical clamps, and a box of mixed sizes lets you swap the right one into each corner.
Remember too that a clamp holds the corner square, but it does not exert much pressure across the glue line. For wide panels and long joints you will still need bar or pipe clamps to pull the joint tight. Think of corner clamps as alignment tools that hold parts in position while other clamps or fasteners do the pressing. Counting how many you need in a single glue-up, rather than how many the set contains, avoids frustration on bigger projects.
Aluminum, Plastic and Cast Bodies Compared
The body material affects stiffness, weight and how long a clamp stays square. Aluminum bodies are common because they are light, rigid and resist rust. Cast or heavier alloy bodies are stiffer still and can take more tightening force, but they weigh more and cost more to ship. Plastic or polyamide bodies are the lightest and gentlest on delicate surfaces, but they flex more under pressure, which can let a joint drift out of square on heavier work.
The surface that touches your workpiece also matters. Smooth, flat faces help keep the board lying flat, while rough or burred edges can scratch softer wood. Some clamps include pads or rubber coatings to protect the work. If you glue up finished wood or veneered panels, look for protective faces or place scrap between the clamp and the work.
Weight figures on listings are not always reliable, as this post notes. A set that claims an implausibly low weight for the material may have a typing error, so do not use that number to decide. Instead, read the description for the material, the thickness of the metal and any machining claims. Where a claim cannot be verified, look at customer photos and questions on the listing, and confirm the details with the seller if accuracy matters to you. A plastic set can be a sensible choice for light frame work and craft projects, while metal bodies are a better match for furniture and cabinet joinery.
Screw Handle Versus Swing Jaw Designs
Most corner clamps close with a screw, but how that screw works varies. A simple threaded spindle with a handle gives fine control over pressure and is easy to understand. Rotating nuts or ratcheting mechanisms can speed up setup when you have many corners to hold. A swing jaw design allows the clamp to adapt to different board thicknesses without removing the screw entirely, which is convenient for work where thickness changes from joint to joint.
Think about how the clamp will be used in a real glue-up. With glue on your hands and a limited open time, you want clamps that go on quickly and hold reliably. Handles that are large enough to grip, and threads that turn smoothly without sticking, make a difference. Rubber grips can help, but check that they will not trap glue and become sticky.
Look at how the screw presses the work. A pad that swivels is more forgiving on boards that are not perfectly square, while a fixed pad can mark the wood if over-tightened. Make sure the screw tip does not dig into the face of the board. Another detail is whether the clamp can be positioned with one hand while you hold the second board in place. This is more important than it seems when you work alone. For repeat projects, choose a design that you find comfortable, not simply the one with the most features.
Using Corner Clamps for Accurate Joints
Good results start before the clamps go on. Cut both boards cleanly and check that the ends are truly square, because a clamp cannot fix a bad cut. Dry-fit the joint first, with clamps in place, to see how the parts align and whether you have enough clamps for the glue-up. Mark each joint so you can reassemble quickly once the glue is applied.
When gluing, apply the adhesive evenly and bring the parts together firmly. Seat the boards fully against both inside faces of the clamp before you tighten the screw. Tighten gradually and watch the joint, because over-tightening can squeeze out too much glue or bow thin boards. Check the corner with a reliable square after the clamp is snug, and adjust before the glue sets. Wipe away squeeze-out with a damp cloth where the adhesive allows, since dried glue on the clamp faces will leave marks on the next job.
If you are driving screws or brads through the joint, check that the clamp does not block the fastener path. Many sets have openings or clearance for this, but not all. After the glue has cured for the time listed on the bottle, remove the clamps and inspect the joint. Finally, keep the clamps clean, dry and lightly lubricated on the screw threads, and store them with the arms closed so the faces are not bent or scratched.
Choosing Corner Clamps by Capacity and Workflow
Corner clamps look interchangeable in photos, yet the wrong size or jaw style turns a simple glue-up into a wrestling match. The six sets in this guide divide by capacity, body material, jaw design and count, and each division maps to a kind of work. This section extends the buying logic so you can choose by the boxes, frames and cabinets you actually build.
Capacity is two measurements, not one
A corner clamp must accept the thickness of your stock and still leave screw travel to apply pressure. Thick cabinet sides, doubled frame stock and laminated legs consume capacity quickly. Measure your thickest typical corner, including any cauls or protective pads you use, and choose a clamp that swallows it with room to spare. Also consider throat geometry: some clamps hold small trim beautifully but cannot reach around wider stock, while large clamps feel clumsy and tippy on small frames. Matching clamp scale to project scale is the single biggest comfort factor in this category.
Count is a workflow decision
A box has four corners, and a frame has four corners, so sets are sold in fours for a reason. A single four-pack handles one assembly at a time. Two sets let you clamp a box and its lid, run two frames in parallel, or hold all corners while a second set of hands adds bar clamps. The twelve-pack and eight-pack options in this guide suit batch builders and teachers; the four-packs suit focused work. Buy the count your bench time justifies, because idle clamps are storage, not capability.
Jaw design and alignment behavior
Fixed jaws are simple and repeatable. Swing or floating jaws accommodate slight thickness differences between the two pieces meeting at a corner, which is common when one side is a panel and the other a frame member. If your stock is consistent and machined, fixed jaws are predictable. If your work mixes materials and thicknesses, a forgiving jaw prevents the clamp from forcing a step into the joint.
Each Pick at Work: Six Sets on the Bench
12 Pack Corner Clamps, 90 Degree Clamping Squares
Volume is the purpose. Twelve clamps suit a class, a batch production run of boxes or frames, or a shop that clamps several assemblies in rotation while glue cures. They also serve as layout and squaring aids beyond gluing, held in place to check assemblies during dry fits. If your bottleneck is waiting for clamps rather than cutting parts, this pack removes it.
8 Pack 90 Degree Corner Clamps
Eight is the two-assembly number: a cabinet box and its face frame, two picture frames, or a full box with clamps doubled at critical corners. It fits the active home workshop that builds on weekends and dislikes pausing a project for curing time. For many users this is the count where clamp availability stops shaping the schedule.
4 Pack 5.5 in 90 Degree Corner Clamps with Box
The larger stated size and the storage box define this set. It suits builders working at cabinet and furniture scale who want a dedicated home for the clamps between projects. The box matters in real shops: clamps stored together, protected and countable at a glance, get used more and lost less than clamps scattered across drawers.
WETOLS 90 Degree Corner Clamp Set, 4 Pcs
A mainstream four-piece set for the standard run of work: frames, small boxes, drawer assemblies and shelf units. It fits the DIYer who wants a recognized option with adjustable clamping for varied stock. As a first corner clamp purchase, it covers the learning phase and most early projects without specialization in any direction.
AXIUM Corner Clamps, 4 Pcs
Another focused four-pack, suited to users who compare on build feel and jaw behavior for their typical stock. It fits frame and box work where the pieces are consistent and the clamp’s job is alignment first and pressure second. Users assembling many similar items, such as a set of matching frames, will appreciate a set whose behavior is identical from clamp to clamp.
Bates Corner Clamps, 4 Pack
Bates positions its pack for everyday woodworking reliability, and it suits the home workshop that wants a straightforward set for cabinets, frames and repairs. It is the kind of purchase that disappears into the workflow, which is praise for a clamp: present when needed, unremarkable in use, and stored without ceremony.
Head-to-Head: The Choices Buyers Wrestle With
Twelve-pack versus two four-packs
On paper the count differs by four; in practice the question is simultaneity. If you ever clamp two assemblies at once, or teach and share tools, the larger pack pays for itself in unbottlenecked afternoons. If you build one piece at a time and store tools in limited space, two matched four-packs bought as needed keep the drawer sane and let you upgrade quality on the second purchase with lessons from the first.
Large clamps versus standard clamps for mixed work
Large clamps can hold small work, but their bulk obscures the joint and their weight can shift light frames. Standard clamps cannot hold stock beyond their capacity at all. Mixed-work shops usually settle on standard clamps as the daily set and add one larger set only when a project proves the need, rather than living with oversized tools every day.
Corner clamps versus a band clamp for frames
They solve different halves of the frame problem. Corner clamps align each miter individually and let you inspect and adjust corners one at a time; a band clamp pressures all four corners at once but offers less per-corner control. Many framers use both: corner clamps to establish and check, band pressure to hold during cure. Choosing one is reasonable for occasional frames; frequent frame work justifies the pair.
First Assembly: Setting Up for a Square Box
Begin with a dry assembly on a flat surface, because a corner clamp cannot correct a twisted carcass and will faithfully hold your errors square-looking until the glue sets. Wear eye protection when trimming or drilling near clamps, keep the work clamped before reaching across it, and protect finished faces with thin pads or tape where clamp faces will bear. Fit one corner clamp loosely, then the opposite corner, checking as you go; working diagonally keeps the assembly balanced instead of chasing errors around the box.
Measure both diagonals across the top opening once all four clamps are snug. Equal measurements mean square. If they differ, loosen slightly and nudge the long diagonal’s corners inward, then re-snug and re-measure; small corrections early are effortless, while corrections after full pressure are a fight. Add bar or band pressure only after alignment is right, since corner clamps align and other clamps squeeze. When the dry run passes, repeat the same order with glue, without improvising a new sequence under time pressure. After the cure time on the glue bottle, remove clamps in reverse order and inspect each joint before moving the piece. That measured routine is the difference between a box that accepts a lid and one that almost does.
Troubleshooting in Diagnostic Order
When a corner assembly disappoints, check causes in this order. First, the parts themselves: unequal lengths and out-of-square cuts guarantee a bad assembly no matter the clamping, so verify parts before glue in the future and measure them now. Second, surface flatness: a twisted bench or table prints twist into the box, and clamping on a known-flat surface removes a whole class of errors. Third, clamp seating: a clamp not fully seated on both faces tilts the corner it was meant to square, so reseat and confirm contact. Fourth, tightening sequence and balance: fully tightening one corner first drags the assembly, while gradual, diagonal tightening preserves alignment. Fifth, glue behavior: excess squeeze-out under a clamp face can act as a shim, and starved joints from over-pressure will look fine until they fail. Sixth, clamp condition: bent arms, worn threads and damaged faces repeat the same error on every project, and a clamp that cannot hold square should be retired from alignment duty. This order moves from free checks to tool replacement, which is the order your budget prefers.
Storage, Pairing and Growing the System
Store corner clamps closed, clean and dry, with threads wiped and a trace of lubricant where the maker allows, so the next setup starts smoothly. Keep a set together in its box or on a dedicated shelf; a missing fourth clamp discovered mid-glue-up is a small disaster with a long memory. Pair corner clamps thoughtfully with the rest of your kit: bar clamps for pressure, a band clamp for whole-perimeter work, squares for verification rather than force, and cauls to distribute pressure on wide panels. Add clamps when a project proves the shortage, in matched sets so behavior stays predictable. Over a few seasons that evidence-based growth produces a clamping wall that fits your work exactly, instead of a collection bought on speculation.
Project Scenarios: Corner Clamps in Real Builds
A set of matching picture frames
Matching frames are a study in repetition: same stock, same miters, same clamping, four or eight times over. Corner clamps let you set each miter deliberately and inspect the face joint before committing pressure, which is where frame quality is actually decided. Builders doing a gallery set will feel the difference between a four-pack, which serializes the work, and the eight or twelve packs in this guide, which let frames cure in parallel while you cut the next set of rails.
A cabinet box that must accept doors and drawers
A cabinet box out of square by a small amount becomes doors that bind and drawers that rack, so corner clamping here is not about the box; it is about everything that must fit it later. Clamp the corners, measure diagonals twice, and add panel or bar pressure only after the corners read true. The larger four-pack with storage box and the WETOLS and AXIUM sets all serve this scale of work, and the right choice is the one whose capacity swallows your cabinet sides with travel to spare.
Small boxes, trays and drawer assemblies
Small work punishes oversized clamps: they obscure the joint, outweigh the parts and shift light assemblies when tightened. Standard corner clamps in a four-pack are the right scale, used with a light touch and an eye on the inside corner where squeeze-out hides. This is also the scenario where corner clamps double as assembly stands, holding parts upright while your hands reach for glue and brush.
Welding and metal assembly support
Used within their material limits and kept clear of heat and spatter, sturdy corner clamps can hold light metal frames square for layout and tack work, a role several owners discover by accident. Protect the clamp faces, keep them out of the weld zone itself, and treat this as a bonus use of a woodworking clamp rather than a reason to buy one, because purpose-built welding squares exist for sustained metal work.
Decision Guide by User Type
The batch builder and teacher should buy count first, pointing to the twelve and eight packs, because their constraint is assemblies waiting on clamps. The cabinet and furniture builder should buy capacity and consistency, pointing to the larger boxed four-pack or a mainstream set whose behavior is identical clamp to clamp. The occasional DIYer should buy the straightforward four-pack and spend the difference on a good square, because verification improves their results more than clamp sophistication will. The small-box and frame maker should buy scale-appropriate standard clamps and resist the bigger-is-better instinct that makes fine work clumsy. In every case, buy the second set only after a project has waited on the first; that wait is the market research.
Ownership Habits: Keeping Corners True
Verify your clamps occasionally against a square you trust: close each clamp on a known-square test corner and check its faces. A clamp dropped on concrete can bend subtly and then teach every project its error. Mark any clamp that fails verification and demote it to rough holding duty where alignment does not matter. Keep faces clean of dried glue, which acts as a shim and tilts the work, and store sets together so a glue-up never begins with a search. These small habits protect the only thing a corner clamp sells, which is trust that the corner it holds is the corner you measured.
Technique Notes: Reading a Corner Before You Clamp It
A corner tells you its problems before glue if you know how to look. Sight along both faces for twist, check the mating parts for equal length with a direct comparison rather than a tape, and dry-close the joint by hand to feel whether it rocks, gaps at the heel, or closes with a spring that clamping will have to fight. Parts that close willingly by hand clamp beautifully; parts that fight by hand will fight harder under a clamp, and the time to fix them is while the tools are still cutting tools, not clamping tools.
Protecting faces and managing glue at the corner
Corner clamp faces concentrate force on small areas, exactly where finished work shows dents. Thin pads of cork, leather, or scrap veneer between clamp and work cost seconds and save refinishing. Glue squeeze-out collects in the inside corner where the clamp body blocks your cloth, so mask the inside corner with tape before glue, or plan to reach it with a straw or a sharpened stick while the glue is still soft. A corner assembled clean needs no heroic cleanup, and cleanup is where many otherwise good joints get damaged.
From one box to a system of work
Once a builder has clamped a few boxes, patterns emerge worth systematizing: a standard order of clamp placement, a diagonal check at a fixed stage, a favorite pad material kept with the clamps. Write your order on the inside of the clamp box lid if it helps; the point is that repeatability, not talent, produces square work on tired evenings. Shops that build to sell treat this routine as part of the product, because a carcass that starts square makes every later step, from fitting backs to hanging doors, measurably easier.
Materials Notes: Stock, Glue and the Corner Itself
When the parts are not perfectly equal
Real projects contain a rail a hair thicker than its mate and a panel sanded a touch more on one face. Corner clamps with some forgiveness in the jaw handle these gracefully, while rigid clamps can force a visible step at the face. During the dry fit, note which corners carry a mismatch and decide whether the step belongs on the hidden face; orienting parts deliberately is a finishing skill that costs nothing. Where a mismatch is structural rather than cosmetic, fix the part, because clamping pressure spent hiding a bad part is pressure the joint needed for itself.
Glue behavior at a miter versus a butt corner
Mitered corners drink glue into end grain and can starve quietly, so many framers size the miter faces with a thin first coat before the real glue-up. Butt corners in boxes are more forgiving but show squeeze-out inside the box where it is hardest to clean. Adjust glue quantity by joint type rather than by habit, mask the vulnerable inside faces, and your corners will come out of the clamps needing inspection rather than rescue.
Skill Progression: The Square Habit
Make diagonal measurement a reflex performed at three fixed moments: dry fit, light pressure, and full pressure. Builders who measure only at the end discover errors at the moment they are most expensive. Over a season of projects, that reflex teaches you your own tendencies, such as always over-tightening the first corner, and self-knowledge of that kind is the least purchasable tool in the shop. Pair the habit with one trusted square reserved for verification and never used as a clamp or a scraper, and your measurement standard stays honest while everything around it works for a living.
Corner Clamp FAQ
How many corner clamps do I need?
Four for a box or frame, one per corner. Eight lets you work two corners of each joint.
Which set has the most clamps?
The 12 pack lists twelve. The 8 pack lists eight and the others list four.
Can corner clamps hold a joint on their own while glue dries?
They hold the corner square, but they do not apply much pressure across the glue line. For stronger joints, combine them with bar clamps, band clamps or fasteners. Use the corner clamps for alignment and the other clamps for pressure.
Are plastic corner clamps strong enough for furniture?
Plastic or polyamide clamps are fine for light frame and craft work but may flex under heavy pressure. Metal bodies are a better fit for cabinets and furniture. Match the clamp material to the force your project needs.
What size corner clamp do I need for cabinet boxes?
Choose a clamp whose jaw opening and arm length suit the thickness and width of your panels. Check the capacity on the listing, not just the nominal size of the square. When in doubt, pick a larger size.
Do I need clamps with a swing jaw?
Not necessarily. A swing jaw is convenient when board thickness changes between joints, but a standard screw design works well if your stock is a consistent thickness. Choose based on your usual work.
How do I stop glue from sticking to the clamps?
Wipe off squeeze-out while it is still wet, and place wax paper or tape on contact surfaces if needed. Clean dried glue from the faces before storing the clamps, so it does not mark the next project.
Can I use corner clamps for picture frames?
Yes, they are well suited to frame corners. Use a small set with gentle pressure to avoid crushing thin molding, and check each corner for square before the glue sets.
How should I store corner clamps?
Keep them dry, with the arms closed and the screws lightly oiled. A case or box protects the faces from scratches and keeps the set together.
Clamping Pressure, Glue and Joint Types
Corner clamps are often over-tightened because the screw handle gives so much leverage. Too much pressure squeezes nearly all the glue out of a joint, which can leave a starved bond that looks tight but is weaker than one with a thin, continuous film. The goal is firm contact and square alignment, with a small bead of glue appearing along the joint line. If glue is running out in streams, back the handle off a little.
Different joints respond differently to the same clamp. A mitered corner has angled faces that tend to slide against each other as pressure builds, so it helps to snug the clamp lightly, check the alignment and then tighten the last quarter turn. Butt joints, where one board ends against the face or edge of another, want pressure on both sides to keep the end grain flush. Box joints, dados and rabbets are more self-aligning, so the clamp is mainly keeping them seated.
- Dry-fit every corner before applying glue and note where clamps will go.
- Use cauls or scrap blocks under the jaws if the stock is soft, so the screw pad does not leave dents.
- Wipe squeeze-out before it skins over, since cured glue can resist stain and finish.
- Leave the clamp in place for the glue maker’s stated clamp time, not just until it feels firm.
Pairing Corner Clamps With Other Clamps
A corner clamp holds two pieces at ninety degrees at one spot. It does not pull a long board tight against its neighbor, and it does little for a joint that is bowed along its length. For frames and boxes with long sides, add bar clamps, pipe clamps or a band clamp across the assembly to bring the parts together. The corner clamps then serve as alignment fixtures while the other clamps supply the closing force.
Spring clamps and quick-grip clamps can hold small stock to the corner clamp’s jaws. For thin or delicate material such as picture frame moldings, light pressure from several points is often better than heavy pressure from one. If you are only doing occasional jobs, a four-piece set often covers a small frame or a box. Larger casework tends to call for more clamps and some extra squares.
Beyond Furniture: Frames, Planters, Shelves and Metal
These tools are not limited to cabinetry. Picture frames, planter boxes, shop shelves, drawers, toy chests and small enclosures all benefit from having both hands free while the corner is held square. Outdoor builders use them to hold cedar or pressure-treated corners while pocket screws or deck screws go in. Because the clamp holds the geometry, you can drive fasteners without the boards creeping.
Some people also use corner clamps to tack-weld or braze small metal frames. Be cautious here. Plastic and some thin aluminum bodies can melt, warp or conduct heat to the user’s hand, and spatter can pit the screw threads. If welding is a use you have in mind, look for a clamp that is made for it and check what the maker says about heat, rather than assuming any ninety-degree clamp will do.
Checking Squareness and Correcting Problems
A corner clamp that is out of true will faithfully clamp a joint out of true, so verify squareness before and after. A combination square or framing square tells you if the corner is ninety degrees at the clamp. For a whole box or frame, measure both diagonals. If they match, the assembly is square. If one is longer, the longer diagonal is the one the frame is leaning along, and a gentle push or a slightly tightened clamp on the opposite corner can pull it back.
Gaps that appear after clamping usually come from one of three causes. The stock may not be cut square, in which case no clamp can fix it. The clamp may be seated unevenly on a bowed board, so check that both jaws sit flat. Or glue squeeze-out may be trapped under a pad, so wipe the faces first. For repeat builds, mark a reference face on each piece so every clamp pad sits against the same side.
Finally, remember that cheap clamps and sets from different makers can vary in the true angle of their jaws. A quick check against a known square when the clamp is new saves a lot of grief on the first project. If a corner clamp is off by a small amount, it can still serve for rough tacking and alignment, but keep it away from final glue-ups that need precise fit.
Storing and Maintaining Clamps Between Projects
Corner clamps spend most of their life on a shelf, so a little habit pays off. Wipe off dried glue with a damp rag while it is still soft, and scrape cured glue from jaw faces with a plastic scraper rather than a steel tool that can scar the surface. Put a drop of light machine oil on the screw threads of metal clamps now and then, and wipe away the excess so it does not stain wood. Store the clamps in a bin or hang them by the handle so the jaws are not bent under other tools. Check for cracks in plastic bodies before each big glue-up.
Frequently Asked Questions
How tight should I turn corner clamps?
Snug until the joint closes and a thin bead of glue appears, then stop. Cranking down hard can starve the joint of glue, crush soft wood under the pad and bow the stock. If the board starts to flex or the pad leaves a dent, you have gone too far. Use a scrap block if needed.
Can corner clamps hold a three-way corner, like a box with a top?
Most ninety-degree clamps are designed for two pieces meeting at a flat corner. Some designs include a three-way or box corner option, but many do not. For a three-way joint, use one clamp for the first two faces and bar or band clamps for the third, or check that a clamp lists three-way capacity.
How can I tell if my box is square after clamping?
Measure the diagonals from corner to opposite corner. If the two measurements match, the box is square. If they differ, the longer diagonal shows the direction the box is racked. Adjust clamp pressure or lightly tap the frame, then recheck before the glue sets. A framing square helps at each corner.
Are corner clamps useful for welding or brazing?
Only if the clamp is made for it. Plastic bodies can melt, and thin aluminum can warp or get hot. Spatter can also damage threads. If you want to hold metal at ninety degrees for tacking, look for clamps with steel or cast bodies and check the manufacturer’s notes about heat use.
The Short Version
For the most clamps, the 12 pack. For eight with a box, the 8 pack. For stated 5.5 inch squares, the 4 pack. For light plastic, the WETOLS. For a rubber handle, the AXIUM. For a swing jaw, the Bates.


