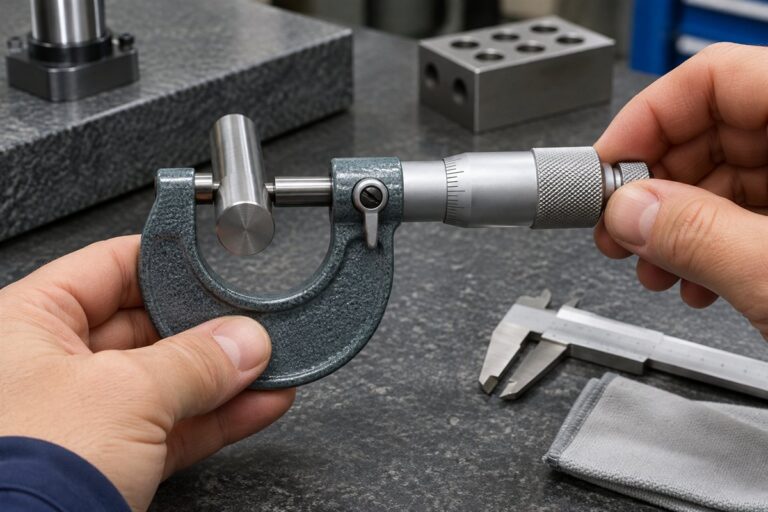
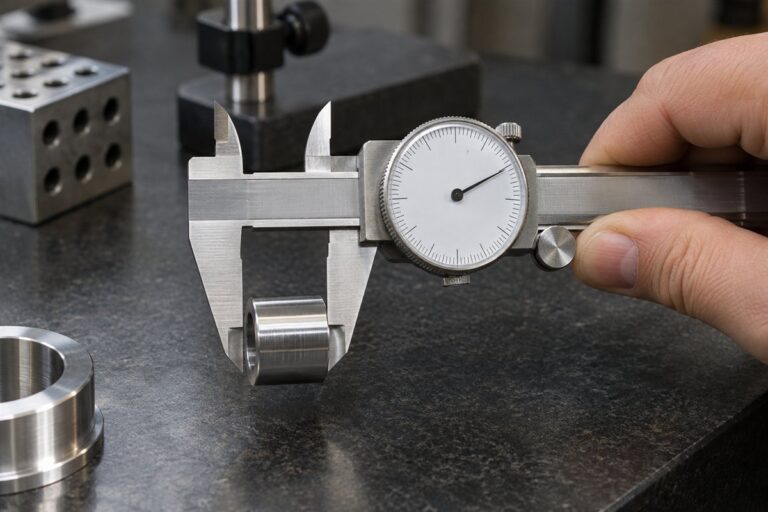
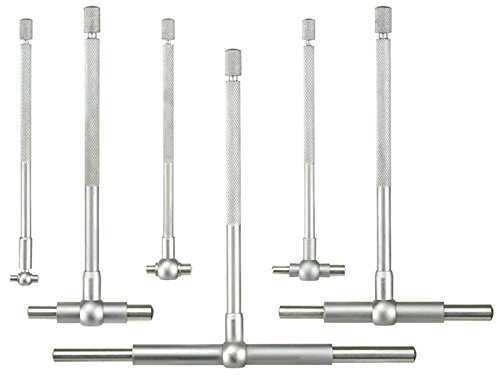
A telescoping bore gauge is a T-shaped tool with spring-loaded plungers. You place it in a hole, let the plungers expand to the wall, lock them, remove the gauge and then measure the locked span with a micrometer. The main choices are the size range, how many gauges are in the set, the handle length and the case.
The six sets below mostly cover 5/16 to 6 inches in six steps, with one metric Mitutoyo set and one listing that mixes up its own sizes. Ranges, materials and accuracy figures come from each listing page and are the makers’ own claims. We have not used these gauges ourselves. A telescoping gauge does not show a number by itself, so plan to pair it with a micrometer.
As an Amazon Associate we earn from qualifying purchases. Links below are affiliate links, and they do not change the product information we give.
What to Look For
| Feature | Why it matters |
|---|---|
| Size range | Each gauge covers a narrow band, so a set needs several |
| Handle length | A longer handle reaches deeper holes |
| Tip surface | Hardened or ground contact points hold their shape |
| Lock | A knurled lock holds the span until you measure it |
| Case | A pouch or case keeps six gauges together |
In this guide
Specs at a Glance
| Set | Range | Pieces | Notes |
|---|---|---|---|
| Ciltlurk | 5/16 to 6 in | 6 | Chrome-plated hardened steel; pouch; 10.8 oz |
| Mitutoyo 155-903 | 5/16 to 6 in | 6 | Hardened faces; knurled clamp; plastic pouch |
| QWORK CA30984 | 5/16 to 6 in (also 1/8 to 1/2 in in text) | 6 (text also says 4) | Material wording differs between fields |
| Fowler 52-470-007-0 | 5/16 to 6 in | Set; 12 in depth | Hardened ground tips; vinyl case |
| Dasqua 5911-0012 | 5/16 to 6 in (type line says 4 in) | 6 | TiN coated; self-centering; case |
| Mitutoyo 155-905 | 8 to 150 mm | 6 | Metric steps; knurled clamp; 8.5 oz |
The 6 Best Telescoping Bore Gauges
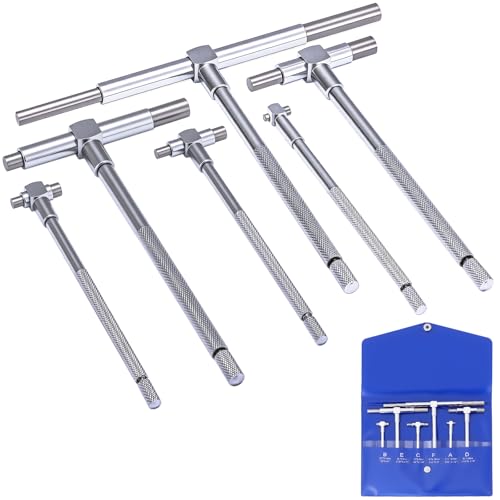
Top pickBest for engine and pipe-fitting bores
1. Ciltlurk 6-Piece T Bore Gauge Set, 5/16 to 6 in
Six T gauges from 5/16 to 6 inches in a pouch. The maker lists polished rods with balanced spring tension, a dual-pivot self-centering design and chrome-plated hardened steel that it says wears three times longer than carbon steel. The four-step method is insert, rotate, lock and read. The package weighs 10.8 ounces.
Suits: engine and pipe-fitting bores. Strengths: six sizes and a pouch. Weaknesses: the wear claim is the maker’s own. Skip it if you want a name brand.

Best for shop work with a name brand
2. Mitutoyo 155-903 Telescoping Gage Set
A six-piece set covering 5/16 to 6 inches with hardened measuring faces, a satin chrome finish, a knurled handle clamp and a fitted plastic pouch. The listing says it is made for small holes and narrow grooves. The table shows a battery line and a 0.0001 inch accuracy, which do not apply to a hand tool that you read with a micrometer.
Suits: shop work with a name brand. Strengths: six sizes in a pouch. Weaknesses: confusing table lines. Skip it if you need a hard case.
View Mitutoyo 155-903, 5/16″ to 6″, 6 piece Telescoping Gage Set on Amazon

Best for a cost-conscious buyer who will check the contents
3. QWORK Telescoping Bore Gauge Set CA30984
A listing that calls itself a six-piece 5/16 to 6 inch set, then also mentions 4 gauges for holes of 1/8 to 1/2 inch. The table says stainless steel, while a bullet says carbon steel with chrome plating. The maker lists a knurled lock knob, a range of 8 to 150 mm and plus or minus 0.0001 inch, which a gauge cannot show by itself. Check what arrives against the six sizes.
Suits: a cost-conscious buyer who will check the contents. Strengths: the wide stated range. Weaknesses: mixed text on pieces and material. Skip it if you want a clean spec list.

Best for deep bores
4. Fowler 52-470-007-0 Telescoping Gage Set, 12 in
A set with a 5/16 to 6 inch range and long handles that reach 12 inches deep. The maker lists hardened, precision-ground tool steel contact points, a double action rigid handle with self-centering, constant spring tension and a fitted vinyl case. The package weighs one pound.
Suits: deep bores. Strengths: a 12 inch reach and a case. Weaknesses: the piece count is not stated in the title. Skip it if your holes are shallow.

View Fowler 52-470-007-0 Telescoping Gage Set, 12″ Size on Amazon

Best for a coated set for shop use
5. Dasqua 5911-0012 TiN Coated Telescoping Gage Set
A six-piece set with a TiN coating and a satin chrome finish, listed as 5/16 to 6 inches. The Item Type line instead says 8-100 mm and 5/16 to 4 inch, so the true top size is unclear. The maker lists a rigid self-centering handle, constant spring tension, contact ends hardened and ground to the radius of the smallest hole, and a fitted case.
Suits: a coated set for shop use. Strengths: self-centering handle and case. Weaknesses: conflicting top size. Skip it if you need a certain 6 inch gauge.

View Dasqua 5911-0012 6 Piece TiN Coated 5/16 to 6″ Telescoping Gage Set on Amazon

Best for metric work
6. Mitutoyo 155-905 Telescoping Gage Set, 8-150mm
A six-piece metric set covering 8 to 150 mm in steps: 8 to 12 mm, 12.7 to 19 mm, 19 to 32 mm, 32 to 54 mm, 54 to 90 mm and 90 to 150 mm. The maker lists spring-loaded plungers and a knurled clamp that holds the span for transfer to a micrometer. One bullet has a typo in the first size. The package weighs 8.5 ounces.
Suits: metric work. Strengths: clearly listed steps. Weaknesses: no inch markings stated. Skip it if your drawings are in inches.

View Mitutoyo 155-905 6 Piece 8-150mm Telescoping Gage Set on Amazon
Care and Setup
- Wipe each gauge with a light oil film before it goes in the case.
- Pick the gauge whose band covers the hole, with the handle square to the bore.
- Rock the handle to find the widest span, then lock and remove it.
- Measure the locked span with a micrometer and write down the result.
Mistakes to Avoid
- Expecting the gauge to show a number by itself.
- Locking the gauge before it sits square in the bore.
- Measuring the locked span with a caliper when you need finer detail.
- Believing a listing that shows two different sets of sizes.
When a Telescoping Gauge Is the Right Tool
A telescoping gauge is a transfer tool: it captures the width of a hole and lets you read that width afterward with a micrometer. That makes it well suited to a particular set of jobs. It is a common way to check bores that are too small or too deep to reach with a standard caliper, such as engine cylinders, bearing seats, bushings, pipe fittings and grooves. Because you can lock the span and carry the gauge to a bench, it also lets you measure inside diameters without a dedicated dial bore gauge.
It is not the only choice. A dial bore gauge gives a direct reading and is faster for repeated work but costs more and covers a narrower range per head. An inside micrometer or small hole gauge may suit very small or very large dimensions. A caliper can measure many holes quickly, though its inside jaws are not intended for fine-tolerance bores. For hobby machining, engine rebuilding or repair tasks that need an inside diameter to a few thousandths of an inch, a set of telescoping gauges paired with a micrometer is a classic and economical approach.
The result is only as accurate as the micrometer and the technique. The gauge does not show a number itself, as the post notes, so budget for a good outside micrometer or confirm you already own one. If you rarely measure bores and only need a rough check, a simpler method may do. If you measure tight-tolerance holes often, think about whether a dial bore gauge would suit your workflow better, and buy for the tolerance you actually need.
Choosing Sizes and Set Coverage
Each telescoping gauge covers a limited band of hole sizes, so a set includes several gauges to span a larger range. The six-gauge sets here, covering about 5/16 to 6 inches, step through ranges so that each gauge handles part of that span. The key is to pick the gauge whose range includes the hole you are measuring, ideally toward the middle of its travel, because the plungers work best when they are neither almost closed nor fully extended. A gauge at the end of its range may have less spring force and less stability.
Think about the sizes you actually measure. Automotive and small engine work often falls in the common mid-range of the set. Very small holes below the lowest range need small hole gauges instead, while holes larger than the top range need other tools. If you work in metric, a set with metric steps, like the one listed from 8 to 150 millimeters, saves converting units. Do not assume a set can be used for both inch and metric work simply by converting the numbers, but remember that the tool itself only holds a span, so the units come from the micrometer you use to read it.
Check how many gauges you really need. A full set is convenient, but if you only measure a narrow range, a partial set can cost less. On the other hand, buying a complete set means you will not be caught without the right size.
Also look at the handle length. A longer handle reaches deeper bores, and a short handle gives better control in shallow ones. The listing should state this, and if it does not, consider asking.
Build Quality, Contact Faces and the Locking Mechanism
The parts that touch the bore matter most. The contact faces on the plungers should be hardened and smooth, and ideally ground with a radius suited to small holes, so they sit in the bore without digging in or slipping. Listings above mention hardened or ground faces, chrome plating or a titanium nitride coating. These finishes can improve wear resistance, but they are the maker’s claims, and the real test is how the tool behaves in use. Coatings do not make a gauge more accurate; they mostly protect the surface.
The spring tension should be even and firm enough to hold the plungers against the wall without forcing them. When you move the handle, the plungers should slide smoothly and return without catching. Sticky or uneven action makes it hard to find the true diameter.
The lock is the part you use every time. A knurled knob at the end of the handle should tighten firmly with a light twist and hold the span while you remove the gauge. If it slips or feels gritty, readings will vary. Check that the handle is rigid and does not flex, because a bent handle will not sit square in the bore.
A case or pouch keeps the gauges together and protects the faces. A rigid case offers more protection in a toolbox, while a soft pouch is lighter and easier to carry. When you compare listings, look for consistent descriptions of materials and sizes. If a listing contradicts itself, as some do, treat the stated details with caution and be ready to inspect the set on arrival.
Measuring Technique and Common Errors
Good results come from method. Select the gauge whose range includes the hole, and loosen the lock so the plungers can extend. Insert the gauge at a slight angle so the plungers expand to the bore wall, then tilt the handle upright and gently lock the knob. The key step is rocking the gauge: move the handle back and forth through the axis of the hole, and the plungers will find the widest point across the diameter. You should feel the plungers settle at the maximum, because that is the true diameter. Lock the gauge at that point, being careful not to disturb it.
Carefully withdraw the gauge, keeping the lock tight, and measure across the plunger faces with an outside micrometer. Use the micrometer’s ratchet or friction thimble for steady pressure, and take the reading the same way each time. Repeat the process several times and in different positions along the bore and at different angles, to check for taper or out-of-round conditions.
Common errors to avoid:
- Locking the gauge before it is square in the bore, which gives a reading that is too small.
- Applying uneven force to the micrometer, which changes the measured value.
- Measuring dirty or oily bores, which causes inconsistent readings.
- Reading a gauge that has been warmed by your hand, since temperature changes dimensions slightly.
- Using a caliper instead of a micrometer to check the locked span when fine accuracy matters.
Practice on a known-size ring gauge or a bore you have already measured, so you can see how repeatable your technique is before you work on real parts.
Care, Storage and Calibration Habits
Telescoping gauges are simple tools, and a few habits keep them accurate. Wipe each gauge clean after use to remove oil, dust and metal particles, then apply a thin film of light oil on the metal parts before storing. Keep the plungers free to move, and check that the lock still holds firmly. Do not drop the gauges or let them rattle loosely against other tools, as the faces can chip.
Store the set in its case or pouch, in a dry place away from moisture. Rust on a face or a pitted contact can change how the gauge sits in the bore. If a plunger sticks, clean it according to the maker’s guidance rather than forcing it.
Remember that the gauge itself needs no calibration in the usual sense, because the micrometer provides the measurement. What does need attention is the micrometer: check it against a standard gauge block or the setting standard that came with it, and look for wear on its faces. If you notice inconsistent readings from a gauge, test it by measuring a known ring or a gauge block bore, and check the lock and plungers for looseness.
Replace a gauge if the faces are worn flat, the plungers no longer return smoothly, the lock cannot hold or the handle is bent. Because the tool is simple, a worn set can usually be replaced for less than the cost of a precision instrument, so keep it in good order and replace it when it begins to give inconsistent results.
Which telescoping bore gauge set should you buy?
The best telescoping bore gauge set is the one that covers the holes you measure, in the units you use, with listing details you can trust. Match your work to the sets below.
- Ciltlurk 6-Piece T Bore Gauge Set: a plain six-size pouch set for engine and pipe-fitting bores when brand name matters less than coverage.
- Mitutoyo 155-903: a name-brand inch set with hardened faces and a knurled clamp, a sensible pick for regular shop work.
- QWORK CA30984: for a cost-conscious buyer who is willing to check the contents against the six sizes on arrival.
- Fowler 52-470-007-0: choose it for deep bores, since the listing mentions long handles and a vinyl case.
- Dasqua 5911-0012: a TiN coated set with a self-centering handle, best once you have confirmed the top size.
- Mitutoyo 155-905: the one for metric drawings, with clearly listed millimeter steps.
If your drawings are in inches, skip the metric set. If you work in millimeters, an inch set still works because the micrometer provides the units, but metric steps match your sizes more neatly.
What to check before you buy a bore gauge, and who should skip it
Before you buy a telescoping bore gauge, confirm the size range, what is in the box and whether you already own a micrometer. This tool is not for everyone, so check the trade-offs honestly.
- Confirm the range of every gauge in the set matches the listing title and the images.
- Check the handle length if your bores are deep.
- Look at whether the set comes in a pouch or a rigid case.
- Read material descriptions and treat contradictions as a reason to inspect the set on arrival.
- Confirm you have an outside micrometer that covers the sizes you will read.
- Check the warranty and return terms on the listing.
The main downside is that the gauge never shows a number on its own, so the quality of your reading depends on your micrometer and your technique. The sets also take practice to use consistently. A name-brand set may cost more than an unbranded one, and whether that is worth it depends on how often you measure.
You can skip a telescoping set if you only measure one or two holes, if you need quick repeat checks that a dial bore gauge handles better, or if your tolerances are loose enough for a caliper.
Compare the picks above, check the current listing for size and what is included, then choose the one that fits how you will use it.
Going Deeper: How Bore Size, Depth and Tolerance Should Drive Your Choice
A telescoping gauge never reads a size by itself. It captures a distance between two spring-loaded plungers and hands that distance to an outside micrometer, so the real buying question is not which set looks most complete but which set matches the bores you actually open up, the depths you reach into, and the tolerance band you have to prove. Start by listing the last ten bores you measured. Most home machinists and engine builders find that the great majority sit in a narrow band, with only occasional excursions to very small or very large diameters. A set that covers your everyday band with several overlapping gauges is more useful than a set that spreads the same number of pieces thinly across a range you rarely touch, because overlap means you can cross-check a suspect reading with the next gauge up instead of trusting a single tool at the edge of its travel.
Depth matters just as much as diameter. A standard telescoping gauge measures near the mouth of a bore comfortably, but a worn cylinder bore, a deep bearing housing or a long bushing needs a longer handle and a head that stays stable while you rock it through the measurement plane far below the surface. If your work is mostly shallow counterbores and valve guides, handle length is a minor comfort point. If you rebuild engines, the long-reach patterns in this line-up earn their place, because a gauge that cannot reach the unworn ridge at the bottom of a cylinder cannot tell you the taper story that decides whether the block needs boring at all.
Tolerance is the third filter, and it is the one beginners most often skip. A telescoping gauge in practiced hands can repeat well enough for general fitting work, but the result always depends on feel, on the micrometer used to read it, and on how squarely the gauge sat in the bore. If your drawings call for press fits and bearing seats, plan your technique and your checking routine as carefully as your purchase. If your work is clearances for sliding fits, pistons and general repair, any sound set here will serve, and your money is better spent on the micrometer and on practice time than on chasing a premium badge.
Matching the set to engine work, lathe work and inspection work
Engine builders live in a world of cylinder bores, main bearing housings and connecting rod big ends. The work rewards a set with smooth plunger action, because a bore that is slightly out of round must be explored at several clock positions, and a sticky plunger smears those small differences into noise. Lathe and mill users measuring bored holes in plates and housings care more about quick, repeatable transfers and about gauges small enough for the holes left by boring bars in smaller work. Inspection-minded users, who measure parts made by someone else, care most about documentation habits: consistent technique, a micrometer they trust, and readings recorded with the gauge identified, so a disputed dimension can be re-checked the same way later. The same set can serve all three, but the feature that delights one user, such as a very long handle, can be dead weight to another.
Head-to-Head: The Picks Compared in Real Use
The two Mitutoyo sets in this line-up, the 155-903 in inch sizes and the 155-905 covering the metric range, represent the established workshop standard: carefully finished plungers, a lock that holds without shifting the setting, and a feel that experienced users describe as the reference everything else is judged against. Against them, the Ciltlurk six-piece set and the QWORK CA30984 set make the value case. They cover the popular span from small bores up to six inches in the Ciltlurk’s case, they arrive as complete sets ready to work, and for a hobby shop measuring a few bores a month they deliver the same workflow at a friendlier point in the range. The honest trade-off is in the fine feel: plunger smoothness and lock behaviour are exactly where budget sets vary most from piece to piece, so a buyer of a value set should test every gauge on day one, while returns are painless, rather than discovering a gritty plunger mid-job.
The Fowler 52-470-007-0 set answers a different question: reach. With its long pattern, it is the pick aimed at deeper bores where standard gauges run out of handle. Compare it directly with the Mitutoyo 155-903 if your work mixes both worlds. For shallow work the Fowler’s extra length is simply more tool to manage, but the first time you need a reading well down a cylinder or inside a deep housing, the standard sets cannot improvise their way to that depth, and the long set stops being a luxury. The Dasqua 5911-0012, with its TiN-coated contact faces, argues for wear resistance and smooth sliding in regular use. Coating does not make a gauge more accurate on its first day; its promise is that the contact faces resist the slow polishing and scoring that change how a gauge feels after hundreds of insertions, so a shop that measures daily may see the benefit long after a casual user would notice any difference.
A quick decision matrix you can actually use
If you measure in inches and want one set to keep for years of mixed work, the Mitutoyo 155-903 is the conservative centre of this line-up. If you measure the same work in millimetres, its 155-905 sibling is the natural counterpart rather than a conversion exercise. If budget is the binding constraint and your bores are occasional, the Ciltlurk or QWORK sets get you working now, with the day-one inspection routine described below as your safety net. If depth is your recurring problem, choose the Fowler long set first and accept its narrower everyday comfort. If your gauges see daily production use and contact-face wear is what kills your tools, the Dasqua’s coated faces speak directly to that failure mode. Notice that none of these decisions requires the largest set or the smallest; each follows from the work pattern, which is exactly how a measuring tool should be chosen.
First Use: Unboxing Checks and Your First Trustworthy Reading
Before any new set earns a place in your toolbox, run a short acceptance routine. Work each plunger through its full travel slowly. It should move smoothly with even spring pressure and return without hesitation or a gritty patch in the middle of the stroke. Work the lock at several settings: lock the gauge, then try to move the plungers with firm finger pressure. A sound lock holds; a lock that creeps will quietly change your reading between the bore and the micrometer, which is the single most frustrating fault this tool type can have. Wipe every contact face and look at the plunger ends under good light. The faces should be smooth, evenly rounded and free of burrs that would catch on a bore wall or score a finished surface.
For your first real reading, choose a bore you can verify another way: a ring gauge if you have one, a bearing bore you can also check with a micrometer-sized feature, or simply a machined hole you measure repeatedly until your results settle. Insert the gauge with the plungers compressed, let them expand against the walls, and rock the handle gently through the centre plane while the lock is still loose enough to let the gauge find the true diameter. The correct feel is a light, even drag as the gauge passes through centre, not a hard jam and not a loose rattle. Snug the lock with the gauge sitting at that centre position, withdraw it in the same plane, and read it with the micrometer using the same light ratchet feel you use for any careful measurement. Repeat the whole cycle five times on the same bore and write the readings down. A spread that shrinks as you repeat the exercise is your technique settling; a spread that stays wide points at the lock, the plunger action, or a rocking angle that changes between attempts.
Building the two-tool habit from day one
Because the gauge and the micrometer work as a pair, store them as a pair, travel with them as a pair, and think of them as one instrument in two pieces. Many users keep the micrometer that reads their telescoping gauges in the same case or drawer, reserved for that job, so its feel is familiar and its zero is checked on the same standard every time. Before a measuring session, close the micrometer on its standard, confirm zero, and only then start transferring readings. This small ritual removes an entire class of argument later, when a bore measures differently from expectation and you need to know whether the part, the gauge or the reading tool moved.
Technique Masterclass: Rocking, Clock Positions and Reading Taper
The heart of telescoping gauge technique is the rock through centre. A gauge sitting even slightly off the true diameter plane reads small, because it spans a chord instead of the diameter, or wedges and reads large if it tips and jams diagonally. The reliable method is to enter the bore with the gauge tilted, let the plungers expand, then swing the handle slowly through the vertical plane so the head passes through the true diameter position. You feel a subtle peak of resistance at centre. Lock there. With practice the movement becomes a small, controlled sweep rather than a wiggle, and your repeat readings tighten noticeably. Rushing this movement is the most common reason two operators get two different answers from the same bore with the same gauge.
One reading is a number; several readings are information. For a cylinder or any bore where wear matters, measure at several heights and at least two clock positions at each height, typically along the thrust direction and across it. Record the grid rather than averaging it away. The pattern tells the story: a bore larger at the top than the bottom has taper; a bore larger in one clock direction than the other has ovality; a bore that is consistent everywhere except one scored band has local damage. This is where a telescoping set earns its keep over a single snapshot tool, because you choose the measurement points and build the map yourself. Keep the gauge oriented consistently, mark your starting clock position with a light pencil line on the part where the job allows it, and work methodically around the grid so no position is measured twice and none is missed.
Temperature, cleanliness and the quiet error sources
Three quiet influences corrupt bore readings more often than faulty tools. The first is dirt: a single chip or a smear of honing grit on a contact face adds directly to the reading, so blow out the bore and wipe the faces before every serious measurement. The second is temperature: a part fresh from machining or from a hot wash is still moving, and a gauge and micrometer held in warm hands drift in the same direction. Let parts settle to room conditions when the tolerance matters, and handle the tools by their insulated grips where fitted. The third is burrs at the bore mouth, which catch a plunger and tilt the gauge as it enters. A light chamfer check with a fingertip before measuring costs two seconds and saves a puzzling oversize reading at the first measurement depth.
Troubleshooting in Diagnostic Order
When readings will not repeat, resist the urge to blame the set immediately and work through the causes in the order they most often occur. First, check the lock: set the gauge against a known feature, lock it, handle it as you would after withdrawing it from a bore, and re-read it. Any change isolates the lock or your locking hand. Second, check plunger action: a plunger that sticks part-way produces readings that depend on how the gauge happened to settle, so clean the gauge, work the plungers, and feel for the sticky point. Third, check your rock: have a second person watch your handle angle, or film a measurement on a phone; a surprising number of repeatability problems are visibly a rocking plane that wanders. Fourth, check the micrometer: zero it on its standard, confirm its ratchet feel, and re-read a locked gauge several times to separate reading variation from transfer variation. Only after those four checks should you suspect bore surface condition, such as a rough hone finish that lets the plungers sit differently on each insertion, which calls for more measurement points rather than a new tool.
A reading that is consistently larger than a second method gives a different diagnostic path. Suspect a diagonal jam first: the gauge entered tilted and locked across a diagonal reads the diagonal, not the diameter. Re-measure with a slower rock and a lighter lock. A reading consistently smaller than expected suggests the plungers never fully expanded, which happens when the lock is snugged before the gauge finds centre, or when spring pressure is weak on an older gauge. Readings that agree at the bore mouth but disagree deeper down usually reflect the bore itself, taper or bell-mouth wear, and the correct response is a fuller measurement grid, not a different gauge.
When the tool really is the problem
Retire or repair a gauge when the contact faces are visibly scored or flattened, when a plunger moves in steps no cleaning will cure, or when the lock slips under the light load of normal withdrawal. These faults cannot be technique-compensated, because they vary inside a single measurement. A set with one faulty piece does not condemn the rest; telescoping gauges work independently, so a single replacement piece restores the set. That modularity is one of the quiet economic strengths of this tool type compared with instruments that fail as a unit.
Care, Storage and Long-Term Confidence
Telescoping gauges ask for little care, but they ask for it consistently. After use, collapse the plungers, wipe the faces with a soft cloth, and return each gauge to its slot in the case rather than loose in a drawer where the contact faces knock against other tools. A trace of light instrument oil on the faces guards against corrosion in a damp shop; wipe it off before measuring so it cannot hold grit against the bore. Store the case away from grinding dust, which works into plunger bores and turns smooth action gritty. If a gauge does become gritty, a careful flush and re-oil usually restores it; forcing a stuck plunger does the opposite and can bend parts that were straight.
Calibration for this tool type is really verification of the system: gauge plus micrometer plus operator. There is no adjustment on the gauge itself to calibrate. Instead, build confidence on a schedule. Every few months, or before a critical job, measure a known bore or ring gauge with each piece in the set and compare against its established size. Log the results with the date. A system that reproduces known sizes on demand is a calibrated system in every way that matters for workshop work, and the log turns an argument about a dimension into a quick demonstration. Users in regulated inspection environments should follow their own quality system’s interval and documentation rules, but the underlying habit, verify against a known size before trusting unknown ones, is identical at every level.
Choosing by user: a final set of scenarios
The weekend engine builder measuring a handful of cylinders per project should buy the set whose feel they trust and spend remaining budget on a good micrometer and a ring gauge for verification; either Mitutoyo set fits this life well. The general machinist in a small job shop, measuring varied bores weekly, benefits from the same sets’ durability and from keeping the Fowler long set in mind the first time a deep housing defeats the standard handles. The learner on a tight budget should start with the Ciltlurk or QWORK set, run the day-one acceptance checks, and invest practice hours in the rock-through-centre technique; skill transfers perfectly when a premium set arrives later. The high-volume user should weigh the Dasqua’s coated faces and, whichever set they choose, adopt the verification log from the start, because at volume the question is never whether a gauge will drift or wear, but whether you will notice it before a batch of parts does.
A Worked Example: Reading a Worn Cylinder Bore From Start to Finish
Suppose a small engine block arrives with unknown history and the question is whether it can be honed and re-ringed or must be bored oversize. Begin by cleaning one cylinder thoroughly and letting the block settle to room temperature. Choose the gauge whose range centres on the nominal bore, verify the system by measuring a known size first, then build the measurement grid: three heights, top, middle and bottom of ring travel, and two clock positions at each height, aligned with and across the crankshaft axis. Record every reading in a small table rather than trusting memory. The top of ring travel usually shows the most wear, and the thrust direction usually shows more than the cross direction, so a typical worn bore reads largest near the top on the thrust axis and smallest near the bottom. The differences between your numbers, not any single number, make the decision: modest taper and ovality within the engine maker’s service limits point to a hone and rings, while larger values point to boring. Finish by re-measuring one position with the next gauge size up as a cross-check; agreement between two gauges on the same spot is strong evidence your technique, not the tooling, owns the numbers.
Telescoping Bore Gauge FAQ
What do I use to read a telescoping gauge?
An outside micrometer. The gauge only holds the span, and the micrometer reads it.
Which set reaches the deepest holes?
The Fowler lists handles that reach 12 inches. The other listings do not state handle length in the pages we read.
Do I need a micrometer with a telescoping gauge?
Yes. The gauge only holds the width of the hole, and an outside micrometer reads that width. Plan to pair the two.
How accurate is a telescoping gauge?
The result depends mainly on your technique and the micrometer. Listing claims are the maker's own, so practice on a known-size bore to see what you can repeat.
How do I find the true diameter of a hole?
Rock the handle back and forth through the axis of the hole and lock the gauge at the widest point. The plungers settle there when they span the full diameter.
Can I use a caliper instead of a micrometer to read the gauge?
A caliper can give a rough reading, but a micrometer is better for fine accuracy. Use a micrometer when tolerances are tight.
What size set do I need?
Pick a set whose ranges cover the holes you measure, ideally with each hole near the middle of a gauge's range. Check whether you work in inch or metric sizes.
How do I store the gauges?
Clean them, apply a light film of oil, and keep them in their case or pouch in a dry place. Avoid letting them knock against other tools.
When should I replace a telescoping gauge?
When the faces are worn, the plungers stick, the lock slips or the handle is bent. Inconsistent readings are also a sign.
Is a telescoping gauge better than a caliper for measuring holes?
For fine-tolerance bores it usually is, because the gauge holds the true diameter and a micrometer reads it. A caliper's inside jaws are fine for rough checks. Choose by the tolerance your job demands.
What is the difference between a telescoping gauge and a small hole gauge?
Both transfer a hole width to a micrometer, but they cover different size bands. Telescoping gauges handle larger bores, while small hole gauges suit very small holes. Check the range listed for each tool.
Do I need a full six-piece set?
Only if you measure across a wide range of sizes. A full set means you always have a gauge whose range fits the hole. If you work in a narrow band, a smaller set can be enough.
Can I measure blind holes with a telescoping gauge?
Often yes, as long as the handle is long enough and the plungers can reach the wall at the depth you need. Check the handle length on the listing. Very shallow or tapered holes can be harder to read.
Why does my gauge give different readings each time?
Common causes are locking before the gauge is square, uneven micrometer pressure, dirt in the bore and a worn lock. Rock the handle to find the widest point and repeat the reading. Practice on a bore of known size.
Should I buy inch or metric telescoping gauges?
Choose the system your drawings use, since the steps are laid out in that system. The gauge itself only holds a span, so your micrometer decides the units of the reading. Check the listing so you know which steps you are getting.
The Short Version
For a plain six-size pouch set, the Ciltlurk. For a name-brand inch set, the Mitutoyo 155-903. For a wide stated range, the QWORK, after checking the contents. For deep holes, the Fowler. For a coated set, the Dasqua. For metric steps, the Mitutoyo 155-905.