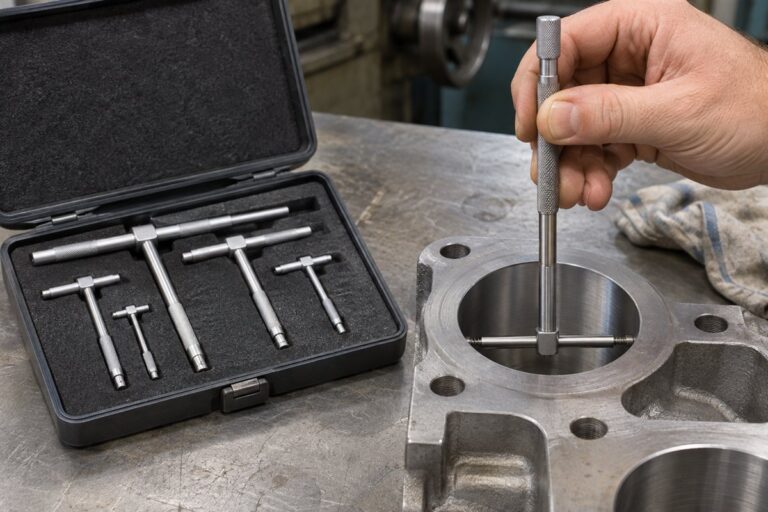
An outside micrometer measures the thickness or diameter of a part between a fixed anvil and a moving spindle. The thimble turns a fine screw, so one turn moves the spindle a tiny, known distance. The main choices are the range, the graduation, the anvil material and whether you want one tool or a set.
The six micrometers below include four 0-1 inch singles, a 0-6 inch set of six and an interchangeable anvil set. Ranges, materials and accuracy figures come from each listing page and are the makers’ own claims. We have not used these micrometers ourselves. Where a listing gives thin or conflicting data, we say so.
As an Amazon Associate we earn from qualifying purchases. Links below are affiliate links, and they do not change the product information we give.
What to Look For
| Feature | Why it matters |
|---|---|
| Range | Each frame covers one inch, so a larger part needs a larger frame or a set |
| Graduation | 0.0001 inch reads finer than 0.001 inch |
| Measuring faces | Carbide faces resist wear |
| Ratchet or friction thimble | Gives a repeatable measuring force |
| Lock | Holds a reading while you remove the tool |
In this guide
Specs at a Glance
| Micrometer | Range | Listed graduation or accuracy | Notes |
|---|---|---|---|
| HDLNKAK | 0-1 in | 0.0001 in graduation | Thin listing; 8.8 oz |
| Mitutoyo 103-177 | 0-1 in | Plus or minus 0.0001 in | Carbide faces; ratchet stop; fitted case |
| HFS digit counter | 0-1 in | 0.0001 in graduation | Mechanical counter; carbide tip; ratchet; padded case |
| Neoteck | 0-1 in | 0.0001 in resolution | Forged steel frame; ratchet stop; alloy-faced anvils |
| Fowler 52-215-006-1 | 0-6 in; 6 pieces | 0.00015 to 0.00025 in | Satin chrome; wrenches; fitted case |
| Mitutoyo 104-137 | 0-6 in; interchangeable anvils | Plus or minus 0.0005 in | Standards; carbide face; wood case |
The 6 Best Outside Micrometers

Top pickBest for light hobby checks
1. HDLNKAK Outside Micrometer, 0-1 in
A 0-1 inch outside micrometer with a listed 0.0001 inch graduation. The page has little more than general wording about a clear scale and a compact body, and it does not name the anvil material or the accuracy. The package weight is 8.8 ounces.
Suits: light hobby checks. Strengths: a fine graduation and low weight. Weaknesses: almost no technical detail. Skip it if you want a clear accuracy figure.

View HDLNKAK Outside Micrometer 0-1″, 0.0001″ Graduation Micrometer Set on Amazon

Best for general machine work
2. Mitutoyo 103-177 Outside Micrometer, 0-1 in
A 0-1 inch micrometer with carbide measuring faces, a ratchet stop, a satin chrome scale and a hammertone enamel frame. The listing gives plus or minus 0.0001 inch accuracy and says it suits metal and non-metal workpieces. It is supplied in a fitted plastic case. The title says x .001 while the table gives the finer 0.0001 accuracy.
Suits: general machine work. Strengths: carbide faces and a ratchet. Weaknesses: the title and the table use different figures. Skip it if you need more than 1 inch.


Best for quick readings of digits
3. HFS Outside Micrometer 0-1 Inch, Mechanical Digit Counter
A 0-1 inch micrometer with a mechanical digit counter beside the usual thimble scale and a listed 0.0001 inch graduation. The maker lists a ratchet stop, a lock nut, a hardened ground spindle with a carbide tip, a padded case and an adjustment wrench. The package weight is about a pound.
Suits: quick readings of digits. Strengths: counter plus a case and a wrench. Weaknesses: no accuracy figure in the table. Skip it if you prefer a plain thimble scale.

View HFS Outside Micrometer 0-1 Inch Mechanical Digit Counter Carbide Tip on Amazon
Best for mold and fixture checks at small sizes
4. Neoteck 0-1 in Outside Micrometer
A newer listing with a one-piece forged steel frame, measuring faces inlaid with a hard alloy, a ratchet stop and a lock nut. The maker lists 0.0001 inch resolution, an anti-glare satin chrome sleeve and thimble and laser-etched scales. The package weight is 9.1 ounces.
Suits: mold and fixture checks at small sizes. Strengths: a forged frame and a glare-reducing scale. Weaknesses: the listing is new and short on tolerance figures. Skip it if you need a named flatness spec.
View Neoteck 0-1″ Outside Micrometer 0.0001″ Resolution Carbide-Tipped Anvils on Amazon

Best for a shop that needs every size
5. Fowler 52-215-006-1 Outside Micrometer Set, 0-6 in
A set of six micrometers covering 0 to 6 inches in one-inch steps, with a satin chrome thimble and sleeve, a hammertone blue vernier scale, adjustment wrenches and a fitted case. The maker lists friction thimbles on the 1 and 2 inch sizes and ratchets on 3 to 6 inch, and 0.00003 inch flatness and 0.00005 inch parallelism on the 0-1 size. The accuracy range is given as 0.00015 to 0.00025 inch, and the page weight of 0.02 kg looks wrong for six tools. The listing offers a one-year warranty.
Suits: a shop that needs every size. Strengths: six sizes in one case with stated flatness. Weaknesses: an odd weight figure. Skip it if you only need 0-1 inch.


Best for larger parts with one tool
6. Mitutoyo 104-137 Interchangeable Anvil Micrometer Set
One 0-6 inch frame with swap-in anvils, supplied with standards and a fitted wood case. The listing names a carbide face on the spindle, a satin chrome scale and a hammertone enamel finish. The table gives plus or minus 0.0005 inch accuracy and a 3.5 pound weight, and the title says x .001 inch.
Suits: larger parts with one tool. Strengths: a wide range from one frame. Weaknesses: a coarser listed accuracy. Skip it if you want a single small micrometer.

Care and Setup
- Clean the faces with a lint-free cloth or paper before zeroing.
- Close the spindle with the ratchet and check the zero on the scale.
- Use the ratchet for every reading so the force stays the same.
- Keep the micrometer in its case with the faces slightly apart.
Mistakes to Avoid
- Forcing the thimble instead of using the ratchet.
- Holding the frame in a warm hand for a long time while measuring.
- Trusting a listing that gives no accuracy or material.
- Closing the faces hard against each other when storing.
How to Read an Inch Micrometer Scale
A standard inch micrometer has two scales that you add together. The sleeve, the fixed barrel, carries a long reference line with numbered marks for tenths of an inch, and each tenth is split into four smaller divisions of 0.025 inch. The thimble, the rotating part, is split into 25 divisions, and each one equals 0.001 inch. To read the tool, note the last sleeve mark that the thimble edge has uncovered, then add the thimble line that sits on the reference line.
A model graduated to 0.0001 inch adds a third scale. On a vernier version, a set of short lines on the sleeve lets you see which thimble line lines up exactly with a sleeve line, and that gives the last digit. On a digit counter version, a small window shows the digits directly, and you still use the thimble for the finest figure. The vernier takes practice. The counter is easier to read quickly, but it is a mechanism that can wear or get out of step, so check it against a known standard now and then.
- Step 1: read the whole inches and tenths from the numbers on the sleeve.
- Step 2: add the 0.025 inch divisions that are visible past the last numbered mark.
- Step 3: add the thimble reading, then the vernier digit if there is one.
Practice on a gauge block or a ground pin whose size you already know. If your answer is off by exactly 0.025 inch, you probably missed one sleeve division, which is the most common reading error for new users.
Matching Frame Range to the Parts You Measure
Every outside micrometer covers a span of one inch, so a 0-1 inch frame only measures parts from zero up to one inch. For a part that is 1.4 inches across you need a 1-2 inch frame, and a 2-3 inch frame for 2.6 inches. Buyers sometimes pick a 0-1 inch tool for a job that is actually larger, so measure the biggest and smallest parts you expect before choosing.
There are three ways to cover a wider range. The first is a set of separate frames, as in the six-piece set above, which gives you a micrometer ready to use at each size. The second is a single frame with interchangeable anvils, which costs less space and money for the range but means you swap anvils and reset the zero each time. The third is to buy only the sizes you use. A machinist who works in small parts may never need more than the first two frames.
Think about how often you change sizes. Swapping anvils is fine for occasional large work, but it is slow if you move between sizes all day, and a fresh anvil seat needs a clean, careful fit. Also consider reach: a large frame is heavier and harder to hold steady with one hand, so a big range is not automatically better. Choose the range that fits most of your jobs, then add other sizes only when a project requires them.
Graduation Versus Real Accuracy
A finer graduation does not guarantee a more accurate tool. Graduation is how small a step the scale can show. Accuracy is how close the reading is to the true size. A micrometer can display 0.0001 inch and still be off by more than that if the screw, the faces or the frame are not well made. The listing pages above show this clearly, since some give an accuracy figure and some give only a graduation.
When you compare models, look for these items in the listing or the manual:
- A stated accuracy figure, not just the smallest division.
- Face flatness and parallelism, which tell you how well the two faces meet.
- The face material, since hard faces keep their shape longer.
- Whether the tool ships with a check standard or a certificate, and what that covers.
Match the resolution to the tolerance you need. If your parts are held to a few thousandths of an inch, a 0.001 inch tool reads well enough, and you do not need to pay for finer marks you cannot use. If you must work to a tenth of a thousandth, you need both the finer graduation and a stated accuracy, and you need to keep the tool well cared for. Where a page gives no accuracy at all, treat that as missing information and ask the seller before you buy.
Technique, Heat and Part Preparation
Good technique matters as much as the tool. Hold the frame lightly near the insulated pad if it has one, or use a stand so your hand does not warm the steel. Metal grows slightly with heat, and a few seconds of hand contact can shift a fine reading. Let the micrometer and the part sit in the same room for a while so they reach the same temperature before you measure.
Prepare the part as well. Wipe off oil, chips and burrs, and make sure the surface is clean where the faces will touch. A tiny burr or a film of dirt changes the reading more than the scale can show. Place the part against the anvil first, then bring the spindle down with the thimble until the ratchet clicks, and rock the tool gently across a round part to find the true diameter, which is the smallest reading you can get. For a flat part, check several points to see whether it is even.
Keep the faces square to the part. Tilting the frame makes the reading too large, and a part that is not held steady can give a different number each time. If you see a drift of a few tenths when you repeat the same measurement, look first at technique, then at the tool. Take the reading while the tool is still on the part, or use the lock before sliding it off, so you do not lose the setting while you read the scale.
Checking Accuracy and Knowing When to Replace
Check a micrometer against a known size, not just against its own zero. A gauge block, or the setting standard that comes with some models, tests the tool at a point other than zero, and it can reveal screw wear or a bent frame that a zero check misses. For a 0-1 inch tool, check at zero and at a size near the top of the range, for example. Check larger frames with the standard sized for that frame.
Signs that a micrometer needs adjustment or retirement include:
- The zero will not hold or keeps drifting between checks.
- The thimble feels rough, gritty or loose rather than smooth.
- Light shows between the faces when they are closed, which suggests wear or damage.
- The readings disagree with a trusted standard by more than your tolerance allows.
- The frame has been dropped, because even a small bend can ruin accuracy.
Minor zero error can often be corrected with the small wrench that comes with the tool, following the maker’s instructions. Wear on the screw or damaged faces usually cannot be fixed at home, and you will need a calibration service or a replacement. For hobby work, a budget tool that you check regularly is practical. For work with tight tolerances or paperwork, plan for periodic calibration and keep a record of the checks.
Which outside micrometer should you buy?
The right outside micrometer depends mostly on the size of your parts and how much listed detail you want behind the accuracy. Start with the range, then decide how much documentation matters to you.
- Light hobby checks on small parts: the HDLNKAK is a plain 0-1 inch tool with a fine graduation, but its listing is thin, so it suits jobs where a rough answer is acceptable.
- General machine work up to one inch: the Mitutoyo 103-177 lists carbide faces, a ratchet stop and a stated accuracy, which makes it the easier one to justify for repeated shop use.
- Quick reading of digits: the HFS has a mechanical counter, a case and an adjustment wrench, so it suits someone who finds a bare thimble scale slow.
- Mold and fixture checks at small sizes: the Neoteck lists a forged frame and a glare-reducing scale, though you should read the tolerance details on the current page.
- A shop that needs every size to 6 inches: the Fowler set gives you a ready micrometer at each size, so you never swap anvils.
- Larger parts with one tool: the Mitutoyo 104-137 covers the same span with one frame and swap-in anvils, with the extra setup that implies.
If you only ever measure parts under one inch, a set is wasted money and bench space. If you move between sizes all day, a single frame with interchangeable anvils will feel slow, and separate frames or a set will save you time.
What to check before you buy, and who should skip it
Before you order an outside micrometer, confirm the range, the accuracy figure and what is in the box. Then be honest about whether you need a precision tool at all.
- The measuring range matches your biggest and smallest parts.
- The listing states an accuracy, not only a graduation.
- The face material is named, since hard faces wear more slowly.
- A ratchet or friction thimble is included for repeatable force.
- A case, wrench or setting standard is listed if you need one.
- The warranty and return terms are shown on the current page.
There are real trade-offs. A finer graduation costs you nothing in use, but it does not make the tool more accurate, so a thinly documented model may read to four decimals without being right to that level. A set or a large frame is heavier and harder to hold steady. Any micrometer needs regular zero checks and clean faces, or its readings drift.
You can skip a micrometer if a caliper already meets your tolerance, or if your work is rough woodworking or general repair. Skip the coarser-listed models if you hold tight tolerances. Compare the picks above, check the current listing for the range and what is included, then choose the one that fits how you will use it.
How the Six Micrometers Differ in Practice
The six tools in this guide all measure outside dimensions to fine tolerances, but they split into single-range instruments and sets, and into reading styles that suit different hands. The HDLNKAK 0-1 in, the Mitutoyo 103-177 0-1 in and the Neoteck 0-1 in are individual micrometers covering the most-used inch of measurement in machining: shafts, pins, stock thickness and small turned parts. The HFS 0-1 Inch adds a mechanical digit counter to the classic sleeve-and-thimble reading, aimed at users who want a quicker, less error-prone read. The Fowler 52-215-006-1 set extends coverage from 0 to 6 inches across multiple frames, and the Mitutoyo 104-137 interchangeable-anvil set reaches wide ranges from a single frame system. The first decision is therefore range architecture — one dedicated frame, several frames, or interchangeable anvils — and the second is how you prefer to read the result.
Reading style deserves honest self-assessment. The classic vernier sleeve rewards users who learned it and read it fluently, and it never needs batteries or suffers a dead display. A digit counter reduces the classic misread — the half-millimetre-style error of its inch equivalent, the misjudged sleeve line — by presenting the coarse count mechanically. Neither is more accurate in a trained hand; they differ in how they fail in an untrained or hurried one. Frame and anvil condition matter more than either: flat, clean, parallel anvils and a smooth spindle with a consistent ratchet feel are the physical basis of every honest reading. Judge any micrometer first by its anvils and action, then by its reading system, then by its badge.
The 0-1 Inch Singles: HDLNKAK, Mitutoyo 103-177 and Neoteck
Among the single-range tools, the Mitutoyo 103-177 is the established professional reference: the micrometer many machinists learned on, with the action, finish and longevity that keep it on benches for decades. The HDLNKAK and Neoteck 0-1 in tools address the same inch of work for home shops, students and occasional users who need genuine micrometer measurement without professional-tier commitment. The practical differences show up in ratchet consistency, sleeve legibility, lock behaviour and how the tool feels after an hour of measuring: small frictions that barely matter for five measurements a month and matter greatly for fifty a day. For occasional precision — verifying stock, checking a shaft before assembly, confirming a turned part — the value-tier tools used with good technique give honest results. For daily production and inspection, the professional tool’s consistency and serviceability justify themselves. Either way, the standard the tool ships with, or a known reference, is what converts it from a purchase into an instrument: verify it in your first session.
HFS Digit Counter: Who the Easier Read Serves
The HFS digit-counter design serves users whose errors have been reading errors. New learners, users who measure infrequently and return rusty each time, and anyone working in poor light or at awkward angles benefit from a coarse count they cannot misjudge. The thimble still teaches fine reading, so skill develops, but the counter removes the most consequential slip — being wrong by a whole coarse increment — from the list of possible mistakes. If your micrometer history includes a part machined to a confidently wrong dimension that turned out to be a misread sleeve, this design speaks directly to you. Keep the same discipline as any micrometer: ratchet for final force, verify zero against the standard, and read the counter and thimble as one result rather than trusting either alone.
Sets Compared: Fowler 0-6 Inch Frames Against Mitutoyo Interchangeable Anvils
The Fowler 52-215-006-1 and the Mitutoyo 104-137 solve the range problem in opposite ways. The Fowler set gives each range its own dedicated frame, which means each tool is optimised for its span, handles naturally and can be verified against its own standard; the costs are case size, total weight and several tools to maintain. The Mitutoyo interchangeable-anvil approach keeps one frame and spindle and extends its reach by swapping anvils, which keeps the set compact and the measuring feel consistent across ranges; the costs are the discipline of correct anvil selection, seating and re-verification at every change, because an anvil not fully seated manufactures error invisibly. Production and inspection shops that measure across ranges all day often prefer dedicated frames for speed and certainty. Maintenance, repair and general shops that measure widely but less constantly often prefer the interchangeable system’s compactness. Both demand the same habit: verify against the appropriate standard whenever a frame or anvil changes.
First Session: Zero, Standards and Measuring Feel
A micrometer’s first session is a calibration of the user as much as the tool. Start with the included standard or a known reference for the tool’s range — for a 0-1 in micrometer, the closed-anvil zero check comes first: clean the anvils, close them gently using the ratchet, and confirm the reading is exactly zero, repeatably, several times. Then measure the standard or a gauge reference and confirm the tool agrees. Learn the ratchet’s language: the final turns belong to the ratchet or friction stop, never to a forced thimble, and the consistent slip or click count you settle on becomes your personal measuring force. Practise on known objects — drill shanks, feeler stock of verified thickness, finished parts with known dimensions — until your repeated readings agree tightly. That repeatability, not the tool’s stated resolution, is your real measuring capability, and the first session is where it is built.
Handle the tool as an instrument from the start. Hold it by the frame, ideally using the insulated grips where provided, because hand heat genuinely expands a micrometer frame enough to matter at fine tolerances during long sessions. Keep the standard with the tool in its case, wipe anvils before every zero check, and store the spindle almost closed with a small gap rather than clamped hard shut. A first session that ends with verified zero, a practised ratchet hand and the tool cased with its standard has set up years of trustworthy measurement.
Technique: Where Fine Readings Are Won and Lost
Cleanliness is the first technique: a film of oil, a chip or a fingerprint’s worth of debris between anvil and part is a measurement error wearing a disguise. Seat the part squarely between the anvils, supporting it so its weight does not tilt it, and bring the spindle in with the ratchet for the final approach so force is identical every time. Read with the lock applied when the part must be removed before reading, and read squarely to avoid parallax on the sleeve lines. Measure the defined location on the part — turned parts vary along their length and around their circumference, so a measurement plan (both ends, middle, two orientations) reveals taper and out-of-roundness that a single reading hides. Record readings as you go when parts must match or when a machining sequence depends on them; at micrometer tolerances, remembered numbers are not data.
Heat discipline separates careful work from lucky work. Let parts cool after machining before final measurement, because a freshly cut part is a larger part. Minimise handling of both part and frame during precision sessions, and re-check zero periodically through a long session rather than assuming the morning’s zero survives the afternoon. When a reading disagrees with expectation, re-clean, re-seat and re-measure before adjusting any machine: the cheapest micrometer error is the one caught by a second honest reading, and the most expensive is a machine adjustment made to correct a measurement that was never wrong.
Troubleshooting in Diagnostic Order
When readings misbehave, diagnose in order. First, clean the anvils and re-check zero; contamination is the leading cause of sudden error. Second, check zero repeatability through several closings with the ratchet; wandering zero points to debris in the spindle, a loose lock or wear. Third, verify against the standard or a gauge reference at the range you are using, especially after any anvil change on an interchangeable set. Fourth, audit your own force and heat: measure a known part repeatedly and watch your spread, because a widening spread is a technique report, not a tool verdict. Fifth, inspect anvil faces for flatness damage, nicks or embedded chips, and the spindle for smooth travel through its whole range. A micrometer that fails verification after cleaning should leave critical service until repaired or replaced; at these tolerances, a doubtful instrument is worse than none, because it produces precise-looking wrong numbers.
Care, Storage and Service Life
Store the micrometer in its case, anvils nearly closed with a small gap, the standard alongside, in a dry place away from grinding dust and coolant mist. Wipe the tool after use, keep the spindle lightly protected as the maker directs, and never leave it clamped on a part or rattling in a toolbox drawer. Keep it away from magnets, drops and bench edges; a single fall can bend a frame invisibly and retire the tool’s honesty without retiring its appearance. Verify zero at the start of precision work and against the standard regularly, and after any anvil swap, any drop, or any loan to another bench. Treated as the instrument it is, a quality micrometer’s service life spans careers, and even a value-tier tool will serve for years of occasional work if its anvils stay clean and its zero stays checked.
Choosing by User and Range
For the home machinist and student living in the 0-1 in world, the HDLNKAK or Neoteck singles cover real needs, and the HFS digit counter suits anyone whose past errors were misreads. For the professional whose micrometer is a daily instrument, the Mitutoyo 103-177 remains the reference in its range. For work that regularly spans several inches, choose your architecture honestly: the Fowler dedicated-frame set for speed and per-range certainty, the Mitutoyo 104-137 interchangeable system for compact coverage with disciplined verification. In every case, the tool is only half the system; the standard, the ratchet hand, the heat discipline and the verification habit are the other half, and together they are what fine measurement actually consists of.
More Questions From the Inspection Bench
When should I reach for a micrometer instead of a caliper?
When the tolerance, the fit or the consequence demands it. Calipers serve general measurement well, but a micrometer’s rigid frame, controlled measuring force and fine resolution make it the right instrument for bearing fits, shaft and pin dimensions, precision stock verification and any dimension where the last small increment decides assembly. A useful rule: if you would argue about the reading, measure it with the micrometer. Keep both instruments verified, and let the micrometer be the court of appeal for critical dimensions rather than a rival to the caliper’s everyday speed.
Why do my repeated readings of the same part keep changing slightly?
Treat the scatter as a report and read it in order. Varying force is the most common author, so return to the ratchet and let it make every final approach. Heat is the second: a part held in warm hands, or still warm from machining, grows measurably during a session. Third is seating — a part resting slightly differently between the anvils each time, or debris arriving on an anvil face mid-session. Fourth is the part itself, which may genuinely vary at the spots you are sampling. Slow down, clean, standardise force and location, and the scatter usually collapses to the tool’s honest repeatability. Persistent scatter after that discipline points to the instrument, which should then be verified against its standard across the range.
How do I measure a shaft that is still in the machine?
With access planning and restraint. Stop the machine and make it safe before any measurement, clean the shaft section, and approach with the micrometer aligned so the anvils contact across a true diameter rather than a chord. Support the tool so its weight does not tilt it, use the ratchet for the final approach as always, and measure at several positions along and around the shaft to reveal taper and ovality rather than trusting one heroic reading in an awkward posture. Where access forces compromises, record the readings as in-place readings and, for critical decisions, confirm them after removal on the bench. An honest approximate reading labelled as such beats a confident number gathered at a bad angle.
What does the lock do, and when should I use it?
The lock freezes the spindle so a reading survives removing the tool from an inaccessible part — measuring inside a machine, under a guard or in any position where you cannot read the sleeve in place. Apply it gently after the ratchet has set the measurement, remove the tool without knocking it, read, then release the lock before the next measurement. Do not use the lock as a carrying clamp or leave the tool stored locked hard on its anvils. Used for its purpose, the lock turns impossible readings into routine ones; used carelessly, it adds its own small errors, so verify your locked-reading technique against a bench measurement until the two agree.
How long should a micrometer stay in calibration for home and small-shop use?
For most home and small-shop work, the practical standard is verification rather than a calendar: check zero at every precision session, check against the standard regularly and after any drop, loan or anvil change, and keep a simple log of those checks. A tool that repeatedly verifies correctly is in calibration for your purposes, whatever the date says. A tool that drifts, wanders at zero or disagrees with its standard leaves critical service immediately. Formal calibration with documentation belongs to regulated and customer-audited work; the verification habit described here is its honest foundation at every level.
Scenario Guide: The Micrometer at Work
Scenario one: turning a shaft to a bearing fit. Measure the bearing’s actual bore-side partner dimensions where possible, work the shaft down in stages, and let the micrometer — verified against its standard that session — arbitrate the final passes, cooling the part before the deciding readings. Scenario two: verifying purchased precision stock, pins and dowels before they enter a build. A minute per piece with a 0-1 in micrometer from this guide catches the out-of-tolerance piece while it is still a supplier conversation rather than an assembly failure. Scenario three: engine and machinery rebuilds, where journals, pistons and shims each carry dimensions that decide clearances. Measure in planned patterns, record everything, and compute clearances from recorded pairs rather than from memory; rebuild quality is largely record quality.
Scenario four: a maintenance shop measuring across many sizes in a week — the case for the Fowler dedicated-frame set or the Mitutoyo interchangeable-anvil system, chosen by how often ranges change and how much the shop values per-range certainty against compactness. Scenario five: the student or home machinist producing a first fitted assembly, where a value-tier 0-1 in micrometer or the forgiving HFS digit counter converts the terrifying question of size into a series of calm, verifiable readings. Across all five scenarios the constants do not change: clean anvils, ratchet force, heat respected, zero verified, readings recorded. Master those, and whichever of these six instruments is in your hand will tell you the truth to the limit of your technique — which practice then keeps raising.
A Short Routine for Every Precision Session
Open the case, wipe the anvils, check zero three times, verify against the standard, and only then touch a part. During the session, re-zero whenever the tool has been set down for a while, whenever the room or the parts change temperature noticeably, and whenever a reading surprises you. Close the session by wiping the tool, returning the standard to the case, and noting anything — a drifting zero, a gritty spindle travel, a part family that measured oddly — in the shop log. The routine takes minutes, scales from a single home measurement to a production inspection shift, and is the visible difference between owning a micrometer and operating one.
One Last Distinction: Owning Precision Versus Practising It
A micrometer in a case is potential; precision is a practice. The practice consists of small, repeatable acts — anvils wiped without being asked, zero checked without being reminded, the ratchet trusted over the impatient hand, parts allowed to cool, readings written down — performed the same way on the hundredth measurement as on the first. None of these acts is difficult, and together they are the entire difference between a shop that owns fine instruments and a shop that produces fine work. Whichever instrument from this guide you choose, adopt the practice with it from the first session. The tool will repay you in the only currency that matters at these tolerances: numbers you can act on without crossing your fingers.
Outside Micrometer FAQ
Why is a micrometer read finer than a caliper?
The thimble screw moves the spindle a small, fixed distance per turn, so the scale shows 0.001 or 0.0001 inch, often finer than a caliper dial.
Which pick covers the most range?
The Mitutoyo 104-137 spans 0-6 inches with one frame. The Fowler set spans the same range with six separate micrometers.
What is the difference between a micrometer and a caliper?
A micrometer uses a precision screw and a fixed measuring force, so it is generally used where finer readings are needed. A caliper is quicker and covers a larger range in one tool, but it is more sensitive to how hard you press and how you hold it.
Can I use a 0-1 inch micrometer to measure a 1.2 inch part?
No. A 0-1 inch frame cannot open past one inch. You need a 1-2 inch frame, or an interchangeable anvil model that covers that size.
How often should I check my micrometer?
Check the zero before each session and check against a standard whenever it has been dropped or feels different. A regular calibration schedule depends on how heavily you use it and how tight your tolerances are.
Why does my reading change when I measure the same part twice?
Common causes are different measuring force, a warm hand heating the frame, dirt on the faces, or a tilted tool. Use the ratchet every time, clean the faces and let the part and tool reach the same temperature.
Is a digit counter easier than a vernier?
Many people find the counter faster to read because it shows the digits in a window. The vernier has no extra moving parts for the digits, but it takes practice to read. Either type needs a proper zero check.
Do I need the lock on the micrometer?
The lock is useful when you want to remove the tool from the part and read it in better light. It keeps the spindle from turning, so the reading does not change on the way out.
Should I buy a set or single micrometers?
A set suits a shop that measures many sizes. A single frame is better if you work in one size range, and interchangeable anvils suit occasional large parts if you accept the extra setup time.
What should I store a micrometer in?
Keep it in its case in a dry place, with the faces slightly apart, as the care notes above say. Wipe off moisture and fingerprints before storing it.
What is the difference between graduation and resolution on a micrometer?
Both describe the smallest step the scale can show, so they are often used interchangeably in listings. Neither tells you how accurate the tool is. Look for a separate accuracy statement before trusting the finest digit.
Do I need a ratchet stop on an outside micrometer?
A ratchet or friction thimble is strongly worth having. It limits how hard the spindle closes, so each reading uses about the same force. Without one, readings vary with how tightly you turn the thimble.
Can an outside micrometer measure inside diameters?
No. An outside micrometer measures the outer size of a part between its faces. Inside diameters need an inside micrometer, a bore gauge or a caliper with inside jaws.
What does a micrometer standard do?
A setting standard is a rod of known length used to check or reset the zero on larger frames. A 0-1 inch tool can close fully to check zero, but larger frames cannot, so they rely on a standard. Check the listing to see whether one is included.
Is a digital micrometer better than a mechanical one?
Not always. A digital readout is faster to read and can switch units, but it needs a battery and is more sensitive to moisture. A mechanical tool has no power needs, and the picks above are all mechanical designs.
How do I clean the measuring faces?
Close the faces on a clean sheet of lint-free paper and pull it out gently. Repeat until nothing shows on the paper. Do not scrape the faces with a hard tool, and check the zero afterward.
The Short Version
For a bare-bones 0-1 inch tool, the HDLNKAK. For a carbide ratchet model, the Mitutoyo 103-177. For a digit counter, the HFS. For a forged frame, the Neoteck. For every size to 6 inches, the Fowler set. For one frame with swap-in anvils, the Mitutoyo 104-137.