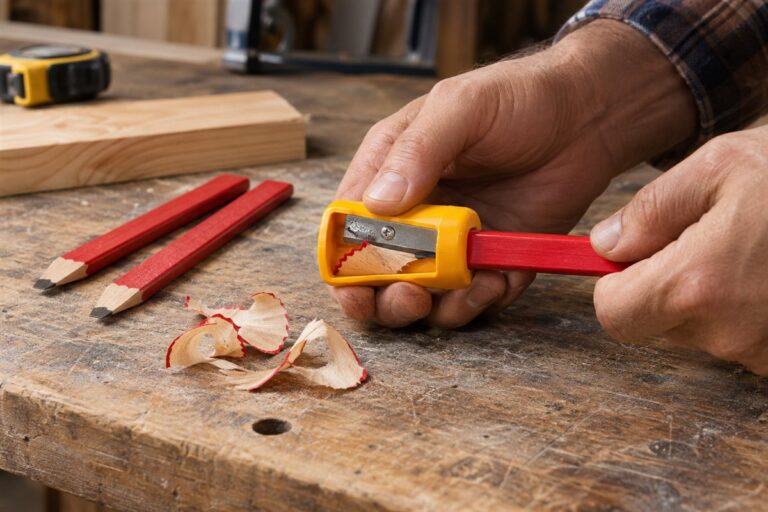
A marking knife scores a fine line across wood so a saw or chisel has a crisp edge to follow. Compared with a pencil, a knife line is thin, exact and gives the tool a tiny groove to sit in, which is why careful woodworkers use one for joinery.
The six tools below include single-bevel and double-bevel designs, with wood and metal handles. We have not used these products ourselves, so please confirm every detail on the current listing before you buy. Blade angles, handedness and what ships in the box differ, so confirm details on the listing.
As an Amazon Associate we earn from qualifying purchases. Links below are affiliate links, and they do not change the product information we give.
What to Look For
| Feature | Why it matters |
|---|---|
| Bevel | Single-bevel knives sit flat against a square; double-bevel knives work either way |
| Handedness | Check whether a knife is left, right or both-handed |
| Handle | Wood handles are warm; metal handles are durable |
| Blade steel | Hard steel holds an edge longer but is harder to sharpen |
In this guide
Specs at a Glance
| Knife | Bevel | Handle | Notes |
|---|---|---|---|
| Narex Marking Knife | Single or double | Wood | Popular budget-friendly woodworking knife |
| Veritas Marking Knife | Single | Wood or metal | Specialist tool maker, check the listing |
| Two Cherries Marking Knife | Single, Japanese style | Wood | Traditional shape |
| Shinwa Marking Knife | Single | Wood | Slim blade for tight joints |
| Crown Marking Knife | Double | Wood | Simple all-around shape |
| Marples Marking Knife | Single | Wood | Well-known British brand |
The 6 Best Precision Marking Knives

Top pickBest for beginners
1. Narex Marking Knife
A simple, well-liked marking knife from a Czech tool maker. The blade is shaped to scribe fine lines against a square. Check the listing for left or right hand use before ordering.
Suits: beginners. Strengths: an affordable, dependable design. Weaknesses: plain finish. Skip it if you want a premium tool.

Best for woodworkers who want a refined tool
2. Veritas Marking Knife
A specialist woodworking tool made by a respected maker. The steel is made to hold a keen edge, and the shape suits layout work. A fine edge is key, so plan to hone it before first use.
Suits: woodworkers who want a refined tool. Strengths: careful design and good edge holding. Weaknesses: availability may vary. Skip it if you want an entry-level tool.
View Veritas Marking Knife on Amazon
Best for traditional woodworking
3. Two Cherries Marking Knife
A German tool maker’s marking knife with a wood handle and a slim steel blade. It is sold as a traditional hand tool. The blade is slim enough to reach small dovetail corners.
Suits: traditional woodworking. Strengths: a handsome handle and a slim blade. Weaknesses: less common stock. Skip it if you want a modern look.
View Two Cherries Marking Knife on Amazon
Best for joinery
4. Shinwa Marking Knife
A Japanese-style marking knife with a single bevel. It lays flat against a square and leaves a very fine line. It stores well in a toolbox next to your chisels.
Suits: joinery. Strengths: a fine line and a flat back. Weaknesses: needs gentle handling. Skip it if you want a heavy handle.
View Shinwa Marking Knife on Amazon

Best for classic hand-tool workshops
5. Crown Marking Knife
A hand tool from a Sheffield maker that has long made woodworking tools. It has a simple, traditional shape. Handle shape affects comfort over a long layout session.
Suits: classic hand-tool workshops. Strengths: a traditional shape. Weaknesses: handle is simple. Skip it if you prefer a plastic handle.

Best for general woodworking
6. Marples Marking Knife
A British hand-tool brand known for its chisels and marking tools. The knife has a wood handle and a firm steel blade. Confirm the blade length and bevel on the listing.
Suits: general woodworking. Strengths: a familiar brand and a firm blade. Weaknesses: blade shape is basic. Skip it if you want a Japanese style.
View Marples Marking Knife on Amazon
Care and Setup
- Hone the bevel on a fine stone.
- Wipe the blade to prevent rust.
- Store in a roll or a pouch.
- Use a sharp edge, since a dull knife tears fibers.
- Keep a small strop nearby and give the bevel a few passes before each layout session.
- Hold the knife against a square and make a single clean pass for the best line.
Mistakes to Avoid
- Using a pencil line when you need accuracy.
- Pressing too hard and wandering from the line.
- Using a double-bevel knife when you need a flat-backed one.
- Ignoring left-handed designs.
- Dragging the knife back and forth, which wanders the line.
- Leaving the blade bare in a toolbox with other steel.
How a Knife Line Improves Accuracy
A marking knife cuts a fine groove across the surface fibers of the wood, and the groove does three jobs a pencil cannot. First, it is thinner than a pencil line, so the position you mark is the position you cut. A pencil line has width, and the question of which edge of the line to follow is a source of error. Second, the knife severs the surface fibers, which helps prevent tear-out when you saw or chisel across the line. Third, the groove gives a chisel or saw something to register against. A chisel placed in the knife line settles into it, and the first cut starts exactly where you intended.
The technique is simple but benefits from care. Hold the blade against a square or a straightedge, with the flat of the blade against the guide, and draw it in a single steady pass. Light pressure on the first pass leaves a thin line. A second pass can deepen it if needed. Pressing hard in one go can cause the blade to wander, particularly across grain with hard and soft areas.
Marking knives are most useful for joinery such as dovetails, tenons and shoulders, where fit depends on accuracy of a fraction of a millimeter. For rough work like framing, a pencil is perfectly adequate. Choose the knife for the tasks where precision shows in the final piece.
- Thin line: removes ambiguity about where to cut.
- Cuts fibers: helps reduce tear-out at the surface.
- Creates a groove: guides chisels and saws.
Single Bevel, Double Bevel and Handedness in Practice
Bevel design is the most meaningful difference between marking knives. A single-bevel knife is ground on one side only, so the flat back can lie tight against a square or straightedge, putting the edge exactly on the line. This tends to give the most accurate result for layout against a guide. Because the bevel is on one side, such knives are often made in left- and right-handed versions, or sold as ambidextrous with a particular orientation, so check the listing and your own preference.
A double-bevel knife is ground on both sides, so it can be used from either direction and in either hand. It is more versatile, but the angled faces mean the blade does not lie flat against the guide, which can introduce a slight offset. It may also push the groove to one side depending on the bevel angle. Many people use double-bevel knives for general marking, and those who do precision joinery tend to prefer single-bevel designs.
Some knives are shaped like a skew or have a tapered tip that reaches into small corners, such as the inside of a dovetail. Others have a rounded or pointed shape for scribing circles and curves. If you work in tight spaces, check the blade length and tip shape on the listing.
- Single bevel: flat back, excellent against a square, often handed.
- Double bevel: flexible and handedness-neutral, but less precise against a guide.
- Check the listing for which hand the knife is designed for.
Handle Material, Steel and Balance
Wood handles are common on traditional marking knives and feel warm and comfortable, but can be affected by moisture and wear. Metal handles are more durable and easier to keep clean, while wood can feel more natural for long sessions. Shape matters as well. A slim, round handle rolls easily between the fingers, and an octagonal or flat-sided handle resists rolling off the bench. Size and weight should suit your hand. A knife that is too heavy may feel clumsy for fine work, while one that is too light may lack feel.
Steel choices affect how long the edge lasts and how easy it is to maintain. Harder steels hold an edge longer, but are harder to sharpen and can chip if mistreated. Softer steels are easier to sharpen but may need more frequent honing. Many woodworkers accept the trade-off in favor of easy sharpening, since a marking knife needs a keen edge and gets frequent touch-ups. Check the listing for steel details, but treat vague claims cautiously, and read user feedback about edge retention.
Also consider rust. Most marking knives use carbon or tool steels that can rust if left damp. Keep the blade dry and lightly oiled, especially in humid workshops.
- Wood handle: warm feel, needs care in damp conditions.
- Metal handle: durable and easy to clean.
- Harder steel: long-lasting edge, more effort to sharpen.
Sharpening and Honing a Marking Knife
A marking knife works only if it is sharp, and a dull one crushes fibers and makes a wide, ragged line. The good news is that sharpening a small knife is quick once you understand the idea. For a single-bevel knife, you hone the bevel on a fine stone, keeping it flat on the stone at the existing angle, and polish the back lightly on the stone to remove the burr. For a double-bevel knife, you hone both faces alternately with the same number of strokes to keep the edge centered.
Use progressively finer stones if the edge is damaged, then finish with a strop, which is a leather strip with a fine polishing compound. A few passes on the strop before each marking session keep the edge keen and often delay the need for a full sharpening. Test sharpness by drawing a line across softwood end grain. It should leave a crisp, clean line without tearing. A dull edge will skid or crush the fibers.
Take care when sharpening. Keep fingers behind the edge, work on a stable surface and use light pressure. If the edge is chipped, you will need to remove material at a coarser grit before returning to fine stones.
- Check the back for flatness before the first use, since factory finish varies.
- Strop regularly to maintain the edge.
- Store the knife in a roll, sheath or slot so the edge does not rub against other tools.
Replace or retire a knife if the blade is bent, the handle is loose or the steel has deep pitting at the edge.
Where Marking Knives Fit Among Layout Tools
A marking knife is one tool among several for accurate layout, and understanding how they work together helps you decide what to buy. A marking gauge scribes a line parallel to an edge at a set distance, and it is the tool of choice for repeated measurements along a board. A cutting gauge uses a small knife blade to cut a line, and a wheel gauge rolls a small cutting wheel. A knife is for marking lines against a square, a template, a ruler or an existing joint, such as when you transfer the shape of a tail onto a board to mark the pins.
Combination squares, try squares and marking templates all work with a knife. A good square is as important as the knife, since a square that is out of true will reproduce its error. Check your squares against a known flat edge, and replace or adjust them if they are inaccurate. Pair the knife with a fine pencil for rough layout, then finish with the knife where accuracy matters.
Before you buy, consider:
- Which joints you cut, and whether you need to reach small corners.
- Whether you are left-handed, right-handed or want an ambidextrous knife.
- If you already own a good square and sharpening stones.
- Whether the listing mentions how the knife is shipped, since edges may need sharpening on arrival.
A simple, well-sharpened knife and a reliable square will do more for accuracy than any extra tool.
Marking Knife FAQ
Why use a marking knife instead of a pencil?
A knife line is thinner and gives your chisel or saw a groove to start from.
Single or double bevel?
Single-bevel knives sit flat against a square; double-bevel knives work in either direction.
How do I sharpen a marking knife?
Hone the bevel on a fine stone, and strop it if you like.
Can I use it on metal?
Marking knives are made for wood; use a scribe for metal.
Can I use a utility knife as a marking knife?
You can for rough work, but a dedicated marking knife has a finer tip and a flat back for use against a square. For precision joinery the specialist tool is easier to control.
Do I need to sharpen a new marking knife?
Often yes, or at least hone and strop it, since factory edges vary. Check the back and bevel and test on softwood end grain.
Why does my knife line wander?
Common causes are a dull edge, too much pressure or holding the blade away from the square. Use a light first pass and keep the flat of the blade against the guide.
Is a marking knife useful for left-handed woodworkers?
Yes, but single-bevel knives are handed, so choose one made for your hand or an ambidextrous design. A double-bevel knife works in either hand.
How do I prevent rust on the blade?
Wipe it dry after use and apply a thin film of light oil. Store the knife in a dry place with a cover or sleeve.
What is stropping?
Stropping is polishing the edge on leather, often with a compound, to remove a fine burr and sharpen the edge. It is a quick way to refresh a marking knife.
Can I use a marking knife on materials other than wood?
Light marking on thin plastic or soft metal is possible, but hard materials can dull or chip the edge. Use tools designed for those materials.
Choosing by Task: Dovetails, Joinery and Rough Layout
Marking knives are not all aimed at the same work, and matching the tool to the job saves frustration. Dovetail layout is the most demanding use. The knife needs a thin, pointed tip that can reach into the corner where a baseline meets a tail or pin, and a slim blade profile that lets you register the knife against a square or a template without the handle getting in the way. Short, pointed knives with a steep bevel on the registering face are the common answer.
Mortise and tenon work calls for a slightly different feel. Lines are longer and often marked across the grain, so a robust blade that tracks cleanly along a square matters more than a super-fine point. A knife that is comfortable in a pinch grip helps you maintain pressure over a long mark. For rough layout on larger stock, a heavier knife or even a utility-style marking blade can be quicker, since precision of a thousandth of an inch is not needed.
- Dovetails and small joinery: fine point, thin blade, comfortable pinch grip.
- Mortise and tenon: sturdy blade, longer registering face, good control across the grain.
- Cabinet and furniture layout: a medium blade that handles a mix of tasks.
- Rough stock: a blade you will not worry about nicking.
Many woodworkers end up with two knives, one fine and one general. If you are buying only one, a mid-sized blade with a well-formed point covers most tasks reasonably well.
Setting Up a Reliable Marking Routine
A good knife helps only if the setup around it is consistent. Start with a reliable reference: a square that has been checked, a rule with clear graduations, or a story stick for repeated parts. Check the square against a straight edge before trusting it, because a square that is slightly off will carry the same error into every line.
Lighting makes a bigger difference than most people expect. A knife line is thin and shallow, and raking light from the side reveals it. A small lamp placed low and to the side shows the line as a fine shadow, which makes it easier to see where the chisel will sit. Dark woods benefit from this more than pale ones.
Technique matters too. Hold the square firmly, place the blade against it, and pull the knife toward you in a single smooth stroke. Light passes are better than one heavy one; a second pass deepens the line without tearing fibers. Keep the flat side of the blade against the square so the line stays true. When you finish, use the line as a groove for the chisel or saw, so the cut starts exactly on the mark.
Working Safely and Protecting the Edge
Marking knives are sharp tools, and their small size can lull people into carelessness. Always draw the blade away from your supporting hand, keep fingers behind the square and not in front of the blade path, and clamp the work whenever possible so you are not holding it with one hand while cutting with the other.
Protecting the edge is just as important. Dropping a knife on a hard floor can chip a fine point, and tossing it into a drawer with other tools dulls the edge. A sheath, a magnetic strip, or a slotted block keeps the edge clear of everything else. Wipe the blade after use, especially in humid shops or after handling sweaty wood, to reduce rust. A light film of oil on the blade, as with other hand tools, helps during storage.
- Keep a small piece of scrap wood nearby to test the sharpness before cutting a final line.
- Store the knife in a spot where it will not be knocked off the bench.
- Replace or reshape a damaged tip before it spoils a good line.
Budget, Mid-Range and Heirloom Thinking
Marking knives span a wide range of prices, but the difference between a basic and a premium blade is smaller than for many tools. A basic knife with decent steel and a sharp edge can mark excellent lines. Premium options typically offer finer fit and finish, better handle materials, and tighter tolerances on the blade geometry, which suit people who use the knife daily.
A sensible approach is to buy a mid-priced knife first, learn how you hold it and what size suits you, and upgrade later if you want something nicer. Spending more does not make your layout more accurate on its own; practice and a good square do that. If you plan to sharpen the knife regularly, the cost of a decent stone or strop matters as much as the knife itself, so include that in your budget.
If you want a lasting tool, look for solid steel that takes a keen edge, a handle you enjoy holding, and a design that can be resharpened many times. A knife that is easy to maintain will outlast one that looks beautiful but is awkward to sharpen.
Frequently Asked Questions
What is the best marking knife for dovetails?
Look for a thin blade with a fine point and a steep registering bevel so the tip reaches into tight corners. Slim knives also let you work against a square or template without the handle interfering. Many woodworkers keep one fine knife just for dovetail work.
Do I need a marking gauge if I have a marking knife?
They do different jobs. A knife marks lines across the grain or along a square, while a marking gauge scribes lines parallel to an edge at a set distance. Most woodworkers use both, since a gauge is faster and more consistent for repeated measurements.
How deep should a marking knife line be?
Deep enough to be felt by a chisel or saw, but no deeper. Light passes work better than one heavy cut because they avoid tearing fibers and leave a cleaner line. Make a second light pass if you need a deeper groove for a chisel to register.
How should I store a marking knife?
Keep the edge protected with a sheath, magnetic strip, or slotted block, and away from other metal tools. Wipe the blade after use and add a light film of oil in humid conditions to help prevent rust. A protected blade keeps its edge longer.
The Picks in Depth: Who Each Marking Knife Really Suits
Marking knives look similar in a catalog and feel different at the bench. What separates these six is bevel style, handle character, how fine a line each leaves against a square, and how much sharpening attention each asks of its owner. This section takes each pick in turn: who will be glad they chose it, what its honest limits are, and when a neighbor on the list is the better buy.
Narex Marking Knife: the dependable first marking knife
The Narex is the natural starting point for someone moving from pencil lines to knife lines. It comes from a Czech tool maker with a good reputation for honest hand tools, the blade is shaped to scribe fine lines against a square, and the review above calls the design affordable and dependable, which is exactly the combination a first marking knife should offer. You are learning a new layout habit, and a tool that simply works lets you concentrate on the habit: registering the flat of the blade against your square, drawing the line in one confident pass, and letting that line guide your saw or chisel.
The limitation is finish. The review notes a plain finish, and that is the honest trade at this end of the list: less polish, less refinement in the details, in exchange for a tool you will not hesitate to use daily. One practical point matters more than finish: check the listing for left- or right-hand use before ordering, because a single-bevel knife bought for the wrong hand will fight you at every layout. Choose the Narex if you are a beginner to knife layout or want a solid bench knife without premium pricing. Skip it if you want a premium tool whose fit and finish are part of the pleasure.
Veritas Marking Knife: the refined layout tool
Veritas is a specialist woodworking maker, and this knife is the refined option on the list. The steel is made to hold a keen edge, and edge holding matters in a marking knife more than in almost any other layout tool, because the whole point of the tool is a hair-fine, repeatable line. A knife that stays keen through a long dovetail layout session keeps every line the same width, which keeps every shoulder and baseline consistent. The shape suits layout work generally, not one narrow task.
Plan to hone it before first use, as the review advises. That is not a defect; fine tools are often shipped with an edge that needs final honing to reach its best, and the sharpening section of this guide explains the routine. The other honest limit is availability, which may vary, so if you decide this is your knife, do not be surprised by some hunting. Choose the Veritas if you are an established woodworker who wants a refined tool and will maintain its edge properly. Skip it if you want an entry-level tool or a knife you can treat casually.
Two Cherries Marking Knife: the traditional German option
Two Cherries is a German tool maker with a long traditional line, and this knife pairs a wood handle with a slim steel blade. The slimness is its working virtue: the blade reaches into small dovetail corners where a bulkier knife cannot follow, which makes it a genuine specialist for the joint that most often motivates buying a marking knife in the first place. The handsome handle is not just decoration either; a handle you enjoy holding gets picked up, and layout accuracy improves with a tool you reach for by default.
The limits are availability and style. The review notes less common stock, so spares and replacements may take more effort to source than the bigger brands here. And it is unapologetically a traditional hand tool, so if your bench aesthetic and habits run modern, it may feel like a guest from another workshop. Choose the Two Cherries if you do traditional woodworking, cut dovetails regularly, and value a slim blade for tight corners. Skip it if you want a modern look or guaranteed easy availability.
Shinwa Marking Knife: the finest line on the list
The Shinwa is the Japanese-style entry, with a single bevel that lays flat against a square and leaves a very fine line. That flat registration is the heart of its appeal: with the flat back riding the square, the bevel pushes the edge into the reference surface and the line lands exactly where the square says it should. For joinery, where a line a fraction off becomes a gap in the finished joint, that behavior is worth learning. It stores well in a toolbox next to your chisels, which suits the way joinery tools actually live.
It asks for gentle handling in return. A fine, hard edge used carelessly, twisted in a cut or dropped on a hard floor, will suffer more than a sturdier, blunter tool. It also rewards an owner who understands single-bevel sharpening, keeping the flat back truly flat and working the bevel only. Choose the Shinwa if joinery precision is your priority and your sharpening habits are already careful. Skip it if you want a heavy handle or a forgiving tool for rough layout work.
Crown Marking Knife: the Sheffield traditionalist
Crown is a Sheffield maker that has long made woodworking tools, and this knife has a simple, traditional shape. Its appeal is straightforwardness: a classic form, from a maker whose trade is hand tools, that does the marking job without novelty. For a workshop built around classic hand-tool methods, it fits the bench as if it had always been there.
The honesty box is equally simple. The handle is simple, and handle shape affects comfort over a long layout session, so someone who marks out large projects for hours may find a plain handle less kind than a shaped one. There is no specialized geometry here to help in dovetail corners or to register in a particular way. Choose the Crown if you run a classic hand-tool workshop and want a traditional shape from a traditional maker. Skip it if you prefer a plastic handle or a specialized blade shape for a specific joint.
Marples Marking Knife: the familiar generalist
Marples is a British hand-tool brand known for its chisels and marking tools, and this knife pairs a wood handle with a firm steel blade. Familiarity is its strength: if your bench already holds Marples chisels, this knife belongs to the same world and will feel like a natural extension of a set you trust. The firm blade suits general woodworking layout, the everyday marking of shoulders, lengths and positions that make up most bench work.
Its limit is that the blade shape is basic, so specialists will find less to excite them here than in the Shinwa’s flat-backed precision or the Two Cherries’ slim dovetail reach. Confirm the blade length and bevel on the listing before ordering, as the review advises, because generalist lines vary. Choose the Marples for general woodworking from a familiar brand. Skip it if you want a Japanese style or a knife shaped for one particular joint.
Head-to-Head: Comparing the Six Knives Against Each Other
Narex versus Marples. Both are sensible general-purpose choices from established makers. The Narex leans toward the beginner, with an affordable, dependable design and a handedness choice to make at ordering. The Marples leans toward the woodworker already invested in a British hand-tool tradition, with a firm blade for general layout. A first-time buyer will usually be happier with the Narex’s clarity; a Marples chisel owner will feel at home with the Marples.
Veritas versus Shinwa. These are the two precision-leaning picks, and they get there differently. The Veritas is a refined Western layout tool whose steel holds a keen edge through long sessions. The Shinwa is a Japanese single-bevel design whose flat back registers against the square for the finest line. If your sharpening routine is built around Western tools and you want refinement, choose the Veritas. If your layout centers on dovetails and fine joinery and you will maintain a single bevel properly, choose the Shinwa.
Two Cherries versus Crown. Both are traditional European tools with wood handles. The Two Cherries distinguishes itself with a slim blade that reaches small dovetail corners; the Crown distinguishes itself with a simple, classic Sheffield shape. Dovetail work tips the choice to the Two Cherries; general traditional bench work tips it to the Crown.
Specialists versus generalists. Stepping back, this list splits by intent. The Shinwa and Two Cherries are shaped by specific tasks, fine joinery lines and dovetail corners. The Veritas is a refined all-round layout tool. The Narex, Crown and Marples are honest generalists at different points of tradition and price. Buy the specialist only if you actually do the task it specializes in; otherwise a generalist plus good sharpening habits will mark every line you need.
A Layout Routine That Gets the Best From Any of These Knives
The knife is only half of a knife line; the other half is the routine around it. Start with reference faces and edges established, because a knife line is only as truthful as the surface it is drawn from. Register your square firmly, hold the knife with its flat or back against the square’s blade as the design intends, and make the first pass lightly. A light first pass creates a track; a second pass in the same track deepens it to a line a saw or chisel can follow. One heavy pass, by contrast, can push the knife off line and tear the grain, especially across it.
Work in a consistent direction and light. Marking across the grain shows a line best when the light rakes across the surface, so a bench lamp angled low reveals lines that overhead light hides. Knife the lines that define joinery shoulders and baselines, and leave pencil for rough dimensioning where a thick line does no harm. When you pare or saw to a line, leave the line itself until the final fitting pass; the line is your record of intent, and removing it early removes your reference.
Edge care is the other routine. A marking knife does fine work with a small edge, so it responds beautifully to little and often maintenance: a few strokes on a fine stone or a strop before a layout session, rather than a grinding rescue after months of neglect. Keep the flat back of a single-bevel knife flat, protect the edge in storage with a sheath, a slot in a tool roll, or a dedicated spot in the drawer rather than loose among chisels, and keep the blade dry and lightly protected in a damp workshop, as the rust-prevention answers in the FAQ describe. None of this takes long. All of it is the difference between a knife that draws a hairline and one that plows a furrow.
More Marking Knife Questions, Answered in Depth
Should I own both a single-bevel and a double-bevel marking knife?
Many experienced woodworkers do, because the two designs solve different problems. A single-bevel knife registers flat against a square on one side and excels when the reference surface is always on the same side of the line, as in much dovetail and shoulder work. A double-bevel knife can work from either side and is more forgiving for general layout. If you buy one knife first, match it to the work you do most; add the other style when you find yourself working around the first one’s limits. The picks above include both philosophies, so the list itself is a reasonable menu for a two-knife bench.
Why does my knife line look good but my joint still does not fit?
Usually the line was fine and the cutting drifted. A knife line guides a saw or chisel only if the tool is started in the line and kept there; a saw started on the waste side of the line, cutting away from it, leaves the line intact and the joint tight, while cutting on the line itself removes half your reference. Work to the line rather than through it, test the fit early, and pare the last material with a chisel registered in the knife wall. The knife’s job is to define the boundary precisely; the fitting is still your hands’ job.
How fine should a marking knife line actually be?
Finer than a pencil line and no deeper than it needs to be. The first light pass should leave a visible track you can feel with a fingernail; a second pass deepens it enough to catch a chisel edge. Lines cut too deeply across grain can tear fibers and leave a scar on a finished shoulder, so depth is not a virtue in itself. If your lines look like small trenches, lighten your hand and let sharpness do the work, which usually means honing the knife rather than pressing harder.
Does handle material change how well a marking knife works?
It changes comfort and confidence more than accuracy. A wood handle, which most of these picks use, warms in the hand and gives a traditional grip that many woodworkers find secure during long layout sessions. What matters functionally is that the handle does not roll unexpectedly, does not flex, and lets you hold the blade at a consistent low angle against the square. If a handle shape tires your hand, you will rush layout, and rushed layout is where errors enter a project.
Can I mark metal or other materials with one of these knives?
Occasionally, with expectations adjusted. As the earlier FAQ notes, a marking knife can scribe a line on softer materials, but hard or abrasive surfaces dull the fine edge that woodworking layout depends on, and a dulled marking knife draws a wide, wandering line in wood. If you scribe metal regularly, keep a separate inexpensive knife or a dedicated scriber for that work and reserve your good marking knife for wood. Protecting the edge is cheaper than restoring it.
How do I choose between a knife on this list if I cut both dovetails and general joinery?
Start from the joint you cut most. Dovetail-heavy work rewards the slim reach of the Two Cherries or the flat registration of the Shinwa. Mixed general joinery rewards the refined all-round Veritas or the dependable Narex. There is no wrong answer among the six for general work; there are only better fits for specific habits. If you truly split your time evenly, the refined generalist is the safer single purchase, and a specialist can join it later when a project demands one.
Layout Errors a Marking Knife Cannot Fix
A marking knife improves the quality of a line, but it cannot rescue errors made before the line is drawn. The most common is marking from the wrong reference: measuring each part from a different edge, so small errors accumulate until the last joint refuses to close. Mark mating parts from the same reference face, and where possible, transfer dimensions directly from one part to its partner with the knife rather than measuring twice. A knife line transferred from the actual workpiece is truthful in a way a ruler reading can never quite be.
The second error is marking before the stock is truly flat and square. A knife line drawn on a twisted board describes a shape that cannot exist in the finished piece, and no sharpness fixes geometry. Prepare the reference face and edge first, as the layout-routine section assumes, and only then let the knife speak. The third error is haste at the square: a square that is not seated firmly, or a knife held at a wandering angle, produces a line that looks fine and lies quietly. Slow down for the two seconds a cut takes, keep the blade registered, and check the first line of a session against a known square corner before trusting the rest. These habits cost nothing, suit every knife on this list, and account for more accuracy than any difference between the six tools themselves.
The Short Version
For a budget-friendly start, the Narex. For a refined tool, the Veritas. For a German classic, the Two Cherries. For a Japanese flat-backed line, the Shinwa. For a traditional British feel, the Crown or the Marples.
Related Guides
- 6 Best Precision Knives for Crafts and Detail Work (2026)
- 6 Best Marking Knives: Dovetail and Joinery Layout Picks (2026)
- 7 Best Digital Calipers: Budget to iGAGING Precision (2026)
- 5 Best Pocket Gram Scales: 0.01g and 0.001g Precision (2026)
- 6 Best Precision Screwdriver Sets: Micro Bits to Kits (2026)