A scriber is a hard pointed pen that scratches a fine layout line into metal, glass, ceramic or hardwood. Many have a tungsten carbide tip, and some add a magnet at the other end. The main choices are the tip, whether it can be replaced, the body and the pack size.
The six picks below run from single classic scribes to a five pack with spare tips and a ruler. Details come from each listing page and are the makers’ own claims. We have not used these scribers ourselves. Where a listing is thin or mixed, we say so.
As an Amazon Associate we earn from qualifying purchases. Links below are affiliate links, and they do not change the product information we give.
What to Look For
| Feature | Why it matters |
|---|---|
| Tip | Carbide is described as hard enough for steel and glass |
| Spare tips | A replaceable point extends the life of the tool |
| Magnet | A magnetic end picks up small steel chips |
| Body | A knurled grip and pocket clip help control and carrying |
In this guide
Specs at a Glance
| Scriber | Pack | Tip | Notes |
|---|---|---|---|
| General Tools 88CM | 1 | Tungsten carbide; replaceable | Magnet; knurled aluminum; pocket clip |
| General Tools 88 | 1 | Tungsten carbide; replaceable | Reversible point; 8.63 in package length |
| Malco A50 | 1 | Carbide; replaceable; 0.3 mm | Pocket clip; limited lifetime warranty |
| GCHMDE 5-pack | 5 plus 25 tips | Tungsten carbide; 0.3 mm | Magnetic cap; 6 in ruler; 1 year warranty |
| NEPAK 2 pack | 2 plus 12 tips | Tungsten carbide | Magnet; knurled aluminum; pocket clip |
| DANG Scratchall | 1 | Tungsten carbide | 3 in stainless body; cap-off; keychain ring |
The 6 Best Scribers

Top pickBest for machine shop layout work
1. General Tools 88CM Carbide Scribe and Magnet
A classic pen style scribe with a tungsten carbide tip that the maker says marks hardened steel, stainless steel, ceramics and glass. The other end carries a magnet for small parts and steel chips. It has a knurled aluminum handle, a pocket clip and a replaceable point.
Suits: machine shop layout work. Strengths: a magnet and a replaceable tip. Weaknesses: one scribe and no spare points listed. Skip it if you want a multi-pack.

View General Tools 88CM Tungsten Carbide Scribe and Magnet, Copper, Replaceable Tip on Amazon

Best for a pocket scribe for a toolbox
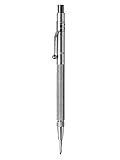
2. General Tools 88 Tungsten Carbide Scriber
The same maker’s version without the magnet in its name. The listing describes a reversible point on a chuck, so the tip can be turned around and stored inside the body, plus a pocket clip. The maker says the point works on hardened and stainless steel, ceramics and glass and is easy to replace.
Suits: a pocket scribe for a toolbox. Strengths: a reversible point. Weaknesses: the listing gives several line size values. Skip it if you want a magnet.
View General Tools 88 Tungsten Carbide Scriber Silver, Medium on Amazon

Best for sheet metal marking
3. Malco A50 Carbide Tipped Scribe
A single carbide tipped scribe with a 0.3 millimeter fine point, a pocket clip and a replaceable tip. The listing weight is 1.12 ounces and the maker backs it with a limited lifetime warranty. The page lists marking out as its use and gives little other detail.
Suits: sheet metal marking. Strengths: a fine point and a warranty. Weaknesses: a short listing. Skip it if you want a magnet or spare tips.

Best for a shared shop or a class
4. GCHMDE 5-Pack Tungsten Carbide Scriber with 25 Tips and Ruler
Five magnetic scribers with knurled aluminum grips, pocket clips, 25 replacement tips in protective cases and a 6 inch stainless steel ruler. The listing gives a 0.3 millimeter line size and a one year manufacturer warranty. The maker says the magnetic cap collects metal shavings.
Suits: a shared shop or a class. Strengths: many scribers and spare tips. Weaknesses: a lesser known maker. Skip it if you want one scribe.

Best for a pair for the bench and the bag
5. NEPAK 2 Pack Tungsten Carbide Scriber with Magnet
Two scribers with 12 extra tungsten carbide tips, knurled aluminum bodies, pocket clips and permanent magnets that the maker says pick up small parts and steel filings. The listing calls the point type broad and gives a 5.39 inch length.
Suits: a pair for the bench and the bag. Strengths: spare tips and magnets. Weaknesses: a broad point. Skip it if you need the finest line.


Best for a keychain tool
6. DANG Scratchall Scriber Etching Pen, 3-Inch
A compact 3 inch scriber with a stainless steel body, a tungsten carbide tip, a cap-off design and a keychain ring. The maker lists uses such as scribing layout lines, marking workpieces, glass etching and jewelry making. It is a single tool with no spare tips.
Suits: a keychain tool. Strengths: small and capped. Weaknesses: no magnet and no spare tips. Skip it if you want a full size grip.

View DANG Scratchall Scriber Etching Pen, 3-Inch Carbide Tip, Keychain Ring on Amazon
Care and Setup
- Apply layout fluid first so the line shows clearly.
- Cap or reverse the point when the scriber is not in use.
- Keep spare tips in their cases.
- Wipe steel chips from the magnetic end.
Mistakes to Avoid
- Pressing hard on glass or ceramic.
- Carrying a scriber point out in a pocket.
- Buying a magnet model and leaving it near a watch or card.
- Counting on the line size when the listing gives several.
Layout Fluid and Making Lines Visible
A scribed line is thin and bright against bare metal, which makes it hard to see, especially on shiny surfaces. Layout fluid, sometimes called marking dye, solves this by coating the metal with a thin colored film. When the scriber cuts through the film, a crisp contrasting line shows. Blue and purple dyes are widely used because the scribed line shows up clearly against them.
Apply a thin, even coat and let it dry before marking. Too thick a coat can flake, and too thin a coat gives poor contrast. A permanent marker can work as a quick substitute on some surfaces, but ink may spread or smear on oily metal. Clean the surface first, as oil prevents the dye from sticking.
- Degrease the work with a suitable solvent before coating.
- Use a straightedge or a combination square as a guide and hold it firmly.
- Scribe in one smooth pass at a consistent angle.
- Wipe off the dye after machining or cutting, following product instructions.
Check safety information on the fluid, since many contain solvents, and use in a ventilated place.
Carbide Tips, Hardness and the Right Pressure
Tungsten carbide is a very hard material, which is why it appears on most scribers in this guide. Hardness lets the tip mark steel, glass and ceramics, where a plain steel point would skid or dull. Makers also describe the tips as replaceable, which extends the life of the tool.
Hardness has a cost: carbide is brittle. A sharp knock or a drop on a hard floor can chip the tip, and heavy side pressure can snap it. Let the tip do the work with light to moderate pressure, and keep the scriber nearly upright with a slight lean in the direction of travel. On glass and ceramics, pressing hard can cause chipping or cracks, so use a lighter hand and support the piece on a soft, flat surface.
- Test on a scrap of the same material to find the right pressure.
- Do not use a scriber to pry, punch hard or twist.
- Replace a chipped tip, which can leave rough or double lines.
Wear eye protection when marking glass or ceramics, as tiny fragments can fly.
Fine Point Versus Broad Point Lines
Tip geometry sets line width. A fine point, such as the 0.3 millimeter figure mentioned in some listings, draws a narrow line that suits precision layout and sheet metal work. A broader point gives a more visible line and may be better for rough marking, but it is less accurate for close tolerances. A listing for a broad point should be read as a sign it favors visibility over precision.
When you need a fine line, check the spec carefully. Several scribers list more than one size or a vague description, so ask the seller if accuracy matters. Also consider the angle: a steeper angle gives a finer line, while a flatter angle creates a wider scratch. Use a light touch and avoid going over the same line twice, which can double the line.
- Fine point: sheet metal, machine layout, jewelry and model making.
- Broad point: fabrication, structural steel, rough marking on thicker material.
- Spare tips in varied styles are handy in a class or shared shop.
Mark on the waste side of the final cut line when possible, so you leave the line visible and have room for finishing.
Magnets, Pocket Clips and Carrying
Features at the other end of the scriber can matter as much as the tip. A magnetic end lifts small steel chips, filings and screws, and some people use it to pick up dropped parts. The magnet is not strong enough for heavy objects. Keep magnetic scribers away from mechanical watches, credit cards and sensitive electronics, which can be affected.
A pocket clip keeps the scriber handy in a shirt pocket or apron, but make sure the point is capped or retracted, since an exposed carbide tip can pierce fabric or skin. Some models have a reversible point that stores inside the barrel, and compact versions have caps and keychain loops. Knurled bodies give a firm grip, though aluminum can be slippery with oily hands.
- Choose a magnet if you work with steel chips and small parts.
- Choose a capped or retractable design for pockets and bags.
- Check the length: a long scriber suits a bench, while a short one fits a travel kit.
- Store the scriber point-up in a holder or in a tray.
Pack scribers away from other tools so the tip does not chip.
Materials It Can and Cannot Mark
A scriber is a scratching tool, so it works best on materials that show a scratch. Listings mention metal, glass, ceramics and some hardwoods. Bare steel, aluminum and brass show a bright line, especially with layout fluid. Stainless steel and hardened steel are tougher, and the carbide tip helps here. Coated or painted metal shows a line where the coating is cut, but the cut can expose the base and invite corrosion, so consider the finish.
There are limits. A scribe line is a permanent scratch, so avoid using it on visible surfaces, polished finishes, glazed items or anything you want to remain unmarked. For delicate or valuable pieces, use a removable marking method such as a pencil, a marker or tape. On soft woods, a marking knife or a pencil is often a better way to define a line, since an awl or scriber can tear fibers.
- Good: sheet metal, tubing, plate, aluminum, some plastics, glass for light etching.
- Take care: finished or coated surfaces, thin glass, valuable pieces.
- Not suited: very soft materials where the point digs in and wanders.
When a project needs a mark that can be removed, plan another marking method and test first on scrap.
Scriber FAQ
What is a scriber used for?
It scratches a layout line for cutting, drilling or bending, mostly on metal, and the makers also list glass and ceramics.
Which picks come with spare tips?
The GCHMDE lists 25 and the NEPAK lists 12. The General Tools and Malco scribes list a replaceable tip.
What is layout fluid and do I need it?
It is a thin colored dye applied to metal so a scribed line shows clearly. You can scribe without it, but the line is much easier to see with it.
Can a carbide scriber chip or break?
Yes. Carbide is hard but brittle, so drops and side pressure can chip the tip. Use light pressure, store the scriber with the point protected and replace damaged tips.
Are magnetic scribers safe around watches and cards?
Keep magnets away from mechanical watches, cards with magnetic strips and sensitive electronics, as they may be affected.
How do I replace a scriber tip?
Follow the maker's instructions. Most use a collet or chuck: loosen it, insert the new tip, then tighten gently, avoiding overtightening.
Can I use a scriber on wood?
On hardwood it can make a fine line, but on soft wood it can tear fibers. A marking knife or pencil is usually the better choice.
Is a scriber the same as a center punch?
No. A scriber draws lines. A center punch makes a dimple to guide a drill bit, and it is struck with a hammer.
How should I store a scriber?
Cap or retract the point, keep it in a holder or case, and avoid loose storage with other tools where the tip can chip.
Scribing Versus Marking With Pencils and Markers
A scriber leaves a thin line by scratching the surface, while a pencil or marker deposits material on top. That difference decides when each is the right tool. For precise metalwork, a scribed line can be as fine as a fraction of a millimeter, which a pencil tip cannot match. It will not rub off with handling or a damp rag, which is useful when a part moves around a shop for hours.
The downside is permanence. A scribed line is a tiny scratch, and on finished or soft surfaces it can remain visible after you are done. Pencils and markers wipe away, which is better for finished wood, plastics and anything that will be seen. Many woodworkers use a marking knife for cross-grain lines because it severs fibers cleanly, while metalworkers rely on carbide scribers for layout on steel, aluminum and brass.
Layout Workflow: From Dimensions to a Cut Line
A good scribed line is the end of a sequence, not the start. Begin by cleaning the surface so the tip does not skip over oil or dirt. Apply a thin coat of layout dye if the metal is shiny. Use a steel rule, combination square or straightedge as a guide, and hold the scriber at a slight lean in the direction of travel, drawing toward you in a single steady pass.
- Measure twice from the same reference edge so errors do not stack up.
- Draw one line per mark. Going over a line twice can wander off the first pass.
- Check the line against the part before cutting or drilling, since a scribed mark is hard to undo.
For holes, scribe crossing lines and mark the intersection with a center punch so the drill bit does not walk. This sequence is why scribers and center punches are often sold or used together.
Using a Scriber With Squares, Rules and Templates
The guide you press against matters as much as the tool. A rule with a worn or rounded edge produces a wobbly line, and a flexible plastic template can shift under pressure. Keep the scriber tip tight against the edge of a steel rule, and press the rule down firmly with your other hand so it does not creep.
When tracing around a template, keep the scriber at a consistent angle. Tilting it away from the template leaves a gap that adds error to the outline. For curved shapes, take your time and use light pressure, since carbide is hard and can skip on a tight curve if forced.
Inspecting, Resharpening and Retiring a Scriber
A dull or damaged tip makes thick, ragged lines that defeat the purpose of the tool. To check yours, draw a test line on a scrap piece with layout dye and look at it in good light. A clean, narrow line means the tip is in good condition. Wide or broken lines suggest a chipped point.
Some scribers have replaceable tips, which makes fixing a damaged one simple. Others are single-piece tools that need careful sharpening on a fine diamond stone or need to be replaced. Because tips are brittle, avoid using a scriber to pry, scrape or punch, and store it with a cap or in a case so the point stays protected.
Scribing on Plastics, Glass and Painted Surfaces
Carbide scribers can mark materials beyond bare metal, but each one reacts differently. On plastics, a scribed line cuts a groove that can crack brittle acrylic when you later snap it along the mark, which is why that technique is used for scoring. On glass, a scriber may leave a faint line, but glass cutting is best left to a purpose-made cutter. On painted or coated surfaces, the scribe will cut through the finish and leave a visible mark, so test on a hidden area first.
Always wear eye protection when scoring brittle materials, since tiny chips can fly. Use light pressure on thin or delicate surfaces to avoid gouging.
Scribers for Hobby and Model Work
Hobbyists use scribers for panel lines on scale models, etching designs into metal sheets and marking jewelry blanks. Fine-point tools suit these jobs because they cut delicate lines. A steady hand and a flexible guide, such as thin tape or a bendable ruler, can help with curved panel lines.
If you work with small parts, a pen-style scriber is easier to control than a long machinist’s version. Choose a comfortable grip and a tip that you can replace, since fine work tends to wear the point.
Safety, Eye Protection and Workshop Habits
A scriber is a sharp pointed tool, so treat it like one. Cap it or hold it in a protective case when it is not in use, never carry it point-up in a loose pocket, and keep it out of reach of children. Wear safety glasses whenever you mark hard or brittle material, since a skipping tip can slip and tiny fragments can fly. Work on a stable surface with the part clamped down, so both hands are free for the rule and the scriber.
Frequently Asked Questions
Can a scriber replace a marking knife for woodworking?
For rough layout it can mark wood, but a marking knife is usually better because it cuts fibers cleanly and gives a crisp edge for a chisel or saw to register against. A scriber can tear grain and wander along it, especially on softwoods.
How do I draw a straight line with a scriber?
Press a steel rule or square firmly on the surface, lean the scriber slightly toward the direction of travel, and draw toward yourself in one steady pass. Keep the tip tight against the rule’s edge and avoid going over the same line twice.
Why does my scriber skip or leave a faint line?
Common reasons are a dirty or oily surface, too little pressure, or a dull tip. Clean the metal, apply layout dye for contrast, and try a test line on scrap. If the line is still faint or ragged, the tip may be chipped.
Do I need a center punch along with a scriber?
Not always, but it helps when you are drilling. A scribed cross marks the location, and a center punch creates a small dimple so the drill bit starts in the right spot and does not wander. For cutting layout alone, a punch is optional.
Building a Layout Workflow Around the Scriber
A scriber earns its place inside a sequence, not as a standalone gadget. A reliable metal layout workflow runs like this: clean the surface, apply layout fluid where precision matters, let it dry fully, establish your reference edges with a square or rule, scribe the primary lines, then add centre marks with a punch only where drilling will follow. Each step protects the next. Scribing on a dirty or oily surface gives a line that wanders and fades; scribing before the fluid dries smears the coating into the groove and ruins contrast. The scriber is the step where measurements become permanent, so the habit worth building is measuring twice before the point touches metal, then committing to one clean pass rather than several tentative scratches that leave a fan of near-parallel lines and genuine doubt about which one is true.
Pressure is the skill inside the workflow. The point should be pulled toward you or pushed along the guide with steady, moderate force, angled slightly into the direction of travel so it tracks rather than skates. Too little pressure gives a hairline that vanishes under workshop light; too much digs a trench that can deflect a drill or saw and makes the line hard to correct. On hardened or coated stock, expect to adjust: a first light pass to establish the track, then a second pass in the same groove to deepen it. Two passes in one groove is good practice; two grooves is a spoiled layout.
Matching the six picks to hands and habits
The two General Tools models split by user temperament. The 88CM adds a magnet to the classic scribe, which suits bench workers who set the tool down among steel offcuts and want it to stay put and pick up small parts; the plain 88 is the purist layout pen, light and simple, for users who keep it in a pocket or apron and reach for it constantly. The Malco A50 serves sheet-metal and HVAC habits, where the scribe works alongside snips and folding tools and lines often need to survive handling, bending, and installation rather than just the saw. Its character is durability under rougher treatment.
The GCHMDE 5-Pack changes the economics entirely: with multiple pens and spare tips, it suits classrooms, shared benches, and users who lose tools or want one at every station. A lost pen from a multi-pack is an annoyance, not a stoppage. The NEPAK 2 Pack pairs the magnet feature with a backup pen, a middle path for a single user who wants the bench convenience plus a spare in the toolbox. The DANG Scratchall, at its short length, is the control specialist: close to the work, almost like drawing with a short pencil, it favours engravers, modellers, and anyone marking small parts where a full-length pen feels clumsy. Choosing among the six is really choosing your failure mode: losing tools, wearing tips, or fighting for control on small work.
Head-to-Head: Tips, Spares and Line Quality
Side by side on the same piece of blued steel, all six will produce a visible line, so line quality alone rarely decides the purchase. What separates them over months is tip management. Carbide is hard but brittle; a dropped pen can chip its point, and a chipped point tears rather than cuts, leaving a ragged line that widens under a saw. Models with replaceable or plentiful spare tips turn that accident into a two-minute fix. Fixed-tip models ask you to dress the point carefully on a fine stone, which is possible but slower and easy to get wrong. If your bench is concrete and your habits are hurried, spare-tip economics beat theoretical point quality.
Body design is the second divider. Knurled or shaped grips matter when hands are oily; a smooth, slim pen rotates in the fingers and the line curves with it. Magnet models add bench manners but deserve one caution: the magnet collects steel dust and tiny chips around the body, so wipe it before fine layout or you will drag grit across the surface you are marking. Length divides the group a third way: longer pens bridge a rule edge more stably for long straight lines, while the short DANG gives finer control for curves, lettering, and small-pattern work. Match the body to the line you draw most, not the line you draw occasionally.
Scribing curves, circles and matched pairs
Straight lines along a rule are only half of layout work. For curves, scribe in short, connected strokes following a template, keeping the point angle consistent so the groove depth stays even; a curve scribed in one heroic sweep usually departs from the template at the point where your wrist runs out of travel. For circles, a scriber paired with dividers or a trammel does the work, and the same light-first-pass rule applies. For matched pairs of parts, scribe one part fully, then use it as the template for its mate rather than measuring both from the drawing; paired parts made this way match each other even if both drift slightly from the nominal dimension, and in assemblies, matching each other is usually what matters.
Troubleshooting Lines That Skip, Wander or Vanish
Diagnose a bad line in order. First, the surface: oil, scale, and loose coating are the most common causes of skipping, so clean and, for precision work, re-blue the area. Second, the point: run the tip lightly across a fingernail; a chipped point feels scratchy in one direction, and the fix is a fresh tip or careful dressing. Third, the angle: a point held too upright skates on hard stock, while a point laid too flat ploughs; adjust until the tip bites at the start of the stroke without digging. Fourth, the guide: a rule that is not held firmly, or that sits on a burr, will move mid-line, so clamp or weight it and check the edge contact before blaming your hand. Fifth, the lighting: a line that looks vanished at one angle often reappears under raking light, which is a reminder to position the bench lamp before layout, not after.
Care is brief but specific. Cap or retract the point in storage where the design allows, keep the pen in a pocket or tray rather than loose in a drawer of steel tools, and never use a scriber as a pry, a centre punch substitute for heavy striking, or a screwdriver in a pinch; each of those is a reliable way to chip the tip you depend on. Used within its one job, a carbide point lasts a very long time, which is why the real cost difference between these six is not the point at all, but the body, the spares, and how the tool fits the hand that uses it every day.
Choosing by Scenario: Bench, Sheet Metal, Classroom and Kit
The full-time bench worker who lays out machined parts daily should buy for point life and hand comfort above all, because the pen is in use for hours and every layout begins with it. A single quality pen, kept in a dedicated spot, capped, and wiped before use, serves this user better than a drawer of assorted pens of unknown sharpness. The General Tools models fit this pattern directly, with the magnet version suiting benches where the pen otherwise migrates under parts. The sheet-metal worker should buy for toughness and line survival: lines must endure marking, cutting, folding, and handling, so a pen that cuts a decisive groove, like the Malco pattern, matters more than fine-point delicacy, and a spare in the gang box matters more than either.
The teacher, club leader, or shared-workshop organiser faces a different arithmetic: tools walk away, tips get abused by learners, and the cost of a missing pen is a stalled lesson. Multi-packs with spare tips, like the GCHMDE set, are the rational purchase here even if each individual pen is less refined, because availability is the feature. The home hobbyist building a first kit should think in pairings: a scriber plus a centre punch covers layout and drill-starting, and a two-pack such as the NEPAK lets one pen live at the bench and one in the travelling toolbox, so the tool is present for the garage job and the workshop job alike. The modeller and engraver, finally, should buy for control at small scale, where the short DANG pattern turns the pen into something closer to a drawing instrument, and where lines are often decorative or functional at a size the full-length pens handle clumsily.
Layout fluid choices and alternatives
Layout fluid earns its keep when lines must be read precisely under time pressure, but it is not the only way to gain contrast. On bright steel, a broad permanent marker swept across the area and allowed to dry gives a thinner, less durable version of the same effect, adequate for a single cut line. On dark or scaled stock, a light dusting of chalk or a soapstone line can guide rough work where a scribed hairline would vanish. Copper-based coatings and purpose fluids give the crispest result for fine work. Whatever you use, let it dry fully, scribe once with conviction, and resist re-coating over a finished layout to fix one doubtful line; re-coating floods the grooves and erases the contrast you created. For repeated parts, consider scribing the first part, verifying it completely, and then using it as the physical template, which transfers not just dimensions but every small decision you made while laying it out.
Scribing Technique for Common Shapes and Joints
Long straight lines are drawn against a rule or straightedge held firmly, with the pen angled into the direction of travel and the stroke made in one continuous pull where the bench allows. Where the line exceeds comfortable reach, reposition yourself rather than stretching; stretched strokes wander at exactly the point where your arm runs out of control. For parallel lines, set dividers or use the edge of the work itself as the reference rather than measuring each line from a scale, because copied lines stay parallel even when their absolute position drifts slightly, and in most fabrications parallelism is the property that matters.
Circles and arcs begin with a punched or drilled centre that the divider point can register in; a divider skating across a smooth surface ruins both the arc and the layout around it. Scribe arcs in overlapping short strokes, rotating the work rather than your wrist where possible. For holes, scribe the circle, then add cross lines through the centre so the drill can be aligned even after the circle is partly cut away. For matched holes in two parts, clamp the parts together and drill or transfer through the first, rather than scribing both independently; transferred holes align, while independently scribed holes merely hope to. These are old workshop habits, and they persist because they remove whole categories of error before the cutting starts, which is the entire purpose of layout.
Reading your own lines under real light
A scribed line changes appearance with light angle, and learning to read it is part of the skill. Position the bench light so it rakes across the surface; the groove catches a bright edge on one side and a shadow on the other, making the true centre of the line easy to split with a saw or align with a punch. If you must work under flat overhead light, tilting the work slowly until the line flashes is the reliable way to confirm which of two close marks is the real groove and which is a surface scratch. Mark the true line’s ends with small witness ticks beyond the cut area, so if the middle of the line is lost during handling, its position can be re-established without remeasuring. Layout is a conversation between the drawing, the tool, and the light, and the workers who treat it that way scrap fewer parts.
Building the Scriber Into a Complete Marking Kit
No scriber works alone for long. The complete marking kit that grows around it usually includes a centre punch for drill starts, an automatic punch for one-handed marking, dividers for transferring distances, a reliable rule and square for references, layout fluid and a marker for contrast, and a fine stone for point maintenance. Bought gradually, each addition removes a workaround. The scriber remains the centre of the kit because it makes the line everything else follows: the punch registers in its intersections, the saw splits its groove, the file stops at its witness marks. Choose the pen that fits your hand and your loss-and-damage pattern, maintain its point, keep it where your hand expects it, and the modest tool becomes one of the highest-leverage objects on the bench, quietly deciding the accuracy of everything built after it.
Scribing for Repair and Restoration Work
Repair work gives the scriber a second career beyond new fabrication. When a part must be replaced in an existing assembly, the surviving parts are the drawing: scribe the replacement directly from the original, transferring hole positions, edge profiles, and witness marks physically rather than through a chain of measurements that each add their own small error. When disassembling something you must rebuild, scribe light witness lines across joints before separation; on reassembly, those lines either align or they tell you immediately that something is seated wrong. When matching a worn edge, scribe the profile from the least worn section and work the repair to that line. In all three cases the scriber’s virtue is the same: it copies reality instead of describing it, and reality is what the repair has to fit.
Restoration adds one caution: original surfaces may be historically or personally significant, and a scribed line is permanent. Work on the hidden face where one exists, use the lightest line that remains readable, and prefer removable marking on show surfaces, reserving the scriber for the underside and the interior. The discipline is identical to new work, measure and think first, commit once, but the stakes include not erasing the object’s own history while you preserve its function.
Common beginner errors and their corrections
Beginners press too hard, because a deep line feels like a certain line; the correction is to lighten pressure until the line is just visible under raking light, then discover that saws and punches follow it perfectly well. Beginners also scribe freehand where a guide belongs, producing lines that wander in sympathy with their reach; the correction is to clamp the rule and shorten the stroke. A third error is marking on the waste side inconsistently, cutting away the line on one part and leaving it on the next; adopt a personal convention, such as always keeping the line on the keeper piece, and never vary it within a project. A fourth is scribing before the design is settled, filling a surface with the archaeology of abandoned ideas; sketch and measure on paper or scrap until the layout is decided, then scribe the workpiece once, cleanly. Each correction is small, and together they are the difference between layout that guides the build and layout that merely decorates it.
Keeping spare tips and a dressing stone together
Store the pen, its spare tips, and the small stone for dressing its point in one place, ideally a small roll or tin that travels between bench and toolbox as a unit. The pairing matters because a chipped point discovered mid-layout is only a brief interruption if the fix is within reach, and a project delay if it is in another building. Check the point whenever the pen is picked up after being lent or dropped, and make the check a reflex: a glance, a light stroke on a thumbnail, and you know the state of the edge before it writes its first line of the day.
A final word on choosing
If the decision still feels open after comparing bodies, spares, and length, decide by the work you did last month rather than the work you imagine next year. The pen that matches your recent, real layout, the bench you actually use, and the losses you actually suffer will be picked up daily, while the pen bought for an imagined future tends to stay in its packaging. Daily use is what turns a scriber from a purchase into a habit, and the habit is where all the accuracy in this guide ultimately comes from.
Finally, keep the scriber’s role in perspective when a layout goes wrong. The pen reports the decisions you made; it does not make them. When a part comes out wrong, trace the error back through the chain, measurement, reference, setting, line, cut, and fix the link that actually failed rather than blaming the most visible one. More often than not the line was honest and the measurement was not, and the scriber, faithfully copying a wrong decision, has done its job exactly as designed.
The Short Version
For a classic scribe with a magnet, the General Tools 88CM. For a reversible point, the General Tools 88. For a fine point and a warranty, the Malco. For a pack with spare tips, the GCHMDE. For a pair with magnets, the NEPAK. For a keychain, the DANG.