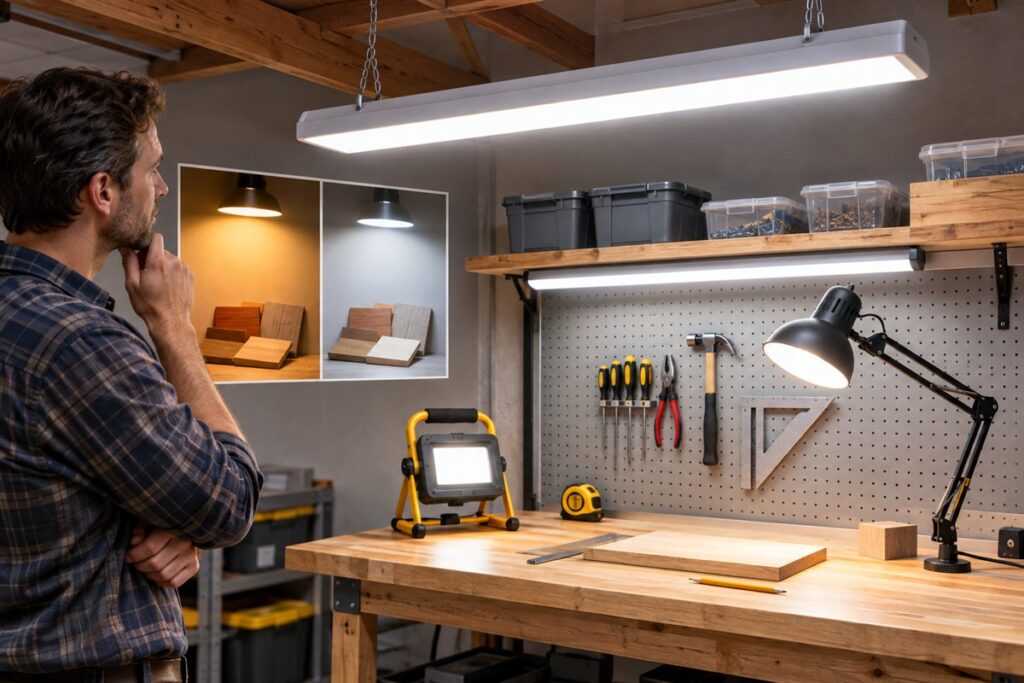
Good workshop lighting is bright enough to see detail, even enough to avoid harsh shadows and neutral enough to show true colors. Think about brightness, color temperature and where the fixtures go, then leave any fixed wiring to a qualified electrician.
Brightness in Plain Terms
Light output is measured in lumens, and larger rooms or detailed work need more of them. A garage used for storage needs less light than a bench where you mark, cut and assemble small parts. Spread the output across several fixtures instead of relying on one bright spot, because even lighting reduces glare and hard shadows.
Color Temperature and Color Accuracy
Color temperature is shown in kelvins. Lower numbers look warm and yellow, and higher numbers look cool and bluish. Many workshops use a neutral to cool white because it feels crisp for detail work. A color rendering index (CRI) figure on the package shows how true colors look under the light; higher values show colors more faithfully, which helps when matching finishes.
Fixture Types
- Linear strip or tube fixtures: wide, even coverage across a room.
- Shop lights that hang or mount to a surface: straightforward to place over benches.
- Portable stand or clamp lights: aim extra light where you need it.
- Task lights: a focused lamp for close work at a bench or machine.
- Headlamps and battery lights: useful for tight spaces under cabinets or inside machines.
Planning Table
| Factor | Why it matters | What to check |
|---|---|---|
| Lumens | Sets how bright the room feels | Output on the package |
| Color temperature | Affects comfort and contrast | Kelvin value |
| CRI | Shows color faithfulness | Value on the box |
| Placement | Prevents shadows from your own body | Light over and in front of the bench |
| Damp-location use | Garages can be damp or dusty | Use limits in the maker’s guide |
Placing Lights Well
- Light the main bench first, with fixtures slightly in front of where you stand.
- Add overhead light for the whole room so walls and floors are visible.
- Add task lights beside machines or at cutting lines.
- Check for flicker or glare, and adjust positions or shielding.
- Keep cords tidy and out of walkways.
Fixed wiring, new circuits and ceiling work belong with a qualified electrician and local rules. Follow the maker’s manual for mounting and for the bulb types allowed, and do not cover fixtures in a way that traps heat.
Estimating How Much Light You Need
A reliable way to size lighting is to start with the room and the work. Measure the floor area, then think about how detailed your tasks are. A space used for storing boxes and parking needs less light than one used for fine woodworking, electronics or finishing. Detailed tasks call for more light on the work itself, usually supplied by fixtures positioned near the bench, while the general room lighting provides a comfortable background.
The package lists lumens, which measure the total light output. To estimate your needs, multiply the area by a target amount of light per unit of area. Guidance on suitable levels is published by lighting bodies and by manufacturers, so check a trusted source for recommendations for workshops and garages in your region. Do not rely on a single number; instead, use it as a starting point, then test with the fixtures in place and adjust.
Wall and ceiling color matter. Light-colored surfaces reflect more light, so a white or pale ceiling and walls make a space brighter without extra fixtures. Dark paint or wood paneling absorbs light, and a dark room may need considerably more output. Dust on fixtures and reflectors also reduces output over time.
- Plan for more light than the minimum if you work with small parts or dark materials.
- Consider light for the floor and walls to help you move around safely.
- Leave room to add fixtures later if the first layout falls short.
LED Fixtures and What to Compare
LED fixtures dominate workshop lighting because they use little power for the light they give, run cool and respond quickly when switched on. When comparing them, look beyond lumens. Efficiency, listed as lumens per watt, shows how much light you get for the electricity you pay for. A fixture with better efficiency may cost more at first but use less power over time. Check the stated lifespan with caution, since it refers to a decline in brightness over time rather than sudden failure, and the details differ between makers.
Check whether the unit is a complete fixture or a replacement lamp for an existing fitting. Integrated fixtures are simple to hang but cannot have the LEDs replaced, so the whole unit goes when it fails. Replaceable tubes or bulbs can be swapped, but make sure they suit the existing fitting and ballast, if any. Some tube replacements need the old ballast removed or bypassed, and wiring changes are a job for a qualified electrician.
Look at the housing. Sealed fixtures with an appropriate rating resist dust and splashes, which suits garages and damp spaces. Check the maker’s guide for suitable locations. Consider the diffuser as well. A diffuser or frosted cover spreads light and reduces glare, while bare LEDs can be harsh to look at. Linkable fixtures that connect end to end allow you to build a long row with fewer outlets, but check the maximum number that can be linked.
- Look for a switch or pull cord that is easy to reach.
- Check the cord length against your layout.
Glare, Flicker and Eye Comfort
Poor lighting causes tired eyes and headaches long before it causes accidents. Glare arises when a bright source or reflection sits in your field of view. Position fixtures so that they do not shine directly into your eyes as you work, and use diffusers or shields to soften bare tubes. Shiny surfaces, such as a metal bench top or a glossy finish, reflect light back at you, so angle fixtures to avoid mirror-like glare. Matte work surfaces help.
Flicker is a rapid variation in light output that may be invisible but can cause eye strain and headaches. Some low-quality or poorly matched dimmers and drivers produce flicker. If you notice flicker, try a different fixture or driver, and avoid mixing dimmers with fixtures not rated for them. Flicker is also a concern near moving machinery, as it can make spinning parts appear to stand still, which is a safety hazard. Choose steady lighting around saws, drills and lathes.
Shadows are another issue. A single overhead source casts your own shadow over the work. Use multiple fixtures from different angles, and add task lighting near the work to fill shadows. Consider the position of fixtures relative to the machines you use, so the cutting zone is lit from the front and side.
- Take breaks and look into the distance to rest your eyes.
- If you wear glasses, choose even lighting that does not create reflections on the lenses.
Power, Wiring and Mounting Choices
How you power and mount lights affects cost, safety and flexibility. Plug-in fixtures with a standard cord are the simplest for renters and for anyone who prefers not to touch the wiring. They can be hung from hooks or chains or screwed to the ceiling or joists. Check that the mounting hardware fits your ceiling and that the fixture’s weight is supported by something solid. Hard-wired fixtures connect to the building’s electrical system and give a cleaner look, but wiring work is subject to local codes and is a job for a qualified electrician.
Think about circuits. Many garages share a circuit between lights, outlets and sometimes other equipment. Adding lights to an already loaded circuit can lead to overloads. Check the total wattage of your fixtures and ask an electrician if you are not sure. Use cords and power strips that are rated for the load, and do not run extension cords as permanent wiring.
Environment matters. Garages can be damp, dusty and cold, and some fixtures are rated only for dry indoor use. Check for the maker’s rating for damp or wet locations when needed. Cold temperatures can affect some lights, causing delayed starting or reduced output, so check the maker’s operating range. Keep lights away from heat sources and flammable materials, and make sure fixtures have clear space around them as the manual advises.
- Use a switch that can be reached from the entry door.
- Consider motion sensors or timers for convenience, if the fixtures support them.
Maintenance and When to Upgrade
Lighting needs little maintenance, but a few habits keep it performing. Dust and grime build up on lenses, diffusers and reflectors, steadily reducing output. Switch off and let the fixtures cool, then wipe covers with a soft, damp cloth, and dry them. Do not spray liquids directly at the fixture. Check cords, plugs and connections for damage, and replace damaged cords or fixtures. Inspect mounting hardware for loosening, particularly where vibration from machines affects the ceiling.
Watch for changes in the light. Dimming, flickering, color shifts, buzzing or fixtures that fail to start suggest aging components or poor connections. With integrated LED units, the entire fixture may need replacing. With tubes or bulbs, replace them with the type specified by the fixture. Mixing new and old lamps can leave patchy color, so replace in sets when practical.
Consider an upgrade when your needs change. A new machine, a bigger bench or a switch to finer work may show gaps in coverage. Walk through the shop at different times of day and note dark spots, glare and shadows. Add task lights where you find problems before replacing the whole system. If the shop is used in the evening, try your lighting in the dark, since natural light from windows can hide weaknesses during the day. Record what you change, so you can repeat successful layouts.
FAQ
Is brighter always better?
No. Too much brightness in the wrong place causes glare and eye strain. Even coverage with focused task light is usually more comfortable.
Do I need special lights near machines?
Spinning parts can look still under some flickering lights, so choose steady fixtures and follow the machine’s manual.
What color temperature is best for a workshop?
Many people prefer neutral to cool white, because it gives good contrast for detailed tasks. Personal preference matters, and warm light can feel more comfortable in a living-style space. Try a sample fixture before buying many.
How many fixtures do I need?
It depends on room size, ceiling height, wall color and the fixture output. Estimate total lumens needed, divide by the output of one fixture, then adjust after testing. Add task lights where you do detailed work.
Can I use ordinary household bulbs in a shop?
In many fixtures, yes, if the bulb fits the socket and the fixture's wattage limit. However, shop fixtures often give wider, more even coverage. Check the fixture label for compatible bulbs.
Are LED shop lights safe in a cold garage?
Many LED fixtures work in cold conditions, but operating ranges differ. Check the maker's listed temperature limits. Fluorescent types can start slowly or dim in the cold.
Why does my light buzz?
Buzzing can come from a failing driver, a loose part, an incompatible dimmer or an old ballast. Switch it off and check the connections if you can do so safely. A persistent buzz is a reason to replace the unit or consult an electrician.
Do I need emergency or backup lighting?
A battery-powered flashlight or lantern is a sensible precaution if you work with machinery, since a power cut can leave you in the dark. Keep one in a known place near the door and check the batteries regularly.
How can I reduce shadows at the bench?
Add fixtures in front of and to the side of the work, use diffused light and place a task lamp near the cutting line. Light-colored walls and a pale bench surface also help.
The Short Version
Aim for even, bright, neutral light with extra task lighting at the bench. Leave fixed wiring to a qualified electrician and follow the maker’s guidance.