A dial indicator turns a small movement of a plunger or a probe tip into a reading on a dial. People use one to check how flat a surface is, how much a part runs out when it spins or how far something shifts. The main choices are the range, the smallest graduation, the dial size and whether it is a plunger type, a lever type test indicator or a digital model.
The six indicators below run from a full 1 inch plunger dial to a probe with only 0.03 inch of travel. Ranges, graduations and sizes come from each listing page and are the makers’ own claims. We have not used these tools ourselves, and you should follow the maker’s instructions. Where a listing disagrees with itself, we say so.
As an Amazon Associate we earn from qualifying purchases. Links below are affiliate links, and they do not change the product information we give.
What to Look For
| Feature | Why it matters |
|---|---|
| Range | A 1 inch plunger travels far, while a test indicator covers about 0.03 inch |
| Graduation | 0.001 inch reads coarser than 0.0005 inch |
| Type | Plunger, lever and digital styles suit different jobs |
| Mounting | Lug backs, stems and dovetails decide which stand fits |
In this guide
Specs at a Glance
| Indicator | Range and graduation | Type and size | Notes |
|---|---|---|---|
| WEN 10703 | 1 in titled; 0.001 in | Plunger; 2 in face | 1.5 in plunger; 1/4 in lug hole; 2 year warranty |
| Neoteck digital set | 0 to 1 in; 0.0005 in (0.01 mm) | Digital with magnetic base | Inch or mm; zero function; 1.5 V battery |
| Fowler 52-520-110-0 | 0 to 1 in; 0.001 in | Plunger; 2.25 in dial | Lug backs in 90 degree steps; 1 year warranty |
| Mitutoyo 513-402-10E | 0.03 in; 0.0005 in | Test indicator | 0.0002 in accuracy listed; styli and case |
| Starrett 25-441J | 0 to 1.000 in; 0.001 in | Plunger; 0 to 100 reading | Jewel bearings; lug on center back; 8 oz |
| Neoteck test indicator | 0 to 0.03 in; 0.0005 in | Test indicator; brass body | 270 degree head; two dovetail clamps; 4.9 oz |
The 6 Best Dial Indicators

Top pickBest for a plain plunger dial for a shop
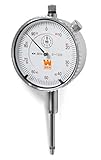
1. WEN 10703 1 in. Precision Dial Indicator
A plunger dial with a 2 inch face, a 1.5 inch plunger and a 1/4 inch lug hole, with 0.001 inch resolution. The maker lists a stainless steel rack and contact tip, a rotatable bezel and adjustable markers, and says it meets ASME and ANSI standards. The details table shows a range of 0.001 inches, which is the resolution rather than the travel, so go by the 1 inch in the title.
Suits: a plain plunger dial for a shop. Strengths: a rotatable bezel, markers and a two year warranty. Weaknesses: the listed range field is wrong. Skip it if you want a 0.0005 inch reading.
View WEN 10703 1 in. Precision Dial Indicator with .001 in. Resolution on Amazon

Best for a ready-to-mount set
2. Neoteck Digital Dial Indicator and Magnetic Base Set
A digital indicator for 0 to 1 inch (0 to 25.4 mm) with 0.0005 inch (0.01 mm) resolution, an inch and mm switch and a zero function, powered by a 1.5 V battery. The set adds a magnetic base with a 5 inch lower arm, a 4.5 inch upper arm, a 14.1 inch total height and a 5/16 inch clamping hole, plus a storage case. The maker lists up to 176 pounds of hold on a steel surface at least 30 mm thick.
Suits: a ready-to-mount set. Strengths: a base, a case and a digital readout. Weaknesses: the hold figure needs thick steel. Skip it if you prefer a needle dial.

View Neoteck Digital Dial Indicator Gauge and Magnetic Base Set, Storage Case on Amazon

Best for a larger, easy-to-read dial
3. Fowler 52-520-110-0 Dial Indicator 0-1 in
A 0 to 1 inch indicator with a 2.25 inch dial and 0.001 inch graduations, marked 0 to 100 continuous in black and 0-50-0 balanced in red. The maker lists lug backs in 90 degree steps, a hardened stainless steel spindle rack with a carbide ball contact point, brass cases and a knurled bezel that adjusts through 360 degrees, with a one year warranty. The page lists 0.704 ounces, which looks too light for a brass dial, so treat that weight as an error.
Suits: a larger, easy-to-read dial. Strengths: a carbide contact and two scales. Weaknesses: an odd weight listing. Skip it if you need a smaller case.

Best for small movement checks
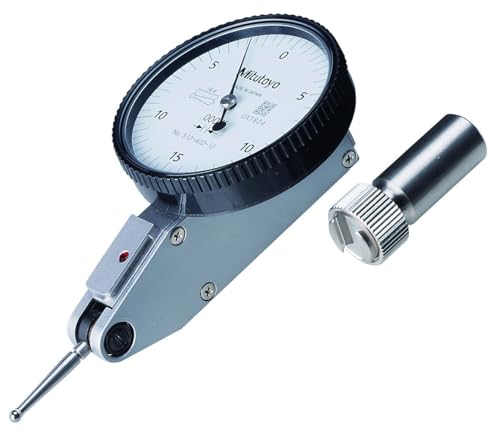
4. Mitutoyo 513-402-10E Dial Test Indicator
A lever style test indicator with a 0.03 inch range, 0.0005 inch graduations and a listed accuracy of 0.0002 inch. The listing says the basic set includes the indicator, a stem, a nut, styli and a case, and that an inspection certificate comes with it. The bullet text calls it a dial thickness gage and the table lists 4.54 grams, so the page text does not match the title well.
Suits: small movement checks. Strengths: a named brand, styli and a certificate. Weaknesses: mixed wording on the page. Skip it if you need a full inch of travel.

View Mitutoyo 513-402-10E DIAL TI, BAS, STD 0.03″, 0.0002″ Accuracy, 0.0005″, White on Amazon

Best for a metalworking dial
5. Starrett 25-441J Dial Indicator 0-1 in
A 0 to 1.000 inch plunger indicator with 0.001 inch graduations, a white face with a 0 to 100 reading, jewel bearings and a lug on center back. The maker describes an unbreakable crystal and a hardened stainless steel stem, gears, pinions, rack and spindle, and says it is made in the USA. The listing gives a one year warranty, 8 ounces and an accuracy of plus or minus 0.001 inch.
Suits: a metalworking dial. Strengths: jewel bearings and a center lug back. Weaknesses: 0.001 inch steps only. Skip it if you want digital readout.

View Starrett 25 Series Dial Indicator, 0-1.000″ Range, .001″ Graduation on Amazon

Best for narrow-area set up checks
6. Neoteck 0-0.03 in Dial Test Indicator
A brass bodied test indicator with a 0 to 0.03 inch range and 0.0005 inch accuracy, a 270 degree rotating carbide measuring head and an anti-scratch dial. The kit holds the indicator, a plastic case and two steel dovetail clamps, 3/8 inch and 5/32 inch. The 3/8 inch clamp is meant for a magnetic stand, which is not included.
Suits: narrow-area set up checks. Strengths: a rotating head and two clamps. Weaknesses: no stand in the box. Skip it if you need a plunger style.

View Neoteck 0-0.03″/0.0005″ Dial Test Indicator with Storage Case,Brass Body on Amazon
Care and Setup
- Follow the maker’s instructions for mounting and use.
- Check that the stand or clamp fits the stem or dovetail size before you buy.
- Keep the indicator in its case when you are not using it.
- Zero the dial on a known reference before each job.
Mistakes to Avoid
- Buying a 0.03 inch test indicator when you need a full inch of travel.
- Assuming every listing range field means travel.
- Forgetting that some test indicators do not include a stand.
- Ignoring a listing that disagrees with itself.
Reading the Dial: Resolution, Range and Accuracy
Three numbers on a dial indicator listing are easy to mix up. Range is how far the plunger or stylus can move, such as a full inch on a plunger dial or about 0.03 inch on a test indicator. Graduation, or resolution, is the smallest step the dial shows, such as 0.001 inch or 0.0005 inch. Accuracy is the error the maker states over the range. A tool can show fine steps and still list a wider error, so read all three before you decide that a finer dial is better for your job.
Match the numbers to the task. If you want to check how flat a plate is or how far a part moves from end to end, travel matters more than a fine step. If you want to detect a tiny runout on a spinning shaft, a fine graduation on a short-range instrument is more useful. Also look at the face. A larger dial is easier to read, and a continuous reading dial shows the full travel in one turn or in several turns, depending on the range. A balanced dial, which reads positive and negative from zero, helps when you compare parts to a reference. Pay attention to the way numbers are arranged, as some listings show both a continuous and a balanced scale. A coarse tool used well is better than a fine tool used carelessly, so choose the resolution you can actually use.
Plunger, Lever or Digital: Picking the Type
A plunger indicator, like the WEN, Fowler and Starrett in this guide, moves in a straight line along its stem. It is good for measuring height differences, thickness comparisons and travel along a slide. A lever type test indicator, like the Mitutoyo and the Neoteck test indicator, has a small arm that swings, so it can reach into tight spots and measure sideways. It suits checking runout, centering work in a chuck and aligning a part on a mill table, where the travel is small.
A digital indicator, like the Neoteck set, shows the reading on a screen, switches between inch and metric and can be zeroed at any point with a button. It avoids the need to read a needle, which helps those who find dials hard to read. The tradeoffs are a battery and, for some models, a display that lags in rapid movement. Needle dials never need power and respond smoothly to motion, which many shop users like for tracking a changing reading while turning a shaft by hand. Think about whether you will often switch units and whether you work in poor light. Neither type is better in general. Pick the one that suits your measuring tasks, and match the mount, since each type has its own stem or clamp requirements.
Stands, Mounts and Getting a Rigid Setup
An indicator is only as good as what holds it. A flexible arm or a loose clamp lets the indicator move with the work, and the reading then reflects the support flexing, not the part. Magnetic bases are common because they attach to steel machine tables and fixtures, but they need a clean flat steel surface. The Neoteck digital set in this guide includes a base, while the Neoteck test indicator says its stand is not included, so many buyers will need to supply one.
Check how the indicator attaches. Plunger indicators usually have a stem of a standard diameter and a lug on the back, and the stand or clamp must fit that stem or lug. Test indicators typically mount by a dovetail clamp, as the Neoteck test indicator listing describes. Keep the arm as short as the job allows, since long arms flex more. Tighten each joint firmly and avoid overextending the arm. Make sure the base sits on a clean surface free from chips and oil, and test that the setup holds still by lightly pushing on the arm and watching the dial. If the needle drifts, find the loose joint before you measure anything. A heavy base with a short, stiff arm gives the steadiest results.
Measuring Technique and Common Errors
Technique affects accuracy as much as the instrument. Set the plunger so it travels in line with the motion you want to measure, because a tilted plunger reads less than the true movement. This is known as cosine error. With a lever indicator, keep the arm close to parallel with the surface to limit the same error. Preload the indicator so the needle is a little off zero at rest, which ensures the contact stays touching and the gear train is taking up slack. Then zero the dial on your reference point, move across the work and check that the needle returns to zero when you return to the start.
Keep the contact point clean, and touch the part gently, without slamming the plunger down. Read the dial straight on to avoid parallax, since viewing at an angle shifts the apparent needle position. Repeat the measurement a few times and note whether the readings agree. Variation could signal a loose setup, a dirty surface, debris on the tip or a worn indicator. For rotating parts, turn the part slowly by hand and watch the full swing of the needle, since runout is the total movement. Temperature also matters on fine work, as metal changes size slightly with heat, so let parts and tools settle in the same room before comparing small differences.
Care, Storage and Checking the Tool Over Time
Dial indicators contain delicate gears. Avoid dropping them, avoid side loads on the plunger and never use the tool as a hammer or a lever. Wipe the stem and contact tip with a dry cloth after use, and keep oil and dust out. Do not spray oil into the mechanism unless the maker says to. Store the indicator in its case, with the plunger relaxed and away from magnets, moisture and heat.
Check the tool from time to time. A simple test is to compare its reading to a known reference, such as a gauge block or a precision step, at several points through the travel. If the needle sticks, jumps or fails to return to zero, or the readings disagree with the reference, stop using it for critical work. Compare against the maker’s stated accuracy and ask whether a repair or a calibration service is available. A bent stem, cracked crystal, loose bezel or a plunger that does not move freely are signs it needs attention. Replace a damaged or unreliable indicator rather than trusting questionable numbers, especially when the result affects safety or the fit of expensive parts. Follow the maker’s instructions for storage and maintenance.
Which dial indicator should you buy?
Pick a dial indicator by the travel you need, the type that fits the job and how you plan to mount it. The six tools here split into plunger, digital and test types.
- A plain plunger dial for general shop work: the WEN is the simple choice, but its listed range field is wrong, so go by the title.
- A digital readout with a base ready to use: the Neoteck digital set includes a magnetic base and a case.
- An easy-to-read, larger dial: the Fowler has a bigger face and two scales.
- Small movement checks, such as runout, with a certificate: the Mitutoyo is a lever test indicator, though the page wording is mixed.
- A metalworking plunger dial with jewel bearings: the Starrett has a center lug back.
- Narrow-area setups with a rotating head: the Neoteck test indicator comes with two clamps, but you must supply a stand.
The key split is travel. If you need to measure movement across a full inch, a test indicator will not do it. If you need to detect tiny runout, a short-range test indicator is the more suitable tool. If your work includes both kinds of task, a plunger dial and a test indicator together cover more ground than either alone.
What to check before you buy a dial indicator, and who should skip it
Before buying a dial indicator, check the range, the graduation and the mounting method on the current listing, and confirm what comes in the box. Several listings here contain conflicting details.
- Confirm the real travel, not a range field that may show the resolution.
- Check that your stand, clamp or fixture fits the stem, lug back or dovetail.
- Decide whether you want a needle dial or a digital screen.
- Check whether a stand, styli or a case are included.
- Read the warranty terms and the accuracy statement.
- Look at the dial size if you read it from a distance.
The trade-offs are real. A fine graduation is only useful if your setup is rigid and your technique is careful. Digital models need a battery, and needle dials need practice to read quickly. A good indicator is also only part of the cost, because you may need a stand or magnetic base to use it properly. Budget for the mount as well as the indicator, and make sure the two fit together before the first job.
You may want to skip a dial indicator if you only need a quick thickness check, since calipers may be enough. If an indicator suits your work, compare the picks above, check the current listing for size and what is included, then choose the one that fits how you will use it.
How Each Indicator Fits Real Measurement Work
A dial indicator earns its place when you need to know not just a size but a movement: runout, alignment, deflection, or the difference between two positions. The six options above split into plunger-style indicators and dial test indicators, digital and analogue, and budget and professional tiers. This section explains who each one genuinely suits.
The WEN 10703 for Accessible Plunger-Style Measurement
The WEN 10703 is the approachable entry to plunger-style measurement: a one-inch travel indicator for tasks like checking runout on rotating parts, aligning machine components, and setting up jigs where you need to see movement clearly. It suits home machinists, woodworkers with machine tools, and anyone whose measurement needs are real but occasional. Its honest limitation is the one shared by budget instruments: it rewards careful handling and a check against a known reference, because its long-term consistency depends more on how it is treated than a professional instrument’s does. Choose it to learn dial work and handle everyday checks. Skip it for daily production measurement where a professional instrument’s durability is the point.
The Neoteck Digital Set With Magnetic Base for a Ready Setup
The Neoteck set’s appeal is completeness: a digital indicator and a magnetic base together remove the two most common reasons a first measurement session goes badly, which are having no way to hold the instrument and struggling to read fine graduations. Digital readout suits users who take comparative measurements, zero the display at a starting position, and read the difference directly. Its limitations are the digital ones: batteries, care around coolant and chips, and a display that gives a number without the analogue sense of how the needle approached it. Choose it if you want a working setup in one purchase. Skip it if you prefer purely mechanical instruments or work in conditions hard on electronics.
The Fowler 52-520-110-0 for the Established Mid-Tier
The Fowler sits in the established-instrument tier: a conventional plunger indicator from a maker with a long presence in metrology, aimed at users who measure regularly and want an instrument whose behaviour they can trust session after session. It suits small shops, maintenance work, and serious hobbyists. Its limitation is that it is an instrument only; you still need a base or stand appropriate to your work, and the total setup cost is part of the real purchase. Choose it for regular, confident analogue measurement. Skip it if you measure so rarely that a budget option plus careful technique covers you.
The Mitutoyo 513-402-10E Dial Test Indicator for Fine Work
The Mitutoyo is a dial test indicator, a different instrument from the plunger models: its contact point sweeps on a lever, which lets it reach into spaces and against surfaces a plunger cannot, and it excels at fine comparative checks like centring work in a four-jaw chuck or verifying alignment over short distances. It suits machinists doing precise setup work. Its limitations are range and delicacy: test indicators measure small movements superbly and larger ones not at all, and their mechanisms deserve gentle handling. Choose it for fine setup and centring tasks. Skip it as your only indicator if your work involves larger travel, where a plunger indicator is the right tool.
The Starrett 25-441J for the Professional Plunger Role
The Starrett 25-441J is the professional-tier plunger indicator, bought by users whose measurements have consequences and who expect an instrument to stay accurate and serviceable over a long working life. It suits machinists, inspectors, and maintenance professionals. The honest limitation is the same value logic as any professional instrument: its advantages compound over years of regular use and are mostly invisible in a single measurement. Choose it if measurement is part of your trade. Skip it if your indicator will live in a drawer between occasional jobs, where its virtues go unused.
The Neoteck Dial Test Indicator for Affordable Fine Checks
The Neoteck test indicator brings the lever-style instrument within reach of hobbyists who want to try centring and fine alignment work without professional-tier commitment. It suits learning and light-duty fine measurement, and it pairs naturally with the realisation that technique matters as much as the instrument at this level. Its limitation is durability and refinement under heavy use; it is a learning and occasional-use instrument, and treating it as a production tool invites disappointment. Choose it to explore test-indicator work affordably. Skip it if your fine measurement is daily and consequential, where the Mitutoyo tier is the honest match.
Head-to-Head Comparisons
Plunger Indicator Versus Dial Test Indicator
This is the most important distinction in the list, and it is about geometry, not quality. A plunger indicator measures movement along its stem’s axis, over a comparatively long travel, and is the general-purpose choice for runout, alignment, and depth-style comparisons. A test indicator measures through a pivoting contact point, over a short range, and reaches surfaces and bores a plunger cannot approach. They complement rather than replace each other. A buyer who chooses by brand prestige instead of by this geometry will own a fine instrument that does not fit the work.
Digital Versus Analogue Dials
Digital indicators make zeroing anywhere and reading exact differences effortless, and they spare new users the classic misreading of a dial’s revolutions. Analogue indicators show movement as movement: you see the needle sweep, sense the rate of change, and can watch for the highest point of a runout check as a physical event rather than a changing number. Many experienced machinists prefer analogue for alignment work for exactly that reason, and digital for recording and comparison. Neither preference is nostalgia; they are different information presented differently.
Budget Versus Professional Instruments
Across the WEN and Neoteck options and the Fowler, Mitutoyo, and Starrett tier, the practical differences are smoothness of movement, consistency over time, and how the instrument survives workshop life. For occasional measurement with careful technique, budget instruments give honest service. For daily measurement, the professional tier’s cost is spread over thousands of readings. The common mistake is buying professional tier for occasional use and then handling it casually because it was expensive, or buying budget tier for production work and blaming the instrument for a mismatch the buyer chose.
Setup Technique That Decides Your Accuracy
An indicator measures the difference between its own mounting and the surface, so a flimsy setup manufactures error. Mount the indicator on a base or stand that is genuinely rigid, position it so the plunger or contact point meets the surface at the correct angle for the instrument type, and arrange the setup so the measurement direction matches the movement you care about. For a plunger indicator, misalignment between the plunger axis and the measured movement reads low and misleads quietly. For a test indicator, the angle of the contact point to the surface affects the reading and must be kept consistent and shallow as the maker directs. Preload the instrument slightly so contact is never lost during the check, zero it deliberately, and take the reading the same way every time. Repeatability is the real product of good setup: an arrangement you can repeat next month is worth more than a clever one you cannot.
Checking Runout as a Worked Example
For a typical runout check, mount the indicator rigidly, bring the contact point onto the rotating part with light preload, zero the dial at a reference point, and rotate the part slowly by hand through a full turn while watching the total movement. Note the highest and lowest readings and where they occur. Rotate again to confirm the pattern repeats before concluding anything; a pattern that does not repeat is a setup problem, not a part problem. That discipline, confirming before concluding, is the difference between measuring and guessing with expensive equipment.
Troubleshooting Measurement Problems
Readings That Will Not Repeat
Non-repeating readings almost always indict the setup before the instrument: a base that flexes, a magnetic base on a thin or dirty surface, a loose arm joint, or a contact point slipping on the work. Tighten and simplify the setup, clean the mounting surface, and shorten the reach of any articulated arm. Only suspect the instrument after the same part measures inconsistently on a known-rigid setup.
The Needle or Display Moves When Nothing Should Be Moving
Drift during a static check points to the stand settling, temperature changes during a long setup, or the workpiece itself not being secure. Let a fresh setup settle, re-zero, and check again. On machine tools, confirm the machine element you are measuring is actually at rest and not creeping under its own controls.
Sticky or Jerky Movement
An indicator that moves in jumps rather than smoothly has usually met dirt, damage, or dried contamination in its mechanism. Keep instruments away from grinding dust and chips, store them in their cases, and never force a sticky plunger. Gentle cleaning of the stem and contact point is user maintenance; a mechanism that stays jerky after that needs professional attention or replacement, because a sticky indicator invents readings.
Care and Decision Scenarios
Store indicators in their cases, keep contact points clean, avoid dropping or knocking them, and treat them as the precision instruments they are rather than as general toolbox items. For decisions: choose the WEN for everyday plunger work on a budget, the Neoteck digital set for a complete starter setup, the Fowler for regular analogue measurement in the established tier, the Mitutoyo test indicator for fine setup work, the Starrett for professional plunger duty, and the Neoteck test indicator to learn fine measurement affordably. Match the geometry to the job first, the tier to your frequency of use second, and any of these six will do honest work.
Buying Criteria, Expanded: Resolution, Range, and the Base You Will Use
Beyond the plunger-versus-test and digital-versus-analogue choices, three practical criteria decide satisfaction. The first is the match between the instrument’s range and your work: an indicator whose travel comfortably covers the movements you measure, without living at the extremes of its range, will serve better than a finer instrument constantly run out of travel, or a long-travel one used only in its first fraction. The second is readability in your conditions: dial size and graduation style that you can read at your working distance, in your lighting, with your eyes, because an instrument you squint at is an instrument you will misread eventually. The third, and the one most often forgotten, is the holding setup. A magnetic base or stand is not an accessory but half the measuring system; budget for it, choose arms that lock firmly, and prefer the simplest rigid arrangement over an elaborate flexible one. The Neoteck set’s inclusion of a base is a genuine buying argument for a first-time owner for exactly this reason, while buyers of the stand-alone instruments should price their base into the comparison from the start.
New Versus Established-Tier Ownership
Ownership experience differs by tier in ways that matter over years. Established-tier instruments from makers like Fowler, Mitutoyo, and Starrett come with service ecosystems: parts, repair, and calibration support that extend working life. Budget instruments are effectively replace-rather-than-repair items, which is a legitimate model when the price reflects it and the duty is light. Neither approach is wrong; the mistake is expecting service-tier longevity from a replace-tier purchase, or paying service-tier prices and then storing the instrument loose in a toolbox where its advantages are knocked out of it.
A Worked Example: Aligning a Machine Vise
Take a common task: indicating a vise jaw parallel to a milling machine’s travel. You mount the indicator on a rigid point of the machine, bring the contact onto the jaw’s face with light preload, and zero the dial at one end of the jaw. Traversing the table slowly, you watch the reading walk as the jaw’s angle reveals itself: the total drift across the jaw’s length is the misalignment, expressed directly rather than guessed. You tap the vise, re-check, and repeat, each pass halving the error, until the needle’s movement across the full traverse is as small as your work requires. Then you traverse once more to confirm, because an alignment you have not confirmed is an opinion. Every indicator in this guide can perform this task within its geometry; the test indicators and plunger models each have their devotees for it. What the example shows is the real product being bought: not a dial, but the ability to see and remove error deliberately instead of discovering it in finished work.
Building a Measurement Habit
The owners who get value from indicators use them early, not as a last resort: checking a setup before cutting, verifying a part before removing it from the machine, confirming an adjustment before tightening everything down. Build the habit of one confirming measurement at each stage of a job and the instrument pays for itself in saved work, whichever tier you chose. Keep a note of recurring readings on your own machines, too; a machine’s habits, once recorded, make future troubleshooting dramatically faster.
Extra Questions Owners Ask in the First Month
Do I need to calibrate a dial indicator, or just use it?
For comparative work, which is most workshop measurement, absolute calibration matters less than consistency: the indicator must move smoothly, return to the same reading at the same position, and agree with itself across repeats. Check that behaviour against a known, stable reference when the instrument is new to you and whenever it has been dropped or knocked. For work where absolute values carry consequences, follow the maker’s guidance on verification and professional calibration intervals. The practical habit is simple: trust, but verify against something known before an important measurement session.
Why does my reading change when I reposition the indicator?
Because geometry is part of every measurement. A plunger indicator reads the component of movement along its own axis, so angling it away from the true direction of movement understates the reading, and a test indicator’s reading depends on its contact point’s angle to the surface. Repositioning changes those angles and therefore the numbers, even on a perfect instrument. The fix is discipline: set up so the geometry is correct, keep it consistent within a job, and treat a changed setup as a new measurement rather than a continuation of the old one.
Can one indicator handle both machine setup and part inspection?
Often yes, within its geometry and range: a plunger indicator on a good base covers most machine setup checks and many inspection comparisons, which is why it is the usual first purchase. The gaps appear at the extremes: fine centring and internal or awkward surfaces call for a test indicator, and long-travel checks call for adequate plunger range. Buy the generalist first, learn where your own work exceeds it, and let that evidence, rather than a catalogue, justify the second instrument.
How should an indicator be stored between jobs?
In its case, clean, with the plunger or contact point unstressed and the case kept somewhere dry and away from grinding and machining debris. Indicators die more deaths in drawers and on benchtops than in use: a knock that bends a stem or shocks a movement may not announce itself until readings stop repeating. Thirty seconds of casing after a job is the cheapest accuracy insurance in the workshop.
Final Advice: Your First Month With an Indicator
Spend the first month measuring things whose answers you already know. Indicate a setup you trust, check a part you have already verified by other means, and repeat familiar measurements until the instrument’s behaviour is as familiar as its readings. That calibration of the user, more than of the tool, is what the first month is for: learning how your base settles, how your touch on the contact point affects a reading, and how your typical setups flex. An owner who has done this can trust the instrument when it reports something surprising; an owner who has not will doubt the tool and the work in equal, useless measure.
Keep the instrument in its case, in a fixed home, and bring it out early in jobs rather than as an emergency witness after a cut has gone wrong. Note the readings that matter in whatever job record you keep, because a machine’s history written down is a diagnostic asset that grows more valuable every year you own the machine. And when the indicator and your expectation disagree, believe the disagreement enough to investigate: re-check the setup, repeat the measurement, and only then conclude. That discipline is the entire craft of measurement, and it is available at every price tier in this guide.
One More Consideration: Renting Your Attention to the Right Instrument
The last buying factor is not in any specification: it is which instrument you will actually bring out of its case on an ordinary Tuesday. A professional instrument that intimidates its owner into skipping checks loses to a modest one that lives at hand and gets used without ceremony. Buy the tier you will handle confidently, keep it where the work happens, and let frequency of use, the true multiplier on every measurement tool, do its quiet work. Accuracy in a workshop is rarely limited by the instrument on the shelf; it is limited by the measurements never taken, and the best indicator in this guide is the one that ends that limitation for you.
Dial Indicator FAQ
What is the difference between a plunger and a test indicator?
A plunger type moves straight in and out over a long range. A test indicator uses a small lever and covers a short range, here about 0.03 inch.
Which ones have a magnetic base?
Only the Neoteck digital set lists a magnetic base. The Neoteck test indicator says its stand is not included.
What is the difference between accuracy and repeatability?
Accuracy is how close a reading is to the true value. Repeatability is how consistently the tool gives the same reading when you measure the same thing again. A tool can repeat well and still be off by a fixed amount, so check both when you can.
Can I use a dial indicator to check table saw alignment?
Many woodworkers use one with a suitable stand or miter-slot fixture to compare blade-to-slot distance at the front and back. You need a stable mount, and you should unplug the saw before working near the blade.
Why does the needle not return to zero?
Possible causes include a loose mount, dirt on the tip or the work, friction in the plunger, or wear inside the gear train. Clean the contact point, check the setup and, if the problem continues, stop relying on the tool.
Do I need a magnetic base?
Only if your work involves steel tables or fixtures where a magnet can hold. Other setups use clamps or stands. Check that your indicator's stem or dovetail fits the base you choose.
What does a balanced dial mean?
A balanced dial shows numbers that increase in both directions from zero, so you can read positive and negative deviations. A continuous dial runs from zero upward in one direction. Choose the layout that suits your reading habits.
Is digital more accurate than analog?
Not automatically. Accuracy depends on the mechanism and the stated error, not just the display. A digital screen can show finer steps, but you still need to read the stated accuracy on the listing.
How do I store a dial indicator?
Keep it in its case in a dry place, with the plunger unloaded and away from strong magnets. Wipe off dust and oil first.
How do I set up a dial indicator for measuring runout?
Mount the indicator on a stable stand with the tip touching the rotating surface, preload it slightly and zero the dial. Turn the part slowly by hand and watch the full swing of the needle. The total movement is the runout.
What is cosine error on a dial indicator?
Cosine error happens when the plunger or lever is not in line with the motion you measure, so the reading is smaller than the true movement. Keep the plunger parallel to the direction of travel. With a lever indicator, keep the arm close to parallel with the surface.
Can I use a dial indicator on a lathe?
Yes, many people use one to check runout and to center work in a chuck. You need a rigid mount and a tip that suits the surface. Follow the machine's safety instructions and keep clear of rotating parts.
What does preloading a dial indicator mean?
Preloading means setting the indicator so the needle is slightly off zero at rest. This keeps the contact touching the part and takes up slack in the mechanism. Then you zero the dial from that position.
How do I choose between 0.001 inch and 0.0005 inch graduations?
Choose based on the tolerance you work to. A finer graduation helps with small differences but demands a rigid setup and careful reading. For general checks, 0.001 inch is often enough.
Can a dial indicator be repaired?
Some can be repaired or serviced by the maker or a calibration service, depending on the model. Check the manual and the warranty. If the needle sticks or jumps, stop using it for critical work.
The Short Version
For a plain plunger dial, the WEN. For a digital set with a base, the Neoteck digital. For a large dial, the Fowler. For a test indicator with a certificate, the Mitutoyo. For jewel bearings, the Starrett. For a rotating head, the Neoteck test indicator.